When typing in Microsoft Word, it uses several special characters when you press the spacebar, tab, or enter keys. For user convenience, these non-printing characters are invisible.
You can polish your work by revealing these hidden characters, like fixing double spaces or accidental extra tabs and page breaks.
Since Word doesn’t show these characters by default, which it uses for housekeeping purposes, I will guide you on how to display non-printing characters in Word here.
Let’s dive in.
How to Show Non-Printing Characters in Microsoft Word
MS Word has a built-in Show/Hide button in the paragraph group for displaying nonprinting characters, and Word uses those for maintaining formatting. This single button reveals all Word’s secret characters and helps determine if any layout doesn’t behave.
However, you can manually handpick what you want to display and always make it visible. But why would you want to display these invisible characters in Word?
These non-printing hidden characters, like tab, line break, paragraph break, etc., are also known as formatting marks. Exposing them helps you precisely edit the content. For example, two spaces between words or extra carriage returns are hard to spot in the naked eye but easily noticeable when exhibiting the characters.
Below, I will show two ways to show off the non-printing character that applies to Microsoft Word 2007, 2010, 2013, 2016, 2019, and Microsoft 365 Word.
Here are the methods to show MS Word’s non-printing characters:
1. Display Specific Non-Printing Characters All the Time
Microsoft Word has an advanced option that allows you to always showcase the non-printing characters when you are typing. Moreover, it lets you cherry-pick the items if you don’t require all the formatting marks to display.
Follow the process below to display non-printing formatting marks in Word:
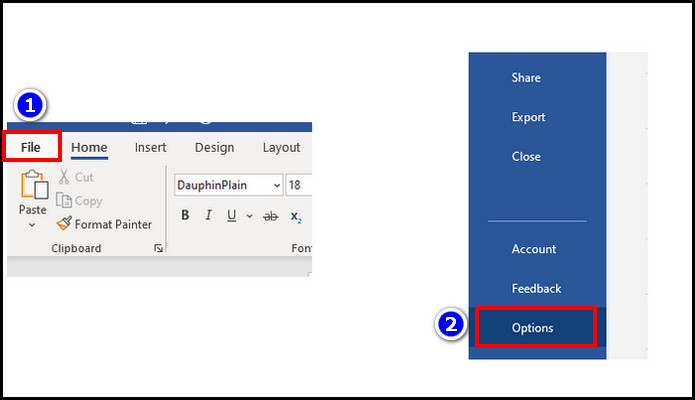
- Open a document full of texts in the Word Desktop app.
- Go to the File tab and select Options from the bottom left.
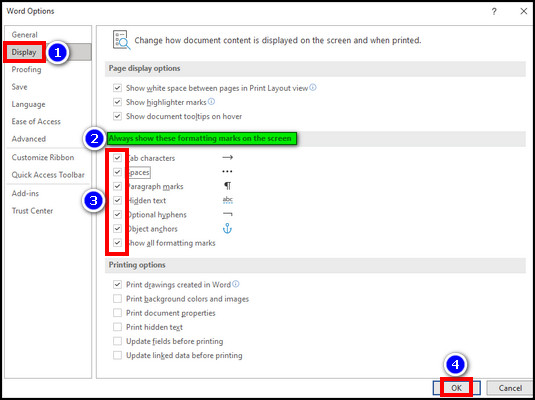
- Select the Display tab on the left from the new popped window.
- Locate the Always show these formatting marks on the screen section.
- Tick the characters you prefer for always showing.
- Hit OK.
For example, I selected all the special characters to show, and here’s the result of before & after.
If you want to stop displaying the non-printing characters, go to the Word Options dialog box again in Word > Display tab > untick the characters you want to hide under the Always show these formatting marks on the screen section and hit OK.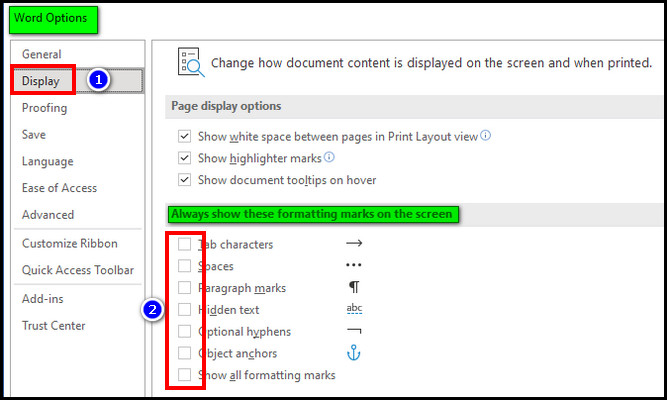
If you untick all the characters, it will return to the default view without formatting marks.
2. Quickly Reveal All Non-Printing Characters When You Need
If you frequently need to check if the formatting is okay, you can use the designated show or hide button to show the Word’s non-printing character quickly. The process is similar to removing paragraph symbols in Outlook.
This button looks like a backward P whose technical name is Pilcrow. In MS Word, hovering the mouse on the button will display as Show/Hide ¶.
Here are the steps to quickly reveal non-printing characters in Word:
- Open your working Word document.
- Go to the Home tab from the ribbon.
- Click on the Pilcrow icon (backward P) from the Paragraph group.
And voila! Your texts are filled with formatting marks. To turn off the feature, click the Pilcrow button again, and all the non-printing characters will vanish.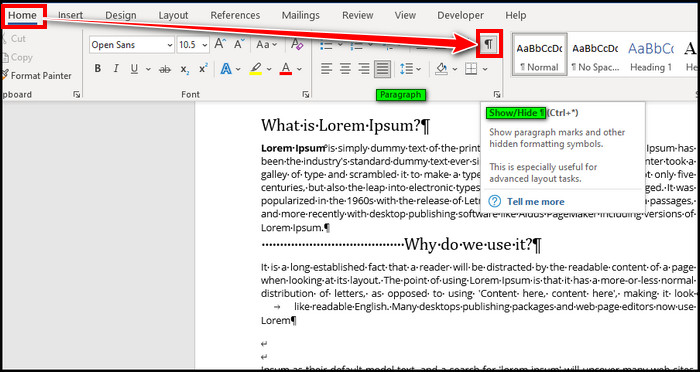
Not only that, you can also use keyboard shortcuts to display the hidden characters in Word. Press Ctrl+Shift+8, and you are done. Repeat the process to undo it.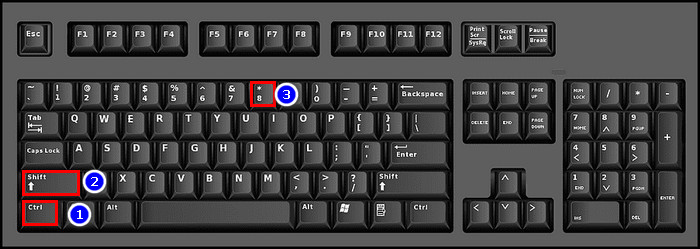
List of Useful Non-Printing Characters in Word
There are several non-printing characters indicated with different symbols. So, if you showcase the special characters and don’t know which is what, you can accidentally massacre your work while polishing it.
Don’t worry. Here, I’m including a table with several handy non-printing characters you can find in MS Word with symbols.
Here is the table containing the non-printing characters list in Microsoft Word:
| Symbol | Non-Printing Character in Word |
|---|---|
 | Paragraph break |
 | Manual line break |
 | Tab |
 | Space |
 | Non-breaking space |
 | Optional hyphen |
 | End of cell |
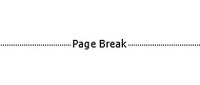 | Page break |
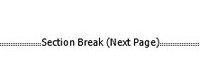 | Section break |
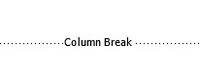 | Column break |
How to Remove Non-Printing-Characters in Word
If you detect any formatting flaws in your Word writing after displaying the formatting marks, you can remove them to fix layout problems.
Generally, you can fix the line break, paragraph break, or space between words easily as they are pretty detectable without revealing the special characters. But you should be required to unveil the special characters for fixing page breaks, section breaks, and column breaks.
When the characters are visible, place the cursor before the break and hit the Delete key to remove the break.
It is handy when working on another one’s document. But you must do the action carefully as it can ruin the work.
For a large document, it can be labor-intensive to point out every character. In this case, you can quickly replace troubling characters with the Find and Replace in Word. I recommend replacing them one by one instead of using Replace all.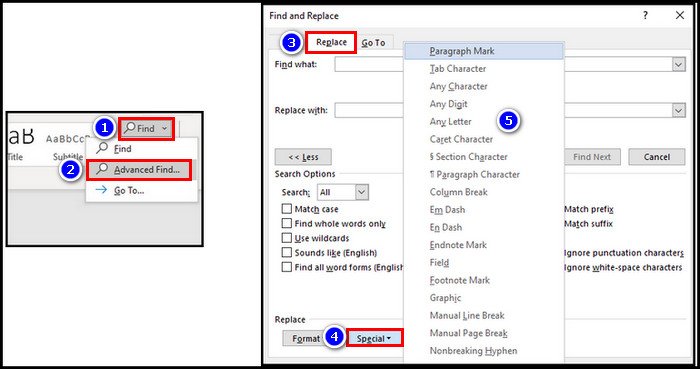
Final Thought
If you require finding double spacing or blank paragraphs in Word, there’s no better way to display non-printing characters in Word.
With the Pilcrow button, you can show the formatting marks with one click in Word. If you have any further queries, please leave a comment.
Have a nice day!