If you are familiar with Skype, and Zoom, then you have also known about Microsoft Teams for its chat or meeting capability.
Like most applications, Teams have a way to collect log data if you face any issues. But you have to do a bit of extra work for this.

In this article, you are about to learn how to obtain Teams log files. Let’s jump in.
Here is the easy way to use the Tasks App in Microsoft Teams.
How to Generate Microsoft Teams Logs for Troubleshooting
Log files are useful as these store event data in real time. This is helpful for in-depth investigation if encountering any troubles. The issue can relate to the microphone not working, interruption in calls, poor voice call quality, disconnection in meetings, message problems, etc.
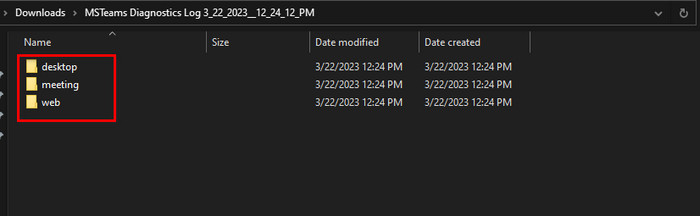
With the help of log files, it will be quick to troubleshoot for the Microsoft support engineer or help desk. For Microsoft Teams, there will create three log folders,
- Desktop
- Meeting
- Web
Usually, the web folder, also known as Debug Log, is the one mainly required for Microsoft assistance. The other two are essential only when the help desk asks for them.
So, how to collect Teams client logs?
Follow the steps below to collect Microsoft Teams logs:
- Open the Team client on the Web browser & log in.
- Start a call or meeting.
- Press the below shortcut key according to your Operating System.
— For Windows: Ctrl+Alt+Shift+1 (the 1 should be from the number row, not from NumPad)
— For Mac: Option+Command+Shift+1
— For Linux: Ctrl+Alt+Shift+1
After this, a window will prompt & will show you where to download the log file. After selecting the location, click on Save. By default, the log file will save in the Download folder.
Depending on your OS, you can find the Microsoft Teams log file location,
— on Windows: %userprofile%\Downloads
— on Mac: ~/Downloads
— on Linux: ~/Downloads
In the MSTeams Diagnostics Log (Time stamp) folder, you will find your desired log files. The log file is saved in txt format. Notepad is able to open the file.
You can press Ctrl+F to find callingService, MessageService, ConversationService or PresenceService to troubleshoot from the main text in the web folder.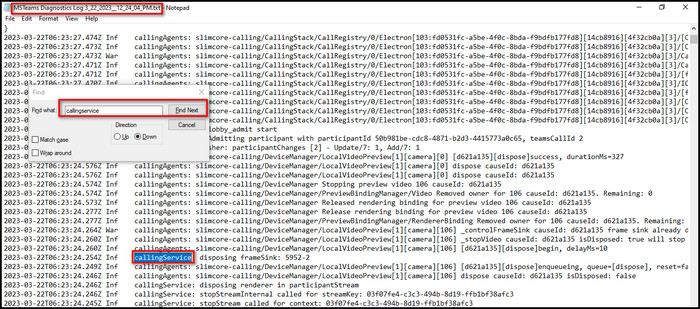 In addition, there are other text files for specific items like calling, extensibility, sync, etc.
Check out the easiest way to use the Whiteboard in Microsoft Teams.
There is another way to generate log files for Teams app. To do so,
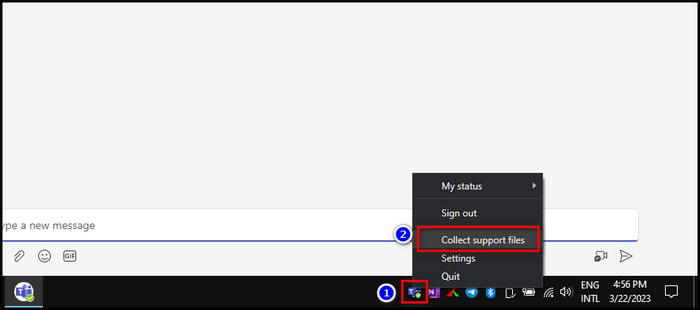
- Open Teams app & sign in.
- Right-click on the Teams app icon from the system tray (bottom right corner on the taskbar)
- Click on Collect support files / Get logs for Windows & Linux.
Click on Help in Teams & choose Collect support files for Mac.
You will get a notification as the file is downloaded.
To obtain the log file for Teams,
— go to %appdata%\Microsoft\Teams for Windows,
— go Desktop folder for Mac &
— go ~/.config/Microsoft/Microsoft Teams/ for Linux.
Now, media logs consume high disk space & by default, it is turned off. If you want to know how to turn on Teams media logs, continue reading.
Go through our epic guide about add Video Filters to Microsoft Teams.
How to Enable Microsoft Teams Media Logs
The first time when I encountered a drop call issue with Teams during a video meeting, I failed to provide the media logs to Microsoft assistant, as it was turned off. From then, I ensure the media log is turned on every time I go to a meeting.
After completing the meeting, I go to the directory file & remove the log file if there is no issue. Note that the media logs get turned off, if you log out from the account. So keep an eye out for that.
Enabling Microsoft Teams media logs is fairly easy. Follow the steps below to enable media logs in Teams,
- Click on the Profile icon > Manage account > General or … beside the profile icon > Settings.
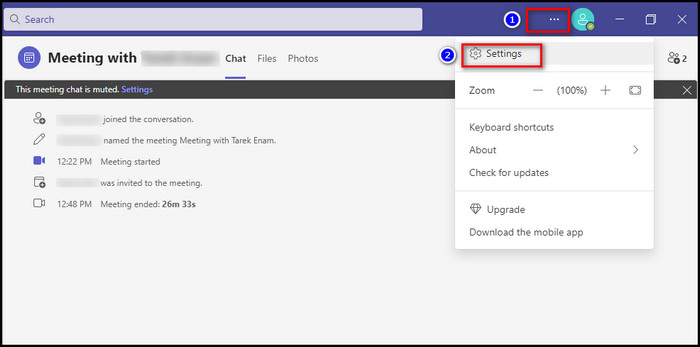
- Scroll down & check the square box to Enable media logs.
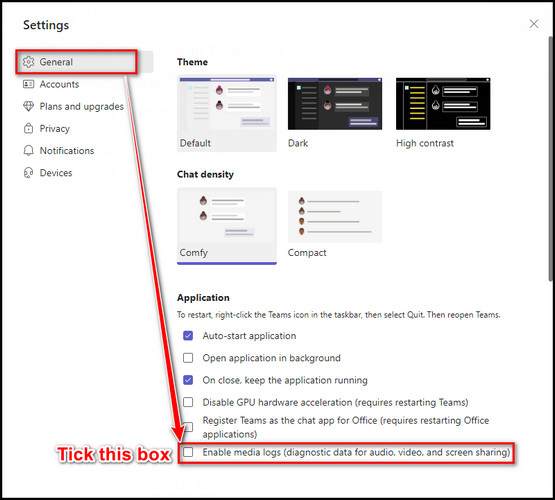
- Restart the app & verify again the tick is there.
As mentioned earlier, if you sign out, you will have to enable the option again.
To collect the media log files, you have to go to the below-mentioned locations,
— on Mac:
~/Library/Application Support/Microsoft/Teams/skylib
~/Library/Application Support/Microsoft/Teams/media-stack
— on Linux:
~/.config/Microsoft/Microsoft Teams/skylib/
~/.config/Microsoft/Microsoft Teams/media-stack/
— on Windows:
%appdata%\Microsoft\Teams\skylib\
%appdata%\Microsoft\Teams\media-stack\
In those locations, you will find files with blog extensions. You have to provide those files for further troubleshooting to the help assistant.
Read more about Microsoft Teams Exploratory License.
Final Thought
Providing log files to the support team is beneficial to find out the problem quickly.
For Microsoft Teams, you have to press Ctrl+Alt+Shift+1 while the Team client is in the foreground. Alternatively, you can right-click on the Team icon from the system tray & select Collect support files.
In this article, I guided you on how to gather logs in Microsoft Teams. If you have any further queries, please leave a comment.