GeForce Experience can sometimes throw the error message 0x0003 when you open it. No matter how many times you close it, you end up on the same screen.
Normally, you would think re-installing the driver would fix this. But you also need to perform some additional steps too. Then you can get GeForce Experience back running, and you can record the in-game footage using it.

So, let’s look at the methods you can use to troubleshoot your installation of GeForce Experience right in this article.
Why GeForce Experience Shows the Error 0x0003 When Opening?
Nvidia GeForce Experience shows the error 0x003 when its essential services are not running. The same happens if Nvidia Telemetry Container cannot access the desktop. Changing the location of the default Programs folder on Windows can give rise to this error code.
When you install the Nvidia drivers, it adds a host of services, which is crucial for its operation. But third-party apps such as Uplay can disable these. And when you do that, GeForce Experience refuses to function.
Some users have also reported this error when they change the directory of the Program Files folder. Maybe they ran out of space on the C drive and did this. But as per Nvidia, GeForce Experience does not support this, and that results in an error.
We also found that the error code 0x0001 exists on GeForce Experience, which is very similar to what we are dealing with here. But both errors can be fixed by the methods detailed in the next section.
How to Fix GeForce Experience Error Code 0x0003
To fix the GeForce error code 0x0003, first, ensure that you have set the Program Files folder to its original location. Next, perform a complete re-install of Nvidia drivers. Then check if the Nvidia services are enabled and that they can access your desktop.
Let’s take a look at these sequentially.
Here are the methods to fix Error 0x0003 on GeForce Experience:
1. Restore the Program Files Folder Location
First, check if your Program Files folder is in the default directory. This is normally in the C:\Program Files folder. If you have set this to someplace else, you will get the error. Nvidia officially recommends this, and you can find more about this on the Nvidia forum.
For those, who did not tinker with the folder, you can just skip this step and go to the next workaround.
Here are the steps to change the location of the Program Files folder:
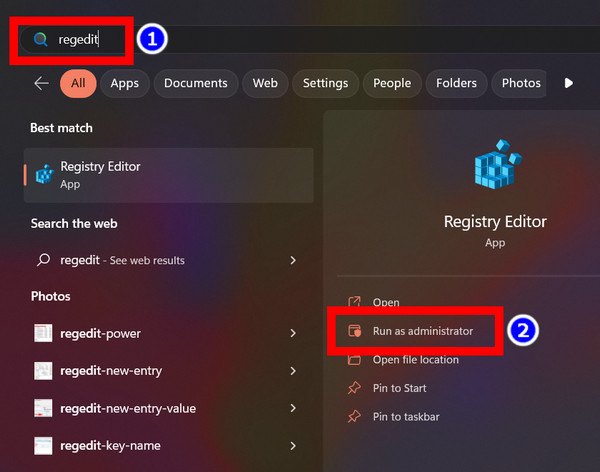
- Search for regedit from the Start Menu.
- Press Run as Administrator under Registry Editor.
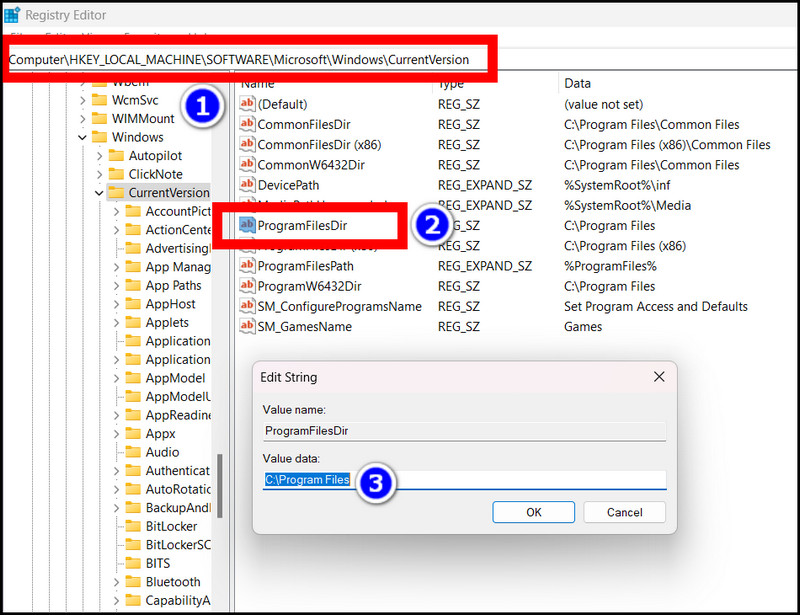
- Navigate to this location by expanding the folders in the left pane:
Computer\HKEY_LOCAL_MACHINE\SOFTWARE\Microsoft\Windows\CurrentVersion- Double-click on ProgramFilesDir.
- Type C:\Program Files under Value data.
- Click Ok and close the Registry Editor window.
Now we need to remove Nvidia’s existing installation so that the older files are no longer present. This will also ensure that you are running the latest driver, which will not have bugs as present on the earlier version.
2. Re-install Nvidia Drivers
Now head over to the Nvidia website and download the latest driver for your graphics card. Select your GPU’s model and download the driver for your operating system. It is better to download the WHQL versions, which are more stable than the Beta drivers.
Now uninstall the old drivers using Display Driver Uninstaller. Sometimes the Nvidia driver gets corrupted, so it will ensure that the old files are completely removed from your system.
Many gamers use this program, so go ahead and download it.
When you have both programs ready, we will first boot to the safe mode and remove the driver. Once the PC restarts, install the latest Nvidia driver on your PC.
Here are the steps to remove the old Nvidia drivers from your PC:
- Press Win + I to open Settings.
- Navigate to System > Recovery > Advanced Startup (For Windows 11) or Update and Security > Recovery > Advanced Startup (For Windows 10).

- Click the Restart Now button. Your PC will now boot to the Recovery Menu.
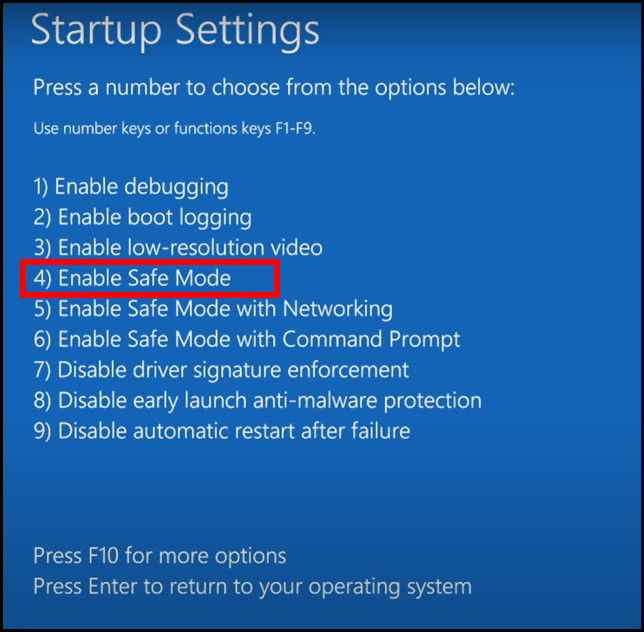
- Navigate to the following location: Troubleshoot > Advanced Options > Startup Settings > Restart.
- Press 4 or F4 to boot into Safe Mode.
Now we will use DDU to uninstall the Nvidia driver.
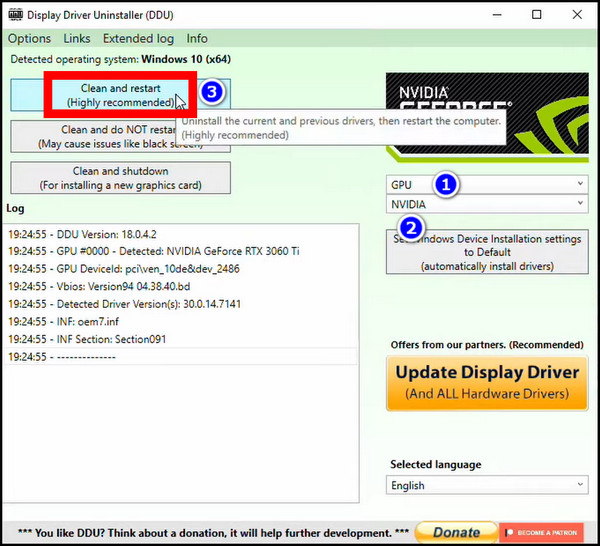
- Open DDU by extracting the file that you downloaded earlier.
- Select GPU and Nvidia from the first and second fields, respectively.
- Click the Clean and Restart button.
Wait for this process to complete, and your PC should restart on its own.
After your PC reboots, open the Nvidia driver executable file and install the driver on your system. You simply need to follow the on-screen prompts and wait until the driver is installed. Then, reboot your PC.
This concludes the second stage of our fixes. Next, we will check if Nvidia’s services are up and running on our system.
3. Enable Nvidia Services
After you have re-installed the drivers, the essential services should be running. These are critical as they have important tasks to perform. Often they will act as a bridge between the GPU and the driver program, making communication possible. Just make one of these services unavailable, and you get the error back.
So, here we will look to find any Nvidia-specific services and make sure they are set to start with Windows.
Here are the steps to enable the Nvidia services on Windows:
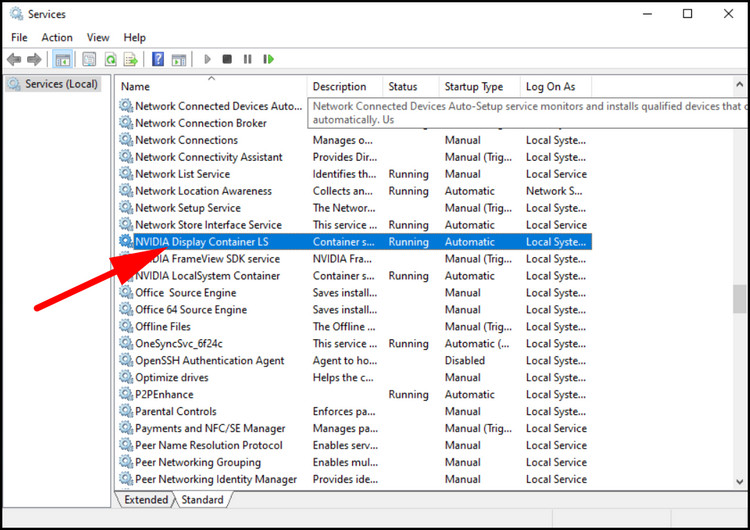
- Press Win + R, type in services.msc, and press OK.

- Scroll down all Nvidia processes. You should find Nvidia Content Telemetry, Nvidia Display LS, Nvidia Network Service, and Nvidia Localsytem here.
- Double-click on a Nvidia service.
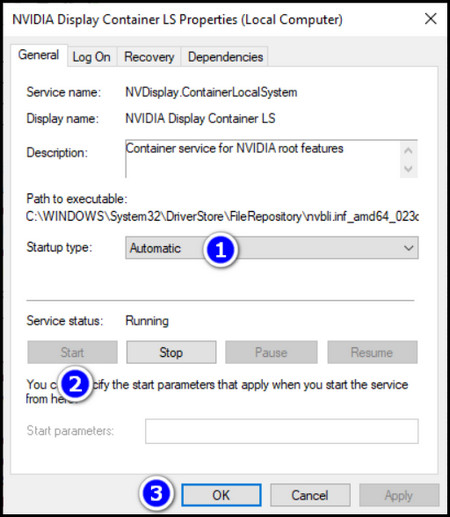
- Under Startup Type, select Automatic.
- Press the Start button under Service Status. If this is already running, the Start button will be grayed out.
- Press Ok to close the window.
Once this is done, we need to perform a final solution. That will involve tweaking the Telemetry services mentioned in the next section.
4. Allow Nvidia Telemetry Services to Access the Desktop
Among all the services that we have enabled in the earlier step, the Nvidia Telemetry service collects data from the system and sends it back to Nvidia. This could be error codes or data used to improve the driver’s performance in future updates.
If this service is disabled, the drivers will not have the required permissions to access the Telemetry Container, and you will get the error 0x0003 when opening the GeForce experience again.
So, this service must be allowed to access your desktop, which can be set up from the Services app.
Here’s how to do it.
These are the steps to allow Nvidia Telemetry from Windows services:
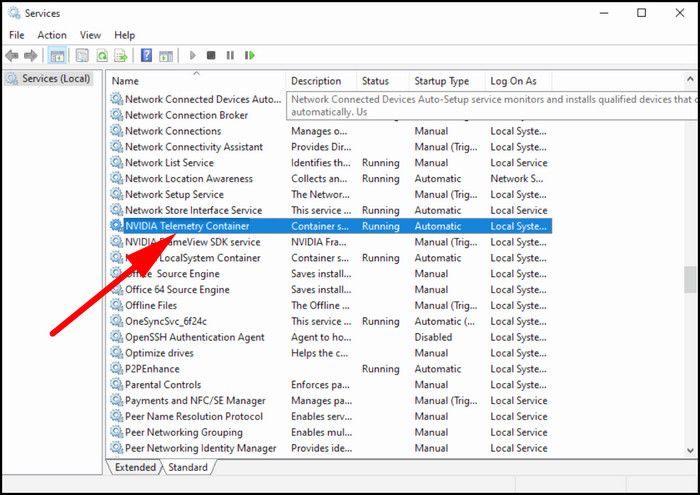
- Search for services from the Start Menu and open it.
- Find Nvidia Telemetry Container and double-click on it.
- Click the Start button to make sure it is running.
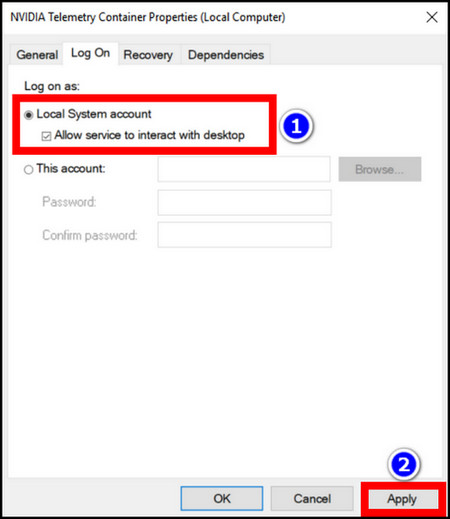
- Go to the Log On tab.
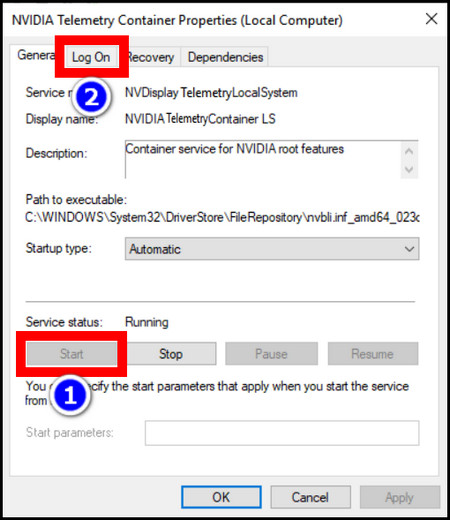
- Mark the check box near Allow service to interact with the desktop.
- Click the Apply button.
- Press Ok to close the window.
As an additional check, go through all Nvidia services and check if they are running.
Now open GeForce Experience from the desktop shortcut. It should open without reporting any error messages.
5. Disable Anti-Virus Program
Even though we do not expect your Anti Virus program to stop the Nvidia driver from running, some users have reported that disabling any virus removal tool has helped them out. So, you can also try this.
This can particularly happen with third-party tools blocking any Nvidia software as a possible threat. Why that can happen even baffles me, but you can check if that’s the case with you.
Frequently Asked Questions
How to fix error 0x0003 saying something went wrong, try rebooting your PC?
This happens when you try installing driver software that is not supported by your graphics card. In that case, download the correct driver for your Nvidia GPU and install it. Also, check that Nvidia services are running from the Windows Services App.
Why GeForce Experience gets an error while installing the driver?
If your Nvidia driver installation is failing, remove the existing GeForce Experience from your computer first. Then download the latest Nvidia drivers and then proceed to install them. Also, make sure you do not have any background programs running during this time.
Final Words
So by now, GeForce Experience should open without giving you any errors. If the error codes still remain, do contact the Nvidia support team and let them know the complete details of your issue.
That’s all, I guess, for this troubleshooting guide. For any additional queries, do comment below, and we will get back to you.