If you are a big fan of virtual reality, chances are you own an Oculus/Meta headset like the Oculus Quest 2 since they are specifically designed for making virtual worlds feel, well, not virtual.
However, recently, reports have been pouring in from our readers, telling us that their Oculus controllers, which are the primary device responsible for making the headset efficiently adapt to your movements, are unable to connect to the headset.
While this may seem like a massive problem, you have absolutely nothing to fear if you spare five minutes of your life to read this quick guide.
I assure you that by the time you reach the concluding paragraph of this article, your VR and its controller will be all set for your next significant virtual experience. So, grab some caffeine and move on to the next section.
Why Is My Quest 2 Controller Not Working?
Your Quest 2 controller is not working because it might already be paired with another Oculus headset or phone. It could also be a temporary bug that will get fixed automatically. Otherwise, the batteries might be dead and need a replacement. If that’s not it, the controller might simply be damaged.
That last point is the absolute worst-case scenario since Oculus controllers are typically built to last. If you have taken reasonable care of the controllers, you don’t have to worry about them being damaged.
Apart from this, the controllers might also require a recalibration, or something might be interfering with its connectivity causing pairing issues.
Here’s a summary of the most common causes for your controller not working:
- Your Oculus controller is already connected to another phone – The solution is to disconnect it from the other phone or headset and retry pairing.
- Your Oculus device has a temporary issue or bug – The solution is to wait for a few minutes or restart the device before trying again.
- The batteries of the Oculus controllers are drained – The solution is to purchase a new set of batteries and replace the old ones before pairing.
- Something is interfering with the connectivity of the controller and headset – The solution is to find the source of the interference and remove it before pairing.
- Your controller is damaged – This is a rare case, and the only solution to this is to purchase new ones.
You may also like to read about VR Oculus Quest 2.
How To Fix Oculus Quest 2 Controller Not Working?
While the fixes below are not too complicated to understand, I recommend checking some basic things first before trying them. This includes making sure you have a stable internet connection since that is usually the main culprit behind any tech-related issues.
I evaluated and tested lots of different methods, and after identifying those that are worthy of your time, I have listed them below.
Here are the ways to fix Oculus Quest 2 controller not working:
1. Remove and Reinsert the Batteries
I don’t know if you know this or not, but your Oculus controller has a set of batteries inside them that provide the necessary power for the controller to work.
You need to try to reinsert them to perform what is known as a ‘force reset’. This will restore the controller.
Follow these steps to remove the batteries:
- Grab your Oculus controller and turn it to the right, where you see a separating line.
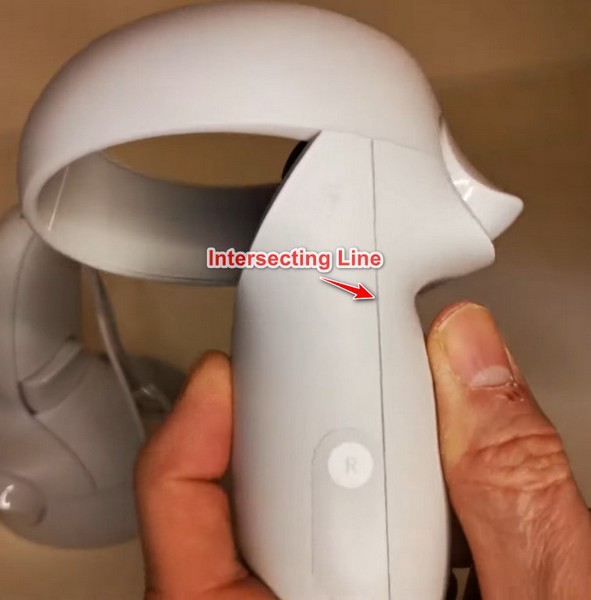
- Look for an arrow indicator at the top. This shows the direction to open the battery cover.
- Press and slide the cover in the direction where the arrow is pointing (typically towards the bottom) by gently applying pressure. This should reveal a single AA-type battery in the battery compartment.
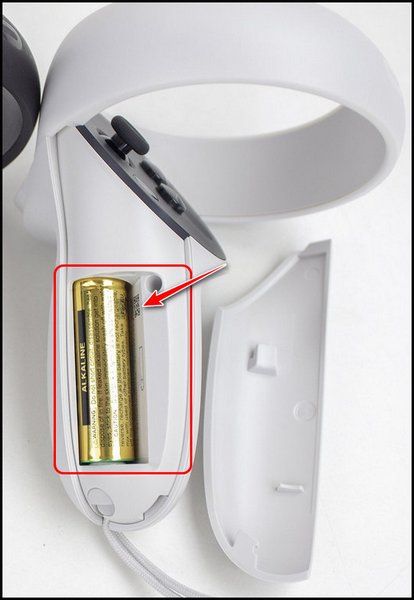
- Remove the batteries and leave them like that for at least five minutes.
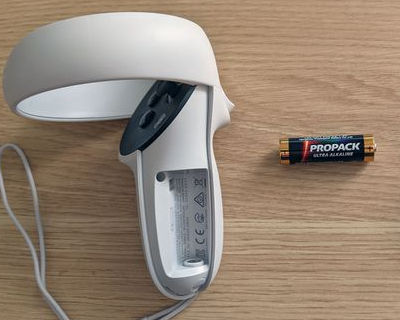
- Insert the battery back into the battery compartment and place the battery cover back in place. Make sure that the top of the battery (pin side) is facing the end of the controller, whereas the bottom (flat rounded side) is facing upwards towards the buttons console.
- Try pairing the controllers once again and see if anything changes.
2. Insert New Batteries
If the previous method didn’t make any changes, there’s a good chance your batteries need to be replaced.
I am not going to list any steps for this because the steps are exactly the same as mentioned in the previous method, except instead of reinserting the same batteries, you are inserting freshly purchased ones.
Note that if you don’t insert the battery pins in the proper direction, as mentioned above, the fix will never work.
Follow our guide to fix Oculus Quest 2 not Pairing to Phone.
3. Pair After Unpairing the Controller
This should be a piece of cake for some users, but for those who haven’t had to pair a new controller in the past, you can follow the steps below.
This is typically the first troubleshooting step, and many users have reported that this immediately solved their issue.
Here are the steps to pair and unpair a controller:
- Launch the Oculus app on your Android/iOS smartphone.
- Tap on the menu icon at the bottom right corner of the app once it opens.
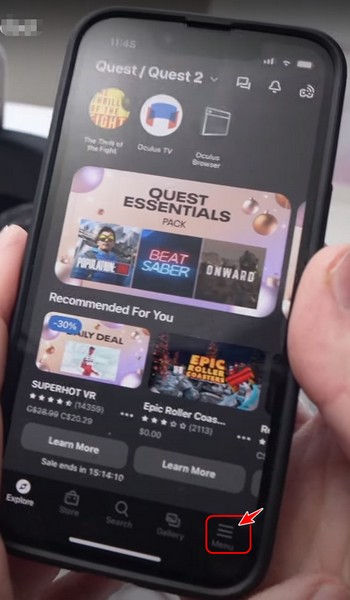
- Tap on the Devices menu from the list of options that appear on the new page.
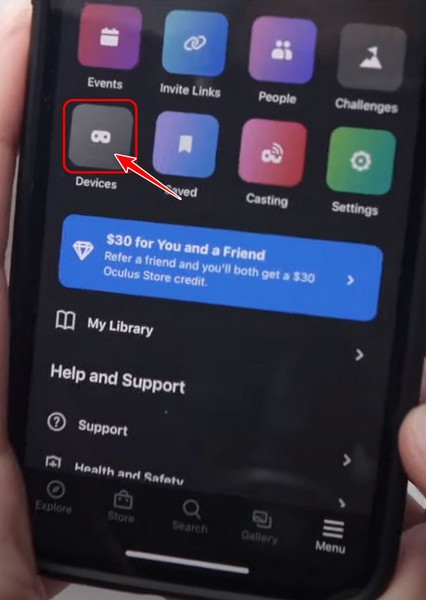
- Choose your Oculus device from the drop-down menu at the top and then tap on Controllers from the options below.
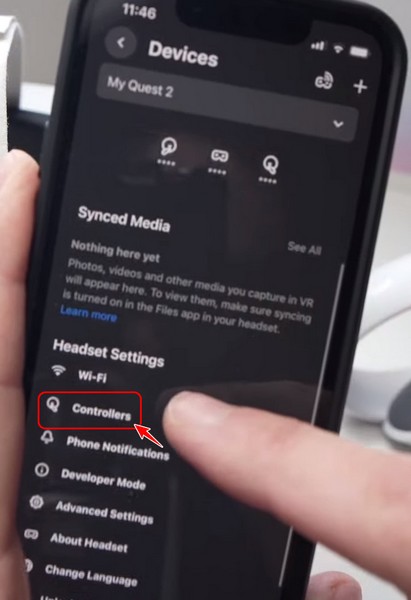
- Tap on the controller you want to unpair from the list of controllers on the next page.
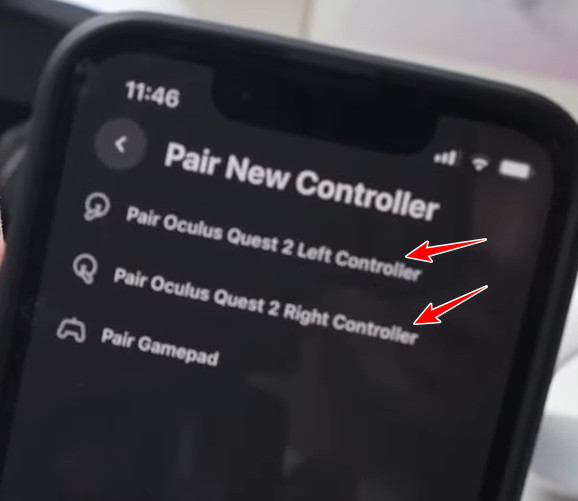
- Tap on unpair and follow the instructions to remove the controller from the device.
- Follow the instructions again and reach the list of controllers page. Tap on the Pair New Controller button to proceed.
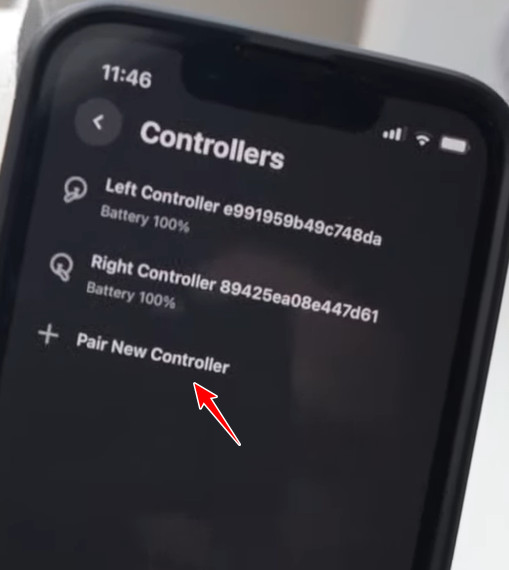
- Follow the instructions that appear on your phone and finish the pairing process.
Also related to this guide how to Pair Oculus Quest 2 Controller?
4. Reboot Oculus Headset
If you have ever faced any issues with your PC, you must have noticed that the first step is always to restart your computer. It’s the same case for the Oculus too.
If you face any problems with the Oculus being unable to pair, you should try performing a reboot first.
Here are the steps to do this:
- Wrap the Oculus Quest 2 headset around your head so that you are able to see the screen in virtual reality.
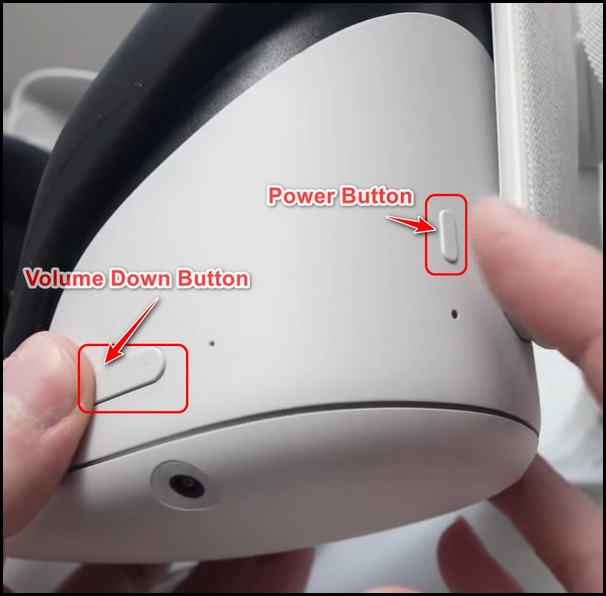
- Move your hands around and find the power button of the Oculus device on the right side using your right hand. Use your left hand to find the volume down at the bottom instead. Press and hold both these buttons at the same time until a menu appears.
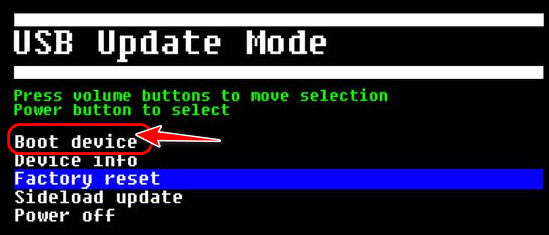
- Select the Boot Device option in the USB Boot Device menu using the volume buttons to navigate. Once that’s done, tap the power button to boot the Oculus headset.
- Try pairing the controllers after the device completes the boot-up process.
5. Clean Battery Contacts
Your Oculus controller has metal connectors in the battery compartment that you must have already seen when you removed the battery cover. Both the metal strip and spring are required to allow uninterrupted electric flow from the batteries to the controllers.
These contacts can gather some dust over time, mainly if they haven’t been used for a long time. As a result, your controller will stop working.
To fix this, purchase a microfiber cloth, and start wiping the dust off the contacts. I also recommend using a small unused toothbrush to wipe off any residual debris. Spend at least five minutes wiping and brushing the metal connectors.
You may also like to read Calibrate Oculus Quest 2 Controllers.
6. Ensure Your Internet Connection Is Working
I don’t know about you, but I have assumed that my internet connection was perfectly working when in fact, my ISP was doing some maintenance. So, open up your browser, go to google and search for anything random.
Then, click on a few pages and notice the page loading times. Remember, you have to ensure that your internet connection is stable enough for the pairing process, not just working.
If you are still not sure, I recommend contacting your ISP directly.
Final Thoughts
Controllers are more fragile than anything else when it comes to VR accessories while also being very important. I hope you managed to fix yours using one of the methods I discussed. If it doesn’t work, your only choice is to replace the controllers.
However, here is the link for Oculus Support if you want their advice on the matter as well.
Lastly, please share this article with your friends if it helped you.