Multiple user accounts are a must if you have only one PC in your home and have to share that PC with other family persons. It’s like splitting up a PC and distributing it among multiple people.
So, when you set up a PC system with multiple accounts, other people won’t see what’s on your account from theirs.
 Users may want to switch between the accounts quickly. And it’s possible by enabling Fast User Switching.
It’s a brilliant feature of Windows, and if you want to enable Fast User Switching but don’t know how, this article is for you.
I have also shown how to disable it in this article, in case you want to. So, read till the end of this tutorial to know the fastest way to switch users in Windows 11 without log-off.
Let’s get started!
Why Enable or Disable Fast User Switching?
Fast Users Switching is a feature in Windows that helps multiple users to sign in and switch quickly between their open accounts. When you fast switch to another account, the application will keep running in the account that you switched from. Not a single setting or modification will change.
When a user signs in, all the files and folders, settings, favorites and history they see are theirs, those can’t be accessible or adaptable from other’s accounts. The main focus is after logging out from the account; all the settings will remain the same when you sign back in.
It is possible to allow other users to sign in to their accounts when a user has already signed in. After you enable Fast User Switching in the multiple user accounts, users can simultaneously use their accounts.
You may also like to read how to show battery percentage on Windows 11
How to Enable or Disable Fast User Switching in Windows 11
After knowing all the superb features of enabling a Fast User Switching, it’s usual that your desire to enable this feature becomes stronger. I will show you the quickest way to enable or disable Fast User Switching from your Windows 11.
You can also apply all the methods and steps to enable or disable Fast User Switching in Windows 10. To enable or disable it, you must go to Windows 11’s Local Group Policy Editor or Registry Editor.
Without further ado, let’s jump to the methods.
Here are the methods to enable or disable Fast User Switching in Windows 11:
1. Use Local Group Policy Editor
If you are using Windows 11 or 10, there will be a local group policy editor by default. You must go to the group policy editor to enable Fast User Switching or disable it. Just follow the below steps to do that.
Note: There will be no Local Group Policy Editor in the Home edition for Windows 10 & 11. You have to install it manually.
Here are the steps to enable or disable Fast User Switching from Local Group Policy Editor:
- Press Windows key + R and type msc.

- Hit Enter after that or press the OK button.
- Navigate to the following policy location:
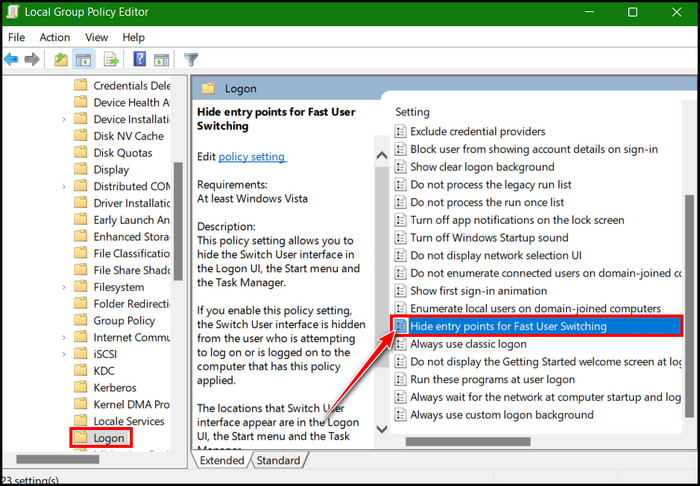
Computer Configuration > Administrative Templates > System > Logon.
- Look for Hide entry points for Fast User Switching in the right pane and double-click it to open.
- Click the Not Configured radio button to select it. It will enable Fast User Switching in the system default mode.
- Click on the Disabled radio button to enable Fast User Switching.
- Click on the Enabled radio button to disable it.
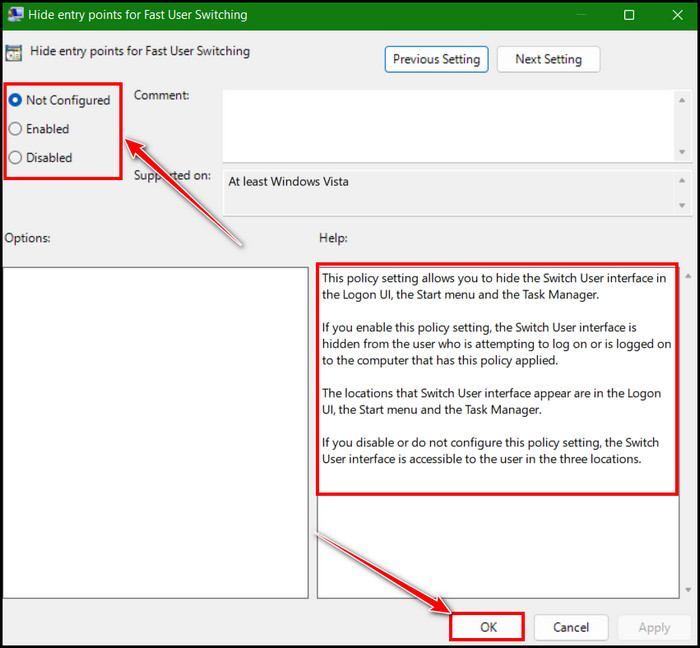
Choose which one to select: Not configured, Enabled or Disabled. To disable the Fast User Switching, choose the Enabled or the Disabled option to enable this feature.
2. Use Registry Editor
You can also enable or disable Fast User Switching from Windows Registry Editor. The registry Editor is a sensitive place to modify windows settings. Even a single mistake can cause chaos to the Windows OS.
So, follow the below steps carefully to enable or disable Fast User Switching from Windows Registry Editor.
Here are the steps to enable or disable Fast User Switching from Registry Editor:
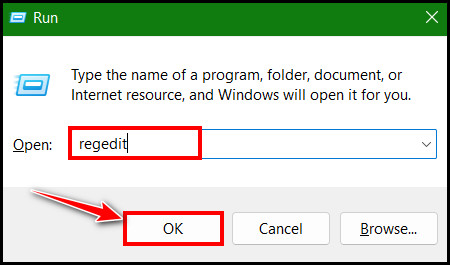
- Launch the RUN dialog box by pressing Windows Key + R.
- Type regedit and hit the OK button.
- Navigate to the following path in the Registry Editor:
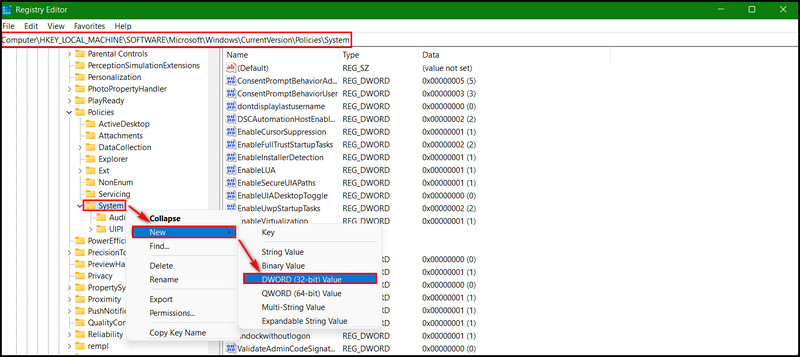
Computer\HKEY_LOCAL_MACHINE\SOFTWARE\Microsoft\Windows\CurrentVersion\Policies\System
- Right-click on the System folder and choose New > DWORD (32-bit) value.
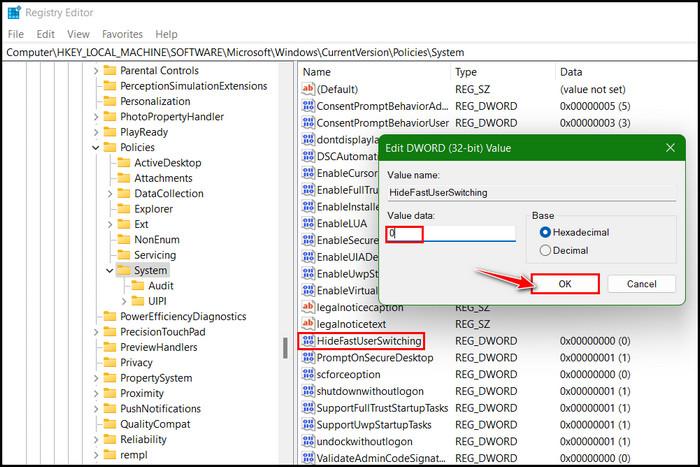
- Rename the newly created DWORD file to HideFastUserSwitching.
- Double-click on HideFastUserSwitching.
- Change the Value data to:
- 0 to forcibly display the first user switch option.
- 1 to hide the first user switch option.
- Click on the OK button after changing the value.
- Close all the expanded files and close the Registry Editor Window.
Now, you can fast switch between the user accounts if you enabled it or can’t see the fast user switching options if you choose to disable it.
Have some time to spare? Check out our latest on how to disable superfetch in Windows 11.
3. Use CMD
You can also enable or disable Fast User Switching only using some commands and running them in the CMD. Those command lines will add or delete relevant Registry keys. Next, restart Explorer.exe to apply all the changes without restarting the PC.
It’s just an easy process, and I will show you how to do it in a few steps.
Here are the steps to enable or disable Fast User Switching using CMD:
- Press Win Key + R and type CMD in the RUN dialog box.
- Press Ctrl + Shift + Enter to launch CMD with admin privileges.
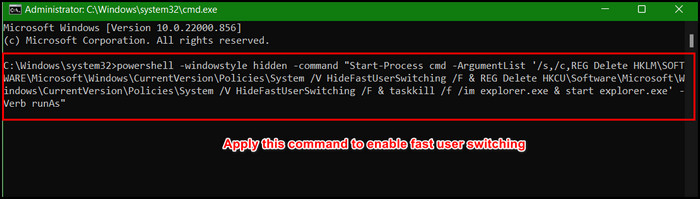
- Paste the following commands in the CMD to enable Fast User Switching:
powershell -windowstyle hidden -command “Start-Process cmd -ArgumentList ‘/s,/c,REG Delete HKLM\SOFTWARE\Microsoft\Windows\CurrentVersion\Policies\System /V HideFastUserSwitching /F & REG Delete HKCU\Software\Microsoft\Windows\CurrentVersion\Policies\System /V HideFastUserSwitching /F & taskkill /f /im explorer.exe & start explorer.exe’ -Verb runAs”
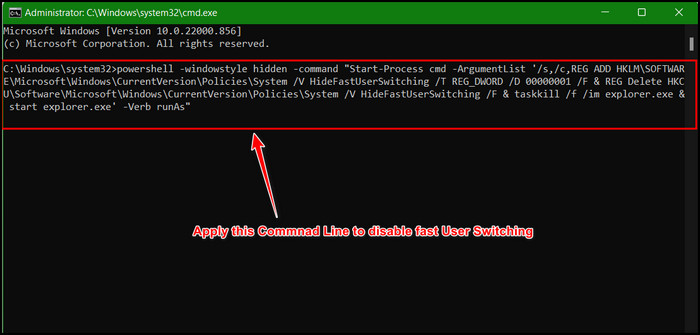
- Paste the following commands in the CMD to disable Fast User Switching:
powershell -windowstyle hidden -command “Start-Process cmd -ArgumentList ‘/s,/c,REG ADD HKLM\SOFTWARE\Microsoft\Windows\CurrentVersion\Policies\System /V HideFastUserSwitching /T REG_DWORD /D 00000001 /F & REG Delete HKCU\Software\Microsoft\Windows\CurrentVersion\Policies\System /V HideFastUserSwitching /F & taskkill /f /im explorer.exe & start explorer.exe’ -Verb runAs”
- Press Enter key to run the command lines.
After hitting the Enter key, commands for enabling the feature will run. You will find that Fast User Switching is enabled or disabled if you run the disabling commands.
Pro Tip: Once Fast User Switching is enabled, the Switch User interface will appear in the Logon UI, the Start menu and the Task Manager.
4 Ways to Switch User Accounts on Windows 11
If you enabled Fast User Switching, you could find the Switch User interface in several places. I will help you to find the exact location of it. Just read the below methods to find out.
Here are the methods for several ways to Switch User accounts on Windows:
1. Use the Start Menu
You can switch accounts from the Windows Start menu. It’s the simple and quickest way to switch user accounts.
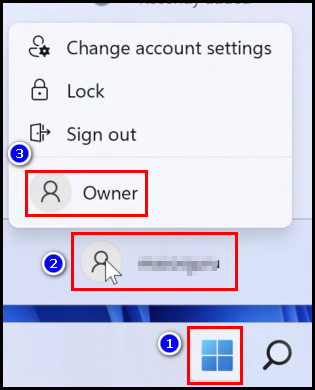
Here are the steps to Switch User accounts from the Start menu:
- Click on the Windows Start menu.
- Click on your Windows Profile picture.
- Choose and select the User Account from the context menu.
I hope you also find this method the quickest one. Let’s take a look at the other alternative ways.
2. Press Ctrl + Alt + Delete
Alternatively, you can Switch User accounts by pressing Ctrl + Alt + Delete keys on your keyboard. Just push those keys simultaneously, and you will see several options along with Switch User. 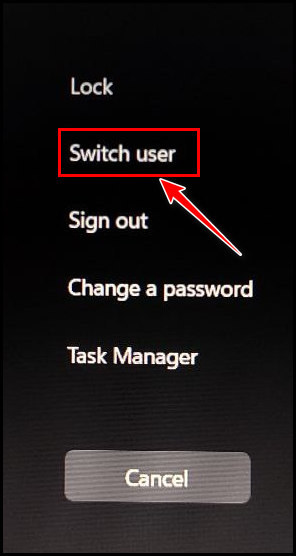
Click on it, and you will be on the login screen. Choose your user account and click on it.
But, before that, do check our latest post on fix can’t install Windows 11 on SSD.
3. Press Alt +F4
This Alt + F4 shortcut key is for closing any running window. Moreover, while on the desktop, only press the Alt + F4 key to launch the Shut Down options.
Pro Tip: When you are on the Desktop and pressing the Alt +F4 key brings nothing, press Windows key + D and then the Alt+ F4 key again.
Here are the steps to Switch User accounts from the Start menu:
- Go to Desktop and Press Alt + F4 key.
- Click on the drop-down key and select the Switch User option from the list.
- Click on the OK button or Enter key to enter the Switch User option.
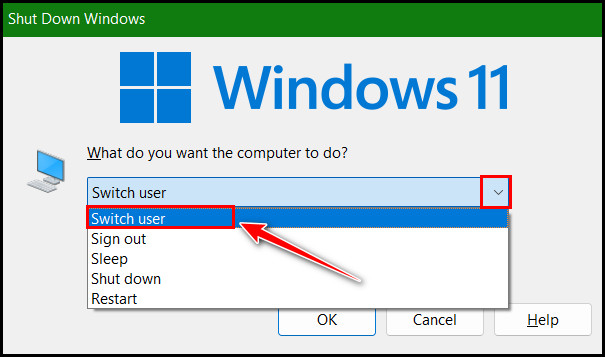
After that, you will be taken to the login screen and choose your account to log in.
How to Enable Group Policy Editor (gpedit.msc) in Windows 10/11 Home Edition
You can’t enable Fast User Switching from the Local Group Policy Editor if you are running Windows 10/11 Home edition. Local Group Policy Editor is not included in the Windows 10/11 Home edition.
But you can install it with a simple trick. Just run some commands in the CMD to install the Group Policy Editor or gpedit.msc in the Windows Home edition. You don’t need to be a pro to do this. Just follow the below steps.
Here are the steps to enable Group Policy Editor in Windows 10/11 Home Edition:
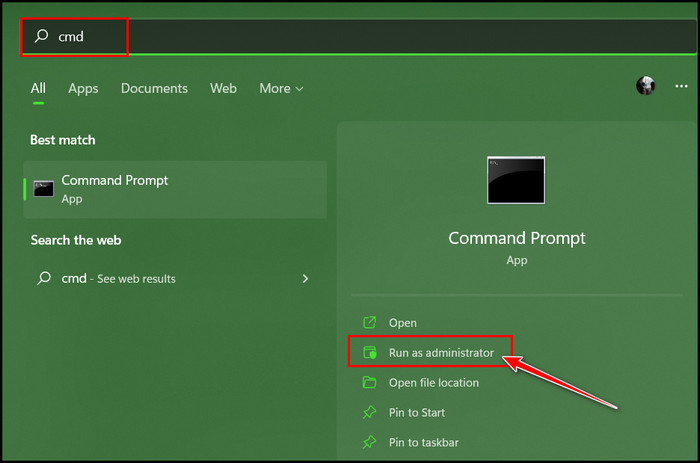
- Press the Windows key + S to launch Windows Search.
- Search for CMD and select Run as administrator.
- Copy and paste the following commands:
FOR %F IN (“%SystemRoot%\servicing\Packages\Microsoft-Windows-GroupPolicy-ClientTools-Package~*.mum”) DO (DISM /Online /NoRestart /Add-Package:”%F”)
FOR %F IN (“%SystemRoot%\servicing\Packages\Microsoft-Windows-GroupPolicy-ClientExtensions-Package~*.mum”) DO (DISM /Online /NoRestart /Add-Package:”%F”)
- Hit the Enter key after that.
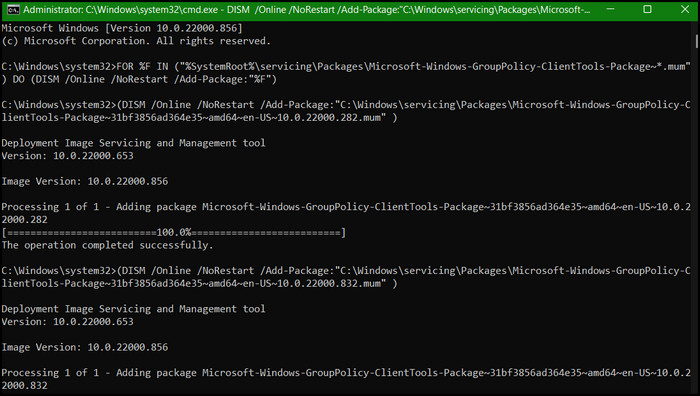
It will start installing the Local Group Policy Editor at the instance. Once done and you will see The Operation completed successfully message twice. After that, close the CMD and search for Local Group Policy Editor.
I hope you will find it, and now you can enable Fast User Switching from gpedit.msc.
But, before that, do check our latest post on logitech G hub not working on Windows 11.
FAQs
Does Windows 11 allow multiple users?
Windows 11 allows multiple users. You can add Microsoft and local accounts by going to the Settings app.
Why won’t my computer let me switch users?
Your computer isn’t letting you switch users because your account is the only user account currently present on the computer. To change users, you will need to create another user first and check whether the Switch Users option is available or not.
What is the shortcut for switch users?
The shortcut key for Switch Users from Windows is Ctrl + Alt + Delete or Alt + F4.
Why is Fast User Switching important?
Fast User Switching is essential because it allows you to switch between user accounts on a single computer without quitting applications and logging out from the computer. The main fact is that users don’t need to be forced logged out for another user to log in.
Bottom Line
Multiple user accounts are a blessing when you need to share your computer with others. With multiple accounts, many users can use the PC simultaneously without affecting others’ files and settings.
That’s why Fast User Switching is needed for a faster switch between accounts. I have given all the quickest methods and steps inside to enable or disable Fast User Switching in this article.
I hope you read till the end and successfully enable or disable it. Do you need any further assistance?
Let me know in the comment box below. See you at the next one. Peace out!