Usually, computer manufacturers show their logo or other relevant information during the boot process. It affects the boot time and takes longer to show the login screen of Windows.
By turning off the BIOS splash screen, you can lower the boot time and eliminate the annoying custom splash screen from appearing during the boot.
In this article, I will share some quick and easy steps to disable the BIOS screen splash on various motherboards.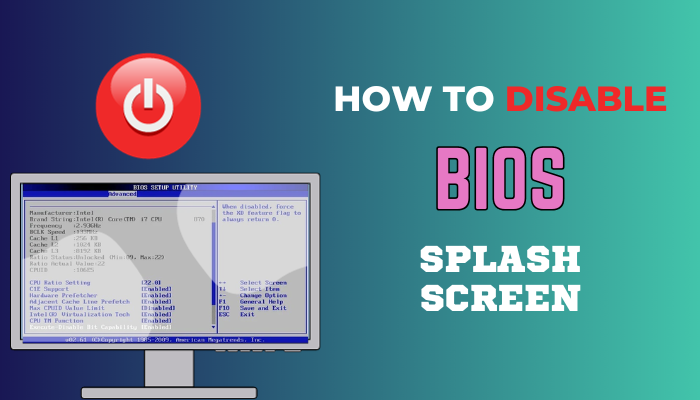
Without further discussion, let’s get started!
How to Disable a Computer BIOS Splash Screen
Depending on the BIOS versions and motherboard manufacturers, you will find different options to turn off the BIOS screen splash. You should check the mobo’s user manual to find the settings in BIOS. Once you find the relevant settings, you should disable the option from BIOS.
If you’re doubtful about the BIOS, you can quickly check the BIOS version and search for the user manual for your BIOS version. It will find the documentation on the manufacturer’s site.
Quick Tips: Simply press the Esc key when the computer is booting to temporarily bypass the BIOS splash screen.
Because of unique BIOS designs from different manufacturers and various BIOS versions, the options are not similar on every computer. However, if you closely inspect the BIOS settings, you will indeed find some settings that refer to turning or showing the splash screen on or off.
After going through various computers and BIOS versions, I have found some settings that disable the splash screen during the boot.
If you’re using an HP, Dell, or ASUS motherboard, consider the following instructions to turn off the BIOS splash screen.
Here are the steps to disable your computer BIOS splash screen:
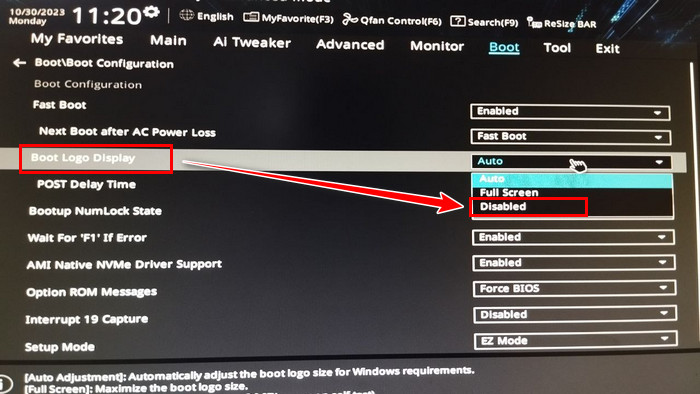
On ASUS
- Restart your computer.
- Press the Delete key during the boot to enter BIOS.
- Navigate to the Advanced Mode.
- Switch to the Boot tab.
- Click the Boot Logo Display dropdown menu and select Disabled.
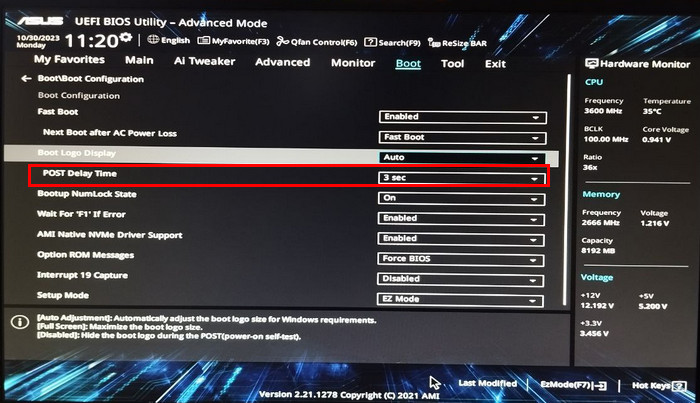
- Expand the Post Delay Time menu and set it to 0 seconds.
- Save and Exit the BIOS.
On Dell
- Restart the device.
- Keep pressing the F2 button during the boot to enter BIOS.
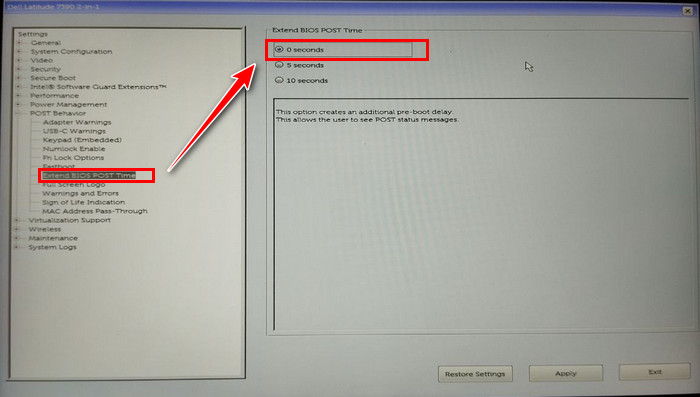
- Click Post Behavior to expand the options.
- Select Extend BIOS POST Time and set the time to 0 seconds.
- Click Full Screen Logo and uncheck the Enable Full Screen Logo option.
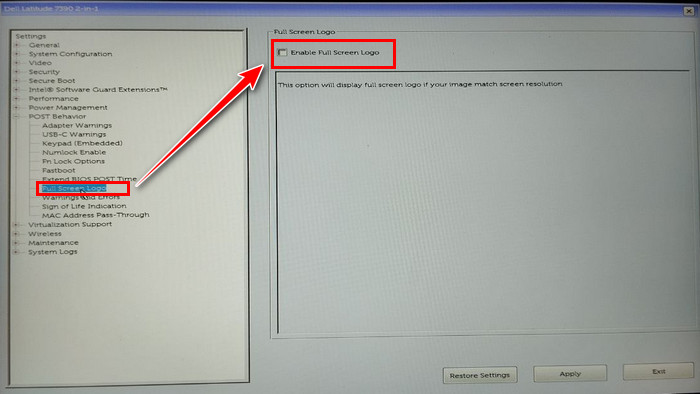
- Look for a setting called Quiet Boot and enable it.
- Click on Apply to save the changes.
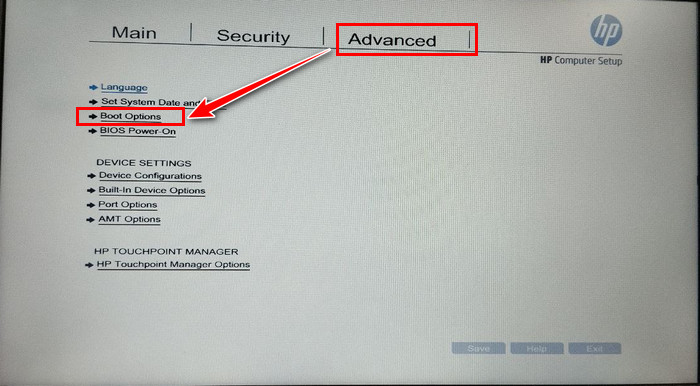
On HP
- Restart your computer.
- Press the F10 button to enter BIOS.
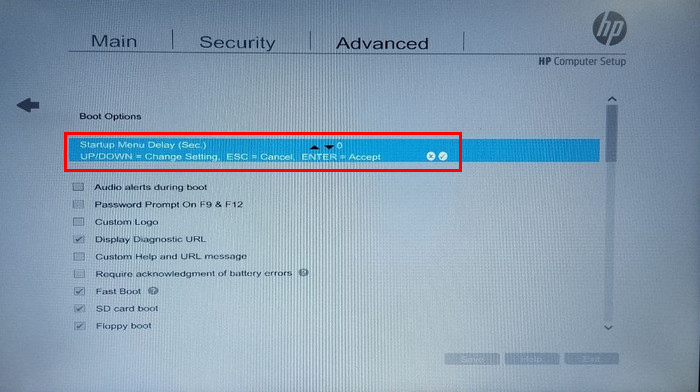
- Switch to the Advanced tab and expand Boot Options.
- Set the Startup Menu Delay (Sec) to 0.
- Uncheck Custom Logo.
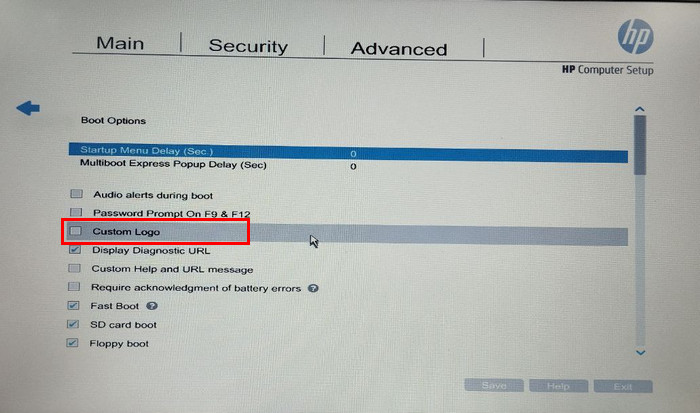
- Save and Exit the BIOS.
Voila! You’ve successfully turned off the BIOS splash screen on your computer. If your device is not listed above, check your motherboard’s user manual to disable the splash screen during boot.
Moreover, turning off the custom or BIOS logo will remove the custom BIOS splash screen from your computer and ensure an accelerated boot.
Undoubtedly, disabling the BIOS splash screen will speed up the boot process and save you time. Moreover, by turning off the Windows 10 splash screen, you can also reduce the boot time. To learn more, move down to the next section.
How to Disable Splash Screen of Windows 10
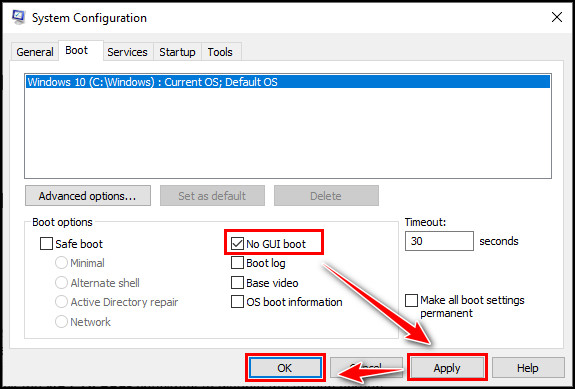
To turn off the Windows splash screen, you must open the System Configuration dialogue box using the Run program. On the System Configuration window, switch to the Boot tab, tick the No GUI boot checkbox to disable the splash screen, and press OK to save changes.
By turning off the Windows splash screen, you can dramatically reduce the boot or system startup time by 3-5 seconds.
When you disable this welcome screen, you will no longer see the Windows logo during the start-up; instead, it will speed up the boot time and directly take you to the login screen.
Here’s how to disable the splash screen of Windows 10:
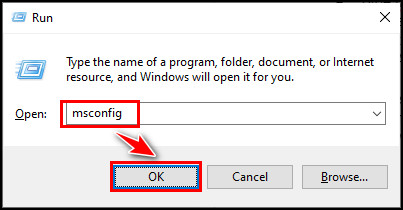
- Bring up the Run dialog box by pressing the Windows + R keys.
- Type msconfig in the text box and hit Enter.
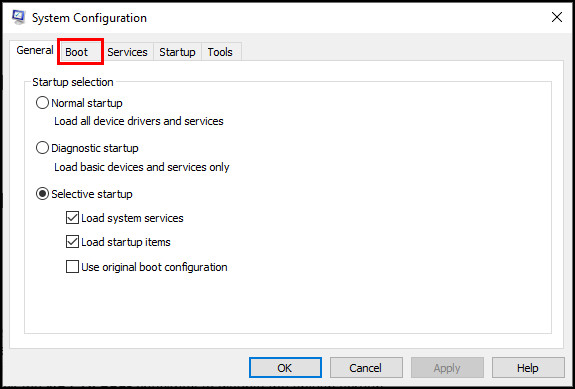
- Navigate to the Boot tab when the System Configuration window appears.
- Check the No GUI boot checkbox to disable the splash screen.
- Click Apply and then OK.
Once you press the OK button, a new System Configuration prompt will appear. Press the Restart button from that window to apply the changes.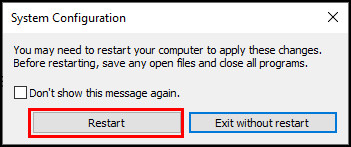
From now on, whenever you boot the computer, it will skip the splash screen and perform a quick boot.
Wrap Up
Once you turn off the BIOS splash screen or other relevant settings from the BIOS, you will experience a noticeable boot time improvement. Moreover, by disabling the splash screen of Windows, you can make the boot process much shorter.
If you’re still getting the splash screen on a particular motherboard, don’t hesitate to mention it in the comment below.