One of SharePoint’s key features is creating customized workflows, which automate routine tasks, facilitate approvals, and ensure smooth information flow within organizations.
From automating repetitive tasks to setting up complex business processes, SharePoint workflows allow teams to work smarter, not harder.
In this article, I’ll explain the process of creating workflows in SharePoint. From designing workflows to configuring triggers & actions using Power Automate, I’ll help you to unlock the total efficiency and effectiveness of SharePoint’s workflow capabilities.
Let’s begin!
In SharePoint, workflows can design and automate various business processes. These processes can range from straightforward document approval workflows involving only one authorizer to intricate customer-facing product catalogs that integrate web service databases.
Workflows can even include highly complex structured business processes, incorporating loops, conditions, tasks, user inputs, and custom actions.
Workflow can be defined as a sequence of tasks for achieving a desired outcome. In the specific conditions of SharePoint Technologies and Products, workflow refers to the automated progression of items or documents through a series of operations or actions associated with a particular business process.
By utilizing workflows, organizations can incorporate business logic into documents or items stored in a SharePoint library or list and routinely supervise regular business procedures.
Workflows can effectively simplify the coordination of routine business operations, such as plan approval or report checks, by facilitating the management and tracking of the tasks involved.
For instance, within a SharePoint site, you can implement a workflow in a document library that directs a document to a group of individuals for approval. When this workflow is active, it generates document approval tasks and sends email notifications to the individuals containing the assignment manual, along with a link to the file needing permission.
Throughout the workflow’s progression, participants can go to the Workflow Status page to monitor the completion status of each task. When all workflow tasks are finished, an automatic notification is sent to the workflow owner.
SharePoint provides pre-built workflows, including Approval, Collect Feedback, Collect Signatures, Publishing Approval, and 3-State. These workflows approve documents, gather feedback, obtain signatures, and implement multi-step plans that improve efficiency & collaboration automatically.
Below I’ve described the pre-built workflows that SharePoint sites offer:
Approval Workflow
This workflow sends a document or item to a group of users for its approval. By default, it is related to the document content type. So, it is readily available in document libraries.
Collect Feedback Workflow
This workflow routes a document or item to a group of people to gather feedback. Reviewers can provide their input, which is then collected and sent to the initial stage of the workflow. It is associated with the document content type and can be found in document libraries.
Collect Signature Workflow
This workflow sends a Microsoft Office file to a team of users to collect their digital signatures. To initiate this workflow, you must use an Office 365 program. Participants need to finish their signature tasks in the document using the relevant Office app.
By default, it is associated with the document content type and is available in the document libraries only if the document contains one or more Microsoft Office Signature lines.
Publishing Approval Workflow
Similar to Approval, this workflow automates the process of routing content to subject matter experts and stakeholders to examine and approve. However, it is specifically designed for publishing sites where the publication of new and updated web pages requires strict control.
3-State Workflow
This workflow is suitable for managing business processes that involve tracking a large number of items or issues, such as sales leads, customer support problems, or project tasks.
You can customize all the above workflows to meet the specific needs of your organization.
To create a workflow in SharePoint for a list or library, you have the options to add an Alert Workflow for notifications, construct a simple Approval Workflow for straightforward approval processes, or create a 3 State Workflow for implementing multi-step workflows with different states.
These workflow options provide flexibility and automation for managing tasks and improving collaboration within SharePoint environments.
Follow the steps below to create a workflow for a list or library in SharePoint:
Add an Alert Workflow
- Locate the item or folder in SharePoint for which you wish to set up an alert.
- Click on the ellipses next to the folder or file and select Alert me.

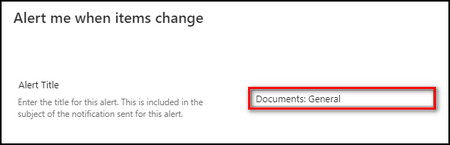
- Provide a title for your alert. The title will appear in the subject line of the notification. I’d suggest you use a descriptive title that clearly indicates the purpose of the alert.
- Enter the usernames or email addresses of the individuals you want to receive the alerts.

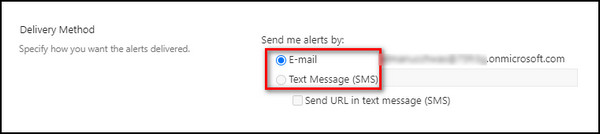
- Select the Delivery Method for receiving the alerts. By default, Email is chosen, and it uses the email address associated with your account. Depending on your Office 365 organization’s configuration, you may have the option to select Text message as the delivery method.
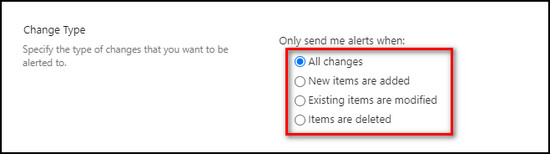
- Define the Change Type for which you want to receive notifications. It determines when you will be notified about modifications made to the specific folder or document you are setting up the alert for.
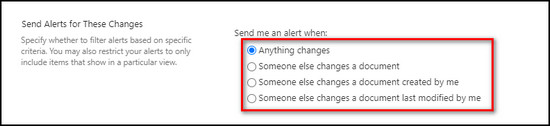
- Customize your alerts by specifying criteria for filtering. It allows you to set scenarios that activate notifications based on your preferences. You can also limit the alerts to items presented in a certain view, ensuring that you receive notifications for appropriate updates based on your chosen standards and view settings.
- Choose the timing for sending the alerts. You can opt to receive immediate notifications when the trigger event occurs, or you can receive a daily or weekly summary based on the frequency of changes being made.
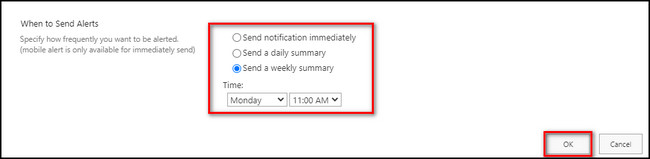
- Click OK to create your alert.
Create a Simple Approval Workflow
- Go to the SharePoint library where you want to create an approval workflow.
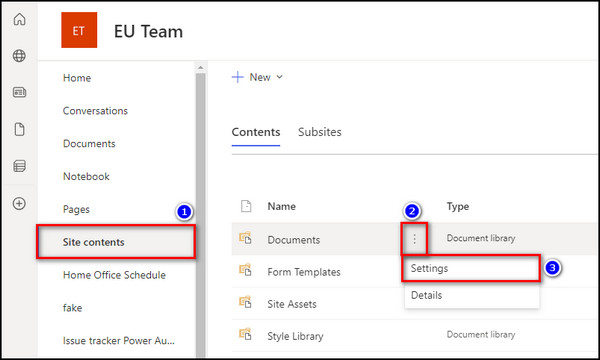
- Hover over the Documents library, click on Show actions, and choose Settings.
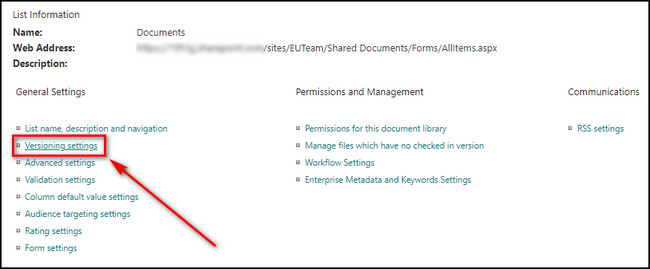
- Select Versioning settings.
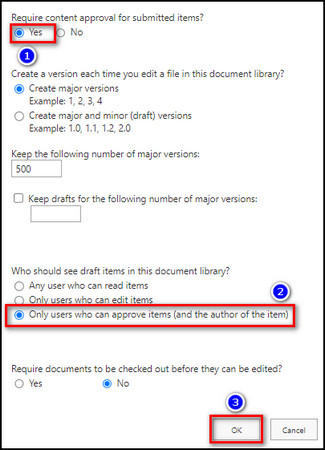
- Choose Yes from the Content Approval section.
- Select Only users who can approve items (and the author of the item) in the Draft Item Security section. It means that documents in the Pending or Rejected state are only visible to the individuals who uploaded them and the designated approvers. Once approved, the documents will become visible to everyone. This setup aligns with the typical desired scenario.
- Click OK to apply the Version settings.
- Go back to the library, and you’ll see a new column labeled Approval Status.
Create a 3 State Workflow
- Open your SharePoint site where you want to create a workflow.
- Go to Site contents.
- Select Return to classic SharePoint from the bottom left corner.

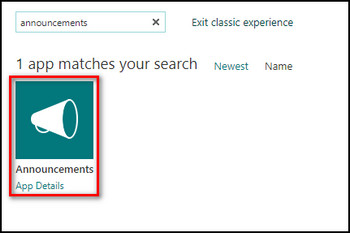
- Click on add an app.
- Select the app to which you want to insert the workflow. In this example, I’ve selected the Announcements app.
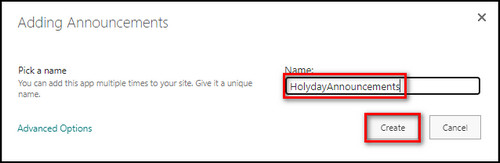
- Enter a name for the app and click the Create button.
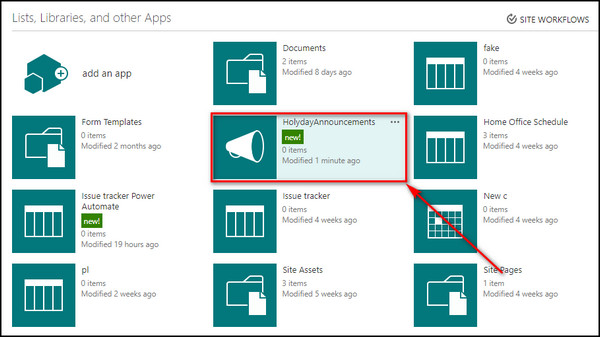
- Select the app you’ve just created.
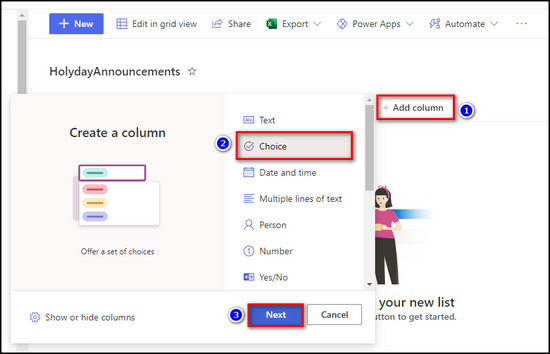
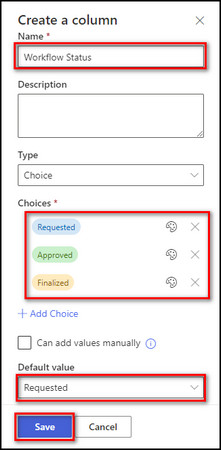
- Click on Add column.
- Pick Choice and click Next.
- Provide the column name, specify the choices, choose the Default value as Requested, and click Save.
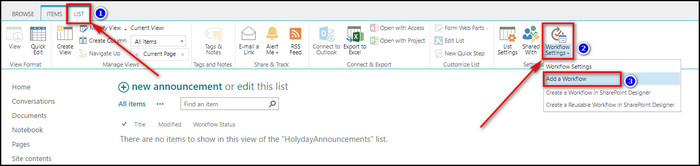
- Select Return to classic site.
- Go to the List tab from the top bar and select Workflow Settings > Add a Workflow.
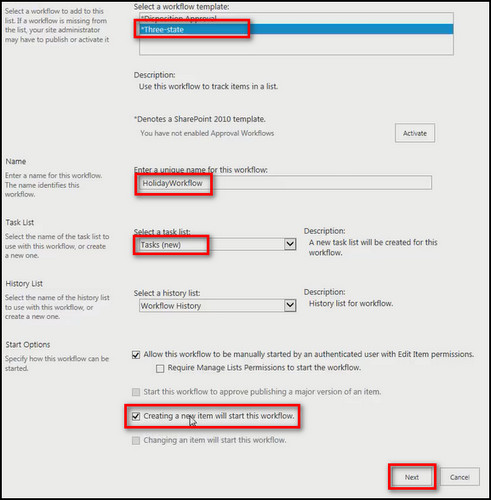
- Choose Three-state as the Workflow template, enter the Workflow name, choose Tasks (new) for the Task list field, check Creating a new item will start this workflow, and click Next.
- Select the column you’ve created for the Choice field and set the choices for the Initial, Middle & Final states.

- Choose the users in the Task Assigned To field to whom the task that’s generated from the workflow will be assigned, make sure the users are valid, and click OK.
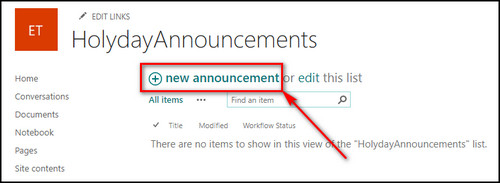
- Select new announcement to start the workflow.
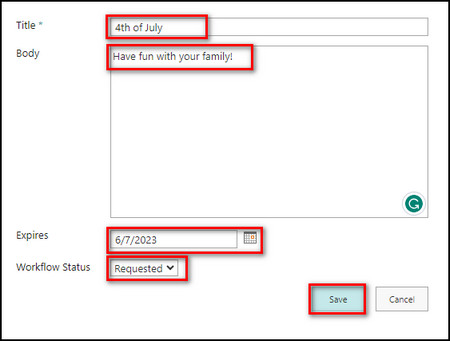
- Enter the title, description, and expiration date for the event. The column you’ve created in this case, Workflow Status will be set to the default initial value. You can change it if you want.
- Click the Save button.
Now in the background, SharePoint will automatically add a Tasks app that holds all the tasks generated by the workflow.
Click on the Workflow status (In progress) to see all the tasks and workflow history.
At this point, it’ll have only one task, which will be assigned to the user you’ve selected. When the user modifies the task, the workflow will create a new task, which will be sent to another user you’ve specified. When the second user modifies the task, the workflow status will change to Completed.
To enhance the functionality of SharePoint workflows, use Power Automate. Incorporate an email notification workflow into a SharePoint list. It will send alerts based on specified conditions. Also, create an approval workflow to simplify the approval process for documents and files.
Below I’ve provided the instructions to add workflow to SharePoint using Power Automate:
In the following example, I’ll add a workflow to a SharePoint list, which will send an alert through email to the person a list item is assigned to when the item was created or updated.
Here are the steps to add a Workflow to a SharePoint list:
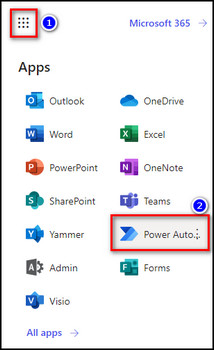
- Open Microsoft 365 and sign in to your account.
- Select the App launcher from the top left corner and Power Automate.
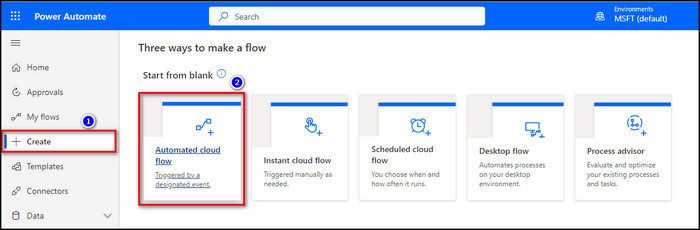
- Move to the Create tab and choose Automated cloud flow.
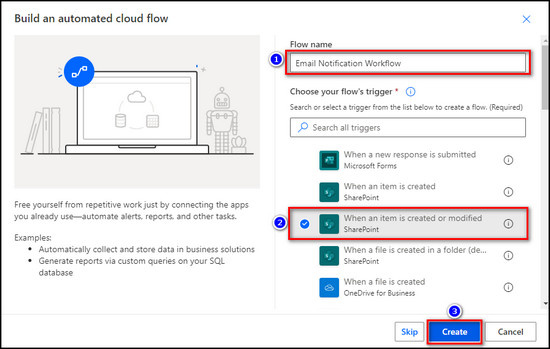
- Enter a name for your flow, choose When an item is created or modified as the flow’s trigger, and click the Create button.
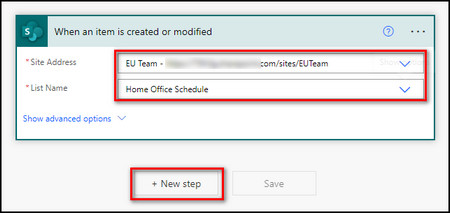
- Choose your SharePoint site in the Site Address field where the list resides for which you want to use the workflow, select the list in the List Name field and click on New step.
- Select Send an email (V2) as the Action.
- Specify the email template that will be sent out when a list item is created or modified.
- Select the To field and choose Add dynamic content from the list item triggering the workflow.
- Select Assigned to Email. It will send the email to the user mentioned in the Assigned to field of the list.
- Finish the email structure and click Save.

Now whenever you or someone with access to your SharePoint site adds an item or updates an existing item in the list the user that the item is assigned to will get notified via email in Outlook.
In the following example, I’ll show you how to create a workflow in the Documents library in SharePoint where every time a new document is created in the library, it triggers the Approval workflow.
Here’s the process to create an approval workflow for a SharePoint library:
- Open Power Automate from Office 365.
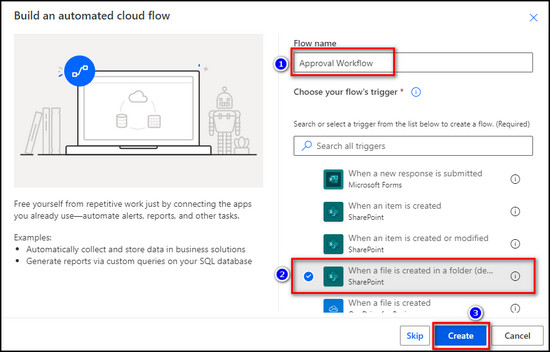
- Proceed to the Create tab from the left menu and choose Automated cloud flow.
- Provide a name for the flow, choose When a file is created for a folder as the trigger for the flow, and click Create.
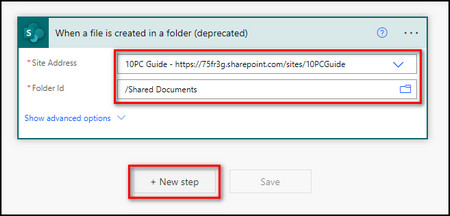
- Choose your SharePoint site in the Site Address field, select Shared Documents for the Folder Id field, and click New step.
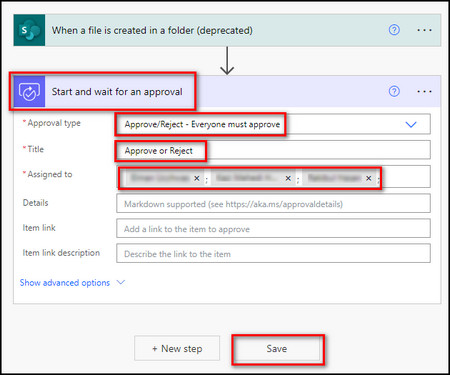
- Search for Approvals and select Start and wait for an approval.
- Choose Everyone must approve for the Approval type.
- Enter a title for the flow, and add the email addresses of the people who need to approve or reject new files in the SharePoint Documents library in the Assigned to field.
- Click the Save button.
Now if you or anyone with access to your SharePoint site upload or create a new document, it’ll target the approval workflow, and emails will be sent out to approve or reject the file.
To grant elevated permissions to workflows in SharePoint Online, you need to enable add-in permissions for the workflow and allow it Full Control permission. This allows the workflow to perform tasks requiring higher privileges and ensures efficient workflow management.
Follow the instructions below to allow elevated permissions workflows in SharePoint:
Allow a Workflow to Use Add-In Permissions
- Navigate to the desired SharePoint site where you intend the workflow to operate.
- Go to the Site contents tab and access the Site settings page.

- Proceed to the Site Actions setting and choose Manage site features.
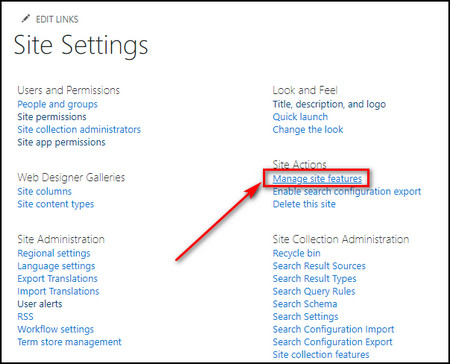
- Scroll down to the Workflows can use app permissions option and click on the Activate button.

Grant Full Control Permission to a Workflow
- Open the SharePoint site with a workflow to which you want to grant full access.
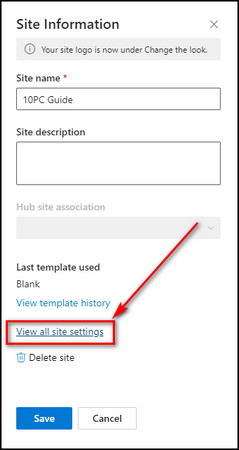
- Click the Gear icon from the upper right corner and choose Site information.

- Select View all site settings.
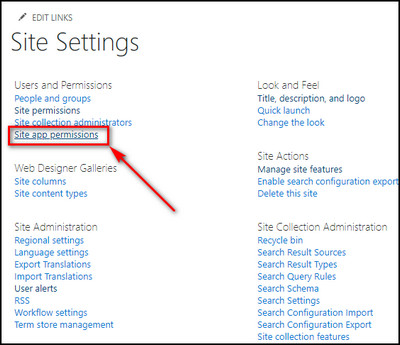
- Choose Site app permissions from the Users and Permissions section.
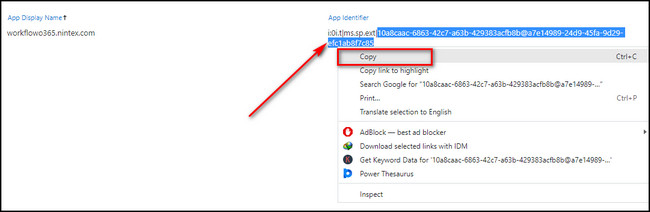
- Copy the Client Id from the App Identifier.
- Remove the last part of the site URL, replace it with appinv.aspx, and press Enter.

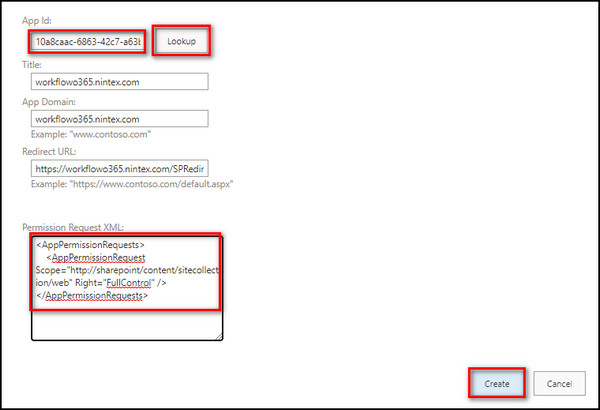
- Paste the Client Id in the App Id field and click the Lookup button. It’ll automatically fill up the Title, App Domain, and Redirect URL fields.
- Enter the following code in the Permission Request XML text box:
<AppPermissionRequests>
    <AppPermissionRequest Scope="http://sharepoint/content/sitecollection/web" Right="FullControl" />
</AppPermissionRequests>- Click the Create button.
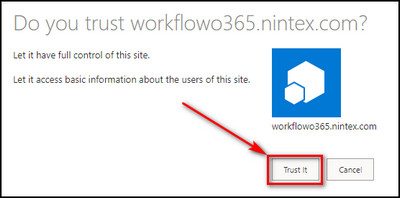
- Select Trust It to apply full control access to the workflow.
Now your SharePoint workflows can execute actions that demand elevated privileges, ensuring effective administration.
Having a clear understanding of the importance of developing SharePoint workflows is essential for improving business operations and promoting effective teamwork.
Acquiring the knowledge of creating workflows in SharePoint enables companies to automate recurring tasks, and simplifies decision-making processes.
When you initiate the process of building a workflow in SharePoint, you define a series of actions and tasks which different members of your team must execute.
Moreover, SharePoint workflows can be customized to meet the specific requirements of your organization, making sure the right individuals are engaged at the appropriate times, and that they complete the tasks in the correct sequence.
Therefore, being an expert in creating SharePoint workflows enables companies to automate and efficiently manage critical processes. It enhances productivity and improves the collaborative atmosphere in the organization.
FAQs
What initiates a workflow in SharePoint?
To initiate a list workflow in SharePoint, you can employ the StartWorkflowOnListItem method. On the other hand, if you intend to commence a site workflow, you should utilize the StartWorkflow method.
Is SharePoint good for workflow?
SharePoint workflows enhance productivity by automating tasks and promoting consistency. They save time and effort, allowing you to focus on strategic activities. These workflows streamline operations, improve efficiency, and foster collaboration.
Are SharePoint workflows going away?
The use of SharePoint 2010 workflows is no longer recommended, although they will continue to receive support until July 14, 2026, for the release of SharePoint Server Subscription Edition.
Final Thoughts
With the right approach and an understanding of SharePoint’s workflow capabilities, organizations can unlock significant productivity gains, enhance collaboration, automate repetitive tasks, and enhance their overall business operations.
By following the steps provided in this article, you can use the built-in tools and features of SharePoint, Power Automate, and Microsoft Flow to design, build, and deploy workflows for your specific business needs.
Comment below if you have further questions, and we’ll get back to you soon.