Ever noticed how every Windows computer becomes laggy and slow a few months after its first use? People have been asking this question in multiple tech forums over the years and still do, but there is one simple answer: Cache files
Don’t get me wrong, Cached files are actually important for your Windows 11 or Windows 10 PC. These files save your preferences and working history to let your computer process similar tasks faster in the future.
However, in the process, it ends up consuming precious physical memory space, which in turn causes the annoying slowdowns that we all hate.
So, what’s the solution? Well, you guessed it. You can simply flush the memory cache and your computer will be restored.
This article will tell you exactly how to do that, so let’s not waste more time and get right into it.
What Is A RAM Cache In Your Computer?
A portion of your computer’s memory is designated to store cached data. This is called the RAM cache, and it takes up a sizeable portion of your available RAM. Cached data is created to store the records and results of your tasks and calculations to enable faster access in the future.
A portion of your computer’s primary is set aside to store cache files. This portion is called the RAM (Random Access Memory) cache.
Data is cached on your RAM to allow faster retrievals and computation of data. Your RAM allows the CPU to access it at the fastest rate than any other memory device. Since it has the fastest access, the RAM is used for storing and retrieving the cached data.
Also, check out our separate post on how to ship RAM safely.
This helps certain applications to run faster where there is a common pattern every time you use them.
The cache records things like your preferences, data entries, browsed web pages, results of different types of calculations, query statements, etc. This data is utilized in the future when you perform the same tasks on your computer by retrieving it faster from your RAM. In this way, the cache can be efficient in such cases when you are performing a similar task again and again.
For example, cache files store database information when you run a retrieval query. It can take a lot of time to run such queries, and if your RAM already has the result stored in the cache, it can instantly give you what you are looking for.
Another instance of a cache’s function is storing web pages that you open on your browser. These pages are immediately loaded from the cache the next time you open them.
The cache memory in your computer does come in handy in many cases, but it also causes your memory to bloat with a lot of unnecessary data that slows down your computer. So, if you do not clean your cache once in a while, it might be the reason for your computer to become slow.
Memory leaks from your installed software can also contribute to stutters and slowdowns.
In order to reduce RAM usage, every Microsoft Windows PC creates a virtual memory page file that occupies a lot of space. To prevent your computer memory from being hogged by unnecessary data, you should delete your cache once in a while.
Speaking of memory, are you facing a high RAM usage issue on your PC? If so, you should immediately read this guide that has step-by-step instructions to reduce RAM usage. Without fixing this, deleting cache memory is useless.
How To Clear RAM Cache On Windows PC?
You can clear RAM cache in any Windows 10 computer using third-party software like CCleaner.There are more ways to clear memory cache and free up RAM, like restarting your computer, stopping unnecessary programs, etc. These are discussed in detail below.
The steps for cleaning out your RAM cache are presented here for you to see and apply them to free up some space on your memory.
Follow these steps to clear RAM cache in Windows 10:
1. Restart Your PC
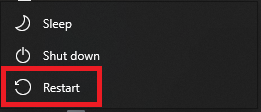
The simplest way to remove memory cache in Windows is by restarting it. Restarting the PC resets the system memory usage and all the cached files created are destroyed. Go to Start Menu > Power Icon > Restart to restart your computer.
2. Use Disk Cleanup Tool
You can use the Disk Cleanup tool in Windows 10 to remove the temporary files created in your computer that have been filling up your memory.
Perform the following steps to remove cache using Disk Cleanup:
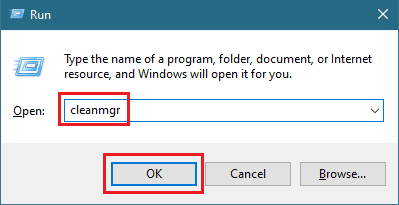
- Press Win + R.
- Type in cleanmgr and click on OK.
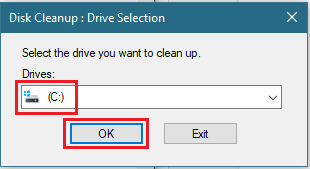
- Ensure Drive C is selected and click on OK.
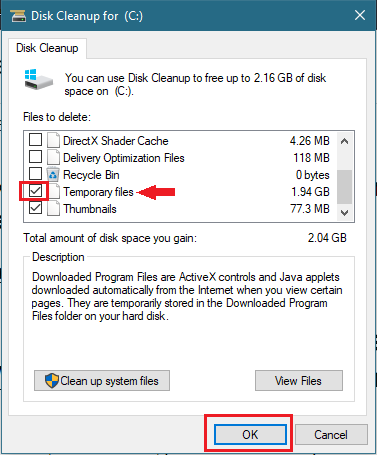
- Check the box beside Temporary Files from the list and click on OK.
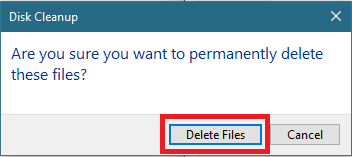
- Click on the Delete Files button to clean out the temporary cache files.
Follow our easy step-by-step guide to use different SLI on Windows 10.
3. Stop Unnecessary Background Apps
Not all that run in the background are integral to run your computer, and you can free up a lot of cache using the Task Manager to terminate useless processes.
Follow this process to stop unnecessary background programs:
- Check the taskbar for unnecessary opened apps and quit all of them.
- Press Ctrl + Shift + Esc to open Task Manager.
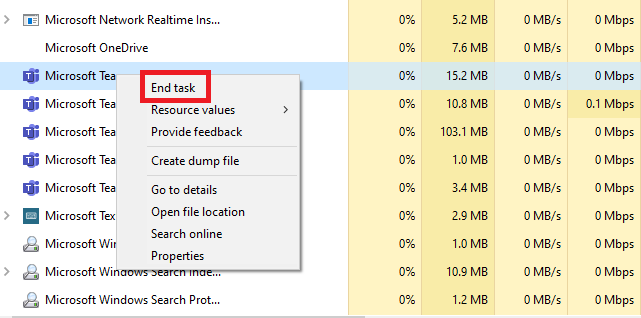
- Right-click on the program/process you want to stop running and click on End Task.
4. Reduce Number Of Startup Programs
If you have many apps set to run at startup, their information is stored in the cache as they get up and running every time you start your computer. You can minimize the number of startup apps and restrict them to only the necessary ones.
Here’s how you can reduce the number of programs running on startup:
- Press Ctrl + Shift + Esc to open Task Manager.
- Go to the Startup tab.
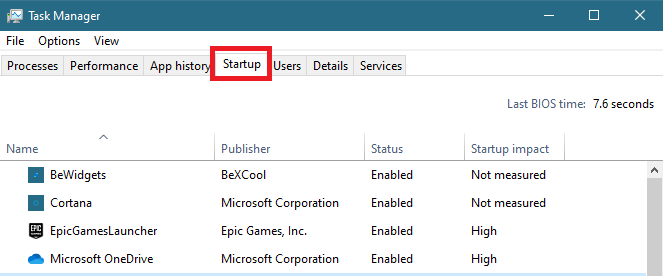
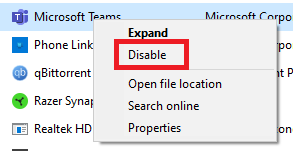
- Right-click on the apps you want to stop from running on startup and click on Disable.
5. Enable Performance Mode To Reduce Visual Effects
In Windows 10, there are many visual effects and animations that are pleasing to the eye but take up a lot of space from your system RAM. This can have a negative influence on the performance of your computer. You have to disable these animations by turning on the performance mode in Windows Explorer.
Go through these steps to reduce visual effects by turning on performance mode:
- Press Win + E to open Windows Explorer.
- Right-click on This PC and select Properties.
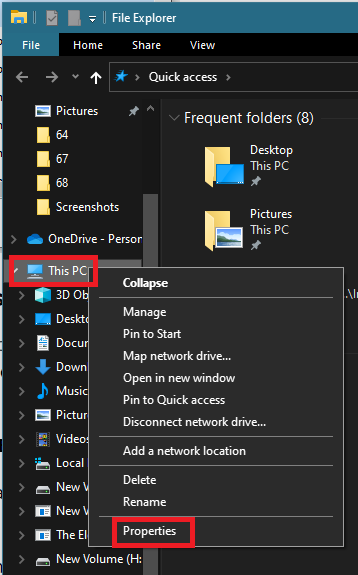
- Scroll down and select the Advanced system settings option from the About tab.

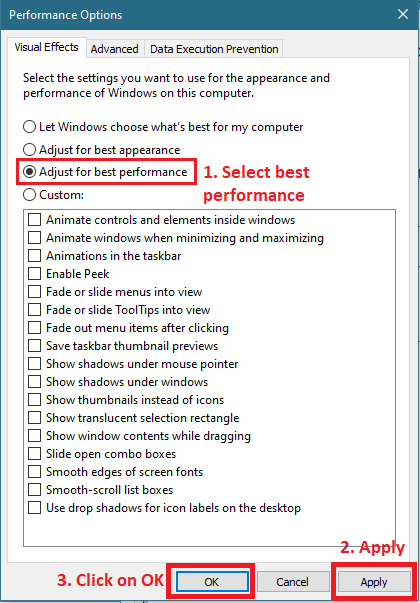
- Click on Settings in the Performance part.
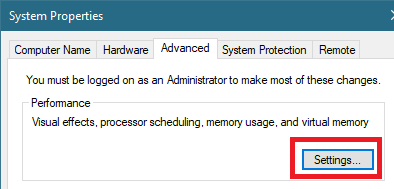
- Enable the Adjust for best performance option, then click Apply and OK.
Follow our ultimate guide if you want to access Temp folder in Windows 10.
6. Create a Shortcut
You can create a shortcut file in Windows 10 that will clear temporary memory files.
Take these steps to create the shortcut file for clearing cache memory:
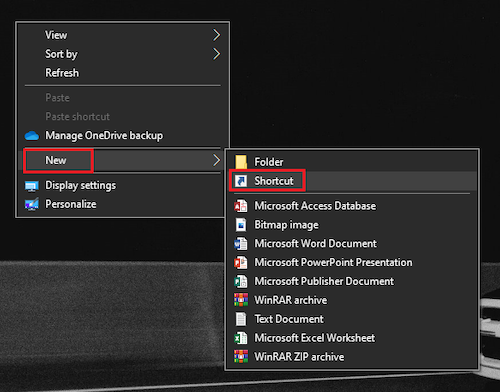
- Right-click anywhere on your desktop and select New, then Shortcut.
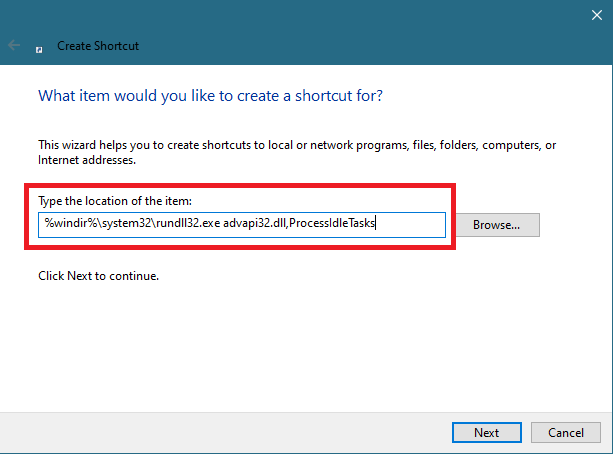
- Type in the following line as the location of the item: %windir%\system32\rundll32.exe advapi32.dll,ProcessIdleTasks.
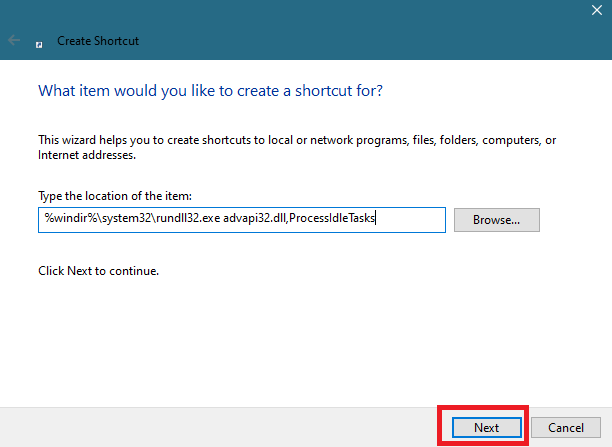
- Click on the Next button.
- Give the shortcut any fitting name and click on Finish.
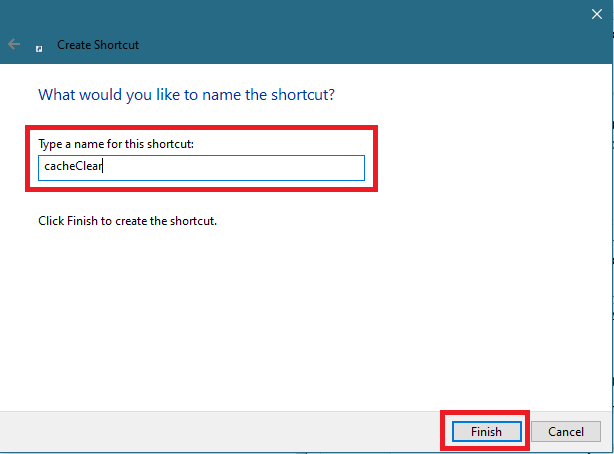
- Double-click on the created shortcut to run it and flush your RAM cache.

7. Clear Page File Before Shutting Down
The Page File is created to use a part of your secondary storage to give your operating system some extra space to store data files.
Since this data is stored on your computer’s HDD, it remains there even when you shut down your computer. So, you can save up space by deleting the Page File before turning off your computer. You will need to use the registry editor to do this.
To clear the Page File automatically at shut down, take these steps:
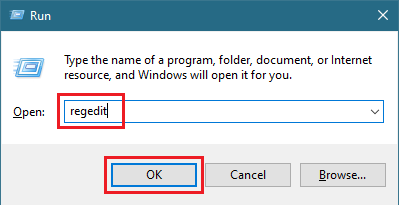
- Press Win + R.
- Type in regedit and click on OK.
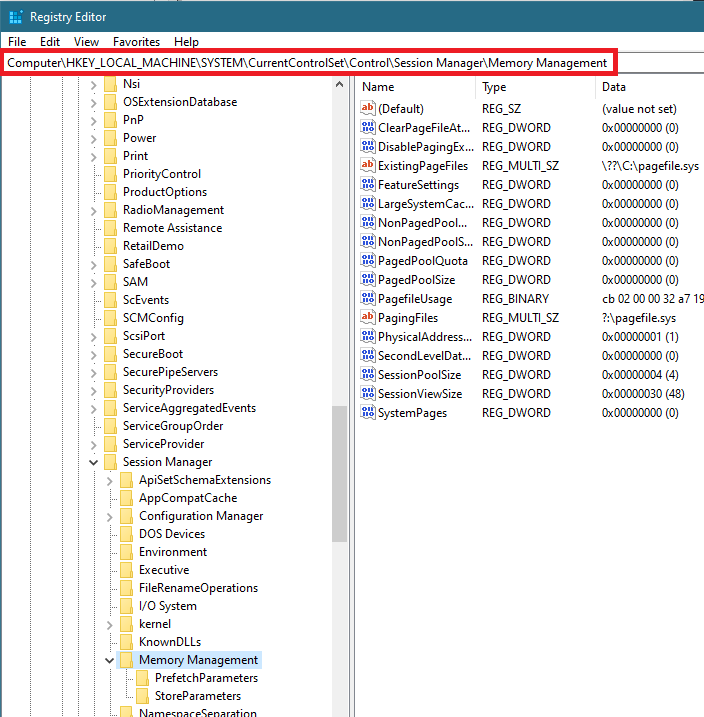
- Go to the following directory: HKEY_LOCAL_MACHINE/SYSTEM/CurrentControlSet/Control/Session Manager/ Memory Management.
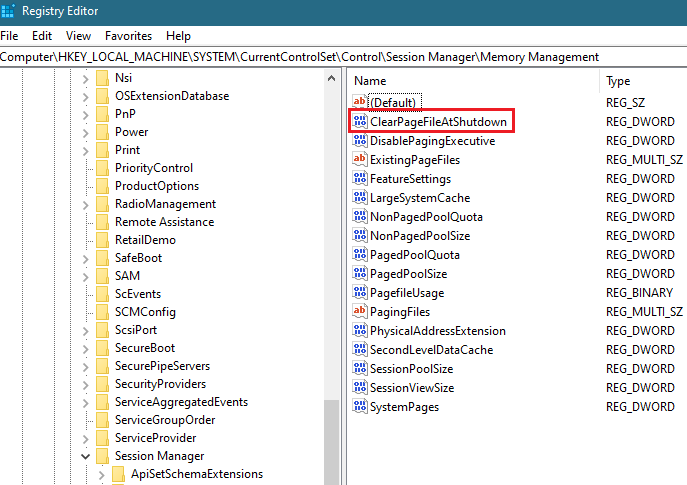
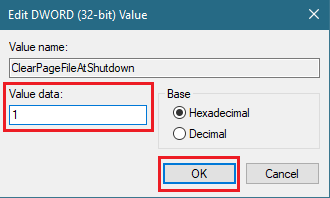
- Double-click on ClearPageFileAtShutdown.
- Set the value to 1 and click on OK.
I also recommend adjusting your page file by reading this incredible guide. By doing this, you can minimize the effect it has on the system to the point where you don’t even need to clear it anymore.
8. Flush DNS Cache
You can delete web pages and online applications-related cache files by clearing the DNS cache. This can be done in Command Prompt.
To flush the DNS cache, follow this process:
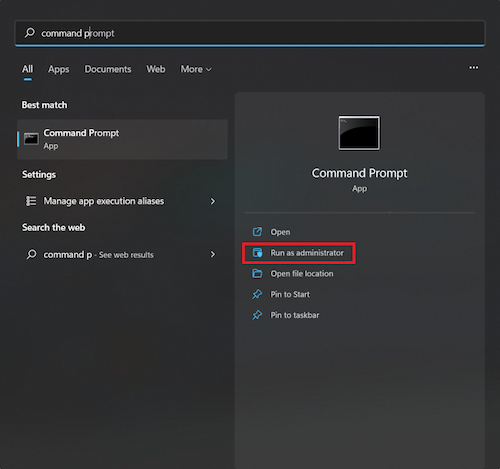
- Search for Command Prompt and click on Run as administrator.
- Type in the following line: ipconfig /flushdns.
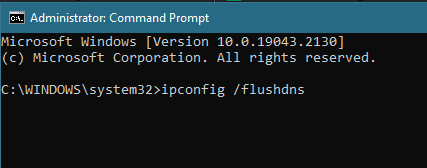
- Press Enter on your keyboard.
While purging cached data, you may delete important files, like browser tabs or browsing history. In this case, you can use data recovery software like RecoverIt to get them back.
Why Do You Need To Clear RAM Cache?
You need to clear different kinds of cache files because it accumulates a lot of space on your hard drive. Moreover, wrong files executed from the cache can also slow down other processes in your computer. This is why you should keep your RAM cache clear.
If your cache gets filled with data that does not come of any use to you, then it is taking up space that could be utilized otherwise.
Here are the reasons for you to clear your RAM cache:
- If you do not have much memory space available, you can clear out old memory files to free up some needlessly occupied memory space.
- Components of your computer use the memory to perform different tasks. They will not work as well if you do not have much space left in the memory.
- The speed of processes running on your computer will be increased by a good amount by removing the cache.
- Unnecessary files that might be executed from the cache memory won’t be a problem if you clear the cache. Otherwise, they will keep continuously running in the background and use up a significant portion of your main memory.
Final Thoughts
A cache memory bloated with unused files can be weighing down your computer and causing it to perform poorly. You should clean out your cache once in a while to make sure that your computer always performs at its peak.
When you go through this guide, you will know all about how to easily clear your RAM cache and speed up your computer’s performance.