Business documents, especially legal documents and paperwork, require different margins. But, many people don’t know how to change the page margin correctly.
In Word, you can select a predefined margin or customize the settings to make the content visually appealing.

This post will explain the ways to change margins on Microsoft Word for different platforms.
Let’s begin.
How to Change the Margins in Word to Predefined Styles
Margins are the blank space between the page edges and the content of your documents. Word offers a decent selection of preset margins.
By selecting one of the predefined styles from the Layout tab, you can use a margin for your Microsoft document. The process is very effortless and quick.
You can set margins to preset styles easily by following the instructions below, whether you’re on the desktop platform (Windows, MacOS, Web) or the mobile platform (Android, iOS, iPadOS).
Here are the procedures to set margins to predefined styles in MS Word:
1. Use Predefined Margin on Windows and macOS
Choosing a predefined margin will adjust the margin size of your document. If the document has multiple sections, the style will apply only to the selected sections.
Here are the steps to change the margins in Microsoft Word on Windows and Mac:
- Open the Microsoft Word application.
- Create or open a new document.
- Go to the Layout tab from the ribbon.
- Click on the Margins option from the top.
- Select a predefined margin to use it.
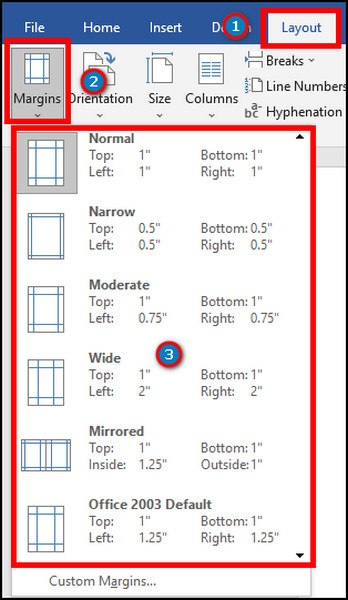
You can select between Normal, Narrow, Moderate, Wide, Mirrored, and Office 2003 Default. If you are a Mac user, Word on Mac doesn’t have Office 2003 style.
Find out how to fix Microsoft Word Ctrl+Z not working.
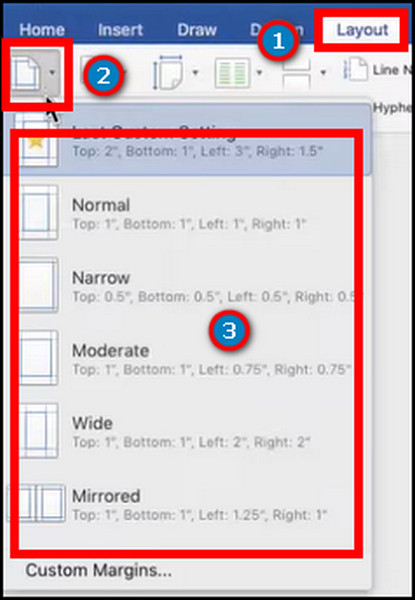
2. Use Predefined Margin on the Web
Here is the process of using a predefined margin on the Web:
- Visit Microsoft Word on the Web.
- Open a saved or create a new document.
- Go to the Layout tab from the ribbon.
- Go to Margins.
- Click on a predefined margin to apply it.
However, the Mirrored style isn’t present on the Web like on Windows and Mac.
Read more on Microsoft Word: How to Unlock Selection.
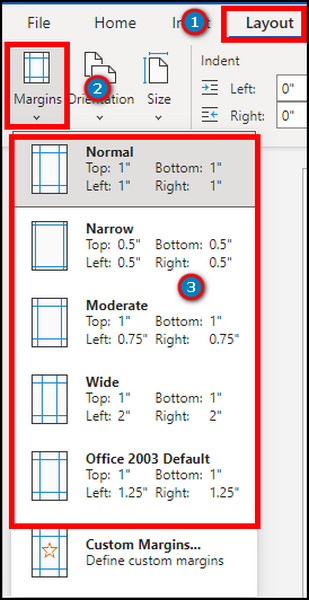
3. Apply Predefined Margin on Mobile
Microsoft Office on Mobile also provides the facility to adjust the margins by navigating to the Layout tab from the App Bar.
Here is the process to apply a predefined margin on Mobile:
- Launch the Word application from your mobile.
- Open a file.
- Tap on the Edit button from the bottom bar.
- Press on Expand more options.
- Select Layout from the App Bar.
- Tap on Margins.
- Choose your preferred margin style to apply it.
. 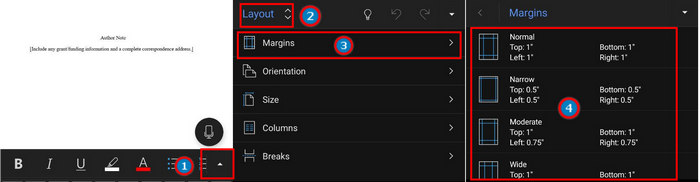
You’ll find the Normal, Narrow, Moderate, Wide, and Mirrored margin styles in the list.
How to Set Custom Margin in Microsoft Word
By changing the values in margin settings, you can use custom styles on pages. You can also see the preview before using the edits. They help to make text documents more personalized for individual needs.
Here are the methods to customize the margins in MS Word:
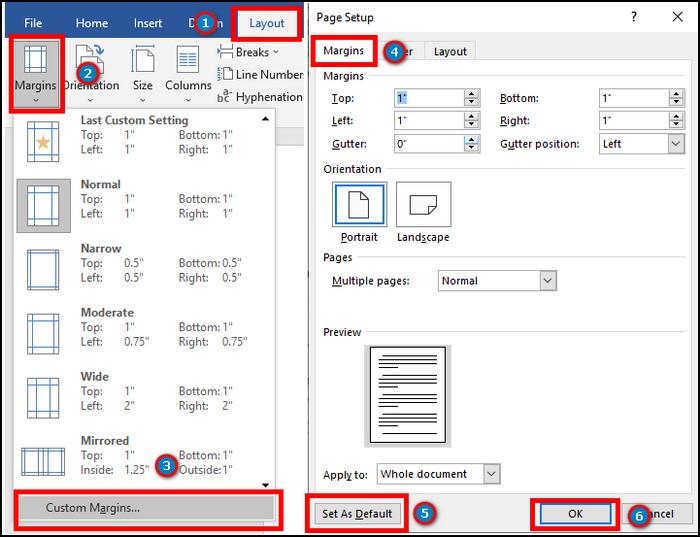
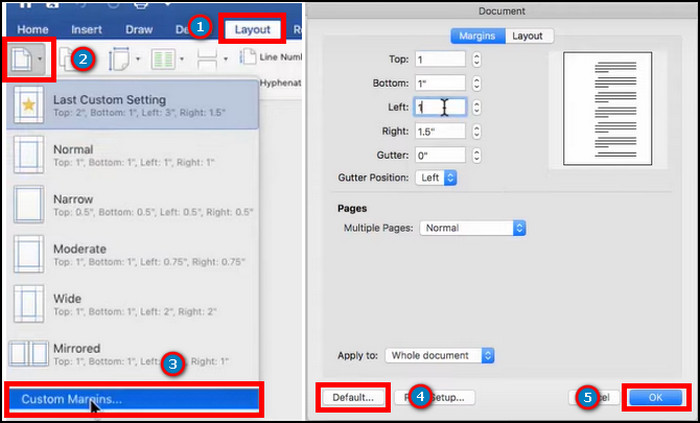
1. Set Custom Margin on Windows and macOS
Adjust margin styles to implement them in your Word file for more personalized styling.
Here are the steps to customize the margins in MS Word on Windows and Mac:
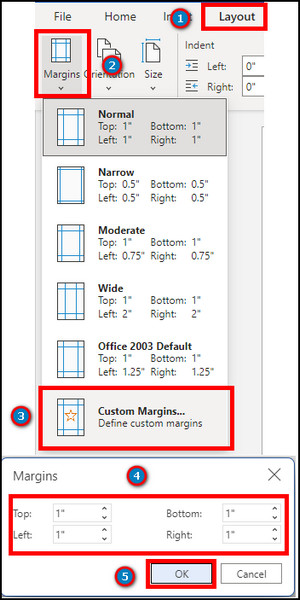
- Open an existing or new document in Microsoft Word.
- Navigate to Layout from the top.
- Press on Margins to open the drop-down.
- Click on the Custom Margins from the bottom of the drop-down. You will enter the page setup dialogue box.
- Go to Margins.
- Modify the values of your margin using the arrows or by typing.
- Click on OK to confirm the changes.
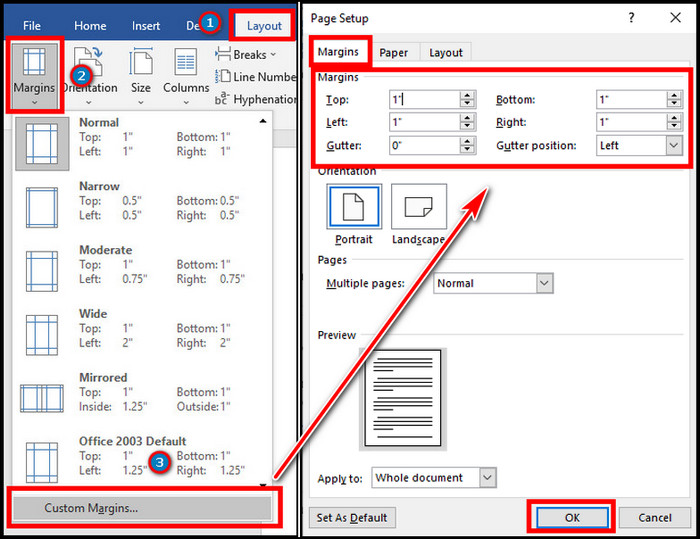
You can change the values from the Top, Bottom, Left, Right, Gutter, and Gutter position. The values are measured in inches.
The margin will apply immediately to the entire Word document or the current point forward. You can also see the preview from the Margins menu. The same goes for MS Word on Mac.

2. Set Custom Margin on Web
You can tweak the values to customize the margin on the Web version. The process is slightly different but more simplified than Windows and Mac software.
Follow the steps to customize the margin on the Web:
- Go to Microsoft Word on the Web using a browser.
- Open a Word document.
- Navigate to Layout.
- Click on Margins.
- Press Custom Margins.
- Modify the numbers.
- Click on the OK button to save the edits.
MS Office 365 on the Web only gives the option to change the Top, Bottom, Left, and Right values. There is no Gutter settings adjustment (which is a problem if you want to bind it like a book). Also, there is no preview here.
Also read how to Microsoft Word unlock selection.
3. Set Custom Margin on Mobile
You can customize the margins from the App Bar of Android, iOS and iPadOS applications.
Here are the ways to customize the margin on Mobile:
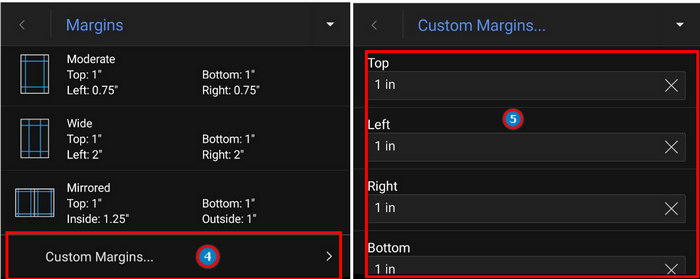
- Open the Word application on your mobile.
- Open or create a new file.
- Press on the Edit button from the bar.
- Tap on the Expand more options button.
- Choose Layout from the App Bar.
- Press on Margins.
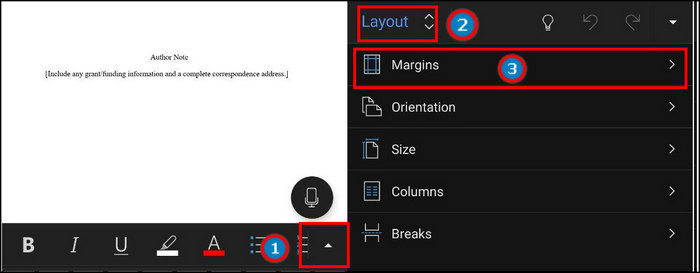
- Scroll down and choose Custom Margins.
- Edit the values to save the edits automatically.
There is no way to see the preview. Also, changing the value automatically adjusts the margin size.
Here’s a complete guide on how to Microsoft Word Find and Replace is not working.
How to Change Default Margin on Word
The default margin is changeable by going to the Margins menu. It doesn’t require extra effort if you need to customize the margin repeatedly.
The option to edit the stock margin is available on the Windows and macOS version. There is no way to change it on the Web or mobile applications.
Here are the steps to change the default margin in MS Word on Windows and Mac:
- Open the Microsoft Word application.
- Create or open an existing document.
- Go to Layout from the top ribbon.
- Select Margins.
- Press on the Custom Margins.
- Go to the Margins tab.
- Go for different settings if you intend to.
- Press the Set As Default button.
- Click on OK.
It will replace the previous default settings. The new margin value will apply to every new file.
If you are a Mac user, you can adjust the stock settings by clicking on the Default button.
Read more on how to Set Different Footer on Each Page in Microsoft Word.
Frequently Asked Questions
How do I change the margins on one page only in Word?
To change the margins on one page only in Word, make the target page a separate section using a section break. Then set the margin on the target page and it will only apply to the current section (i.e. the target page).
What is the default margin in Word?
The default margin in Word is 1 inch.
How many types of margins are there in Word?
Depending on the platform, there are up to 6 types of predefined margins in Word: Normal, Narrow, Moderate, Wide, Mirrored, and Office 2003.
How do you set margins in Word?
To set a margin in Word, go to Layout > Margins.
Conclusions
Using the perfect margins on MS Word files makes them attractive and more engaging.
In this guide, I’ve provided all the procedures to change margins in Word for every platform (Windows, Mac, Web, Android, iPhone, etc.), and I hope it’ll help you a lot to make the docs more elegant.
Don’t forget to share your thoughts after using the margin style in your docs in the comment box below.