I don’t think there’s any good alternative to Grammarly if you want an error-free document, especially if you want real-time feedback on typos, spelling, and grammatical mistakes. It will even clarify or adjust the tone of your sentence to make it less confusing.
And the best part is, it supports integration with pretty much all renowned document-writing apps/services, including Microsoft Word.
So let’s see how you can easily add Grammarly to your Microsoft Word on Windows or Mac.
How to Add Grammarly to MS Word
Simply downloading and installing the Grammarly app on your Windows device will automatically integrate it with your Microsoft Office programs. And for Mac users, it’s even easier, like adding an extension to a browser.
And since Grammarly isn’t a hardware-demanding service, you can easily run it on weaker desktops or older laptops. Just make sure you have Office 2010 or a newer version installed on your computer, as Grammarly might have compatibility issues with older iterations.
Related article: how to add Grammarly to PowerPoint.
Add Grammarly for MS Word on Windows
Here’s how to add Grammarly to Microsoft Word on Windows:
- Visit Grammarly’s download page & click on Download Grammarly.
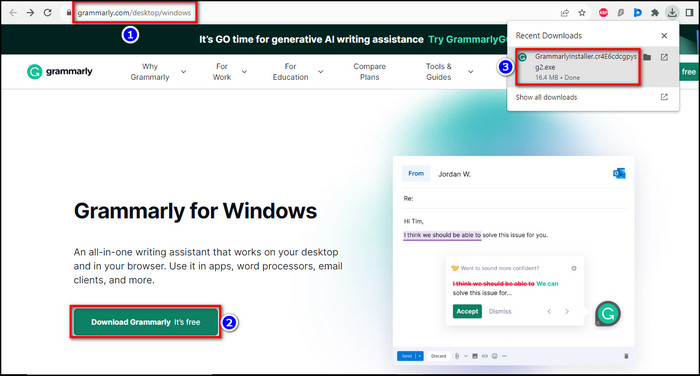
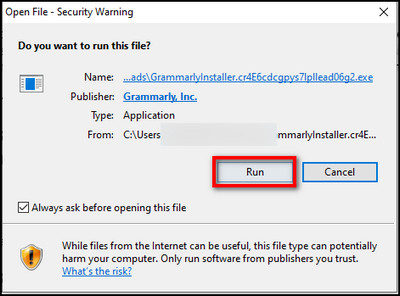
- Run the setup file. After the setup completes, a sign-in page will appear on your browser.
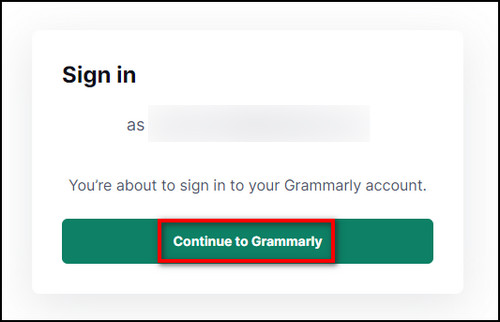
- Create a free account or sign in if you’ve already got one.
- Click on Continue to Grammarly. Select Open Grammarly if you get a prompt from the browser.
- Select Activate Grammarly to activate the browser extension. This step is not mandatory, you can close the app after you’ve signed in.

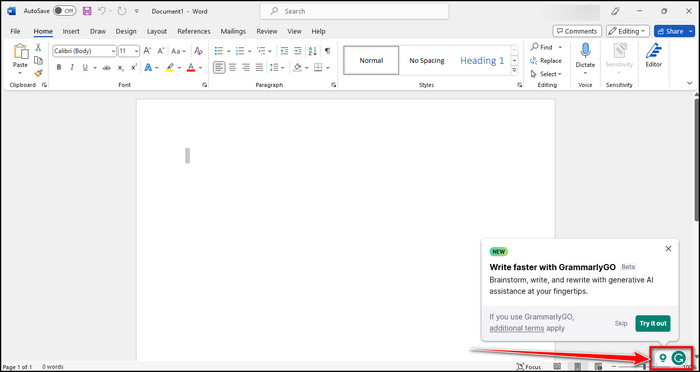
- Launch Microsoft Word on your device and open a document to check if the plug-in has been added successfully. You’ll see a floating icon for Grammarly at the bottom right corner of the screen.
Add Grammarly for MS Word on Mac
Follow these steps to add Grammarly to Microsoft Word on macOS:
- Launch Microsoft Word & open a blank document.
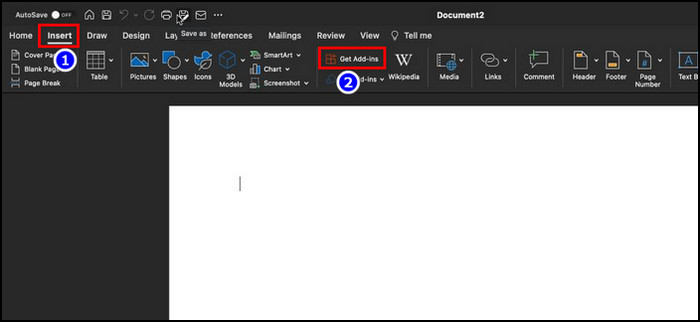
- Click on the Insert tab & select Get Add-ins. You’ll be redirected to the Microsoft Store page.
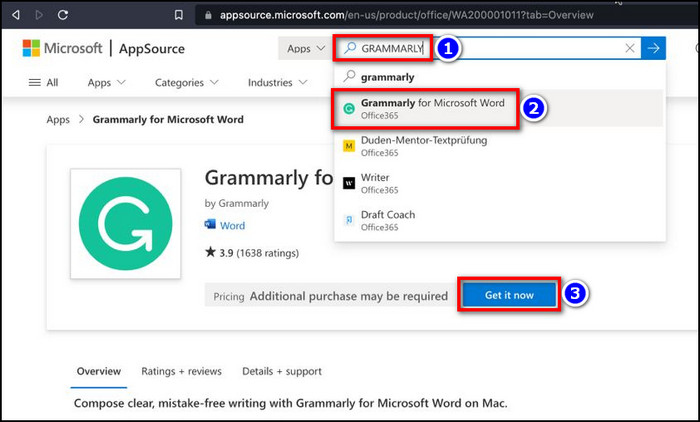
- Type grammarly in the search bar & select Grammarly for Microsoft Word from the search results.
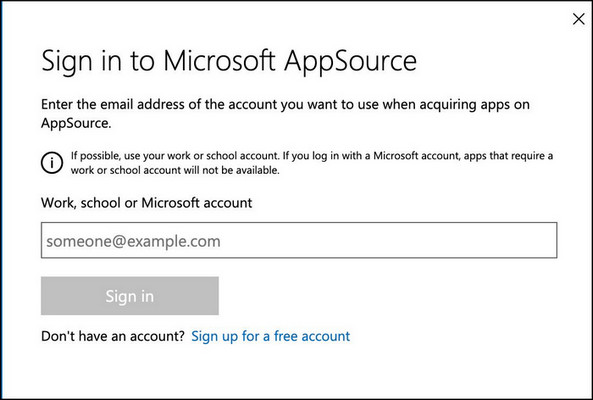
- Click on Get it now. Sign in to your Microsoft account if you haven’t already.
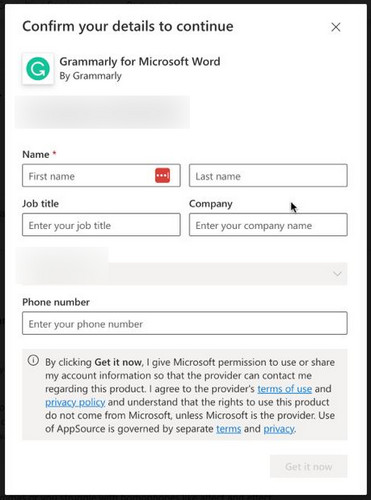
- Fill in the boxes and hit Get it now.
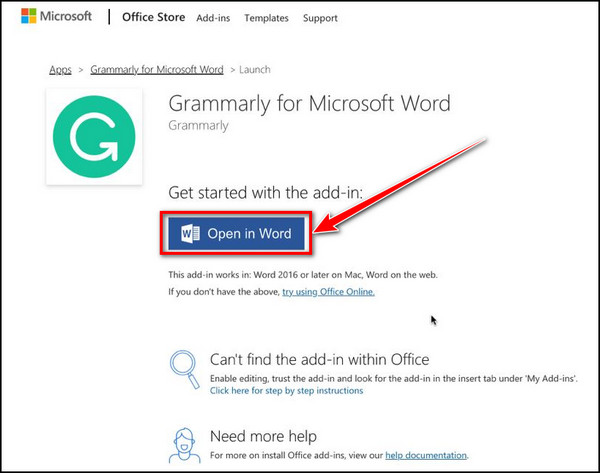
- Click on Open in Word.
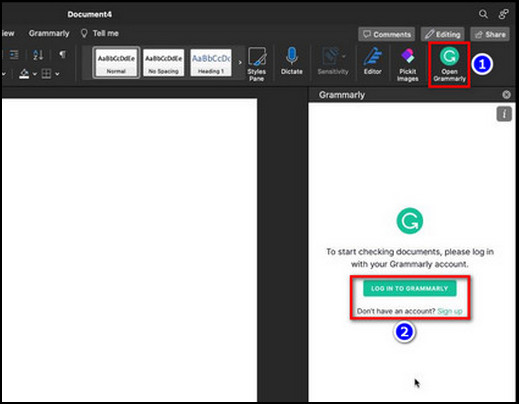
- Close the Word app and launch it again with a document to make sure that the integration was a success. You should see the Grammarly option being added to the top navigation bar and Open Grammarly option on the ribbon.
Done! This is how you install Grammarly for free on Windows/Mac.
On a side note, you can also enable/disable the built-in spell checker of MS Word if you don’t want a third-party grammar checker.
How to Use Grammarly on Microsoft Word
After you’ve successfully integrated Grammarly with your MS Word program, you can start using it for any documents. Simply open a blank page or create a Word document, and Grammarly will automatically do its work in real-time.
This works the same for both Windows and Mac users. While writing a document, Grammarly will highlight the error/suggested area with different color codes, such as red means error, purple means suggestion, etc.
To get a grammatical summary of the entire document, click on the Grammarly icon from the bottom right corner (for Windows) or select Open Grammarly from the ribbon (for Mac). You can review and Accept/Dismiss the grammatical feedback from each of the cards.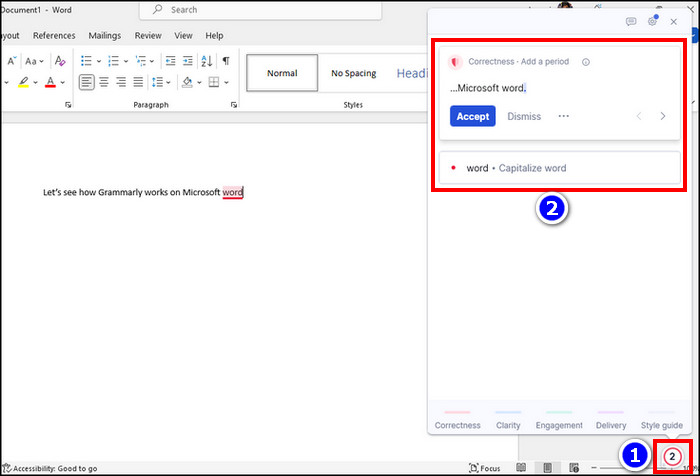
You can also accept or dismiss these suggestions directly from the document while typing.
Furthermore, if you have a premium or business account, you can use Grammarly Go for AI assistance. Click on the Grammarly Go icon and insert a prompt like write an intro for how to use Grammarly on Mac. It will give you AI-written content based on your prompt.
You can even further customize the content as you see fit, like making it more assertive or shortening it.
However, check out the embedded article if MS Word isn’t opening anymore after adding Grammarly to it.
Frequently Asked Questions
Is there a built-in grammar checker for Microsoft Word?
Yes, MS Word has built-in functionality to check the spelling and grammar of a document. Pretty much all the MS Office programs can check the spelling, but only a few(one of them is MS Word) can check the grammar of a document as you type.
How do I turn on the grammar checker in Word?
To start checking the grammar and spelling errors in your Word document, select File > Options and click on the Proofing tab. Then tick the boxes for Check spelling as you type and Check grammar with spelling options.
Is Grammarly better than the native spell checker on Microsoft Word?
Yes. Grammarly is much more advanced than the built-in grammar checker that comes with the MS Word app. Grammarly is a lot more sophisticated and offers in-depth analysis throughout your entire document, something that native spell checkers lack.
Wrapping It Up
If you’re someone who spends a lot of time writing, you know how important it is to have a tool that can help you catch errors and improve your writing. With the help of Grammarly, you can focus on your creativity instead of worrying about grammatical issues.
Hopefully, this guide has helped you integrate Grammarly into your MS Word app without any hassle. If you face any issues while following this write-up, feel free to let us know in the comments below.
Have a nice day!