MS Excel allows you to make your data sheet in such a manner that it will definitely stand out. That’s why Excel is the number 1 spreadsheet program around the globe.
You can add borders to your Excel sheet to make it eye-cache and readable. When you insert borders into your workbook, it looks more organized. Plus, adding borders to an MS Excel sheet is super easy.

Therefore in this article, I will show you how you can quickly add borders to your sheet. Also, you will learn how to create custom borders, add borders with a single click, and the process of removing borders from this content.
So without skipping, read the entire article to find the easiest methods to complete those actions.
Let’s start!
What is the Use of Border and Shading in MS Excel?
Borders and shading in Microsoft Excel mainly focus on the primary texts when a reader goes through them. When you want your data to stand out from the document, you can use the borders or shading options from MS Excel. They are an excellent choice when you want to emphasize some point.
Here are the advantages of borders & shadings in MS Excel:
- Make a document more eye-cache to viewers.
- Help you to compose a data sheet that will stand out.
- Emphasize the main point.
- Help you make a reader-friendly document.
- Increase the readability.
So it’s essential to use the borders or shading where necessary. Now, let’s head toward the next segment and find out how you can easily add borders to your Excel sheet.
Related contents you should read how to add a total row in Excel.
How to Add Borders in Excel
You can apply the Home Border Ribbon or Draw Border options to add borders to your desired cell. Also, there are some Shortcuts available to complete this task.
Let’s sort out how you can quickly add borders to your Excel sheet.
Here are the steps to add borders to your Excel file:
1. Use the Home Border Ribbon Option 
The most straightforward way to add borders in an Excel file is the Home Border Ribbon option. Let’s see how you can execute that operation.
Here are the steps to use the home border ribbon option:
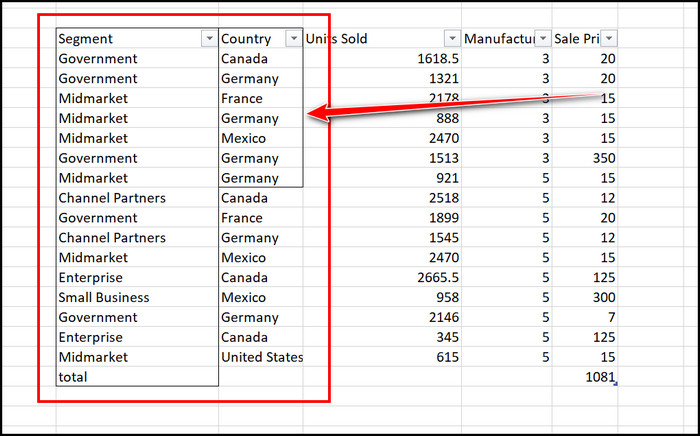
- Select the desired cells from MS Excel.
- Move to the Home menu.
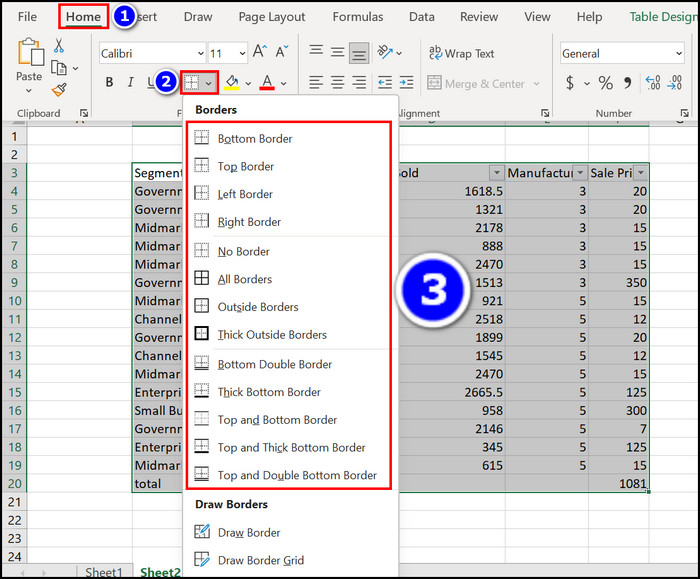
- Expand the Borders option.
- Click on your specific Border.
Immediately you will see that a borderline is added to your selected cells.
2. Draw the Borders in MS Excel 
You can Draw your required borders with Excel’s Draw Border feature. Follow the stated instructions to complete this operation.
Here are the steps to use the draw border feature to add borders in MS Excel:
- Launch the Excel application.
- Select the Home tab.
- Click and expand the Borders tab.
- Choose the Draw Border or Draw Border Grid option.
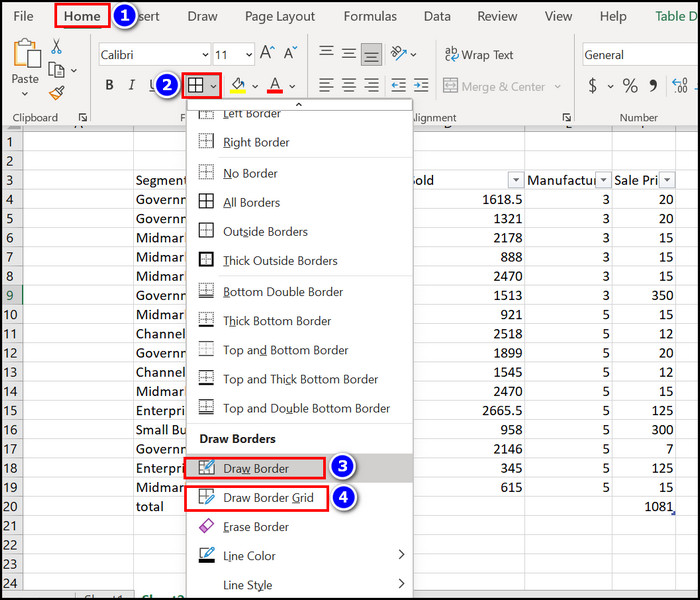
- Draw your specific Borders with those options.
See how easy it is to add borders in Microsoft Excel? You must try it yourself.
3. Apply Shortcuts to Add Borders in MS Excel 
There are several shortcut keys to add borders to your Excel sheet. Let’s find out what those shortcuts are and how you can use them.
Here are the steps to apply shortcuts to add borders in Microsoft Excel:
- Highlight the specific cells from the Microsoft Excel program.
- Press the ALT+H+B buttons one by one and choose your particular border option.
- Click on the button indicated on that specific border option, and you are all set.
- Follow the stated shortcuts and press the keys one by one to operate them.
All Borders: ALT+H+B+A
Outside Border: Ctrl + Shift + & (Windows) and Command + Option + 0 (Mac)
Left Border: ALT+H+B+L
Bottom border: ALT+H+B+O
Right border: ALT+H+B+R
Top border: ALT+H+B+P
Thick Outside Border: ALT+H+B+T
Now you know how you can easily add borders to your Excel with shortcuts.
You may also like to read add leading zeros in Excel
How to Create or Change Border Format in MS Excel
If you want to create or change a border format in Excel, you can do it easily with the More Borders option.
Let’s sort out how to create a new border format in Excel.
Here are the steps to create or change border format in Excel:
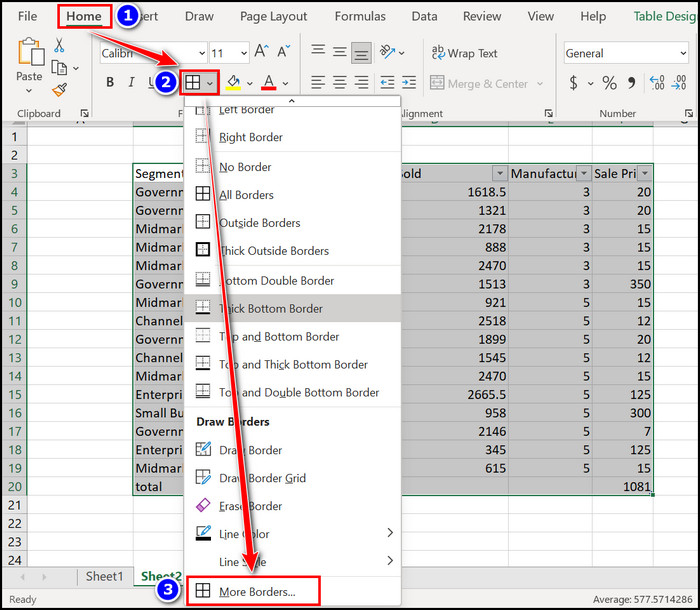
- Select the particular cells in which you want to add borders.
- Navigate to the Home section.
- Expand the Borders menu.
- Scroll down and select the More Borders option.
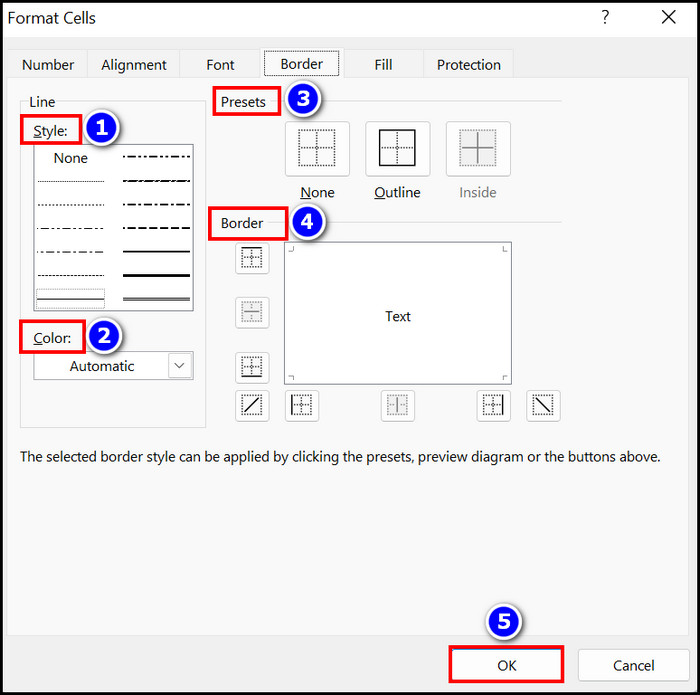
- Choose Border style.
- Select a Border Color.
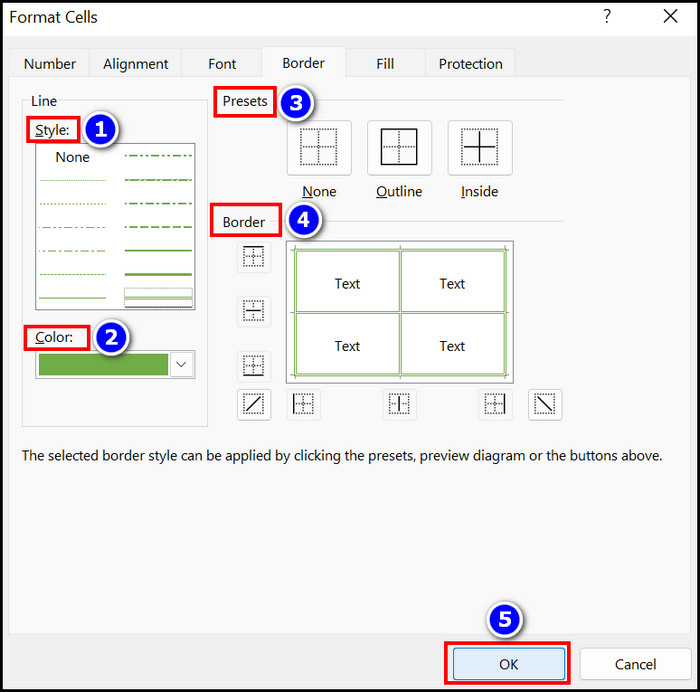
- Select your desired format from the Presets and Border option.
- Hit the OK button when all modifications are complete.
Instantly a new border format will appear on your selected Excel cells.
Read on to learn about the process of creating a Custom Border Style in Microsoft Excel.
Also, check out our separate post on how to make a histogram in Excel?
How to Create a Custom Border Style with Cell Style in Excel
Your unique custom borders can make your Excel document more special and readable. But to make a custom border, you first need to head over to the Cell Style option.
Let’s see how you can create a custom border style with the cell style option.
Here are the steps to create a custom border style in Excel:
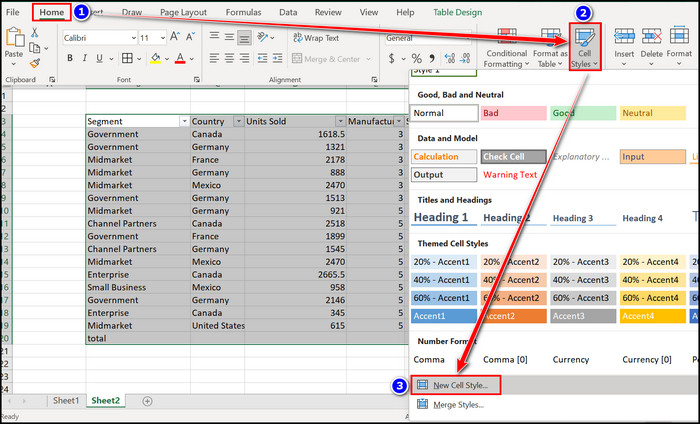
- Navigate to the Home tab from an Excel workbook.
- Click on the Cell Styles option.
- Select the New Cell Style option from the bottom.
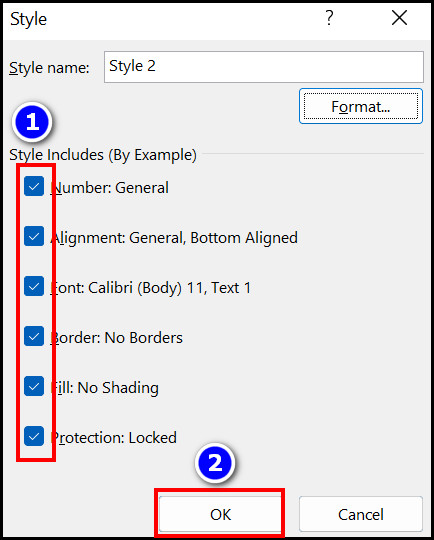
- Give your Style format a name from the Style name box.
- Click on the Format option.

- Choose Style, Color, Presets, and Border from that Format Cells window.
- Press the OK key.
- Check or uncheck your desired Style checkbox.
- Hit the OK button when you are all done.
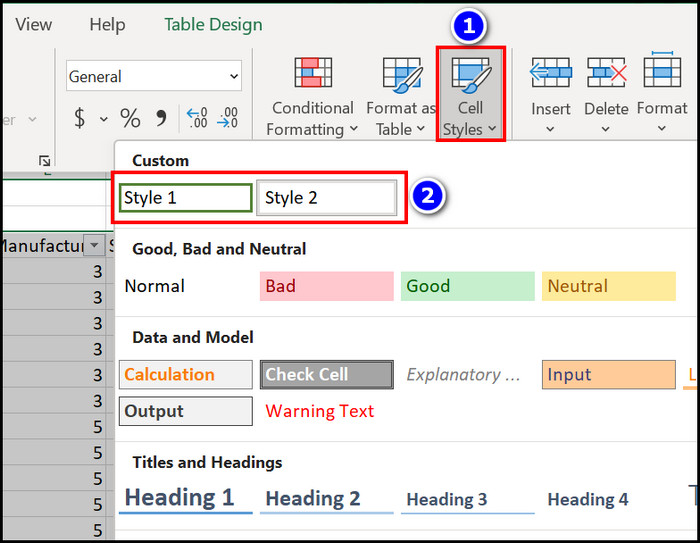
- Head to the Home > Cell Styles options to use your newly built custom border format.
These simple steps allow you to build your custom border in MS Excel quickly.
How to Add Borders in MS Excel with a Single Click
With the help of the Quick Access Toolbar, you can add borders to an MS Excel sheet with a single click. But you must add the Borders option in the Quick Access Toolbar to complete that action.
Here are the steps to add borders in a single click with Quick Access Toolbar:
- Open the MS Excel program.
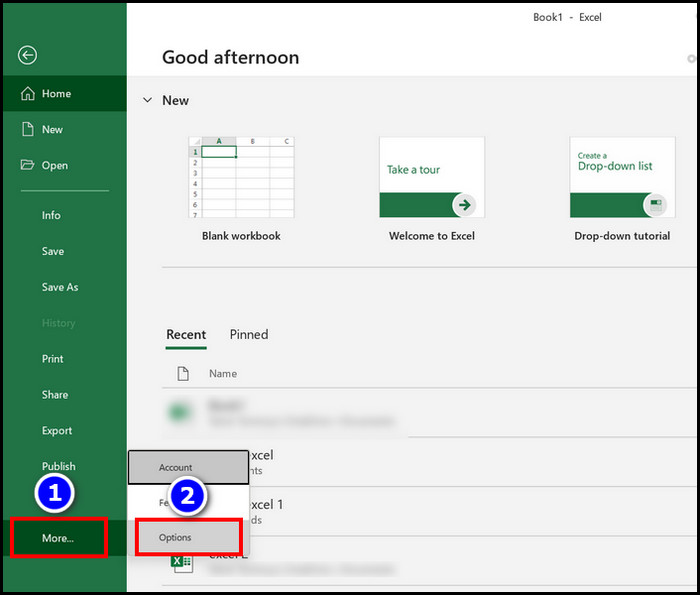
- Move to the File section.

- Select the More > Options menu.
- Navigate to the Quick Access Toolbar section.
- Find and click on the Borders option.
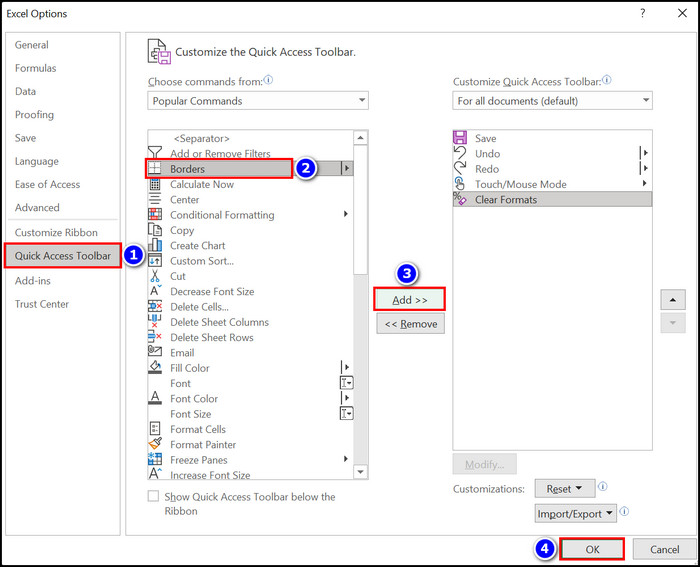
- Click on the Add > > button.
- Press the OK button.
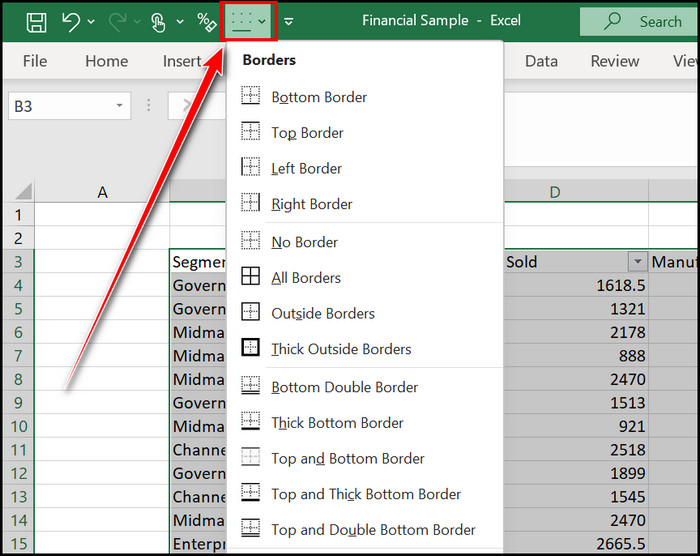
You can select the Borders option from the top left corner of the Excel window, which is just a click away.
Follow the next heading to learn how to remove borders from an Excel sheet.
Follow our guide on how to autofill dates in MS Excel.
How to Remove Borders in MS Excel
Removing the borders from the Excel sheet is super easy. You just head to the Home Border section and select the No Border option. Also, you can choose the Erase Border option to delete an individual Border. The whole process is stated below for your understanding.
Here are the steps to remove the Borders in MS Excel:
- Highlight the bordered cells.
- Navigate to the Home tab.
- Click on the Borders section and Expand it.
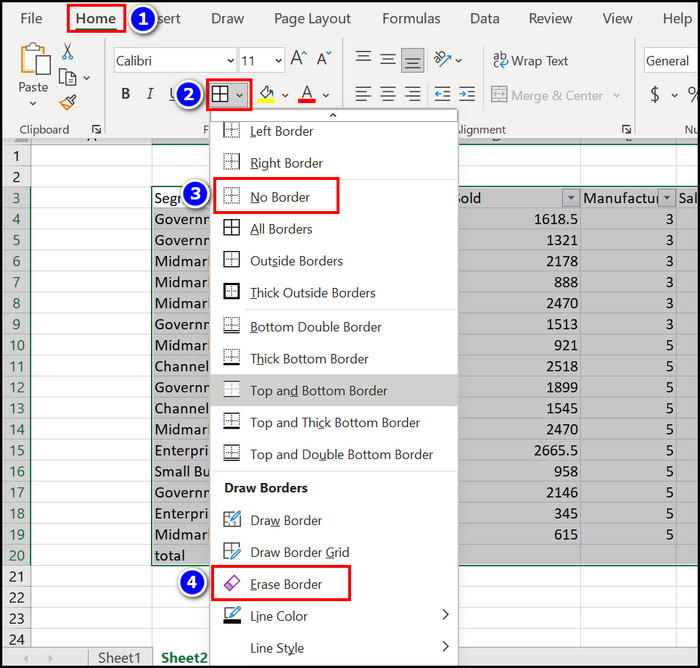
- Select the No Border option to remove the entire Border from the selected cells.
- Choose the Erase Border option to delete individual borders from cells.
You will see that your borders have vanished from the Excel sheet. Also, you can use the Clear Format option to delete the borders. There is a shortcut for removing borders from an Excel sheet, which is ALT+H+B+N.
FAQs
How do I add outside borders in Excel Mac?
You can add Outside Borders in Excel Mac by following the Home > Borders > Outside Borders option. Also, you use the shortcut keys (Command + Option + 0).
What is the shortcut for all borders in MS Excel?
The shortcut for All Borders in Microsoft Excel is ALT+H+B+A; you must Press those buttons one by one.
How do I draw individual borders on MS Excel?
You can follow the Home > Borders > Draw Border options to draw individual borders from your MS Excel Workbook.
Wrapping Up
Adding borders in Microsoft Excel comes in handy when viewers are navigating through your document.
You can use several methods to add borders in MS Excel, such as Home Border Ribbon and the Draw Border option. Additionally, I displayed some shortcuts in this article that will help you add borders.
I also demonstrate how to add borders in MS Excel with a Single Click. So read this content and follow it accordingly to achieve your goal.
If you need further assistance on this topic, let me know in the comment below.