As Origin progresses, its Windows client is also being installed on a huge number of Windows computers as Windows supports most Origin games. So it’
s obvious that many users face several problems, including various installation errors on Windows.
If you have faced installation errors such as error code 20:2, you are not alone. There are quite some error codes that many of the users are still facing while installing Origin on their computers. I used to stream Titanfall on stream and now have shifted to Apex Legends. Also, check out the easiest ways to link ea prime gaming with twitch.
Why Do I Get Errors While Installing Origin?
There are quite some installation errors that can happen while installing Origin on your Windows computer. Different error codes appear for different reasons. So I will try to explain the reasons here.
Here are the reasons behind the Origin installation error on Windows:
- Unable to access administration rights for creating or making certain changes,
- Having insufficient disk space may result in facing installation errors.
- Windows Defender or third-party antivirus restricting Origin from installing properly.
- Damaged or old cache files can also interfere in the case of reinstalling new versions.
- VPN softwares may also interfere with the installation process.
No matter the reason, I will guide you through all the errors codes and give you the appropriate solutions to the problem. So read the methods mentioned here and try to implement them to rule out the error possibilities. Tired of origin not loading on Windows 11? Follow our 2-minutes epic guide to fix this issue.
How to Fix Origin Error Codes
I will try to cover most of the Origin error codes to help you fix the problem and explain all the possible fixes for those codes.
Here are the Origin error code and their fixes:
1. Fix Origin Error Code 6:0 (Old Client Files)
According to Electronic Arts’ official website, the error code 6:0 shows when you try to reinstall the Origin client, and the cache files from the previous version of Origin interrupt the new installation process showing Error code 6:0.
Though the installation stops, you can fix this problem relatively easily. Here are the steps to fix Error Code 6:0: Enable or disable CD burning capability in Windows 11 with this registry hack our experts provided.
1. Clear the Cache And Temporary Files
In most cases, the old cache files are found to be interfering with the installation process. Here are the steps to clear the cache and temporary files:
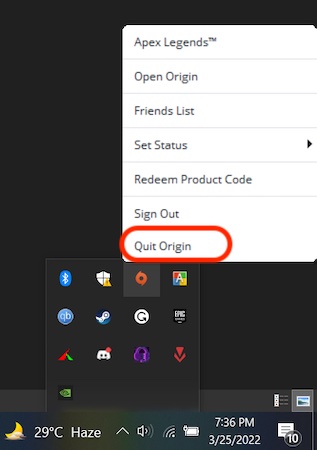
- Take your mouse to the right side of the taskbar and right-click on the Origin client icon.
- Turn off Origin by clicking on the Quit Origin
- Search for Run from the Start menu.
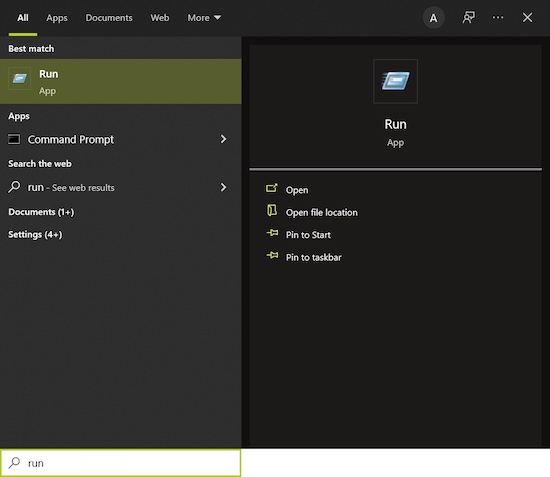
- Launch Run
- Write %ProgramData%/Origin in the run box and press Enter.
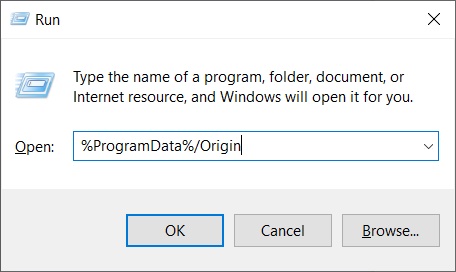
- Delete everything in the Origin folder except for the folder named

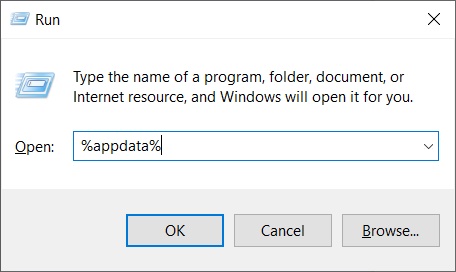
- Close the Window and relaunch Run from the Start menu or press the Windows key and the R key simultaneously.
- Type %appdata% in the box and hit enter to go to the path Appdata>Roaming.
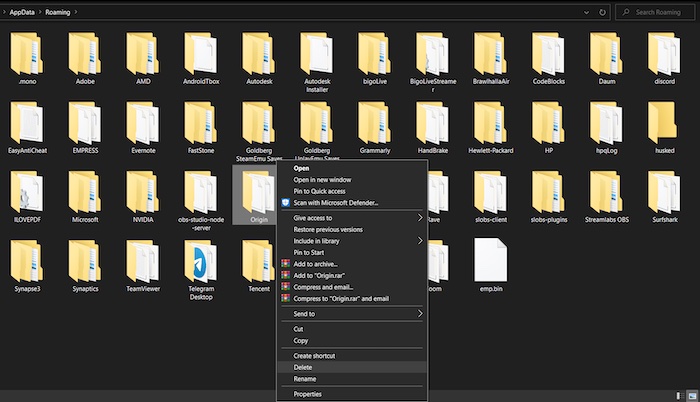
- Delete the Origin folder from the Roaming
- Press the Backspace key once to go back to the AppData folder and double-click on the Local
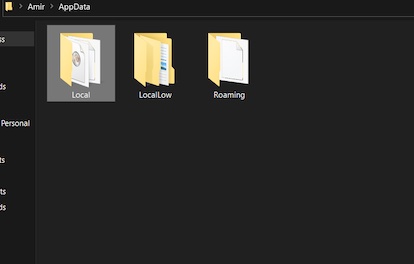
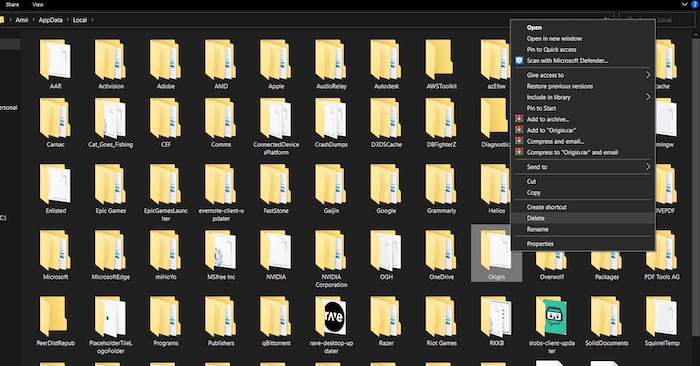
- Delete the Origin folder from there as well.
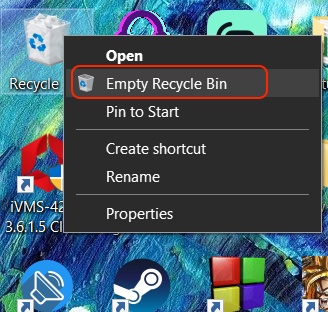
- Empty the Recycle Bin from the desktop to completely erase those files.
Also check our exclusive tutorial on can’t add friend on Origin.
2. Uninstall The Older Version of Origin
After clearing the cache files, uninstall the older Origin client. Here are the steps to uninstall Origin:
- Open Control Panel by searching it in the Start menu.
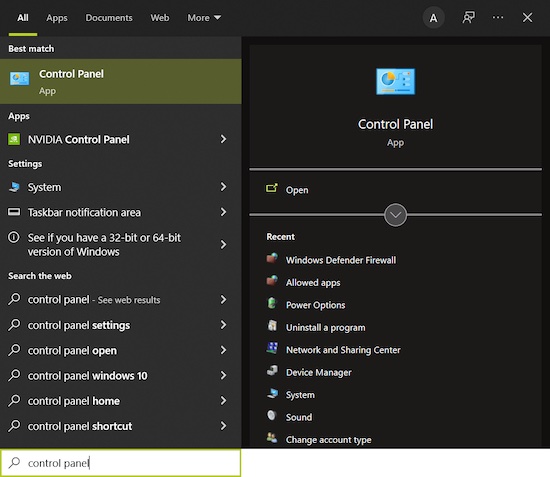
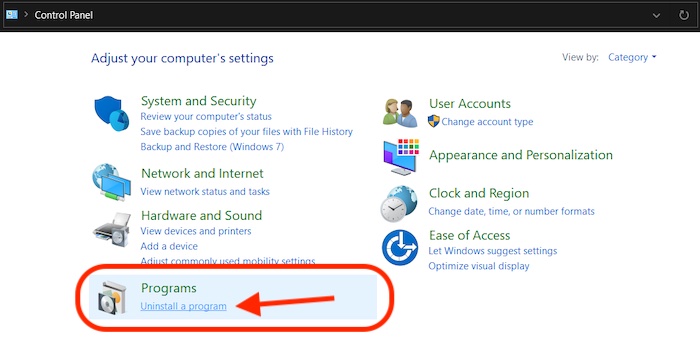
- Look for Programs and click on Uninstall a program under it.
- Find the Origin client from the list.
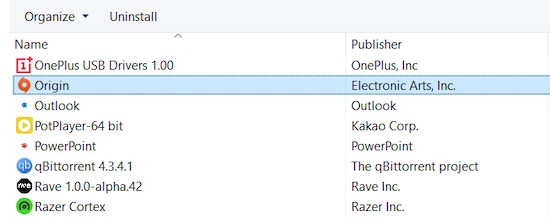
- Double-click on Origin to uninstall the Origin
- Give permission to uninstall Origin.
- Follow the instructions on the screen to uninstall Origin successfully.
- Restart your computer, and you will be ready to proceed.
Follow our guide step-by-step to fix Origin cloud storage data sync error.
3. Install The Newest Version of Origin
Now you need to download the latest version of Origin and download it from their official website and install it.
Here are the steps to install the updated Origin client:
- Search for Origin in Google and go to their official website.
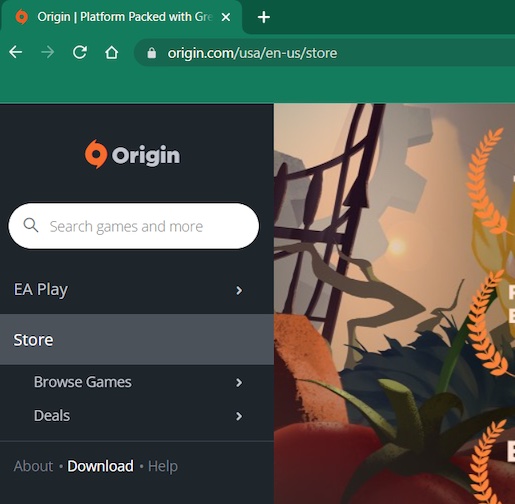
- Download the client installer by clicking on the Download button on the left side of the webpage.
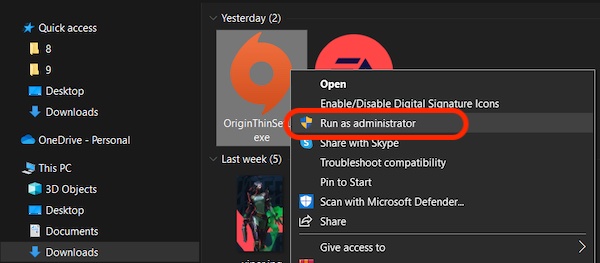
- Right-click on the installer and select Run as administrator to give the installer administrator rights.
- Allow the installer to run as administrator and install origin as instructed in the installation wizard.
If you have followed all the steps correctly, you will not get the Error code 6:0 again, and you will be able to install the Origin client successfully.
2. Fix Origin Error Code 10:0 (Corrupted Cache Files)
Error Code 10:0 shows when there are defective cache files that may prevent the user from accessing their game. We can delete the cache files through the previous method, but sometimes the method does not work if you already have the latest Origin installed.
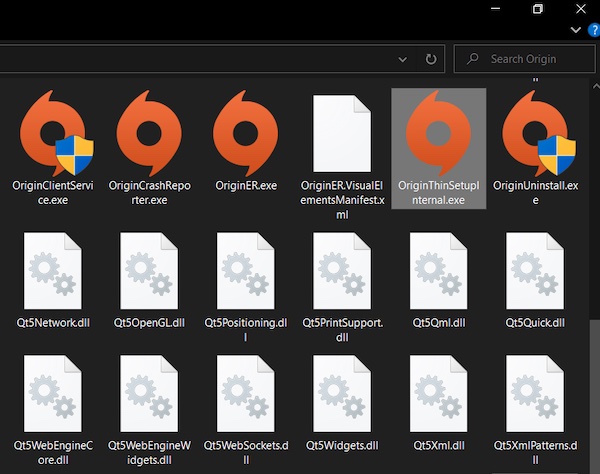
So deleting the OriginThinSetupInternal.exe file works in this regard. This problem is not distinctive, and the solution may be hit or miss. On top of that, you may need to reinstall the Origin client to fix the problem by which you will lose the saved game files. This is quite disturbing, but fortunately, it is unlikely that you will ever encounter it. So, you can’t change the display name on Twitch?
Here are the steps to fix Origin error code 10:0 :
- Launch Origin on your computer.
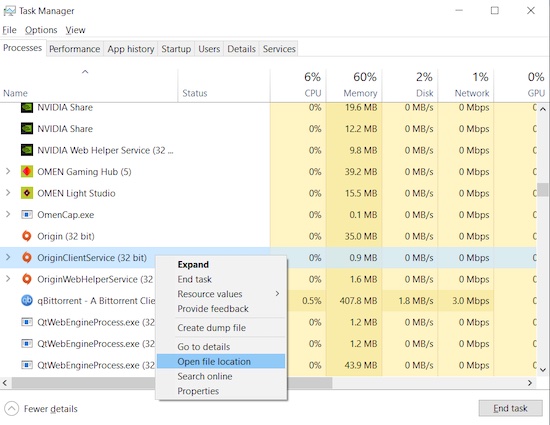
- Right-click on the taskbar and open Task Manager.

- Find OriginClientService from the list and right-click on it.
- Click on Open file location.
- Delete OriginThinSetupInternal.exe file.
- Quit Origin and close both the Task Manager and the Window.
- Relaunch Origin client, and now everything will work as usual without error.
3. Fix Origin Error Code 20:2 (Insufficient Disk Space)
Maybe you are installing Origin after a long time, and suddenly you may encounter Error code 20:2. After looking at EA’s official question and answer website, I found out that this error code shows up when you do not have sufficient installing space on the drive you are installing the client in.
So to fix the problem, you need to free up the drive in which you are trying to install the client. If you install the client on your (C) drive, you may consider checking the Download folder and deleting or transferring the downloaded files to some other drive to free up some drive space.
While installing Origin, you can also change the installation location so that the client installs in a different drive on which you got free space.
EA did not mention clearly how much free space is required to install Origin. But after scouring the internet, I found out that you need at least 10GB of free space to install Origin. I recommend keeping 30GB of free space, ensuring future safety.
4. Fix Origin Error Code 9:0 (.NET Framework Missing)
When one or more of your .NET Framework files go missing, this error code shows up. As a result, the installation cannot complete properly, showing this message.
To solve this problem, you need to download the latest version of the .NET Framework from Microsoft’s official website and install the software as directed in the installation wizard. After the installation is complete, restart your computer, and it should fix the problem.
5. Fix Other Origin Installation Errors
Except for the errors mentioned above, there may be other installation errors. For those, you can try some common troubleshooting solutions.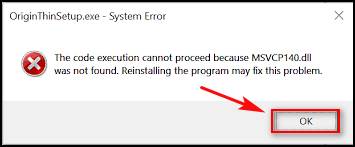
Here are some other solution methods:
1. Uninstall VPN
Sometimes, your VPN may cause Origin installer problems from connecting their website and servers, resulting in installation failure. So you may try uninstalling or disabling your VPN and see if it works in your case.
2. Disable Windows Firewall And Third-Party Antivirus
Overprotective third-party antivirus and sometimes even Windows Firewall interfere with Origin’s installation and show errors while installing Origin. So you can disable them temporarily to see if they help.
Here are the steps to disable Windows Firewall:
- Search for Control Panel in the Start menu.

- Go to System and Security in the Control Panel App.
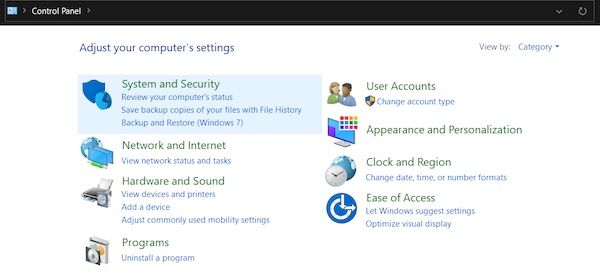
- Find and go to Windows Defender Firewall.
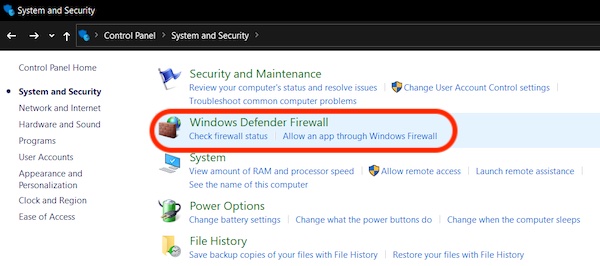
- Select Turn Windows Defender Firewall on or off.
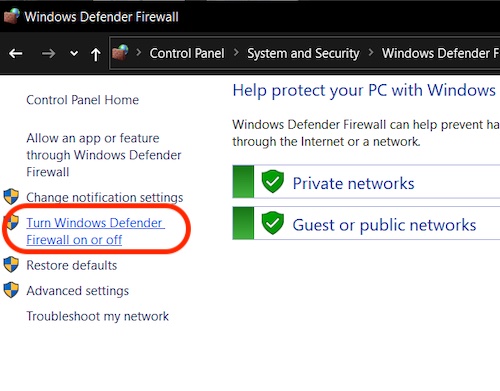
- Select Turn off Windows Defender Firewall for both Private network settings and Public network settings.
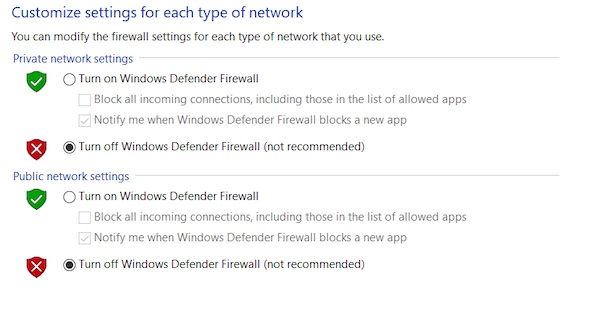
- Hit the OK button to save the settings.
Conclusion
I tried to give you all possible solutions to the Origin installation errors. Hopefully, you will be able to solve them if you follow the procedure accordingly. If you face any other trouble, let us contact us.

