Update failure is a common reason when using a BIOS tool. It also happens when your update is interrupted by power and electricity.
Sometimes, the BIOS becomes corrupted, and the motherboard gets bricked. But still, there are good chances the motherboard is fine, and it’s possible to recover the BIOS.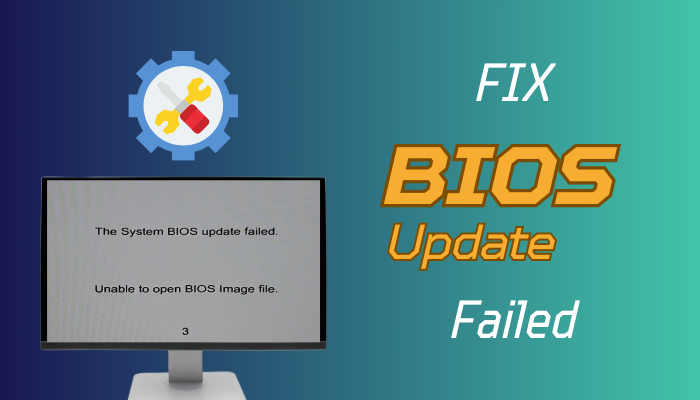
In this article, I’ll explain the consequences of a failed BIOS update and the way to recover from failure.
So, let’s start.
What Happens When the BIOS Update Fails?
BIOS, or Basic Input/Output System, is a crucial part of the computer. The BIOS is located on the motherboard. It contains instructions that check the hardware component and boot up the PC.
When you update the BIOS manually, it may not complete the process successfully. As a consequence, your computer will not work properly.
Here is the common problem that appears after a BIOS update fails:
- System Instability: The BIOS update tool often installs spamware and unwanted files to your computer. When the update fails, it will remain on your PC and may cause system instability.
- Boot Failure: The most common issue after a BIOS failure is the system’s inability to boot. It happens when the update is interrupted or unsuccessful. As a result, the system doesn’t start or is stuck in the boot screen.
- Hardware Incompatibility: BIOS updates are released to improve hardware compatibility. You may encounter compatibility issues with the newer hardware components when the update fails.
- Motherboard Issue: Due to BIOS update failure, the motherboard will get bricked in the worst case. In this situation, the motherboard won’t function, and the entire system will stop working.
A failed BIOS update is indeed frightening for every PC user. So, what should you do when the BIOS update fails?
Well, there are a few ways to recover from the BIOS update failure, and the following passage will describe the methods.
How to Recover from a Failed BIOS Update
To recover the failed BIOS update, you can press the recovery jumper or switch to bring the BIOS to a working state. If your motherboard has dual BIOS features, you can boot to backup BIOS and turn your PC on. Also, flashing the BIOS will update and fix the issue.
The recovery process only works when the motherboard is still in working state. When the update fails, there’s a chance your motherboard will survive. So consider following the process below to fix the BIOS.
Here are the ways to recover from a failed BIOS update:
1. Use Recovery Jumper/ Switch
A failed update may create conflict with the previous BIOS version and doesn’t boot properly. Therefore, it’s suggested to reset BIOS using jumper or switch.
Most modern motherboards contain the reset/ clear option on the motherboard beside the CMOS battery.
Follow the process below to reset BIOS settings using the recovery jumper/ switch:
- Turn on your PC and disconnect from the power source.
- Locate the BIOS recovery jumper/ switch on the motherboard.
- Short the jumper or press the switch to the recovery position.
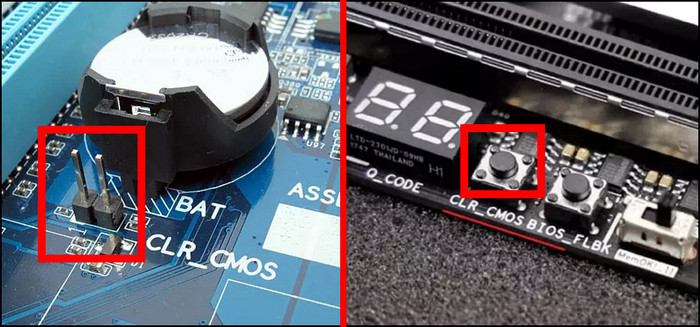
- Connect your computer to the power source and turn it on.
The BIOS recovery process will start, and the PC will boot up automatically after completing the process.
2. Use Dual BIOS/ Backup BIOS
Many motherboards have a dual BIOS chip or backup BIOS feature that keeps a copy of your BIOS. If anything happens to the main BIOS, the backup BIOS kicks in.
So, if you have such a motherboard, you can stay tension free. The backup BIOS will start automatically if the main file doesn’t start. Your PC will be operational after doing a simple restart.
3. Use Bootable USB to Flash BIOS
If you don’t have a dual BIOS and clearing the settings doesn’t work, you should try flashing the BIOS using a bootable USB drive.
During the flash, you don’t have to worry about the other components because BIOS flash works with or without a CPU. Flashing the BIOS will fix the issue and update it to the latest version.
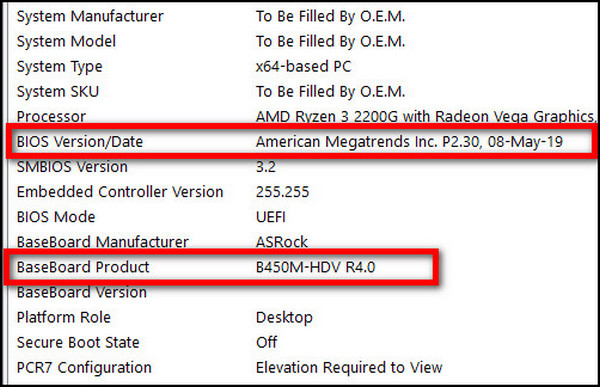
To download the correct update, you should check the current version and model name.
Read the method below to check and download BIOS for your mobo:
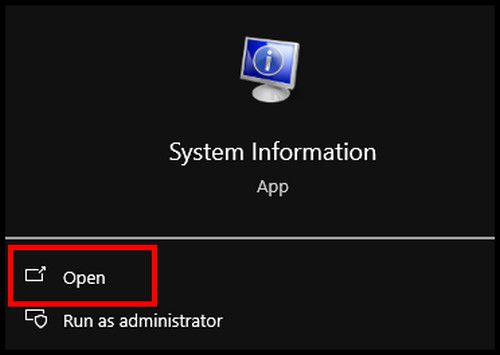
- Search msinfo and open System Information.
- Note the BIOS Version/Date, System Model, and Baseboard Product.
- Go to the manufacturer’s website to download the BIOS version.
- Check the information and download the correct BIOS file.
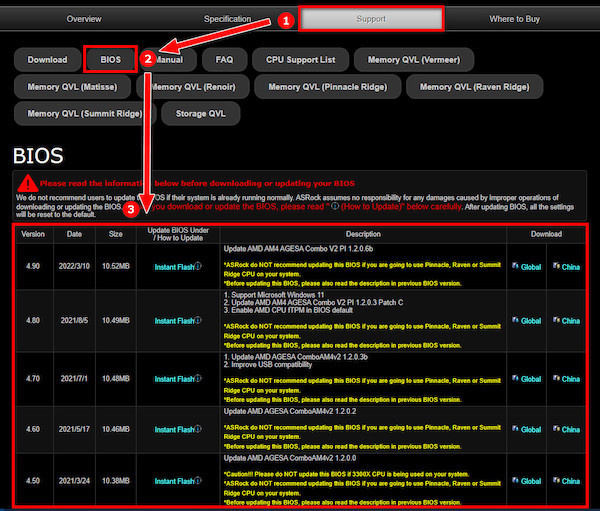
After that, you need to prepare a USB drive for the BIOS flash. You need to use another PC for this procedure.
Here are the steps to flash USB drive:
- Insert the USB drive into your PC.
- Right-click on your USB drive and press Format.
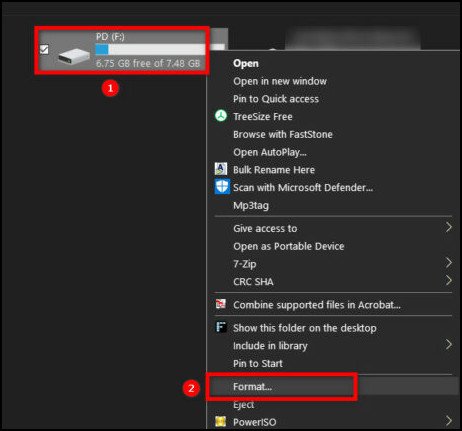
- Choose FAT32 and click on Start.
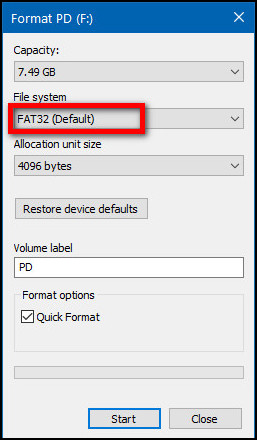
- Copy the BIOS file and paste it to the main directory of the USB drive.

- Rename the file following the motherboard instructions.
Now, it’s time to flash the BIOS and resolve the update issue. I’ll describe the universal method that works on laptops and desktop PCs.
Follow the procedures carefully to update/ flash BIOS:
- Plug in the USB drive on your PC.
- Turn on your computer and go to the BIOS menu.
- Find and click on M-Flash/ Q Flash/ EZ Flash, etc.
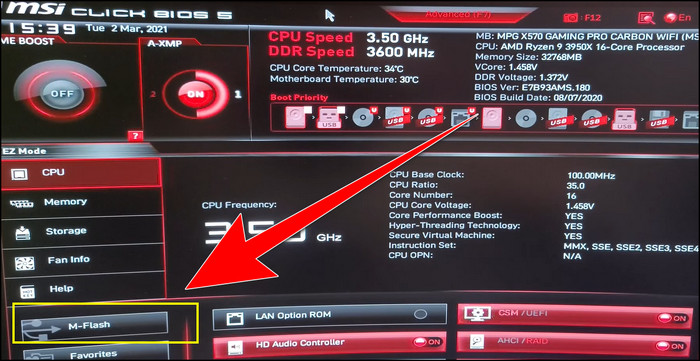
- Confirm to enter flash mode.

- Select the BIOS file and confirm.
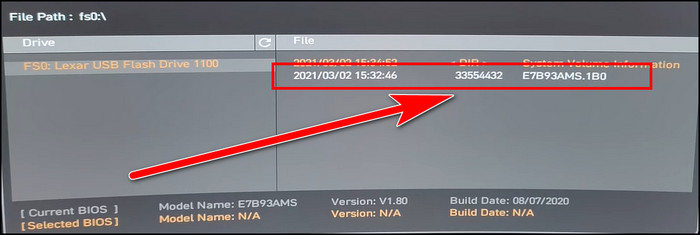
- Wait until the update is complete.
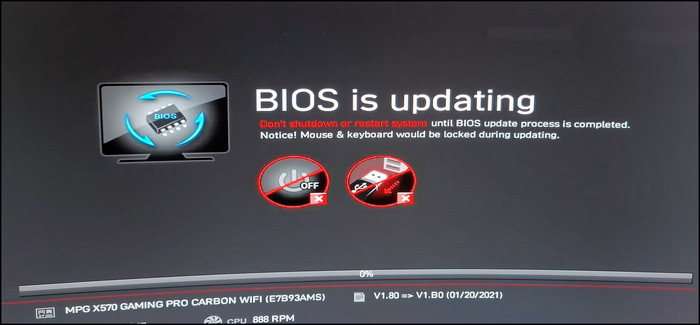
Your computer will restart, and the BIOS will be updated. If you had an issue with the update failure, flashing with USB will resolve the problem.
4. Contact an Expert
If your motherboard gets bricked during the BIOS update, there is no way to fix the problem. You need to change the BIOS chip inside the motherboard to make it work.
Updating the BIOS voids the warranty given by the manufacturer. Therefore, you need to contact a computer expert to change the component.
Ending Note
BIOS is a crucial part of your computer. Updating the BIOS is good for your PC, but failing during the update process may lead to severe issues.
However, you can recover the BIOS by resetting the settings, using backup BIOS, and flashing via a bootable USB drive. However, the process only applies when the motherboard is functioning. Otherwise, you may need to change the mobo to fix the problem.
Goodbye.