You may know the accessibility features that come standard with Windows 11. Sticky Keys is one such function that makes using your PC keyboard simpler. This feature helps people with disabilities or unique abilities to customize computers.
As a senior consultant, I recommend this feature for disabled people who have trouble typing on their keyboards. It gives them great results.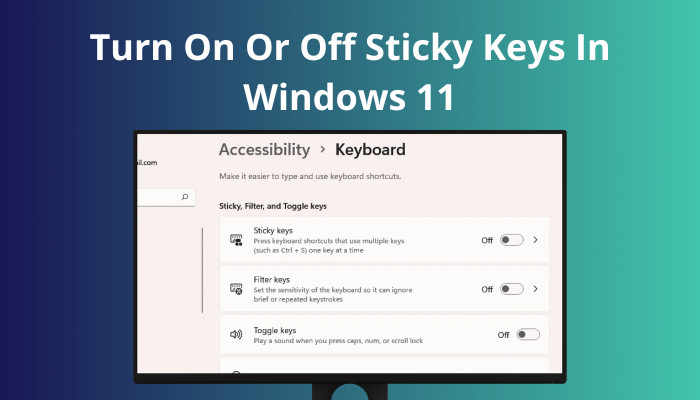
Continue reading if you or a loved one wants to learn more about Sticky Keys and how to enable or disable them. I’ve described a few simple methods for doing that.
Also read how to update drivers on Windows 11.
What is the Sticky Keys Feature?
Sticky Keys is an accessibility feature designed to assist Windows users with physical limitations in minimizing the type of movement related to repetitive strain injury. Instead of forcing users to hit many keys simultaneously, this functionality serializes the keystrokes.
The Shift, Ctrl, and Alt keys are modifier keys in Sticky Keys. You may then hit a command key after that.
For instance, you must simultaneously hit the Ctrl and S keys to save a document. If you cannot accomplish that, Sticky Keys allows you to hit both of these keys sequentially.
After the computer recognizes that the Ctrl key has been depressed, you may finish the Save command by pressing the S key.
Similar to how Ctrl + Alt + Delete, Ctrl + C for Copy, Ctrl + V for Paste, and other commands may be used with Sticky Keys.
Once you hit a modifier key, it won’t stop working until you press a letter, number, or non-modifier key or until you click the mouse. Additionally, holding down a modifier key twice locks it until you hold it down a third time.
Sticky Keys are compatible with the Win key, allowing you to utilize it for keyboard shortcuts like Win + I to launch Settings by hitting Win first, then I.
Follow our guide to fix blue screen on Windows 11.
How to Turn On or Off Sticky Keys in Windows 11
Sticky Keys may be set up in several ways. The quickest method is to use a hotkey to turn them on and off. The Settings app and the traditional Control Panel are other options.
Follow the methods below to enable or disable sticky keys in windows 11:
1. Toggle On the Shift Button
Using the keyboard on your PC is the most convenient way to enable Sticky Keys.
Constantly press Shift five times. A request to enable Sticky Keys will appear. To enable them, select Yes.
A loud noise will start playing when Sticky Keys turns on to let you know. Your taskbar will also display the Sticky Keys symbol.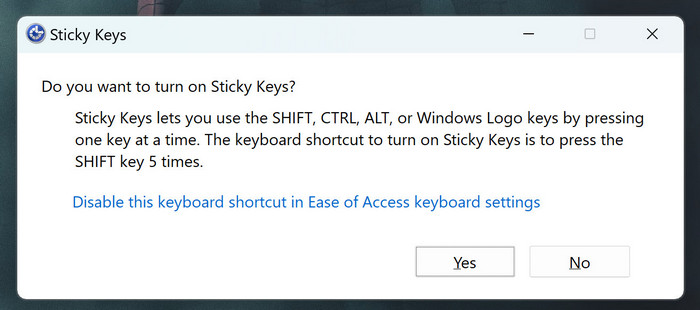
To turn them off, hit the Shift key five times a row. When Sticky Keys are turned off, you’ll hear a sound.
Also, check out our separate post on how to fix PC won’t go to sleep in Windows 11.
2. Use Quick Settings
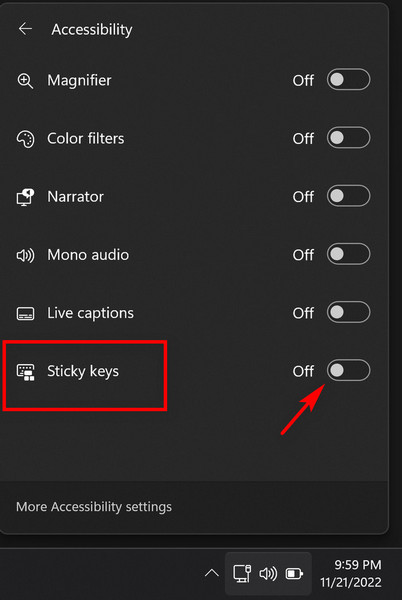
You can enable or disable sticky keys using the quick setting. From the Windows taskbar, you can easily access the feature.
Follow the steps below to enable/disable sticky keys using the quick setting:
- Press Windows + A button.
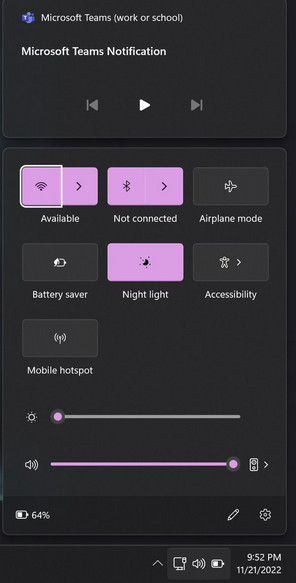
- Choose the Accessibility setting from there.
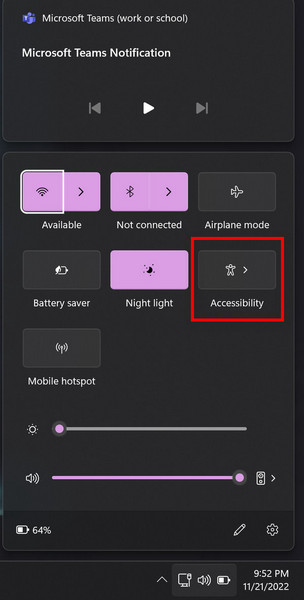
- Toggle on or off the option as you wish.
3. Utilize The System Setting
Sticky Keys can be activated or deactivated using Windows Settings. They are available and have customization options in the accessibility settings.
Follow the steps below to enable or disable sticky keys using the settings:
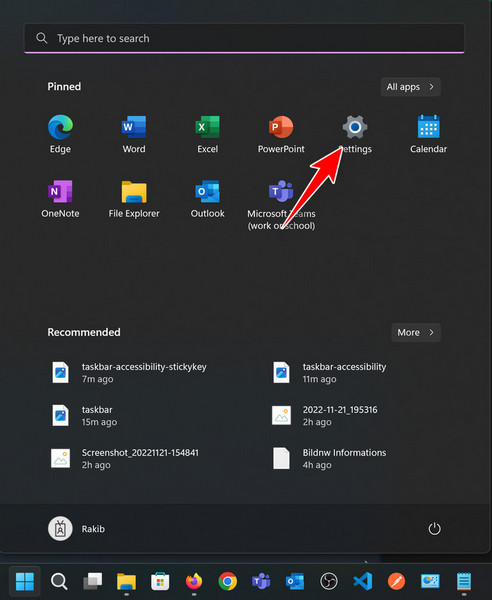
- Click on the Windows icon.
- Choose the Setting option from there.
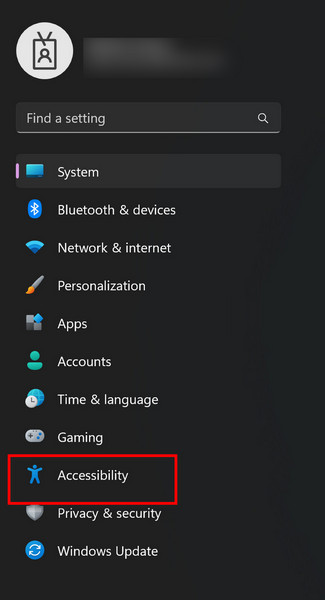
- Click on the Accessibility option from the left menu bar.
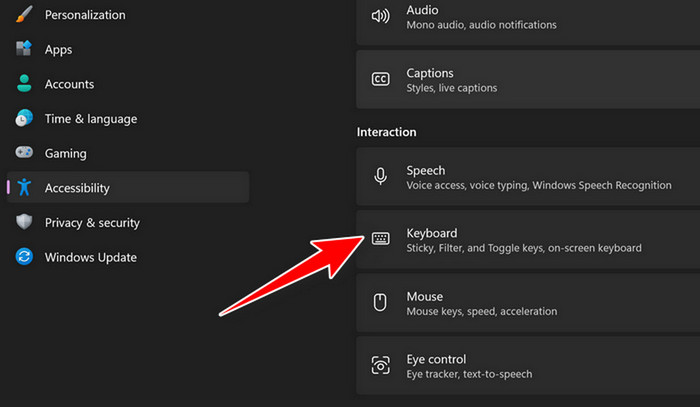
- Choose the Keyboard option from the right side.
- Toggle on or off the option from there.
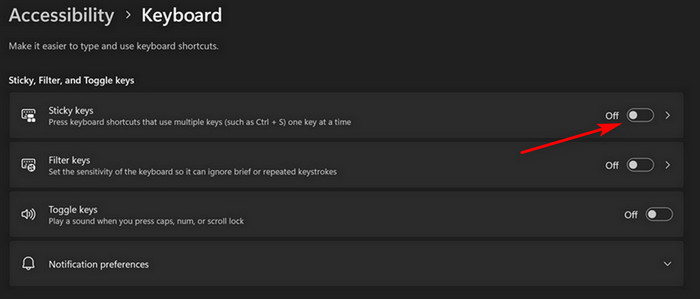
- Customize the feature by clicking on the arrow of the option.
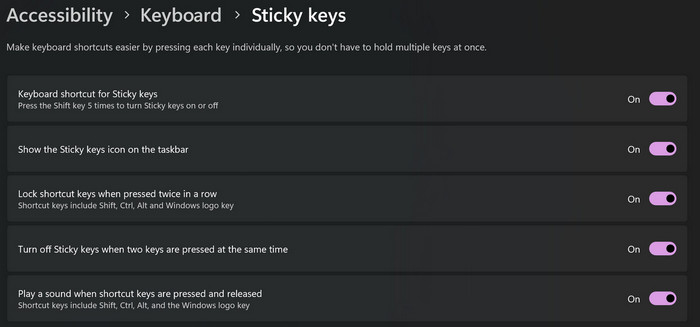
You may lock the Sticky Keys when pushed twice consecutively and activate or disable the Sticky Keys shortcut and icon here.
Additionally, you can configure preferences so that a sound is played when a Sticky Key is pressed and that Sticky Keys are turned on or off when two keys are pressed.
Check out the easiest way to install active directory users & computers on Windows 11.
4. Use The Control Panel
You can easily use the Control panel option to enable or disable the sticky keys feature. It is a traditional approach to do so.
Follow the steps below to turn on/off sticky keys using the control panel:
- Click on the Search option from your taskbar.
- Type there Control panel to search the option.
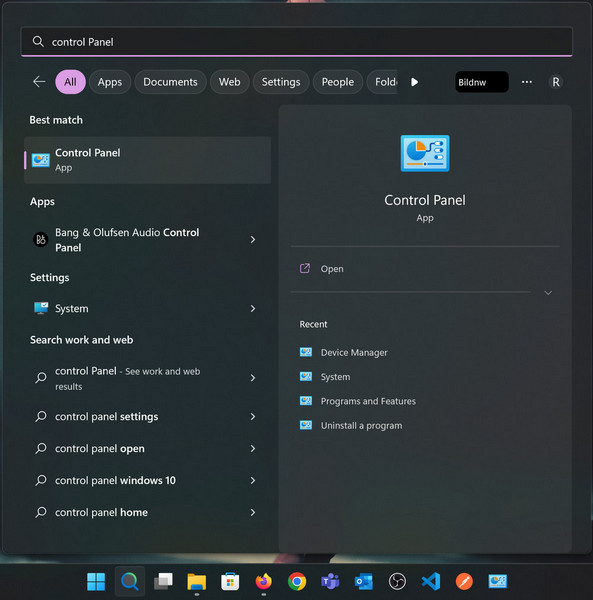
- Click on it.
- Select the view by Category option, then click on the Ease of Access menu.
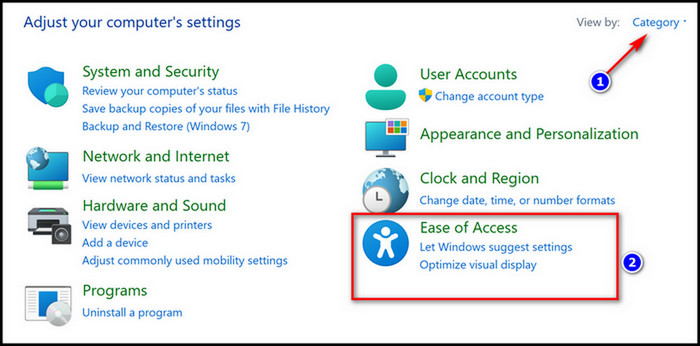
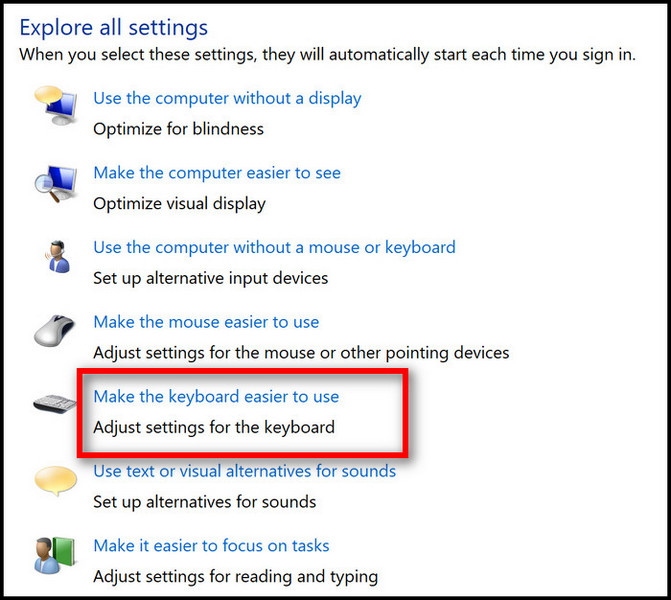
- Click on the Ease of Access Center option.

- Choose the option named Make the keyboard easier to use.
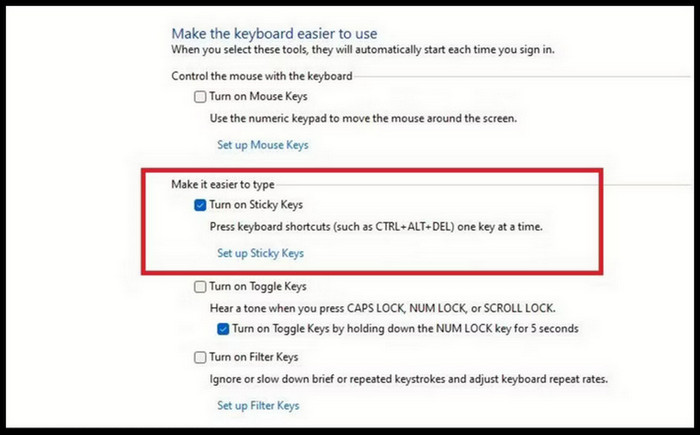
- Enable the Turn on Sticky Keys box to turn on the Sticky keys feature. You can also disable the checkbox to turn off the sticky keys feature.
Also, check out our separate post on how to Windows can’t access network drive on Windows 11
5. Use the Windows Sign-in Screen
When logging into Windows, you may use Sticky Keys to ensure the machine boots up quickly.
Select the Accessibility symbol in the lower right corner of the sign-in screen when it appears. 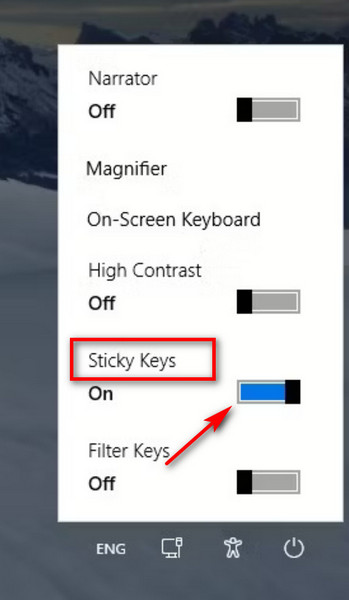
Just toggle on the option to enable Sticky Keys, which will be present. Simply move the switch to the off mode if you wish to turn off Sticky Keys after logging in after a gap or if you forgot to do so.
Conclusion
The sticky keys feature is an excellent advantage for Windows 11. You can enable or disable it at any time when you wish.
The shift key technique is very fast to enable or disable it. Using the quick settings is also a very easy and good choice if you want to enable or disable the sticky keys.
To customize the sticky keys feature, you should use windows system settings. Some people also use the traditional Control panel approach to activate or deactivate sticky keys with customization.
You can also activate or deactivate the sticky keys setting during the sign-up process by following some simple processes, as I mentioned above.
Don’t forget to tell me what drives you to use the Sticky keys feature in Windows 11.