Installed a high-capacity RAM to accelerate your work, yet you notice only half of the memory is usable by the system. Wonder why?
For starters, it can be overwhelming to figure out the reasons and fix them accordingly. Various catalysts influence the computer not to comply with the memory modules as it should.
In this article, I will explain everything you ever need to know about half-usable RAM and the ways to fix it.
So, stop scratching your head and tag along!
Why is Only Half of My RAM Usable?
The primary reason for half of your RAM being usable is that you have installed 32-bit Windows on your machine. Besides, if the RAM is not seated correctly on the memory slots, it can cause this issue too. Physical defects with the memory and on the slot can create problems.
Let’s go through all the reasons behind this issue in detail.
Here are the reasons why only half of your RAM is usable:
32-Bit Windows
4GB of physical memory is usable when running 32-bit Windows. It’s the limitation of the 32-bit version.
When you installed Windows on your machine, chances are you have chosen 32-bit instead of 64-bit. Now any amount of RAM more than 4GB is unusable by the system.
You can determine the version of Windows with simple steps.
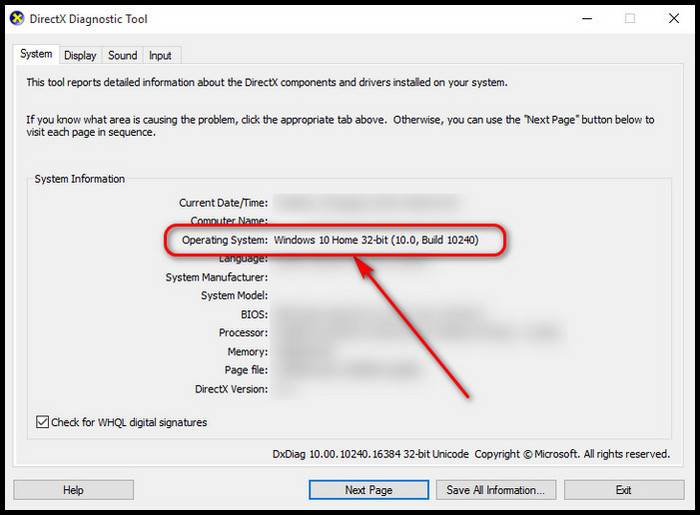
Here are the steps to figure out 32-bit Windows:
- Press Windows + R to open Run.
- Type dxdiag in the box and press Enter.

- Observe Operating System. You will see the version of Windows installed on your machine.
Memory Limitations
Your system can not use the total amount of RAM because of possible memory limitations.
To imply a limit on the RAM, it must be done manually. It can be applied through some sort of mistake while performing other operations.
Incorrect Installation of RAM
If the RAM is not installed correctly on the memory slot of the motherboard, the system can not access that module.
The computer may even refuse to boot up entirely, let alone not to be able to use it.
Incorrect BIOS Settings
On some motherboards, BIOS settings deprive the system of accessing the full amount of RAM.
Your BIOS may have a memory map feature turned off by default. As a result, Windows cannot utilize memory fully.
Integrated Graphics Consumes RAM
Computers without dedicated graphics cards use the integrated graphics unit on the CPU to render 3D graphics and video output.
Integrated graphics occupy RAM as VRAM. Therefore usable memory decreases. For example, if your system has 8GB RAM installed and 1GB integrated video memory accessible, Windows can only use 7GB of memory.
If more video memory is allocated to the iGPU, the usable amount of RAM will decrease accordingly.
Defective Memory Module
One of the specific factors leading to a half-usable memory is if you have a defective memory installed on your system.
A physically damaged RAM stick simply does not work. However, if the system recognizes it, it will cause tons of problems, including system freezing, crashing, BSOD etc.
Bad Memory Slot on Motherboard
Let’s say you have just installed 16GB memory with an 8×2 configuration, but you can only see 8GB RAM available on your system. It can be due to a bad DIMM slot on the motherboard.
The defective slot cannot detect the memory altogether. Therefore task manager only provides information about a single stick of RAM.
How to Fix Half Usable RAM
You can quickly fix your computer and let it access the RAM’s full potential by tweaking the registry editor. Clearing CMOS, re-installing the memory sticks, running the memory diagnostic tool, re-installing Windows etc. can also effectively fix the problem.
Here are the tested fixes to make the RAM fully usable:
1. Install 64-bit Windows
If you find out you are running a 32-bit Windows, you need to reinstall Windows. Install the 64-bit version of the operating system.
32-bit has a memory cap of 4GB. Installing 64-bit Windows will lift that limit, and you will be able to utilize the full capacity of the memory.
2. Tweak Registry Editor
Tweaking the registry editor is a smart way to let your computer exploit the RAM’s full potential.
Here’s how you can tweak the registry editor:
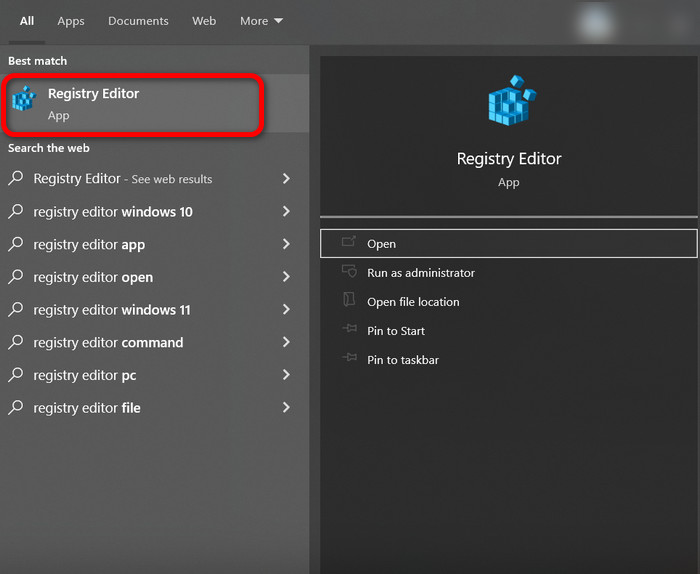
- Press Windows + S key together.
- Write Registry Editor.
- Click to open.
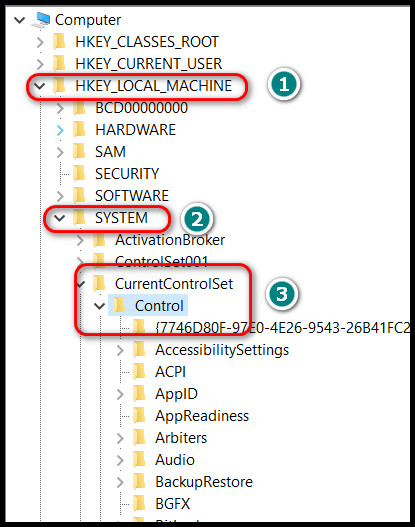
- Navigate to HKEY_LOCAL_MACHINE from the left panel.
- Click on System to expand.
- Select CurrentControlSet.
- Choose Control.
- Click on Session Manager.
- Select Memory Management.
- Double click on ClearPageFileAtShutdown from the right side panel.
- Set value data 1.
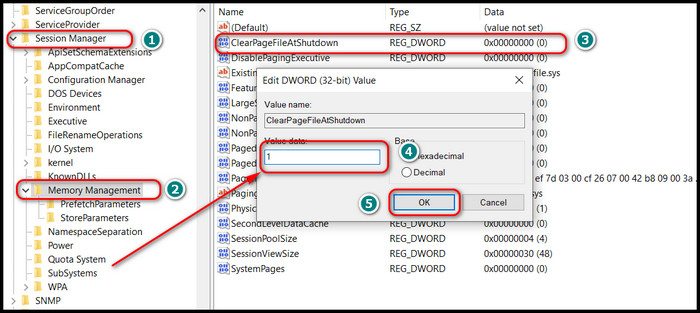
- Restart your computer.
Your computer is now instructed to access the full amount of RAM. After rebooting, check usable RAM in the DirectX Diagnostic Tool.
3. Memory Diagnostic Tool
If you install a new stick of RAM and your system refuses to identify it, you can run a memory diagnostic tool and figure out the problem. This tool reports if any problem is found.
Here is the process of running the memory diagnostic tool:
- Click on the start menu icon from the bottom left corner.
- Select Settings from the left side.
- Write Diagnose, and you will see a suggestion Diagnose your computer’s memory problem.
- Click on the suggestion.
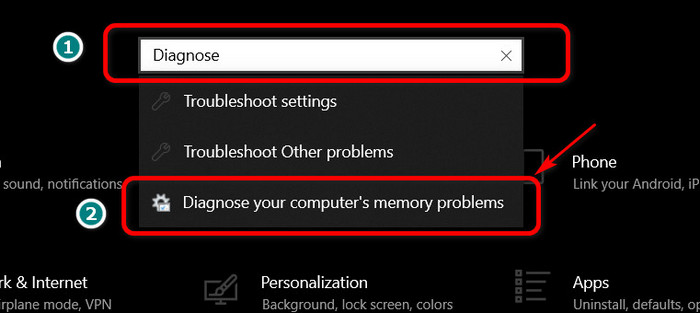
- Choose Restart now and check for problems(recommended).
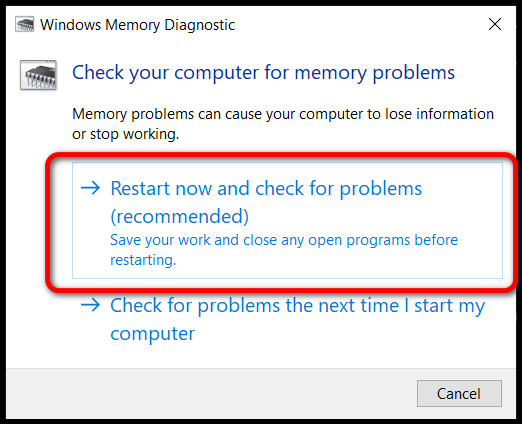
The computer will reboot and run the diagnostic. It will show a detailed report on what went wrong. Take action accordingly.
4. Re-install RAM
Memory modules can loosen up due to carrying or moving the computer around. Hence your system may detect one less RAM stick.
Simply reinstall the modules on the DIMM slots.
Here is the procedure to re-install RAM:
- Remove the side panel of your computer.
- Push the clip on each side of the DIMM slot gently. Memory sticks will protrude.
- Pull each module lightly. It will come out without any problem.
- Give the golden connector pins a gentle cleaning with isopropyl alcohol.
- Align the notch on the slot and the RAM.
- Push each end of the stick gently. You will hear a click sound that ensures a perfect installation.
Turn on your computer and go to the task manager. You will notice all your memory modules are working fine.
5. Lift Memory Limitations
Memory limitation may be applied accidentally, preventing Windows from accessing RAM effectively.
Here are the steps to lift memory limitations:
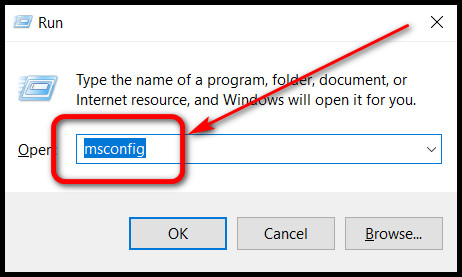
- Press Windows + R simultaneously.
- Type msconfig and press Enter.
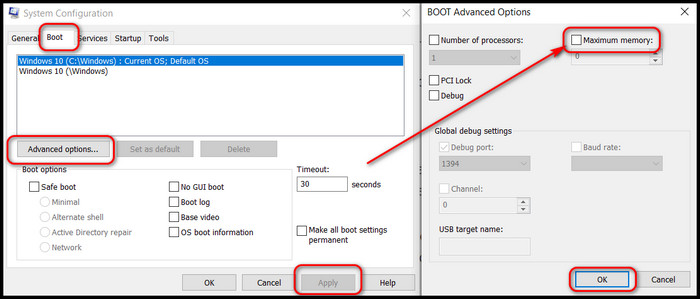
- Navigate to the Boot tab.
- Select Advanced options.
- Uncheck the box labeled as Maximum memory.
- Click Ok, then hit Apply.
Memory limitation is now lifted, and your PC can use as much memory as required.
6. Make Changes in BIOS
Many features in the BIOS can reduce the amount of usable RAM for the system; Integrated graphics is one of them.
You can assign the amount of RAM to be used as VRAM. It improves iGPU performance but eats up a significant amount of RAM.
Tune down the amount of RAM acting as VRAM from the BIOS to access more memory.
Here are the steps to make changes to the BIOS:
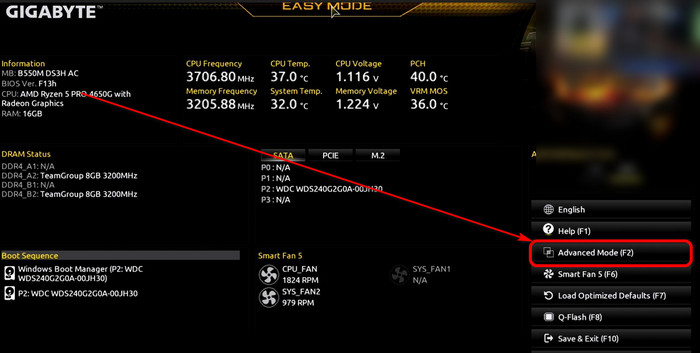
- Restart your computer and keep pressing the BIOS button on your keyboard as long as you see the flash screen.
- Check the top and bottom carefully and press the button for Advanced mode. In my case, it’s the F2 button.
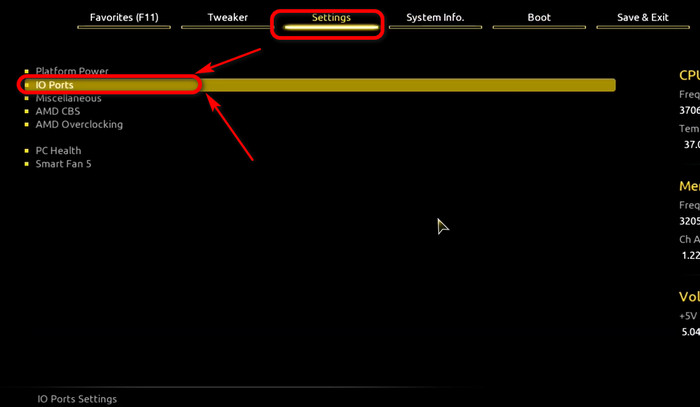
- Navigate to the Settings tab and expand IO ports.
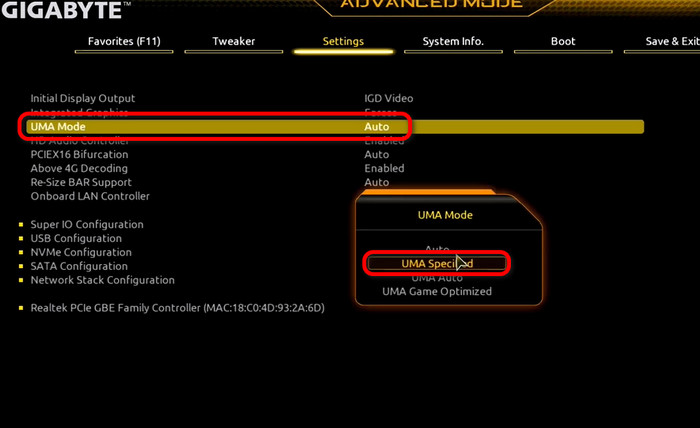
- Select Forces in the Integrated Graphics option.

- Set UMA Mode to UMA Specified.
- Choose your preferred VRAM amount from UMA Frame Buffer Size. This option is only enabled if you select UMA specified.
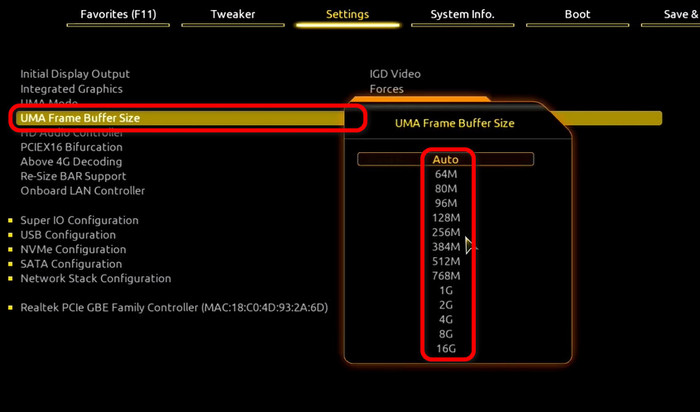
You can choose any amount of VRAM but remember this will reflect on your usable memory. If you do much memory-intensive work on your machine, set the VRAM to 256MB.
7. Clear CMOS
When the system suffers from a BIOS-related problem, it does not respond to any hardware or software tweaks. Therefore resetting the BIOS comes into play.
Clearing the CMOS is the most effective method for this task.
Here’s a universal method for clearing CMOS:
- Locate the CMOS battery on your motherboard.
- Take out the battery by pressing on the metal clip.
- Reinsert the battery after 5 minutes.
- Power on your computer and choose default settings for BIOS.
Your BIOS may ask for customization, but setting the default values is recommended. After booting into Windows, you will find BIOS-related issues vanished.
Important Note: We used a Gigabyte B550 motherboard in this example. Settings names can vary due to different manufacturers.
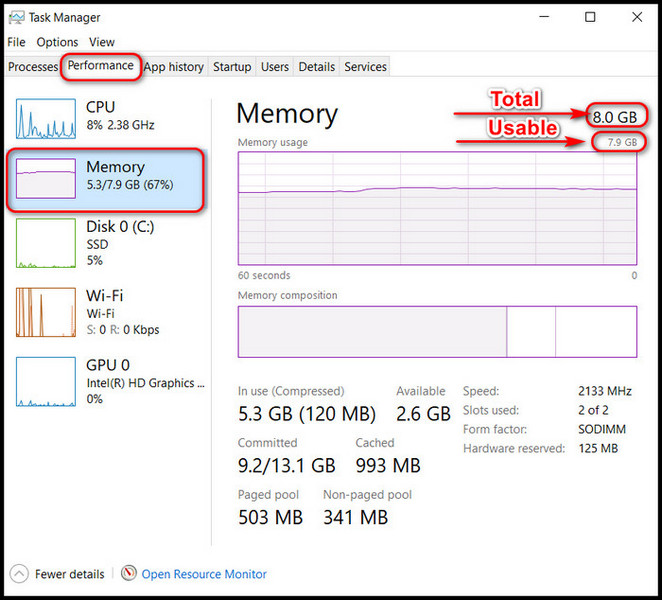
How to Check Usable RAM in Windows 10
Checking the usable RAM in your Windows 10 is relatively simple. Go to the Task Manager and follow the below-mentioned steps to verify. I believe anyone with ABC knowledge of computers can check it within seconds.
Here is how you can check usable RAM in Windows 10:
- Press Ctrl + Shift + Alt simultaneously. It will open Windows Task Manager.
- Click on the Performance tab.
- Select Memory from the left side.
Notice the Memory text on the right side?
Opposite the heading, you will see two numbers. The top one is the total installed RAM, and the bottom one written in small font is the total usable memory.
Final Thoughts
It is highly annoying not to be able to utilize RAM properly, especially after buying a new PC or installing a memory module. Various factors prevent your system from using the total amount of RAM.
This article is a brainchild of prolonged research. I hope you have gained enough knowledge to solve this problem.
Have questions and confusion? Just comment below.
Sayonara!