AirPods are pretty reliable and offer excellent quality for the price.
Most AirPods users are happy with the sound quality and usability of AirPods.
So it might come to you as a shock when you find the AirPods sound cutting out.
This post will take you through the reasons behind the issue and guide you through the fixing process.
So keep reading the post till the end.
Why Do My AirPods Keep Cutting Out?
AirPods are one of the best true wireless earbuds on the market. It’s the top choice for Apple device users. AirPods work great with Apple devices such as iPhones, Mac, iPad, etc.
Everything from sound quality, build quality, ease of usage and wearing comfort on the AirPods are top-notch.
Though a bit pricey, they’re a great option as earbuds.
As a well-made device, you wouldn’t expect issues from the AirPods. But nothing in the electronics world is perfect. AirPods sometime face problems too.
One such issue is when the AirPods output keeps cutting out. In such a case, you’d hear choppy sounds with big stutters. The AirPods would still be connected to the audio source, but it’ll feel like there’s frequent disconnection.
Whether you’re listening to music, watching a video or attending a meeting, you won’t be able to hear the sound clearly and continuously. The sound would cut out in the middle.
It won’t be a pleasant experience, and you might think the AirPods are done with it.
But that’s not the case. Many factors are playing a role behind the crackling and choppy sound. Some factors are due to the AirPods, others not so much.
Also, check out our separate post on how to fix AirPods won’t make sound.
Here are the reasons why AirPods keep cutting out:
1. Unstable Bluetooth connection
The Bluetooth connection must be stable to enjoy a stutter-free hearing experience.
Since the AirPods connect to devices wirelessly using Bluetooth, you must ensure there’s no unstable connection via Bluetooth. The instability depends on several factors, such as other Bluetooth devices or objects creating interference, Bluetooth range, etc. 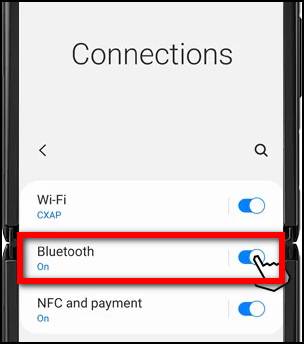
When you’re in the middle of many Bluetooth devices, you will get a low signal on the AirPods connection because every Bluetooth device is fighting for lanes in the small 2.4GHz spectrum.
Walls and furniture sitting between your AirPods and the audio source will also be an obstacle and weaken the Bluetooth signal.
The Bluetooth range for AirPods is 30-60 ft. You’ll definitely hear stutters when you move out of the range.
2. Low battery on the AirPods
AirPods are known to cause trouble when the battery is low. The wireless earbuds need an excellent backup to transmit high-quality audio wirelessly. 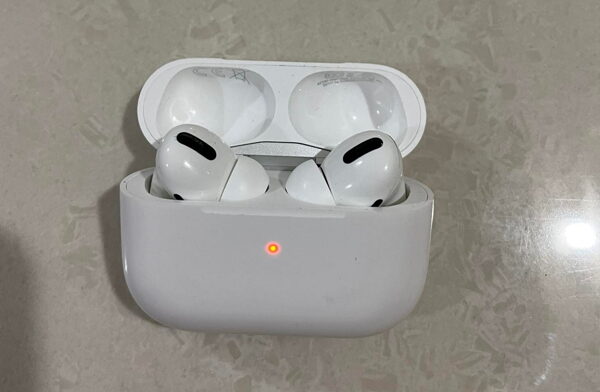
Hence when the battery is low, stutters can occur. That’s especially true if you’re playing high-quality audio or listening at a distance to the audio source.
3. Hardware damage or sensor issue
Daily driving the AirPods might cause wear and tear on them, especially if you’re not super careful about them.
At some point, there might be internal damage to the AirPods. Dust and dirt buildup on the outside can also cause internal damage.
AirPods have many sensors around them to give you advanced features. You’ll likely face distorted audio and choppy playback if the sensors get damaged.
Here’s a complete guide on how to fix AirPods double tap play pause not working.
4. Outdated firmware
AirPods get regular firmware updates. If your AirPods have outdated firmware in them, it might cause compatibility issues. 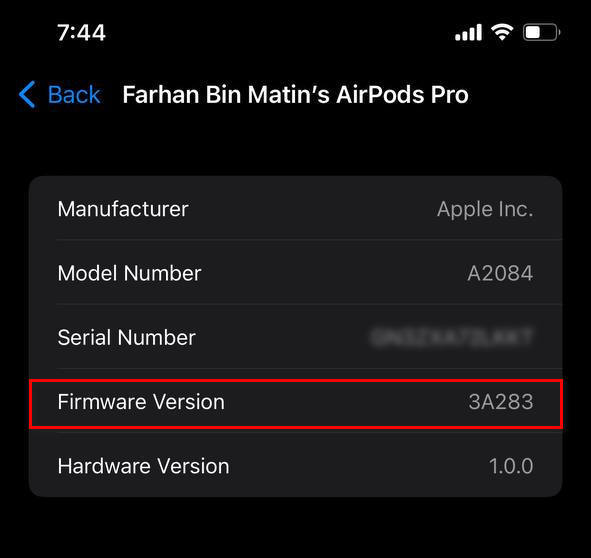
That’s especially true if you’re using the latest update on the audio source (iPhone, Mac, etc.) The more the gap between the audio device version and AirPods firmware, the more likely it is to cause issues.
5. Issues from the audio source
The audio source can have many problems like low battery, low-quality audio, Bluetooth issue, connectivity issue, etc.
Any of these reasons might cause the AirPods audio to cut off.
Now that you know the reasons behind AirPods’ audio cut-off let’s go through the fixes one by one.
How To Fix AirPods Cutting Out
AirPods can keep cut out due to many reasons. Luckily, you can follow some simple methods to eliminate the issue.
Below I’ve listed the best methods to fix AirPods’ sound that keeps cutting out. You’d be able to solve the issue following the procedures quickly.
Follow the methods below to fix the AirPods keep cutting out:
1. Improve the Bluetooth connection
AirPods connect to the audio source via Bluetooth. Bluetooth performance drops due to interference and greater distance between the source and AirPods.
Bluetooth technology uses the 2.4GHz spectrum. Various electronic devices also use the same spectrum, like the WiFi router and microwave oven (when it runs).
These days, we also have many Bluetooth devices around us. All these signals cause interference on the 2.4GHz lane and cause choppy audio.
You can turn off wireless Bluetooth devices around you to give the AirPods some relief. Walls and other solid substances also hinder wireless signals. So you should try to have an obstacle-free space between the source and the AirPods.
Having a small distance between the source and the AirPods is also essential. AirPods have a Bluetooth range of 30-60 ft; any distance more than that will cause the connection to drop.
Also check our exclusive tutorial on how to fix AirPods not working with MacBook.
2. Check the battery levels
Low battery on the AirPods can cause the sound to cut out frequently.
AirPods need enough juice to send and receive high-quality audio over the air to other devices. Usually, it’s advised to have over 20% battery level on the AirPods for a smooth experience.
There is no battery indicator on the AirPods. The carrying case has an indicator but doesn’t give the percentages.
If you have an iPhone, it’s pretty easy to check out the battery levels:
- Put the AirPods into the case.
- Close the case.
- Bring the iPhone right next to the AirPods.
- Open the AirPods case lid.
- Wait for the AirPods battery level to show up on the iPhone screen.
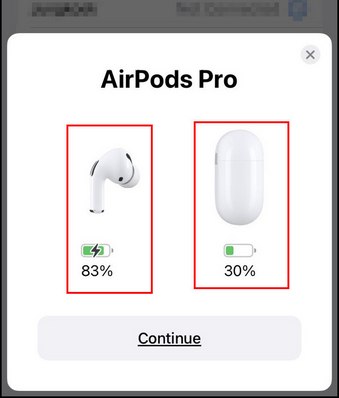
If you see a battery level below 20%, you should consider charging the AirPods. The AirPods typically hold a charge for about 5 hours of playback. The charging case can top up the AirPods 5-6 times.
3. Disable Automatic Ear Detection
Automatic Ear Detection is a feature that pauses the audio based on whether you’re wearing the AirPods. It uses sensors to detect you taking off the AirPods.
When you take off one AirPod from the ear, it’ll pause the audio briefly and then continue, when you take off both the AirPods, the audio pauses until you take them on again.
The feature is quite handy, but if there’s an issue with the sensor, it can behave weirdly.
Do as follows:
- Go to the Settings app.
- Select Bluetooth.
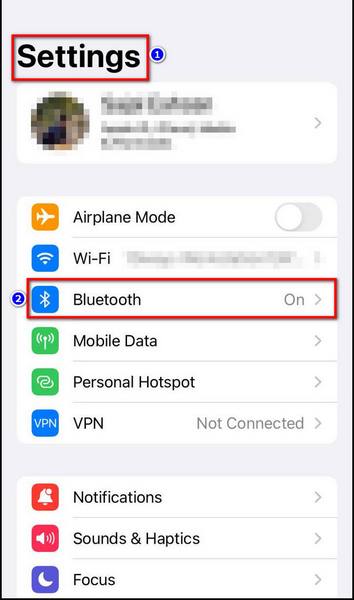
- Tap on the i icon at the right of the AirPods.
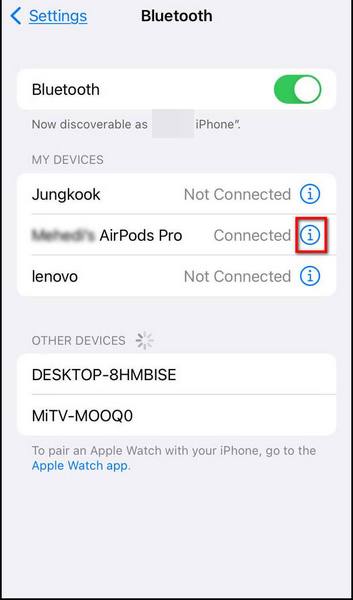
- Turn off Automatic Ear Detection.
Now the audio will keep playing even if you take the AirPods off.
4. Reconnect the AirPods
Reconnecting the AirPods works well to fix many issues regarding AirPods, including the audio cut-out issue.
Here’s how to reconnect the AirPods to your iPhone:
- Go to the Settings app.
- Select Bluetooth.

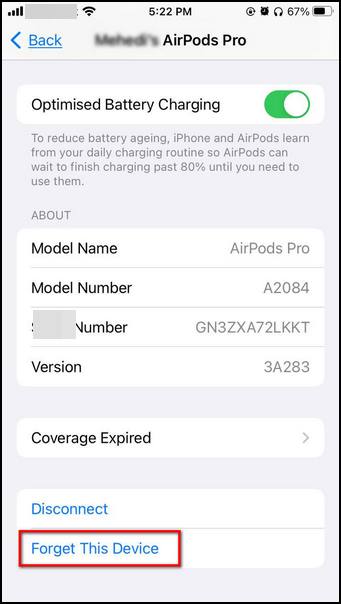
- Tap on the i icon next to the AirPods.

- Select Forget This Device and confirm the action.
- Wait for a while.
- Open the lid of the charging case. Ensure AirPods are inside it.
- Bring the iPhone close to the charging case.
You’d see a pop-out appear from the bottom asking you to connect the two devices.
Follow our easy step-by-step guide to fix AirPods not working with FaceTime.
5. Reset the AirPods
If reconnecting the AirPods didn’t do anything, maybe the reset will.
After the reset, you’d need to pair the AirPods again.
Here are the steps:
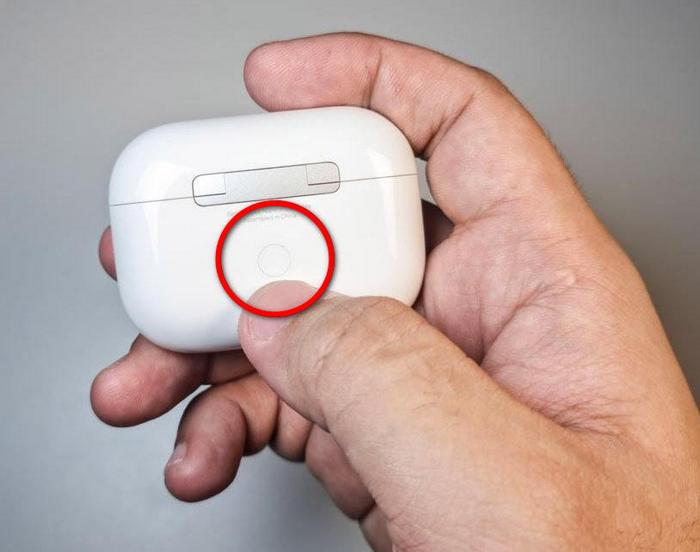
- Put the AirPods into the case.
- Close the lid.
- Press the Status button on the charging case for 15 minutes until the Status light changes from amber to white. The reset is complete. Now we’ll reconnect the AirPods.
- Bring the iPhone close to the AirPods.
- Open the lid.
- Wait for the pairing pop-out to appear.
- Pair the AirPods with iPhone.
Now test if the audio still stutters.
6. Clean the AirPods
Dirt and debris build-up can cause the sensors to get covered, causing AirPods to malfunction.
The AirPods need to be cleaned regularly. You can use a lint-free cloth and rubbing alcohol to clean the outside carefully.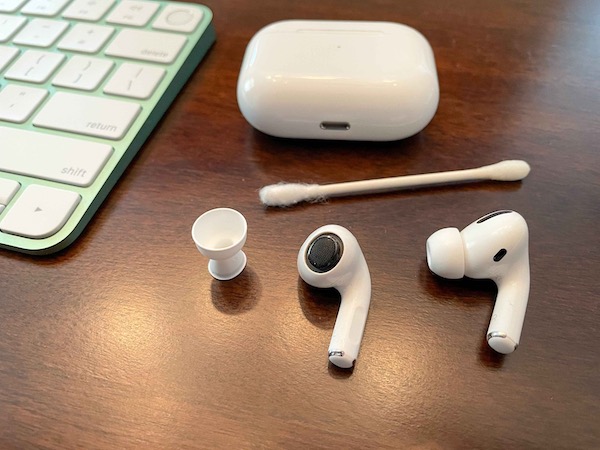
Then use a dry piece of cloth to remove any tracing wet patches from the AirPods.
7. Update AirPods firmware
AirPods firmware contains important bug fixes and other improvements. The newer firmware is needed to support more recent versions of the source device (iPad, iPhone, Mac, etc.)
There is no direct way to update the firmware. You must connect the AirPods case to the power with AirPods inside, then keep the iPhone close to the AirPods.
If there are updates, it will automatically install on the AirPods.
8. Contact Apple Support
If none of the above steps have solved the issue, you should consider contacting Apple Support. You will get them via phone or chat.
Apple Support will either fix the issue or give you a replacement depending on the issue and warranty terms.
Also read how to Fix AirPods Not Working with FaceTime
Final Thoughts
AirPods are great to listen on due to their excellent battery life and high comfort.
Installing and cutting out audio is less common on the AirPods than on other wireless devices. Still, you can face them.
By following some simple steps, you can quickly solve the issue.