Many processors and PC hardware components create heat and require active cooling to remain stable. Heatsinks and fans are used for such active cooling situations.
If you’re upgrading or building a new PC, or if it’s overheating, you may need new fans. But, plugging-in new fans is a bit difficult, as it depends on the type of motherboard connectors you are using.
In this article, I discuss the method of hooking PC case fans in various ways. Feel free to read till the end.
Where Should I plug in my PC case fans?
There are two ways to plug in the case fans. You can connect the fans via motherboard or via PSU. Plugging in case fans to your PC may be useful for various reasons. For example, you might be building a PC and concerned about airflow. Or it could be that your PC may be experiencing thermal throttling.
A common complaint among PC buyers and builders alike is the difficulty of installing case fans. Because it is not clear where the case fans will be plugged into the motherboard, and no one wants to risk damaging their equipment by plugging them into the wrong slot.
Here is a guide to explain where you should plug in your PC case fans:
How many ways can you plug in the case fans?
Case fans can be plugged in one of two locations. First is the motherboard, and it’s the most common configuration used all over the world. Alternatively, the case fans can be connected directly to the power supply unit. It does, however, have some downsides.
These two methods are explained below:
1. Connecting the fans to the motherboard
If you connect your fans to the motherboard, you’ll be able to adjust the speed of the fans using the BIOS on the motherboard itself. But to use that option, you must use a connector with four pins and connect it to the four-pin headers.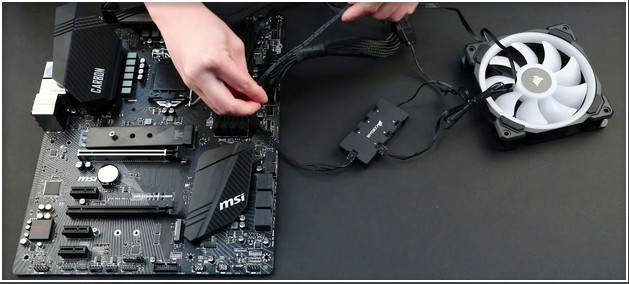
The best thing about plugging case fans into your motherboard is that you can easily change their speed from the BIOS or use third-party programs you can download. But the drawback of plugging-in fans on your motherboard is that you can only plug in a certain number of fans simultaneously.
Moreover, there are ways to get around the limitation of fan connecting headers so that the extra fans can be plugged directly into the motherboard.
But the ways around the rules have their own risks. You should consider all the associated risks regarding all the workarounds and then decide what works best for you.
Related contents you should read about are Noctua Fans Worth It?
2. Connecting the fans to the Power Supply unit
The easiest way to connect your case fans is to hook them up to the power supply. You will need MOLEX connectors on your PSU and fan connector to do this. MOLEX connectors have four prongs and can be used to power extra parts in your build.
First, you will have to connect the fan to a 3-pin MOLEX adapter, and then you will connect the adapter to the 4-pin MOLEX header on the power supply unit (PSU). These adapters are included in the packaging of many fans. However, depending on the circumstances, you might need to get the adapters independently.
Please remember that not all power supply unit models come equipped with MOLEX connectors. However, if you have a modular power supply unit, you should be able to attach MOLEX connectors to your power supply.
You will not have a choice but to connect the fans to the motherboard if the power supply unit you purchased does not come with any MOLEX connectors.
It is essential to remember that if you directly hook your fans to the power supply unit (PSU), you will lose all ability to regulate the speed at which they spin.
About the connectors that you have to plug in
A standard connector for a motherboard fan is a three- or four-pin connector attached to the end of the wire that leads to a PC fan. This is connected to the fan header on the motherboard, which might have three or four pins.
Usually, in a motherboard with four headers for fan connection, the following naming principle is used:
- SYS_FAN (System Fan)
- CHA_FAN (Chassis Fan)
- PWR_FAN (Power Fan)
- EXT_FAN (Extension Fan)
If you have trouble finding these connectors, look in the motherboard’s bottom left corner for them. You will find one of the headers in a short time.
Not all fans or motherboards control or power the fan assemblies similarly. Fans that use less power and are smaller than usual usually use 3-pin connectors.
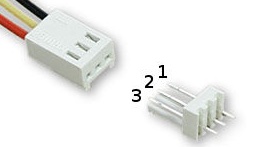
The pins of the 3-pin connectors and headers are described below:
| Pin Number | Name | Wire color |
|---|---|---|
| 1 | GND | Black |
| 2 | +12V DC or +5V DC | Red |
| 3 | CLK | Yellow |
Note that fans and onboard fan headers are backward compatible. This means you can connect a 3 pin fan header to a four-pin power connector and vice versa.
Remember that when a 3-pin power connector is used with a 4-pin fan header, the fan is always on, and the speed cannot be controlled.
On the other hand, CPU fans that use a lot of power usually have 4-pin connectors. Fans and onboard fan headers containing three or four pins can be used in either direction in this case too.
The details of the four-pin headers are as below:
| Pin Number | Name | Wire color |
|---|---|---|
| 1 | GND | Black |
| 2 | +12V DC | Red |
| 3 | Sense | Yellow |
| 4 | Control | Blue |
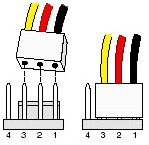
Moreover, the connectors that are used to plug in the fans directly to the PSU are known as MOLEX connectors. This four-pin power connector is the standard for all PATA-based hard drives, cooling fans, high-end video cards, and other internal devices.
Read more on Computer Beeps 4 Times On Startup.
Here is the pinout of MOLEX connectors:
| Pin Number | Name | Wire color |
|---|---|---|
| 1 | +12V DC | Yellow |
| 2 | COM | Black |
| 3 | COM | Black |
| 4 | +5V DC | Red |
How to connect the headers to the power pins
Once the Header has been located, it is time to begin plugging it in. This is the procedure to follow:
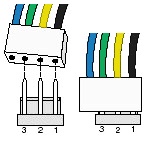
- Each connector will have two bulges that look like bumps (at the beginning of the port and at the end of it). Place it in the correct position above the motherboard.
- To ensure that the connection is attached correctly to the motherboard, carefully slide it down the Header until it clicks into place.
If you want to have tidy cable management, you should try to plug the Fan into the fan header that is the nearest to you.
Below is a graphical representation of how to connect various 3 and 4-pin fan headers to the motherboard.
Things that you should know while plugging-in PC case fans
Before you dive into how you want to install the case fans, let’s take a step back. You absolutely must have some background information on the type of fans. When you take the cover off your computer, you will most likely find four different kinds of fans within it.
The four types of fan commonly found in computers are
- Intake fan
- Exhaust fan
- CPU and GPU cooling fan
- PSU cooling fan
After learning about the different kinds of fans, the next step is to investigate the operation of case fans, which are usually a combination of intake and exhaust fans.
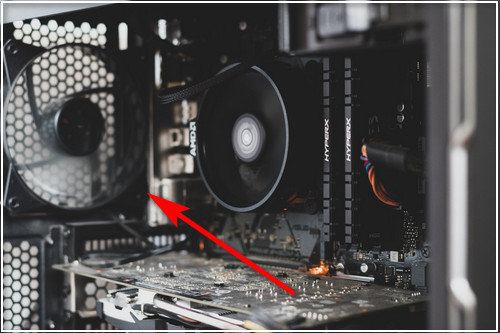
Generally, the intake fans are located at the front of your CPU. They are located at the bottom of the front side to suck in cool air from the environment. The exhaust fans are placed at the top portion of the back side of the casing.
The intake fans pull in the cool air from your room or wherever your computer is located to cool your computer parts, and with the assistance of the exhaust fan, they push the hot air out of the device.
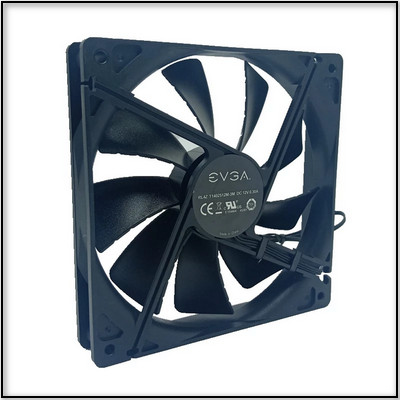
You must figure out how the Fans will be oriented before installing them. Some of the new Intake fans will have an arrow printed on the body to indicate the direction they should face.
If it does not, you will need to check the fan label or the sticker within the body if it does not have an arrow on its body. In most cases, the side with the sticker will be the front side. Position the Fan in that direction.
However, if the sticker is also absent, you should search the fan’s spokes or the mesh grill instead.
But before that, go through our epic guide on how cold can a Computer Get?
Conclusion
No one wants to risk damaging their equipment because it’s unclear where case fans will plug in. Case fans can be plugged into the motherboard or into the power supply. MOLEX connectors can power extra items in your computer, although, Not all PSUs have these connectors.
Look in the bottom left corner of the motherboard. Three- or four-pin fan headers that are found there can be utilized either way. Using a 3-pin power connector with a 4-pin fan header makes the fan always on and uncontrollable.
Before installing Fans, determine their orientation. Some new Intake fans will have an arrow printed to identify their direction.
So, what did you learn about Plugging-in case fans of your computer?