The 667.2GB usable internal space on the PS5 is never enough, especially when you try to maintain a large game library. It’s only a matter of time before you get the not enough storage message.
So, expanding the PS5 storage size by upgrading to a better M.2 SSD is a foot in the right direction. How do you do this, then?
Well, in this article, I’m going to walk you through how to upgrade your PS5 storage. Let’s begin.
What Storage Type Should You Get for PS5 Upgrade?
The PS5 requires an M.2 SSD that works via the NVMe interface. Besides, the storage drive has to be a PCIe 4.0 x4 model that has a sequential read speed of 5500 MBps and up. PS5 currently supports SSDs with a maximum of 4TB and a minimum of 250GB space.
So, when you shop for an additional storage drive to upgrade the PS5, you must pick an M.2 SSD.
Sony, however, clearly states the basic requirement for storage expansion on the PS5. Let’s take a quick glance at it.
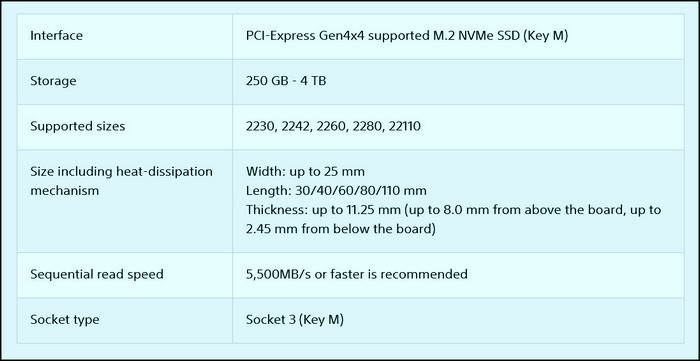
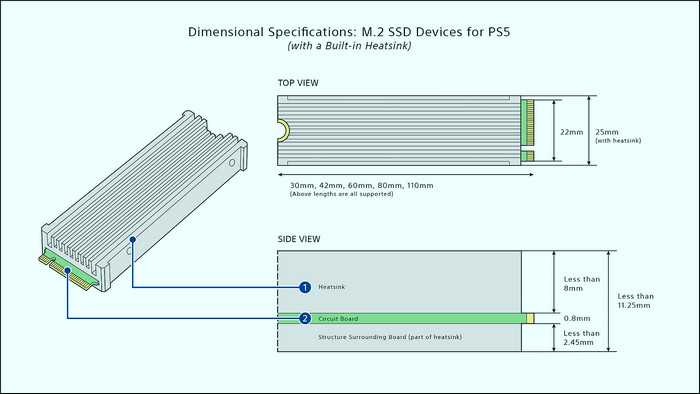
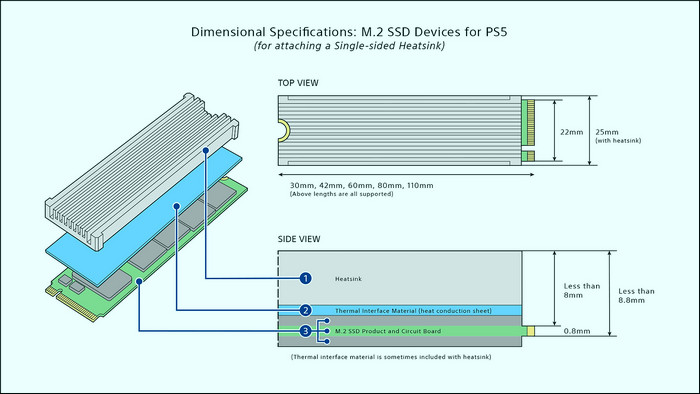
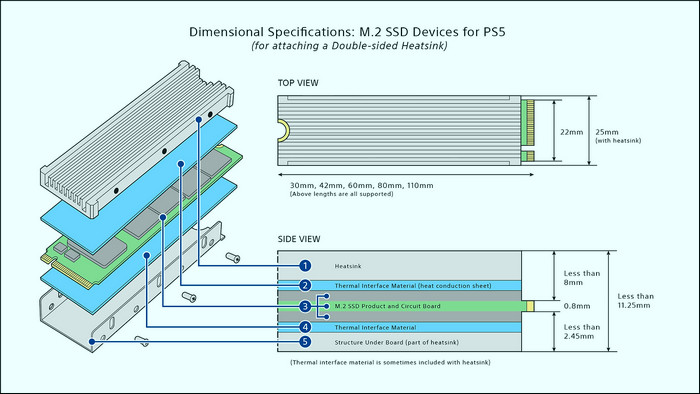
As you can see, it’s recommended to choose an M.2 SSD with a heat sink to retain top read speed. This is crucial as switching between different levels in a game can stutter or cause lag issues when SSD falls to a meager speed.
Best M.2 SSD for PS5
The Western Digital Black SN850P M.2 NVMe 2TB is the best SSD for PS5 storage upgrade in every aspect. It has a sequential read and write speed of up to 7300MB/s and 6600MB/s through the PCIe 4.0 x4 NVMe interface. Besides, it comes with a built-in heat sink and is optimized to use with a PS5.
When you call shots on upgrading the PS5 storage, a nice thing to do is find the best M.2 SSD. Such a drive will boost your gaming experience down the road.
In terms of durability, this WD black M.2 SSD is rated for a whopping, 2400TBW. Trust me, this is going to last forever!
With 22mm in width and 80mm in length, it’s a perfectly crafted unit with a gorgeous black heat sink. Though, when installed on the console, you can’t really appreciate the design.
Western Digital also covers this drive with a 5-year limited warranty. And all of this comes at just under 140 USD. This is an absolute bargain for a PS5-certified M.2 SSD. However, if you keep your keen eye on offers, you may find this drive even cheaper.
How to Install M.2 SSD on PS5
Remove the back faceplate of the PS5 and then take off the metal SSD cover. Put the spacer in the hole as per your M.2 length. Align the notch on the SSD and the slot and insert the drive. Secure the other end of the SSD. Re-assemble everything and turn on the console. Finally, format the M.2 SSD.
But, to complete this process, you need to gather some tools.
Required Tools
Before jumping in to install the M.2 SSD on PS5, you require some tools. These will help you crack open the SSD slot on the console and mount the SSD.
Here’s a list of what you need to install M.2 SSD on PS5:
- An M.2 Gen4 SSD
- A Phillips head screwdriver
- A clean, smooth, flat surface such as a table
Once you have everything, let’s start the M.2 SSD installation process on PS5.
Here are the steps to install M.2 SSD on PS5:
Step 1: Remove the Rear PS5 Faceplate
Power off the PS5 console before working with any internal parts. Remove any cables connected to the PS5, such as power, HDMI, or any other peripherals. Also, don’t forget to take off the built-in stand if it is mounted on the console.
Place the console horizontally on the table with the PS5 logo facing down. It leaves the back side on top or facing toward you. For the disc version, lay the PS5 down, facing the optical drive toward you.
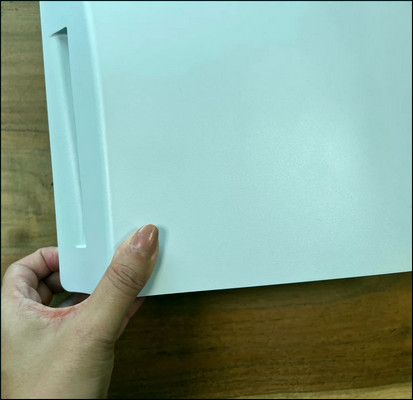
Now, you need to take off the faceplate to get to the SSD slot. Hold the top corner protruding from the console firmly with one hand and gently push it upward. Slide the cover toward the bottom of the console with your other hand. And with that faceplate will come off easily.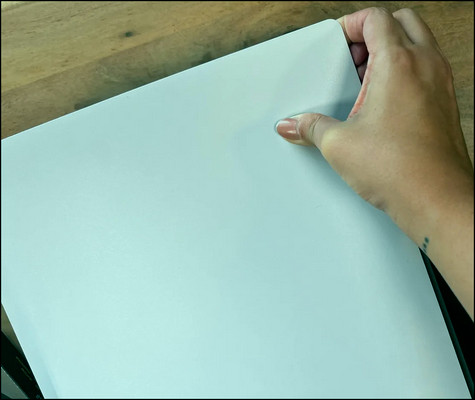
Step 2: Remove M.2 NVMe SSD Expansion Slot Cover
With the faceplate off of the PS5, you’ll see a rectangular space covered with metal. It’s just beside the intake fan. Trust me; it will announce its presence once you remove the cover. 
Take the Philips head screwdriver and remove the single screw to take off the metal cover. This will reveal the M.2 slot on the PS5. 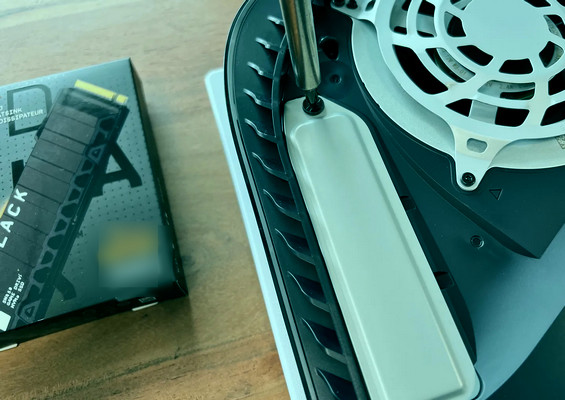

Save the metal cover and the screw to a safe place. You’ll need it once the SSD is in the slot.
Step 3: Move and Place the M.2 Spacer Screw Correctly
Peeking inside the SSD slot, you’ll notice some markings such as 30, 42, 60, 80, and 110. These indicate all the supported SSD lengths in millimeters.
By default, you’ll find the spacer at 110. Take it off with the screwdriver and place the spacer according to your SSD’s length. For example, if your SSD model says 2280, put the spacer on where it says 80 on the slot. 
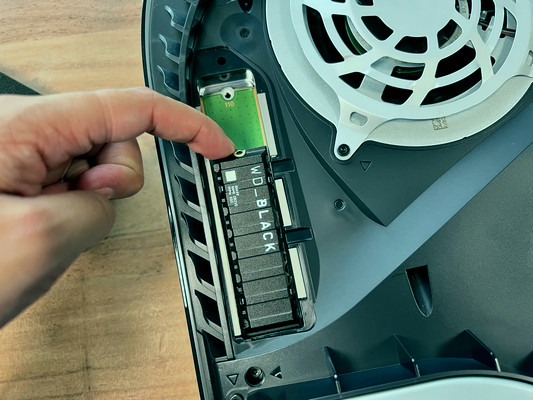
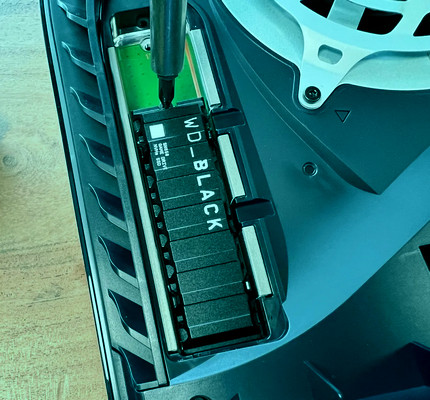
Step 4: Install the M.2 SSD
With everything in place, it’s time to mount the M.2 SSD in the slot. To install the M.2 SSD, line up the notch on the drive & the slot and gently push it in. You’ll feel a subtle click. Now push down the SSD and secure it with the M.2 screw you removed earlier. However, don’t over-tighten it. 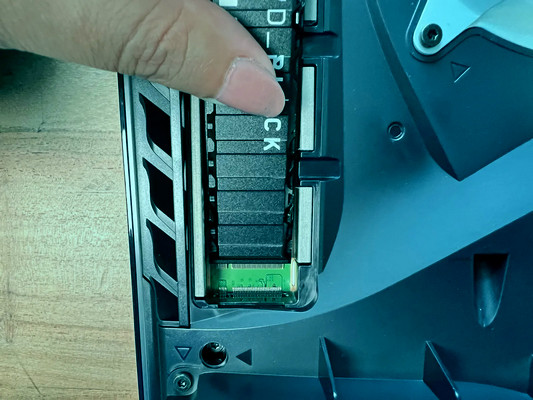
Step 5: Put Everything Back Together
Once you install the SSD, put back the SSD cover and the PS5 console faceplate. Plug everything in, like power and HDMI cables or other accessories.
Step 6: Format the SSD
After completing the physical storage upgrade process, turn on the console. The PS5 hardware will automatically recognize the new M.2 storage.
Now, on the boot screen, it’ll ask you to Format M.2 SSD. Go ahead and format the drive.
And that’s it! Your PS5 now has enough space to accommodate more games. Transfer your current games from the internal storage to the second M.2 SSD from the settings to keep your main storage clean.
On top of that, you can choose your upgraded M.2 drive as the default installation directory. But system files will remain in the primary storage.
How to Remove M.2 SSD from PS5
In case you have an existing SSD installed on the PS5, you need to remove it to install a new drive. Otherwise, there’s no way to upgrade the PS5 storage.
Follow the steps below to remove M.2 SSD from PS5:
- Turn off the console and unplug the cables.
- Lay the PS5 on a flat and smooth surface.
- Remove the back cover to get to the SSD slot.
- Take off the metal cover on the SSD area.
- Unscrew the SSD.
- Lift up the SSD from the back.
- Pull it out from the M.2 socket.
When you get the old SSD out, go ahead and mount the new M.2 SSD to the same port.
Frequently Asked Questions
Is It Worth Expanding Storage on PS5?
Yes, it is worth every penny to expand storage on PS5. A better, high-speed drive provides the console with more space for games and apps. It also improves the console’s performance.
Is 1TB Enough for PS5 Expansion?
1TB is a good expansion option for the PS5. It costs less money yet upgrades the storage size to a respectable margin. 1TB extra space is enough to maintain a decent size game library.
Should You Upgrade Internal or External PS5 Storage?
You should upgrade the internal storage as PS5 games will run on high-speed M.2 SSD only. However, if your game library is based on PS4 or PS3 games, external storage is a cost-effective solution. Also, you can use external storage to back up your PS5 games.
Can Any SSD Go Into PS5?
Only an M.2 SSDs will go into PS5. But to work flawlessly, it has to be a Gen 4 NVMe SSD with a 5500MB/s sequential read speed or better. Unlike PS4, the latest console does not have a slot for a 3.5-inch SSD or a hard drive. Obviously, it links back to technical reasons and PS5’s architecture.
Last Bit
PS5’s internal storage upgrade process is not that difficult. You can do it at your home following this the steps I explained above. But make sure to meet the minimum requirement for the M.2 SSD you choose. That’s all.
If you need more clarification about the process, let me know in the comments.