To convert an audio interview into text, transcribe a lecture, or document important meetings, having the ability to transcribe efficiently can increase productivity and save time.
One powerful tool that can make the transcription process seamless and quick is Microsoft Word.
In this article, I’ll provide the essential steps to transcribe audio files into text in Word successfully.
What are the Requirements for Transcribing an Audio in Word?
Before you start converting your audio into text in MS Word, you should know the requirements for transcribing. You must learn what browsers you can use if you use Word on the web and what audio file format to transcribe.
Below I’ve provided the requirements for transcribing audio into text in Word:
- Transcription is exclusive to Microsoft 365 subscribers. It is available for all corporate, education, and personal plans.
- Accepted audio formats include .mp3, .m4a, .wav, and .mp4 (even though it’s not audio). Additionally, Word also supports Apple’s .aac format for transcription purposes.
- 200 MB is the maximum size for each uploaded audio file.
- Use Google Chrome and Microsoft Edge for the transcribe feature in the MS Word web version.
Now that you know what you need to transcribe audio into text in MS Word, I’ll explain how to do that in the following section.
How to Transcribe Audio to Text in Microsoft Word
To transcribe your recordings into text, open MS Word and select Home > Dictate > Transcribe. Start recording or upload the audio you want to get transcribed. After the file finishes uploading, you can add it to your document as regular text.
Here are the steps to transcribe recordings to text in Word:
1. Open Voice Options in MS Word
- Open your document in Word and go to the Home tab.
- Click on the Dictate option from the Voice section.
- Choose Transcribe.

In case you are wondering what the Dictate option does, it will give you a transcript of everything you are saying. For more details, check out our article on how to dictate in Word.
But for now, let’s focus on converting existing or your recorded audio into plain text.
2. Record or Upload Audio
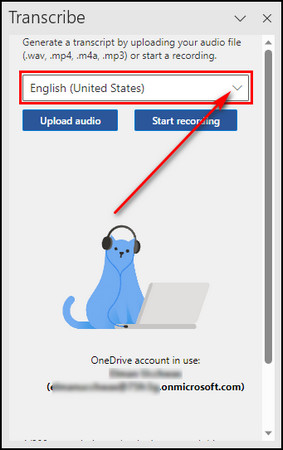
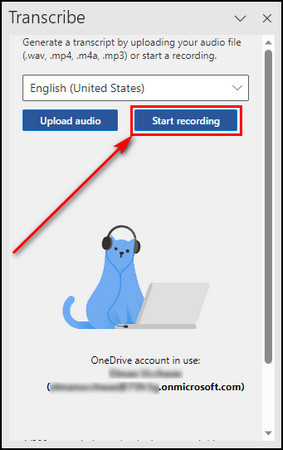
- Select Transcribe, and a new pane will open on the right side.
- Choose your language from the dropdown list. There are over 80 different languages that you can choose from.
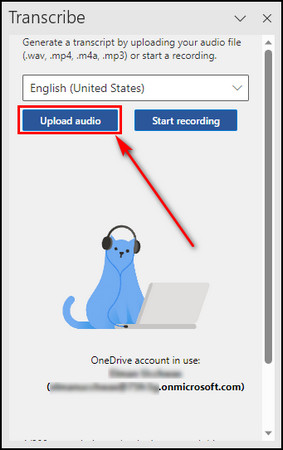
- Choose Upload audio to upload existing audio. If you have recorded some audio externally, this option will bring that into Word.
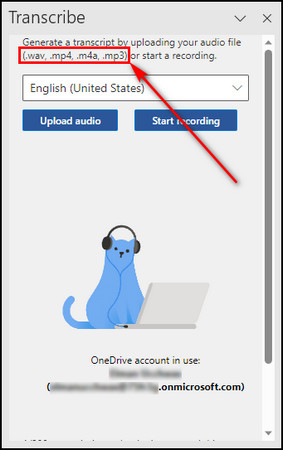
- Observe the audio file formats that support transcription in Microsoft Word. Besides audio files, you can also upload a video file, such as MP4, and it’ll pull out the audio and then transcribe that.
- Select the other option, Start recording, for using MS Word to record your audio and transcribe.
3. View the Transcribed File
After recording your audio or uploading an existing one, you can see it on top of the Transcribe panel as a .wav audio format. Select the file to download it on your device.
The file will also be uploaded to your OneDrive automatically. To view it:
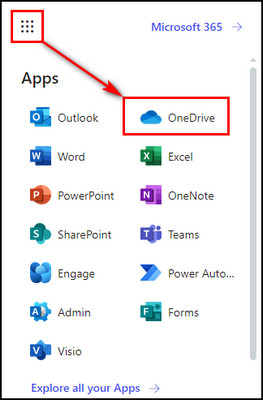
- Open Microsoft 365.
- Click on the App launcher from the top left corner and choose OneDrive.
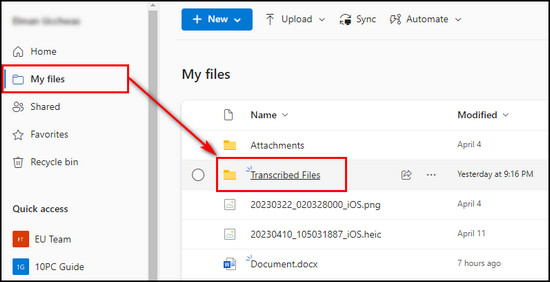
- Go to the My files tab.
- Open the Transcribed Files folder. It contains all the audio files you’ve uploaded in Word for transcribing.
4. Control Transcribed Audio Playback
Back in the Transcribe panel in Microsoft Word, you’ll see the Playback controls. 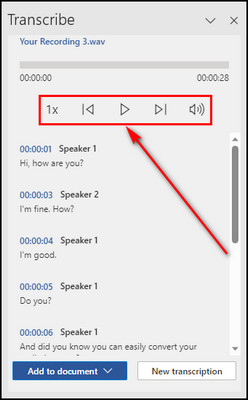
You can adjust the Playback speed from 0.5x to 2x. It is handy when getting through a very long interview or recording. 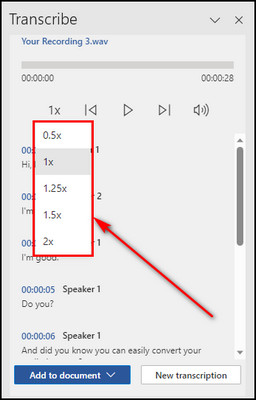
MS Word automatically highlights the text currently being played above. This feature allows you to synchronize the text with the audio effortlessly.
To jump to a specific point in the audio, just click on the timestamp. It’s an excellent way to navigate the transcript. 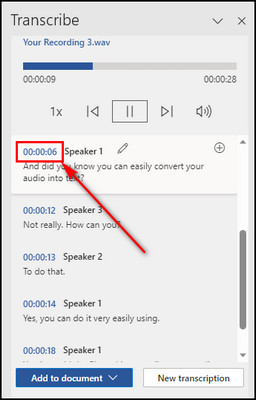
5. Edit Your Transcript
To edit a specific part of the transcript, hover over that part, and you’ll see a Pen icon. Click on it, and that transcript part will be divided into two text boxes.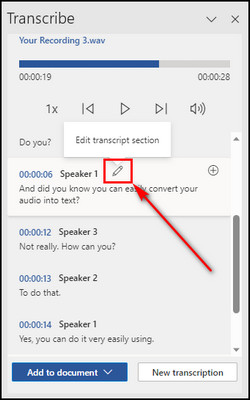
In the first text field, you can change the speaker name and modify the text in the text box below. Once you are done, click on Confirm. 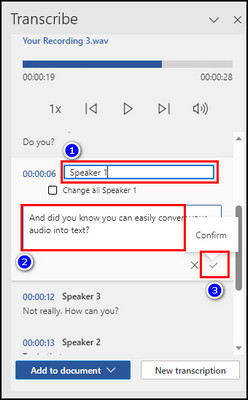
6. Add Text to Your Document
If you want to add a certain transcript section, hover over that part and click on the Plus (+) icon. Word will add it to the document, timestamp, and speaker. 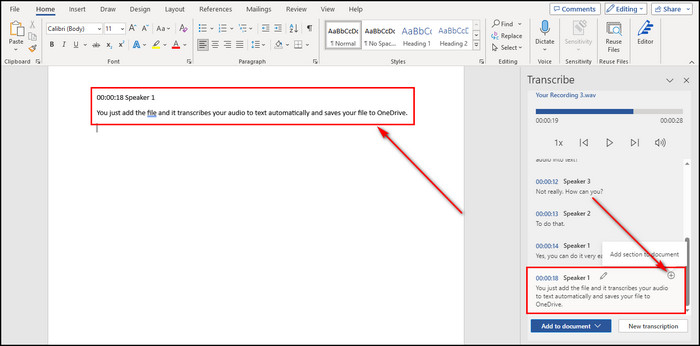
To insert the whole transcribed text, select Add to document. Then you can choose to add it to the document, either just the text, with speakers, with timestamps, or with speakers and timestamps. 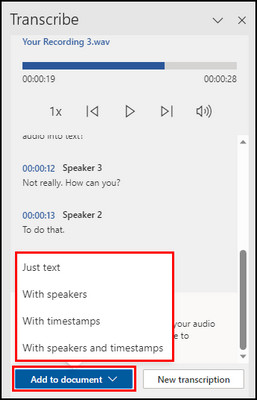
The transcript is now added to your Word document as plain text. You can edit it just like any other document.
What are the Limitations of Transcription in Microsoft Word?
Transcribing in Word has limitations of one transcription per document, restricting simultaneous multiple transcriptions. Additionally, privacy concerns arise as Microsoft’s servers can obtain the data. It causes confidentiality issues for sensitive content.
Here are the limitations of transcription in Word:
One Transcription for Each Document
Each Word document supports only one audio file or recording for transcription.
You’ll receive a warning that your current transcription will be deleted if you attempt a new transcription with an active transcript. This limitation seems to be connected to how Microsoft stores them.
A simple solution to this issue is to open a new Word document and perform a separate transcription. Then copy and paste the transcribed text into the previous document.
Privacy Considerations
The uploaded audio files for transcription are automatically stored on OneDrive in the designated Transcribed Files folder. And Microsoft has access to this content.
FAQs
Why can’t you find the Transcribe option on your Microsoft Word?
You cannot locate the Transcribe option because you are not on the correct browser when using MS Word on the Web. Make sure you are using Microsoft Edge or Google Chrome, and don’t forget to sign in with your Office 365 account.
What is the difference between Dictate and Transcribe?
Dictate will give you a real-time transcript of everything you are saying. On the other hand, with Transcribe, you can take existing audio or record audio and convert it to plain text.
Which Microsoft apps support the Transcribe feature?
Microsoft has integrated the Transcribe feature into Microsoft 365. The Transcribe feature is available in Microsoft Word on both the app & web version, OneDrive, and the OneNote desktop application for Windows.
Final Thoughts
Microsoft’s built-in transcription feature, powered by Azure Speech Services, enables users to transcribe recordings easily and accurately. It also integrates timestamps and speaker identification for our convenience.
By following the steps provided in this article, you can transcribe your audio content efficiently in no time.
Comment below if you have further questions, and we’ll get back to you.