There are certain times when you need to remove Nightbot from Twitch. I have done it before on certain occasions on my Twitch channel.
You might think that the process is quite involved, but that is not the case. It only takes a couple of minutes to do so, and I will show you the process in this post. But,
What are the reasons to remove Nightbot from Twitch?
The primary reason to remove Nightbot from Twitch is to use alternative bots for moderation, as there are quite a few available for Twitch. If you are having issues with Nightbot, you can remove it and then add it again for troubleshooting.
Keep reading the post to know everything you need about removing Nightbot from Twitch.
Changing Twitch name color is a great way to gain a lot of audiences. Quickly check out our epic guide to find out how.
Things To Consider Before Removing Nightbot
I know that you have strong reasons to remove Nightbot from Twitch.
But keep in mind that Nightbot acts like a moderator on your Twitch channel and chat, so removing it has some consequences.
So you need to prepare in advance to face the consequences before removing Nightbot. Otherwise, things can get messy. So, your twitch following list is not working? Find out the cause and solutions to your problem real quick by checking our epic guide.
Let me point out some preliminary steps to removing Nightbot and how you can handle the situation:
- Removing Nightbot makes your chat prone to spam and unwanted links. Hence you need to ensure there are other human mods or an alternative moderator bot to keep things clean.
- If you remove Nightbot for troubleshooting purposes, ensure you enable it again before the next stream. Otherwise, your chat can get messy and might violate Twitch ToS (Terms of Service).
- If you’re going to add Nightbot again or have custom commands set up, do not disable or delete the Nightbot account. Parting the channel from Nightbot is good enough to disable Nightbot temporarily, and it doesn’t erase the previous data/settings. You can add the channel again later and instantly gain access to the custom commands.
- There’s no need to disable Nightbot if all you want is to use another bot with Twitch. Two or more bots can stay active together and usually play fine often. Be sure to go through the websites of the respective bots for any incompatibility issues.
- Removing Nightbot will disable the custom commands, so ensure your regulars (privileged users) and other mods know about it firsthand. Otherwise, they can get super confused.
Once you have covered these steps, you can proceed to remove Nightbot from Twitch.
How To Remove Nightbot From The Twitch Channel
You can remove Nightbot from your Twitch channel in three ways: by using the Nightbot command, the Nightbot dashboard, or deleting the Nightbot account completely.
It doesn’t matter which process you choose, as long as you follow any of them correctly.
So I’ll show both the processes here, and you can pick one according to your preference. Check out our separate post to fix adblock not working on twitch anymore on Chrome.
Here are the steps to remove Nightbot from the Twitch channel:
1. Use the Nightbot command
Nightbot commands are the primary way we interact with the bot. There are an extensive collection of commands that allow us to tweak every little setting that we can think of.
The good thing is that you can use the Nightbot commands to remove Nightbot itself from your Twitch channel.
The process is the same as you would execute other Nightbot commands. Twitch error code 6000, also referred to as unsupported browser error playback can occur due to an Outdated graphics card. Follow our separate post to know more about this error.
For brevity, I am mentioning all the steps here:
- Open Twitch in the desktop app or web browser.
- Login if you are not already.
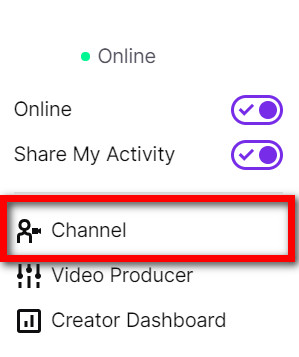
- Go to your channel by expanding the menu and selecting Channel.
- Expand the Stream Chat if it’s collapsed.
- Type the command: !nightbot part and press Enter.
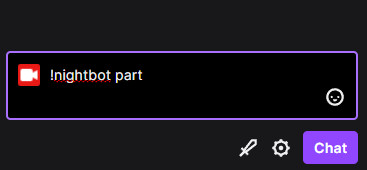
Now Nightbot should part itself from your channel.
But there are times the command might not work straight away. In that case, you can try the alternative command: !nightbot leave. Both commands perform the same action, so there is no need to get confused.
As Nightbot is no longer a part of your channel, you can safely unmod it by executing your Twitch chat’s /unmod nightbot command. 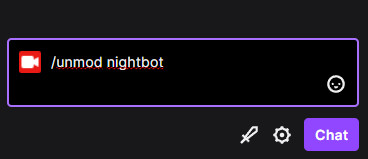
2. Use the Nightbot dashboard
Not feeling confident enough about Nightbot removal through command? Try the dashboard, then.
The Nightbot dashboard offers extensive options to manage and tweak the settings of Nightbot. Are you a fan of the Halo infinite game? Then you better check ping and enable fps counter in halo infinite real quick.
You can quickly log in to the dashboard and disable Nightbot for your Twitch channel.
Just follow the steps below:
- Go to the Nightbot website.
- Login to Nightbot using Twitch, and it should redirect you to the Dashboard.
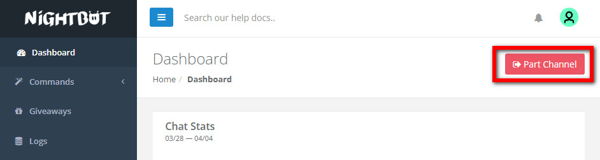
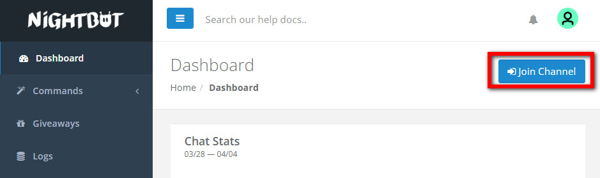
- Click on the red button that says Part Channel. It will show a notification saying ‘Nightbot is now leaving the channel,’ and the red Part Channel button will transform into a blue Join Channel button.
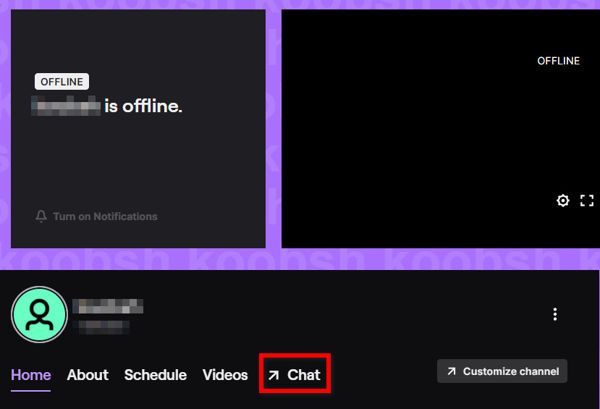
- Go to your Twitch channel chat.
- Type: /unmod nightbot and press Enter to remove mod privileges from Nightbot.
That’s how you remove Nightbot through the dashboard.
3. Delete the Nightbot account
Parting the channel from the dashboard does a good enough job to remove Nightbot from your channel.
But, Nightbot still remembers the Twitch connection, and if there’s a bug, it might still show up on your Twitch chat.
Hence, if you want 100% confidence that Nightbot is removed and you won’t be adding Nightbot again, it’s best to delete the Nightbot account. Enable or disable CD burning capability in Windows 11 with this registry hack our experts provided.
However, if you are troubleshooting Nightbot and want to add it again to your Twitch channel, don’t go through this method and stick to the above two.
Here are the steps to delete nightbot account:
- Go to the Nightbot website (www.nightbot.tv).
- Log in using your Twitch account if you aren’t already. You will get redirected to the Dashboard.
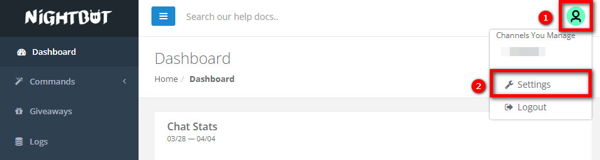
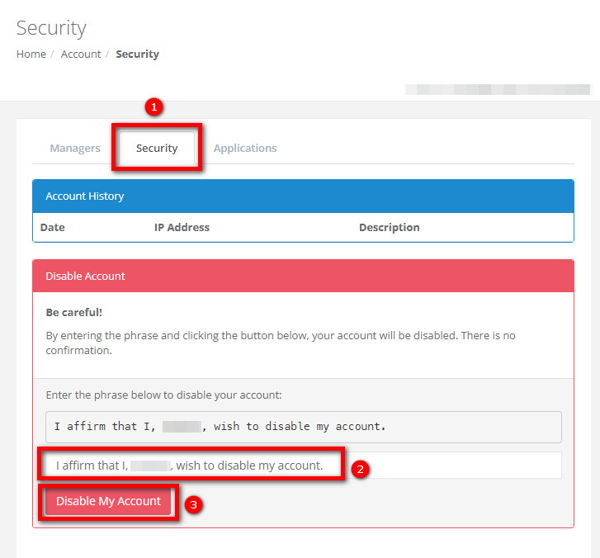
- Click on your avatar from the top-right and select Settings.
- Go to the Security tab. You will see a red Disable Account section.
- Type the phrase as it is (maintain the spaces and upper/lower case letters) in the box right below it.
- Click on the Disable My Account button.
At this point, all of your data associated with Twitch will get erased from Nightbot. You cannot log in again to bring back the old data and have to start fresh.
How To Add Nightbot To Twitch
Nightbot is a moderation bot that keeps your Twitch chat clean and removes unwanted links or spam messages.
Nightbot is quite popular both on Twitch and YouTube. The bot is quite flexible with the ability to add custom commands.
Adding Nightbot to your Twitch channel is just a matter of a couple of clicks.
So, start following the steps below:
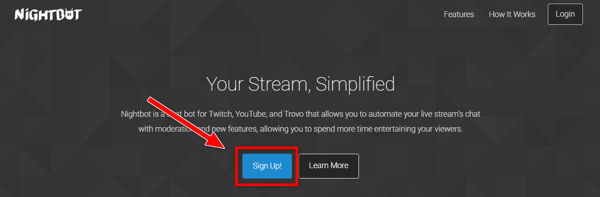
- Go to the official website of Nightbot.
- Click on the blue Sign Up button.
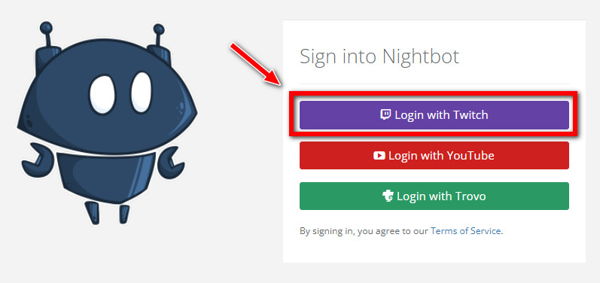
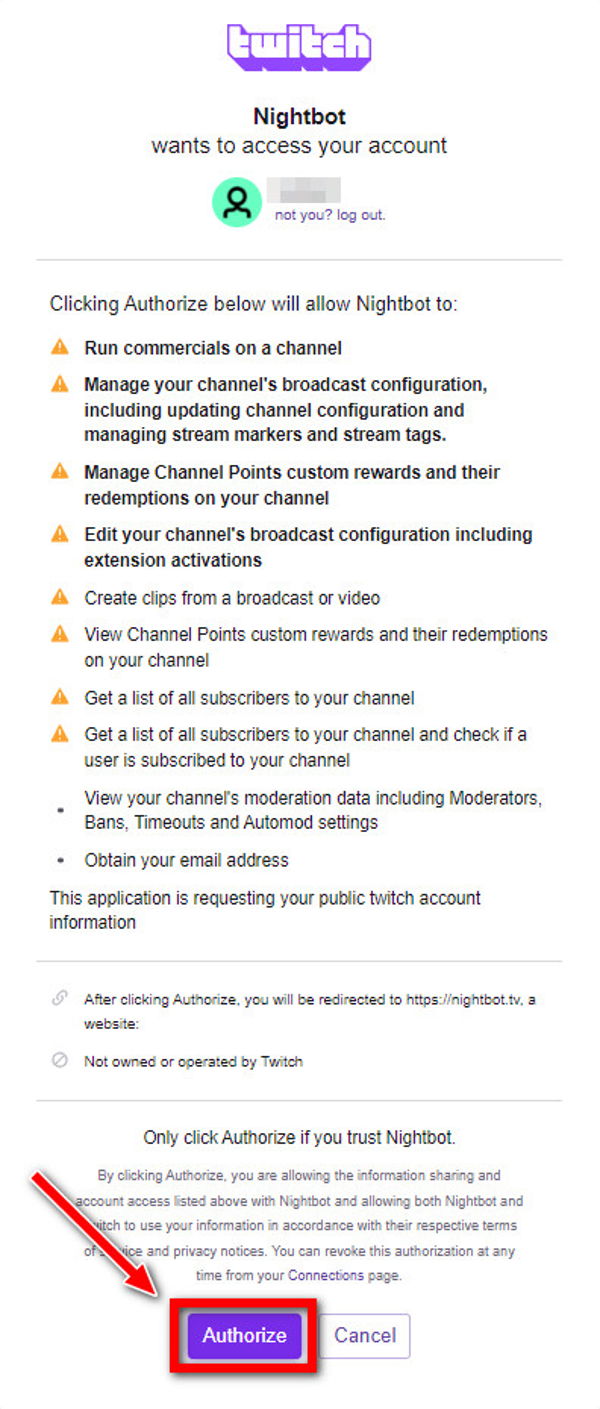
- Click the purple Login With Twitch button.
- Authorize Nightbot for Twitch. It will take you to the Nightbot dashboard.
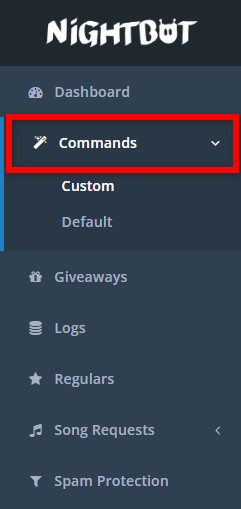
- Configure the default commands or add custom commands if you desire by clicking on Commands from the left menu. Read the Help Docs to learn more.
- Go back to Dashboard using the left bar.
- Click on the blue Join Channel button. It will bring a popup saying ‘Nightbot is now joining your channel’ and ask you to give mod privileges to Nightbot on Twitch.
- Go to your Twitch channel and open the Stream Chat.
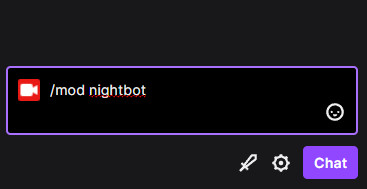
- Type: /mod nightbot and press Enter to appoint Nightbot as a moderator.
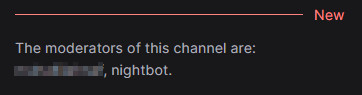
- Use the /mods command to bring up the list of mods and ensure Nightbot is indeed a moderator on your Twitch channel.
And that should be enough to add Nightbot to your Twitch channel. Next time you stream, you will see Nightbot in action, protecting your chat from spam.
How To Fix Nightbot Not Getting Removed From Twitch
If you followed any of the above methods to remove Nightbot from your channel, it should not appear again.
However, several users have reported that it still shows up in the Twitch chat, giving warning and time out to viewers.
You do not need to worry if that is the case for you, as you can go through some steps to fix the problem for good.
Below I have discussed some issues and their corresponding solutions:
Remove Nightbot through the dashboard
Try this method if Nightbot is still showing up despite removing it through command.
Though commands are the most common way to interact with the Nightbot, they are not guaranteed to work 100% of the time.
A quick drop in the internet connection or a slight spike in the Twitch chat server can cause Nightbot to miss receiving a command. Hence make sure to disable Nightbot from the Nightbot dashboard by clicking the Part Channel button.
If you’ve decided not to use Nightbot at all, disable the Nightbot account through Nightbot settings. Then unmod Nightbot in Twitch and re-login to Twitch to give it a reset. That should stop Nightbot from showing up again.
Remove the spam filters manually
If you have unmodded Nightbot, but the spam warnings are still popping up in the chat, remove the spam filters manually.
Disabling moderator privileges for Nightbot will not stop it from controlling your chat. As long as the spam filters are present in Nightbot settings, it will continue giving warnings to your viewers.
So you need to either disable Nightbot altogether from your channel using the above method or remove the spam filters.
To disable the spam filters manually, go to the Nightbot website and use the Spam Protection settings from the left menu to disable all of them. 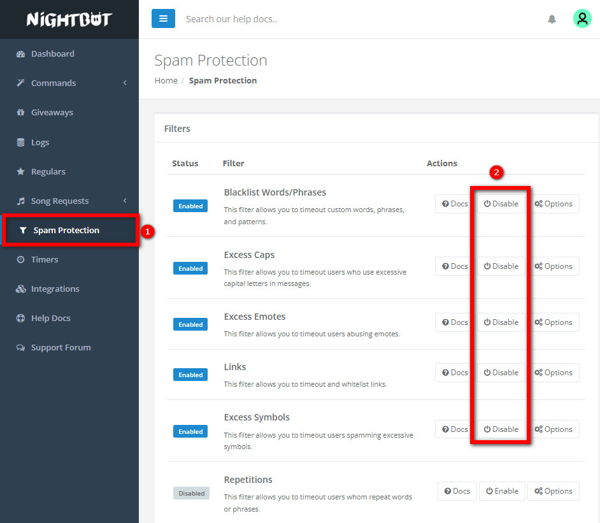
Final Thoughts
Nightbot is an essential tool for any Twitch streamer to keep the chat clean and maintain the ToS. It does an excellent job of detecting and removing spam and inappropriate links.
But you might want to switch to a new bot or remove Nightbot temporarily.
The good thing is that removing Nightbot is pretty straightforward and will take you less than a minute to accomplish the task.
However, you need to understand the takeaways of removing Nightbot as it’s a moderator of your Twitch chat.