Microsoft Teams is improving communication for remote teams and professionals by adding features like sharing screen content and video feeds.
Sharing the display content and video feeds from the device camera at the same time is changing virtual meetings.

In this article, I will cover all the methods to share videos and screens simultaneously, along with the benefits and drawbacks.
Tag Along!
In Microsoft Teams, you can share the desktop screen and videos simultaneously using the Share content menu. Click the Share content button, choose a Presenter mode, and select a screen or window to start sharing the video and screen content at the same time.
Teams allow users to share their video feeds along with other content. Three types of video feed presenter modes exist: Standout Mode, Side-by-side Mode, and Reporter Mode.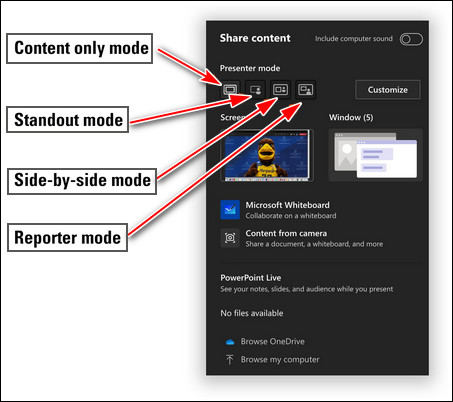
The Presenter Mode is only available on the Microsoft Teams desktop version. Besides, the presenter must turn on the video camera to activate the Presenter Modes. Otherwise, the Presenter options will be grayed out.
By default, the Presenter mode is set to Content only during a Teams meeting. The Content only mode is designed to share the content of your screen. However, the other three modes can share screen content and videos at a time.
Consider the following instructions to share your screen content and video feeds simultaneously in a Teams meeting.
Here are the steps to share display content and video at the same time:
- Launch the Teams desktop application on your device.
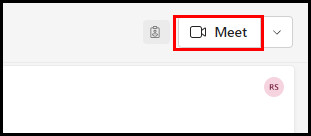
- Click the Meet button to start a new meeting.
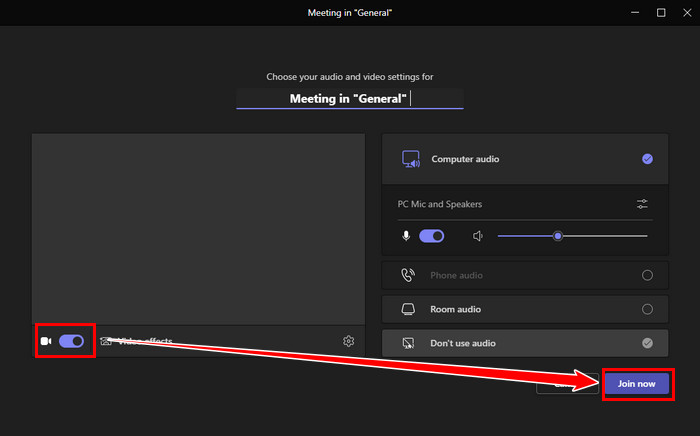
- Turn on the Camera and click Join now.
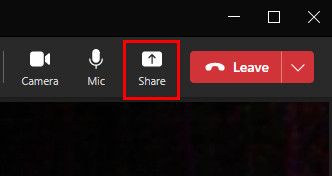
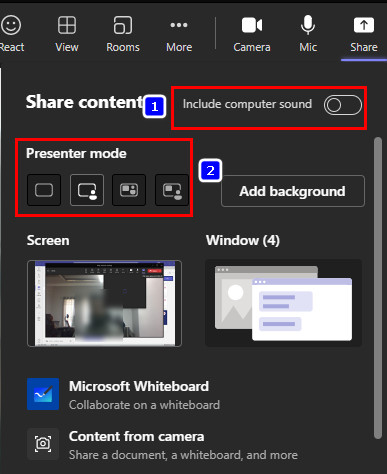
- Click the Share content button or press Ctrl + Shift + E to open Share content options.
- Toggle on the Include computer sound option to add sound during the presentation.
- Choose any of the following modes under the Presenter mode:
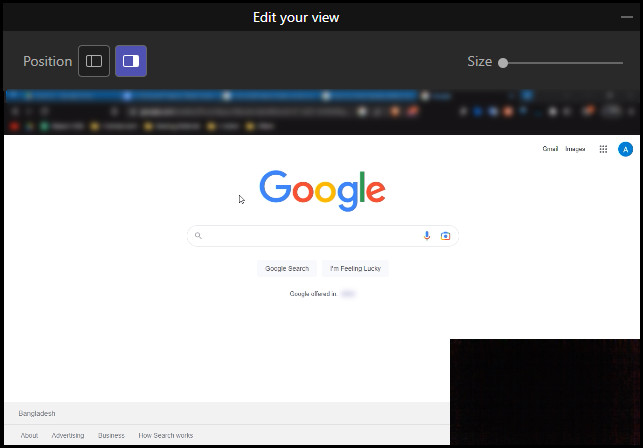
- Standout Mode.
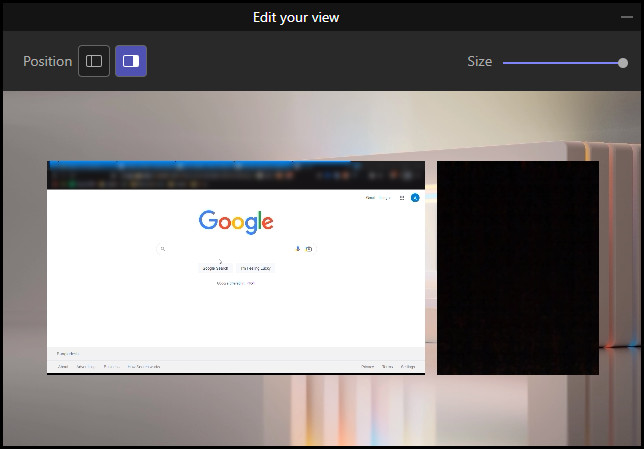
- Side-by-side Mode.
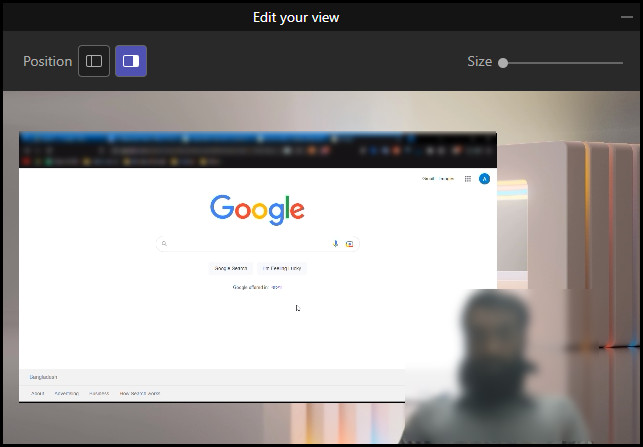
- Reporter Mode.
- Standout Mode.
- Choose Screen or Window to share it with your video feed.
- Adjust the Size and Position in the Edit your view window.

To turn off screen sharing, click the Stop sharing button or press the Ctrl + Shift + E keys together. And then, click the Leave button or press Ctrl + Shift + H keys to revoke the meeting.
Teams users can effortlessly request control or give control of the sharing screen during a Teams meeting.
Different Types of Presenter Modes When Sharing in a Teams Meeting
There are four types of Presenter modes available in Teams. Each presenter mode is designed for a particular task. For instance, the Reporter mode recreates the reporting style video. Consider the following discussion to understand the features of different Presenter modes.
Let’s have a look at different types of Presenter modes and which one to choose:
Content Only Mode
As the name suggests, this mode is used to share only content during a Teams meeting. If you don’t turn on the Camera permission before starting the session, the only option you will get is the Content only mode.
Standout Mode
This mode becomes visible when sharing content with a functioning active camera. Standout mode overlaps the video and automatically removes the background from the video feed.
You will see only the video feed at the bottom of the shared screen. The video feed may block some of the screen content in this mode. However, you can adjust the video size and position according to your need. Otherwise, go for other ways.
Side-by-side Mode
This mode uses a unique screen-wide background and places the screen content and video feed side by side. Besides, you can change the side view and adjust the video size from the Edit your view window.
Reporter Mode
Reported mode represents the anchoring of a live news broadcast template. The screen content and video feed are placed on a screen-wide background image in this mode.
Reporter mode also removes the background of the video and only presents the main subject in the meeting. Furthermore, you still get the opportunity to adjust the size and position of your video.
The Advantages and Drawbacks of Presenting Video and Content at the Same Time
The Presenter mode brings the option to share the screen content and video feeds at the same time. This feature helps to make the presentation more engaging and effective. However, this mode badly impacts the bandwidth; sometimes, the attendees experience a choppy video.
Besides, the Presenter mode is only available on the Teams desktop version. MS Teams share screen will not work on other devices.
Check the following discussion on the benefits and downsides of presenter mode:
Advantages
- Complete control over the screen content and video feeds. You can share only one window or app you need to share with the audience.
- The attendees can hear the instructions and see a step-by-step guide in this mode.
- The presenter can share the control of the screen with others.
- The audience will only see what you choose to share—reducing the risk of bringing inappropriate content to the foreground.
Drawbacks
- Presenter mode is not available for mobile and tablet. So you must use your laptop or desktop to present your screen and camera footage together.
- The top bars of the applications remain visible until pushed to full screen. These bars can decrease the attendee’s focus.
- You cannot entirely utilize the feature of the Presenter mode without using a second monitor. Use one monitor for presentation files and the other for personal apps and files.
- As you share your screen and video at a time, the system needs to use a ton of bandwidth. High bandwidth usage can cause the attendees to face delayed, slow, or choppy video during the meeting. Try disabling the incoming videos to improve speed.
Once you are done sharing the screen and video feeds, use shortcuts to stop sharing on Teams.
If you want to share multiple screens during a Teams meeting, use the split screen feature to arrange the apps and documents you want to share by pressing the Windows + Left or Right arrow keys simultaneously. And then share the screens with the meeting participants.
The split screen feature is the easy-to-use method for sharing multiple screens in a Teams meeting. Check out another detailed post to see multiple screens on Microsoft Teams for more workarounds.
Consider the subsequent instructions to show multiple screens in a Teams meeting:
- Open the files or applications you want to share.
- Select any file or app and press Windows + Left or Right arrow keys to split the screen. Adjust until you get a satisfactory result.
- Launch Teams and create a meeting.
- Click the Share content button and choose Content only or Standout mode.
If you choose Standout mode, your video feeds will also show up in the meeting along with the split screens. Contrarily, selecting the Content only mode will share only the split screens with the meeting attendees.
Frequently Asked Questions
Which applications can share multiple screens simultaneously?
Teams can hardly manage to share multiple screens at a time. However, using some workaround, Teams users can accomplish that.
How do I share my screen with audio and video in Microsoft Teams?
Start a meeting and toggle on the Include computer sound option to share your screen with audio and video in Teams. Then choose Share > Screen or Window to share your screen.
Can participants see me when I share my screen in Teams?
If you share your screen in a meeting on the Teams desktop application using the Presenter mode, the participants can see the screen and your video feeds. In Presenter mode, choose between the Standout Mode, Side-by-side Mode, or Reporter Mod.
Wrap Up
In the Share content menu, the Presenter mode has multiple unique options to share your display content and videos from the system camera at a time.
Besides, users can also share multiple screens simultaneously under some circumstances. For instance, if you need to share two different files or apps, you can still share them at once in Teams meetings.
Did this article assist you in sharing your screen and videos during a Teams meeting? For further assistance, leave a comment below.