The Internal Exception Connection Reset is a common error among people who are playing Minecraft Realms. And the issue hasn’t been fixed officially yet. Just go to a subreddit and look at all the people facing the same problem.
Most of the time, internet connectivity is to blame for the error. Since no official patches exist, users have to rely on the workarounds found by other users online.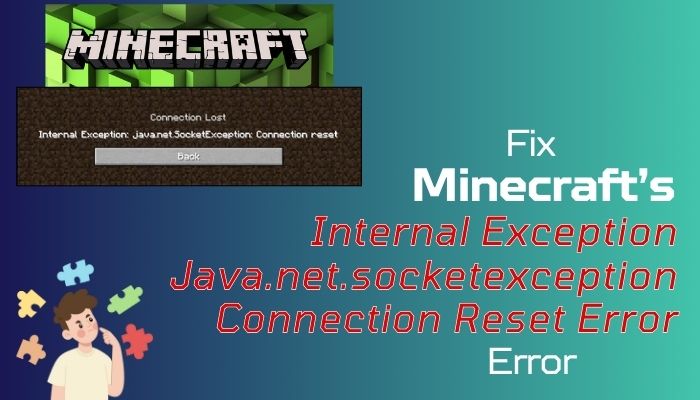
To help you fix it, I have rounded out the solutions to fix this error on Minecraft. So, let’s look at them.
What is the Java.net.socketexception Connection Reset Error on Minecraft?
The Java.net.socketexception error means the connection between the Minecraft client and the server is not working. It happens when there is a problem with your internet connection. Also, a bad DNS server or its corrupted cache can give rise to it.
When reaching out to Mojang, they state that this can happen due to your IP Address and DNS server. Again, fixing it helps out some users but not everyone.
There is also the case when running an older Minecraft version runs into this error. Specifically, the error happens if you are on version 1.7 and below.
So basically, there is not a simple fix that will magically solve it. I have compiled all the workarounds that have solved the error for most people right at the top. Go through each solution and verify the one that works best for you.
How to Fix Internal Exception Java.net.socketexception Connection Reset
To fix the internal exception connection reset error, connect your PC to a VPN and try running Minecraft. You can also flush the DNS cache, remove any installation of Hamachi VPN, switch to a different network, and run Minecraft with the latest version of its launcher installed.
That’s just the jist of it. We will explore every single fix in great detail in their respective sections below.
These are the methods to fix Minecraft’s Internal Exception Connection Reset Error:
1. Use a VPN
Many users have fixed this annoying problem by just connecting to a VPN. Even if you use a free VPN, that will work. Just connect to a VPN service and relaunch the Minecraft launcher.
There are a lot of free VPNs you can use. You can use literally anything, and this should work. If you purchase a paid service such as Express or Nord VPN, that will probably solve the extremely slow internet speeds that come with a free service.
2. Restart your Router
If your router is causing interference, then that can also give out the same error. In that case, power down the router and unplug it. Wait for a few minutes before you turn it back on.
We are basically performing power cycling on your router. You can also do it on other devices, such as your computer. It clears the memory of an electronic device so that any error building up will no longer be present the next time it reboots.
So re-connect the router and open Minecraft. See if this fixes the connection reset error.
3. Flush DNS Cache
So, if the router is working okay, then maybe your DNS server is facing difficulties connecting to Mojang’s server. The DNS cache holds addresses visited from your PC in the past. When the cache becomes unusable by the game client, you get connectivity errors in the game client.
Clearing the DNS cache helps when multiplayer games face latency issues. So, this, in theory, should also work with Minecraft Realms and fix the Java connection reset on Windows and Mac.
We have shown how you can clear the DNS cache for both Windows and Mac.
Follow these steps to flush the DNS Cache on Windows 10 and 11:
- Search for cmd from Windows Search. Click on Open as Administrator.
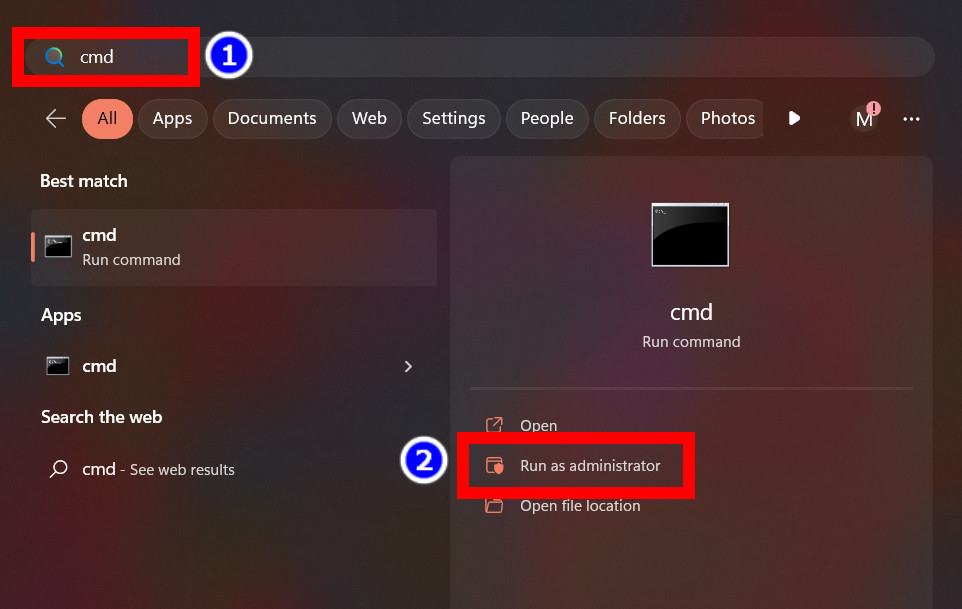
- Type in the following commands and press Enter each time.
ipconfig /flushdns
ipconfig /registerdns
ipconfig /release
ipconfig /renew
netsh winsock reset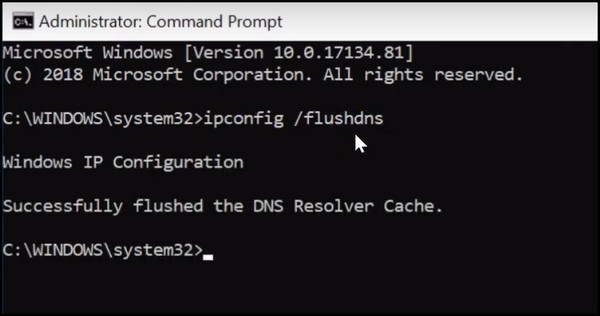 These commands will clear your DNS cache and assign a new IP Address for your PC. Now over to the steps for Mac OS.
These are the steps to flush the DNS Cache on Mac OS:
- Press Command plus Space bar and type Terminal. Open it from the results.
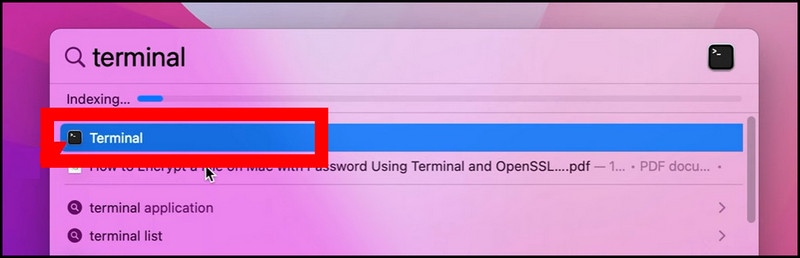
- Type the following commands and press Enter:
Sudo dscacheutil -flushcache; sudo killall -HUP mDNSResponder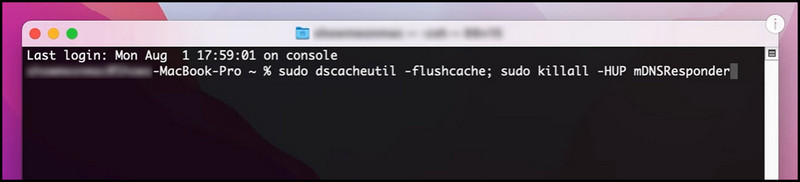 You will need to enter your Mac’s password. Enter that, and the DNS cache will be deleted.
Once everything finishes, go ahead and restart the PC or Mac. Then launch Minecraft and see if the connection error appears.
4. Uninstall Hamachi VPN
Many users have created their own private Minecraft server. That would require installing Hamachi VPN. But the problem is the app can tweak some Network settings on your PC, which can give rise to the internal exception error.
The fix involves removing Hamachi VPN installed files and rolling back the network settings. This is important as simply uninstalling would not undo the network configurations. Then you would get the same error again.
Note: If you do not have installed Hamachi VPN, you can just skip this step.
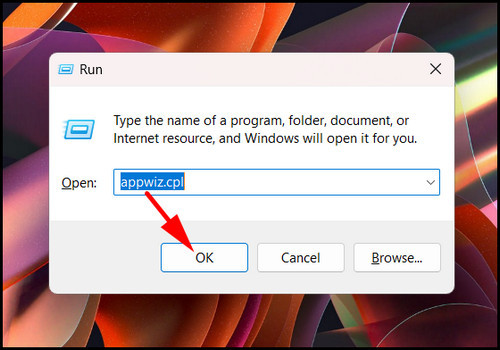
Here are the methods to uninstall Hamachi VPN from your PC:
- Press Win + R, type in appwiz.cpl, and press Ok.
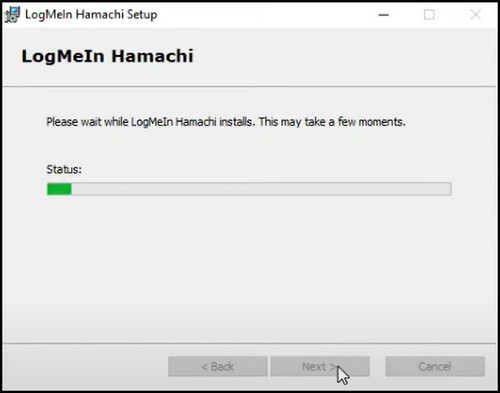
- Right-click on Hamachi VPN and click on Uninstall.
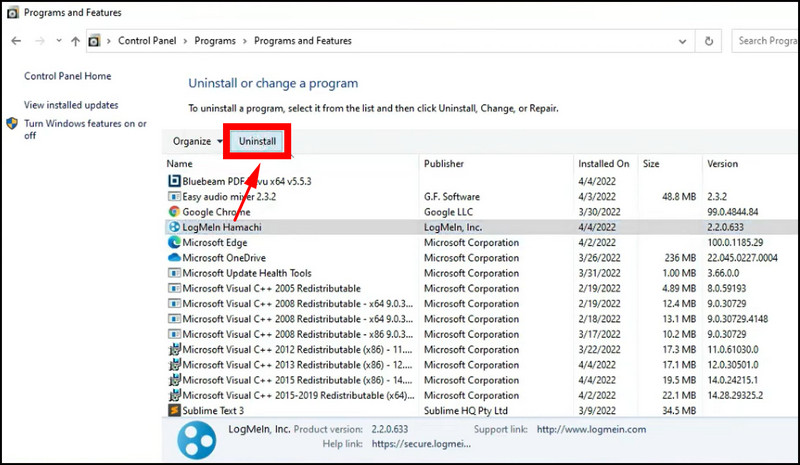
- Follow the prompts on-screen and complete the installation.
Now we need to undo some of the configurations changed by the app
- Search cmd from the Start Menu and open it as Administrator.
- Type in the commands sequentially and press Enter after each one.
netsh interface tcp show global
netsh interface tcp set global rss=enabled- If Window Auto Tuning is Disabled, type in:
netsh interface tcp set global autotuninglevel=normalNow open up a web browser and see if the internet connection remains stable. Then check if you can successfully load up Minecraft and join your friends.
5. Allow Minecraft from Windows Firewall
It is also a good idea to check if Windows Firewall is blocking Minecraft Realms when it tries to access its server. Normally it does not do that, but you need to double-check if that’s the case.
When you install Minecraft, Windows Firewall asks for your permission to allow the app to access the internet. If you select no, Minecraft will not be able to connect to a web server.
Here are the steps to allow Minecraft on Windows Firewall:
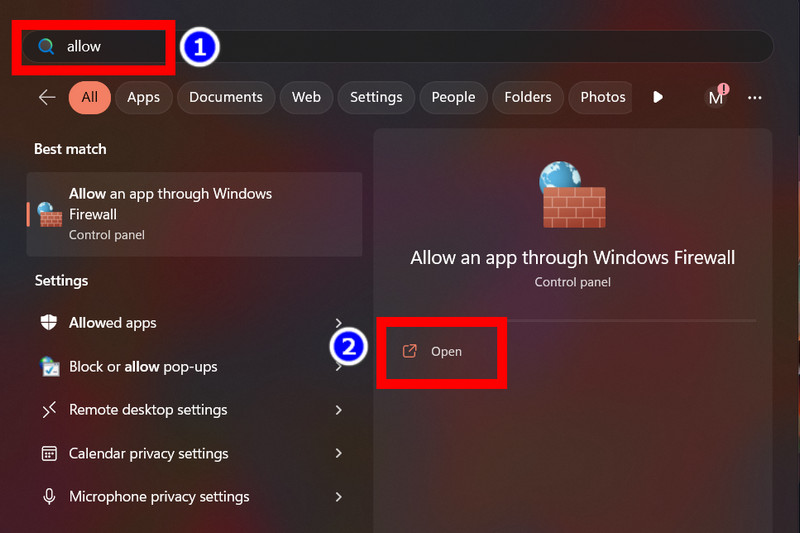
- Search for Allow Programs from the Start Menu. Open the Windows Firewall option that shows up in the results.
- Scroll down and find Java Platform SE Binary from the list.
- Ensure it is allowed in the Public and Private fields. If not, mark the checkboxes next to it.
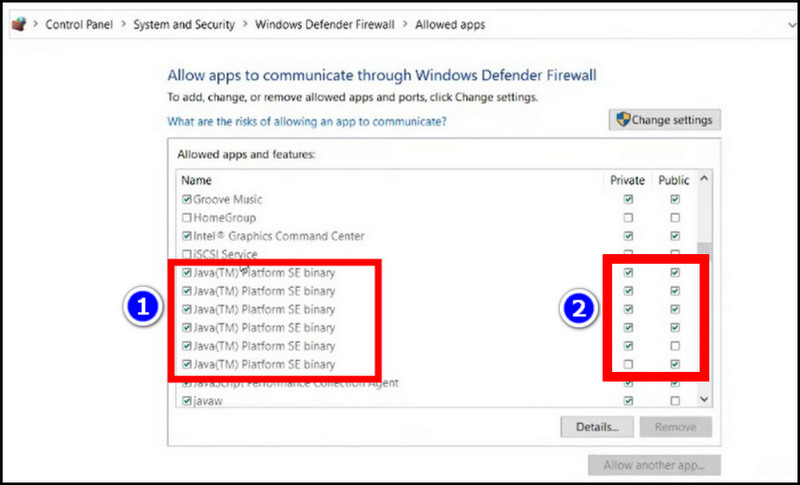
If there is no entry for Java Platform SE Binary, then you have to add these manually.
- Press the Change button from the same Firewall window as before.
- Click on Allow another app and Browse.
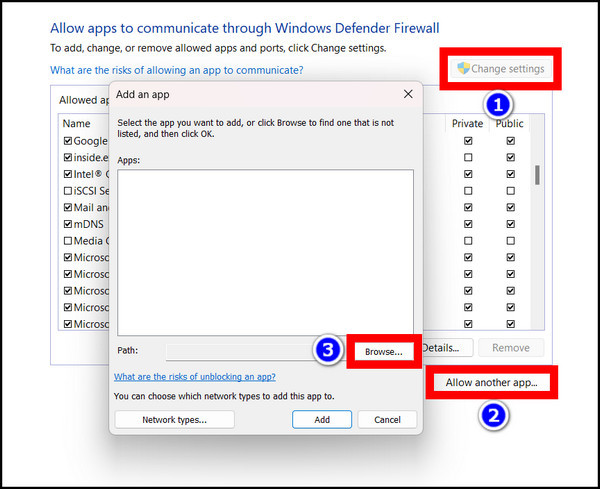
- Navigate to C:\Program Files (x86)\Minecraft\runtime\java-runtime-alpha\windows-x64\java-runtime-alpha\bin.
- Select javaw.exe and press Ok.
- Ensure it has access to the Public and Private networks.
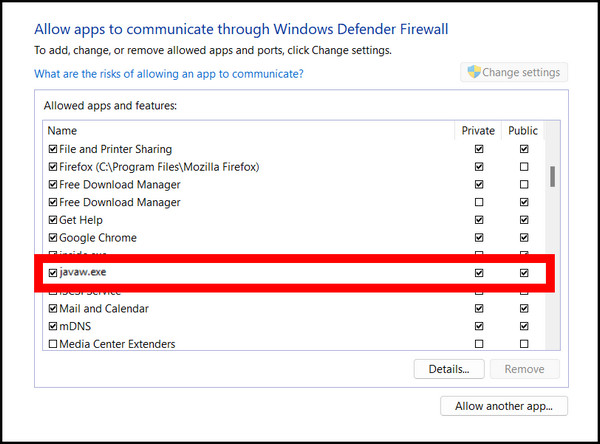
Restarting the computer is not necessary at this point. Open Minecraft and see if it can join the servers successfully.
6. Switch to a Different Network
Many users have tried this fix, and it has worked for them. All they did was switch from a wired or Wi-Fi connection to a mobile hotspot. It makes the Minecraft client make server requests from a different path.
So, when there is no obstruction, the connection is made successfully, and you do not get any errors.
7. Uninstall Optifine
Minecraft add-ons such as OptiFine can also cause the connection Reset error. Even though this is highly uncommon, again some users were able to fix the error by removing OptiFine.
If you do not use it, you do not need to worry about it. But if you use it on TLauncher, go ahead and remove it. See how that fares for your system.
Follow these steps to remove OptiFine from your system:
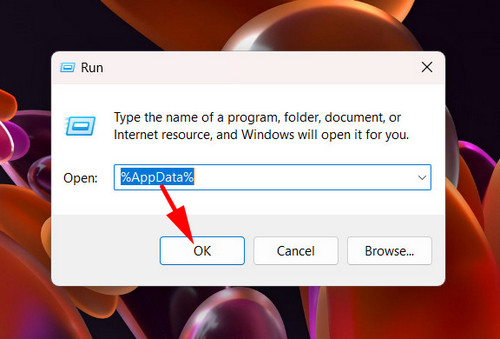
- Press Win + R to open Run. Here type in %appdata% and press the Ok button.
- Navigate to .minecraft > Versions.
- Select all Optifine entries and press the Del key.
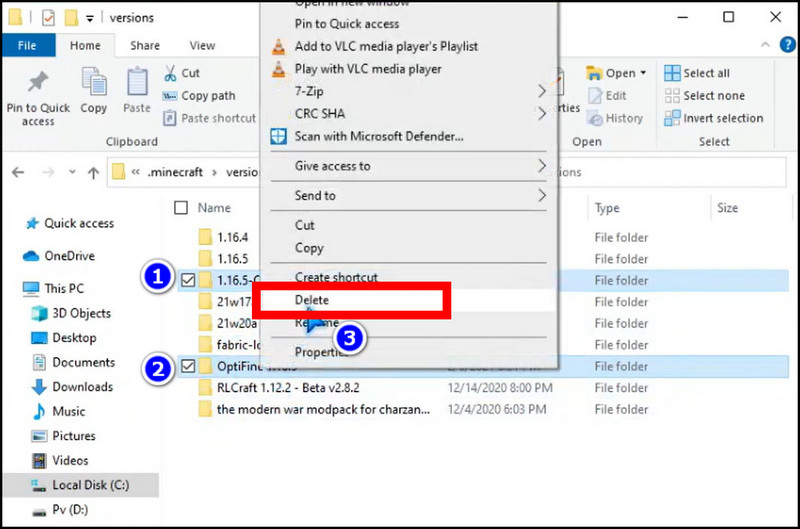
Now launch Minecraft again and see if it solves this problem.
8. Decrease Render Distance
You can try reducing the visual elements in-game to see if that is something causing the problem. If your visuals are bumped up, that can take time to load the in-game assets. Even though the error we are troubleshooting is related to a network problem, larger game assets can also cause problems in Minecraft.
There are a lot of visual effects you can tweak on Minecraft. You can change textures and resolutions to make the game more playable if it lags. To do this, go to the pause menu and navigate to Options > Video Settings to make these changes.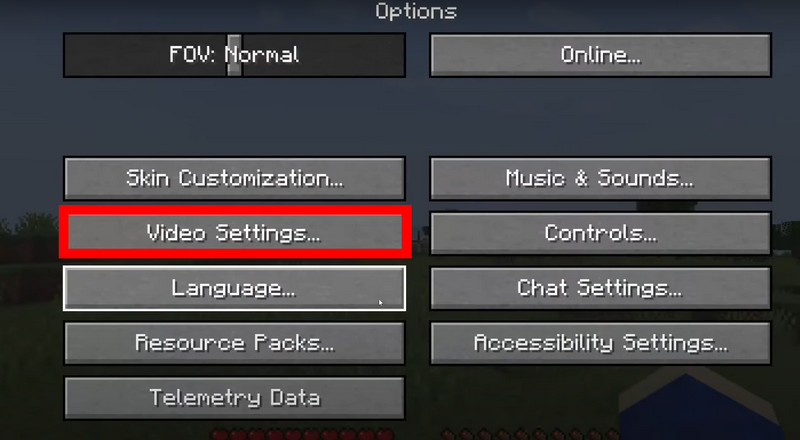
Mainly look to change the Render Distance and set it to a value of 8 chunks or below. That way, Minecraft should take less time to load, and notice how that affects the error that we are dealing with.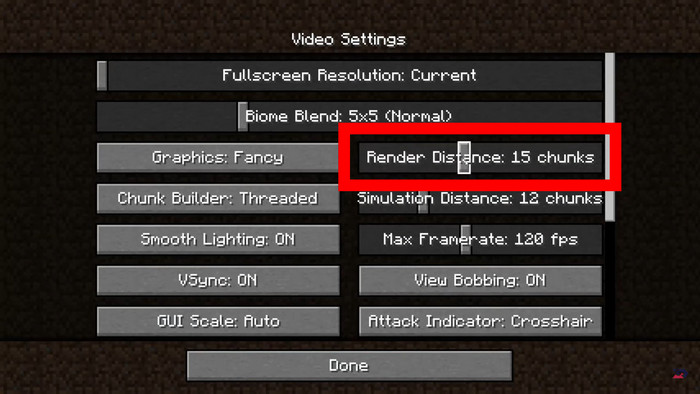
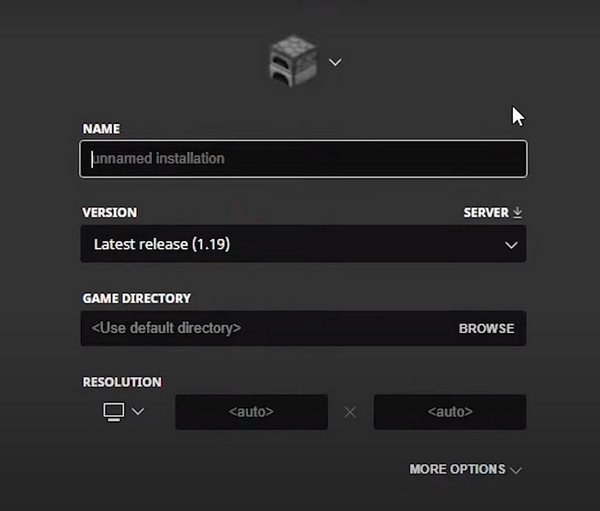
9. Create New Minecraft Installation
Sometimes your existing installed version of Minecraft has some bugs, or even worse, the installed files are corrupted. Then the game will not launch.
So, we will create a separate installation and then try to join a realm. Most existing errors should disappear right away this way.
These are the steps to create a new Minecraft installation:
- Open the Minecraft Launcher.
- Click on Installations > New Installation.
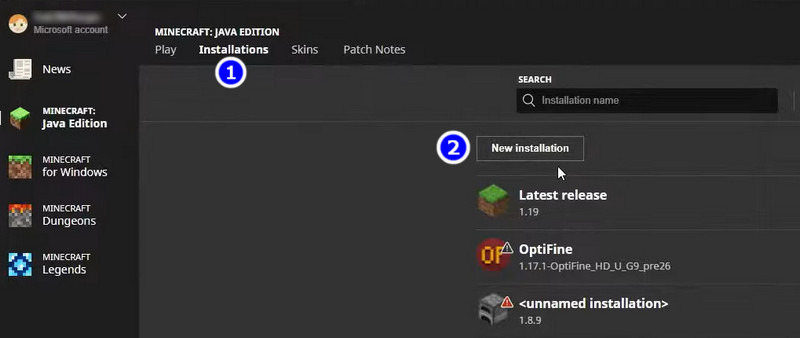
- Enter a name for this iteration.
- Select the latest version available to play.
- Click on Ok.
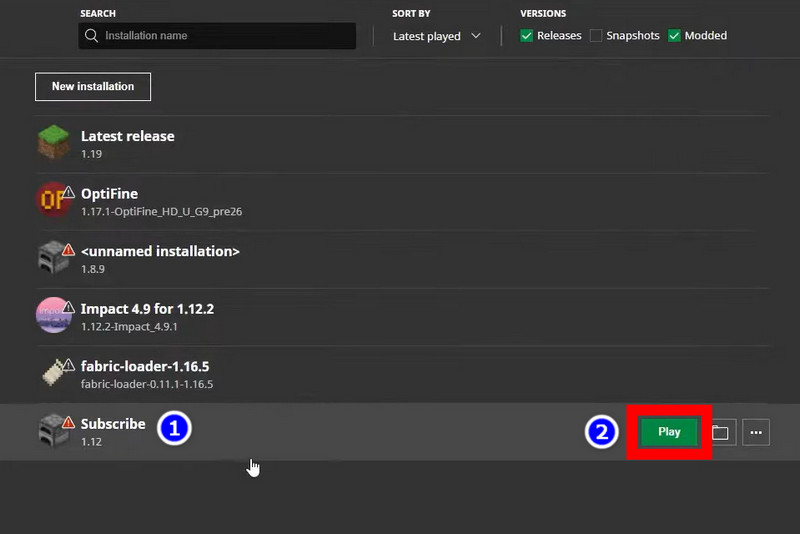
- Select the newly created game from the Installed versions screen and hit Play.
If you face the same error as earlier, try selecting a different version. Sometimes a specific version has bugs ironed out by newer updates.
10. Update Minecraft and Java
Finally, keep the Minecraft Launcher and Java runtime up to date. Mojang recommends that you always keep the latest iteration of Java when playing Minecraft. The Java updates are tiny, so they will not take a significant time to update.
Minecraft Launcher automatically downloads the latest versions for you. Then, you just need to select them from the launcher screen and hit Play.
As for Java, you always have the updater tool running in the background. So, when an update arrives, it will notify you. Then click on it, and Java will start updating to the latest version.
Frequently Asked Questions
Why does my Minecraft keep losing connection?
If you have a spotty internet connection, that can terminate any connections Minecraft is making with the server. You also need to check if a Firewall does not block Minecraft on your computer.
How to fix the internal exception connection reset error on Minecraft with Aternos?
First, ensure that your internet is working properly. Next, flush the DNS cache and assign the Google DNS 8.8.8.8 on your PC. If this does not work out, open a support ticket on the Aternos website and let them know of your issue.
How to fix the internal exception connection reset error on Minecraft with Hypixel?
To fix the connection reset error on Hypixel, restart your router and try flushing the DNS cache. Also, try changing the game version and lowering the in-game settings. If this does not work out for you, contact the Hypixel support team.
Next Steps
So, did you fix the Minecraft connection reset error? If yes, let others know which method worked for you in the comments below. It can help others resolve their Minecraft problems.
If nothing works out for you, do contact the Mojang Support team. Let them know what you have tried, and also include the version of Minecraft that you are running. At this point, we have eliminated almost everything that can go wrong, so only Minecraft seems to be broken. So let’s hope the developers put out a patch and fix it.
That’s it, then. Hope this article helped you out.