Imagine the thrill of jumping into MW2 or Warzone 2, only to be met with the infuriating Hueneme Negev Error. Disappointing right?
It’s like a glitch that robs you of your victory, leaving you questioning the integrity of your gaming experience.
The frustration is real, but so are the solutions. In this article, I’ll discuss Hueneme Negev’s error in MW2 & Warzone 2 and provide actionable steps to solve it.
So, without delay, let’s get into the article and fix the Hueneme Negev Error.
Why Does the Hueneme Negev Error Occurs?
The Hueneme Negev error happens for internet connection problems, faulty network settings, or unstable DNS servers. Also, outdated network drivers could raise this issue. Additionally, you may face an error when the Activision Server is down or under maintenance.
That said, what is the Hueneme Negev Error?
The Hueneme Negev error is a network connection issue that Modern Warfare 2 and Warzone 2 players encounter when attempting to join a multiplayer game. The error message states, “Unable to connect to host. HUENEME – NEGEV.”
Hueneme Negev Error in MW2 is a disruptive technical glitch that triggers game freezes and crashes. This error is commonly associated with network instability or server difficulties, significantly hindering players’ smooth and enjoyable gaming experience.
Here are the potential causes for Hueneme Negev’s error in MW2 and Warzone 2:
- Server Connectivity Issues: Unsteady server communication can trigger the Hueneme Negev Error, causing your game to falter due to poor connection between you and the game’s server.
- Network Instability or Interruptions: Unstable internet connections, whether due to weak signals or temporary disruptions, can catalyze encountering the Hueneme Negev Error in MW2 and Warzone 2.
- Corrupted Game Files: When files are missing or corrupted among your game files, it can lead to the error of Hueneme Negev in MW2 & Warzone 2.
- Software Conflicts or Outdated Drivers: Outdated graphics drivers or conflicts with other software running on your system can trigger the Hueneme Negev Error.
The origin of the Hueneme Negev Error can be traced back to connectivity issues. If your network experiences even a minor hiccup, it can lead to the sudden appearance of this error. So let’s now fix this issue.
How to Fix Hueneme Negev Error in MW2 & Warzone 2 For PC
To fix the Hueneme Negev error in MW2 and Warzone 2, you need to check your internet connection correctly and, if necessary, restart or update your network setup. Also, using the Google DNS server can solve the particular error in Modern Warfare 2 & Warzone 2.
In essence, the Hueneme Negev error caused the connectivity issue. Before you start robust troubleshooting, you need to try these common fixes.
- Restart the MW2 Game: Just a simple restart can solve your issues. So, turn off the game and launcher properly, restart the game, and check whether the problem is resolved.
- Check the Official Game Server: When facing the Hueneme Negev Error, first check the MW2 game server. The server might be under maintenance and causing this issue. Wait patiently for the server to complete its maintenance.
- Check Connection Speed and Stability: Modern Warfare 2 and Warzone 2 is a resourceful game that requires a stable internet connection. Therefore, check the connection speed and test the stability, which is crucial. In case you find a connection issue, contact your ISP.
- Try a Different Router: Maybe the connection is okay, but your router can’t provide a stable connection. You can test with a different router to check the stability of the connection.
After trying all this and your issue persists, it’s time to start advanced troubleshooting.
Here are the methods to fix Hueneme Negev error in MW2 & Warzone 2 for PC:
1. Update the Network Driver
Outdated or incompatible network drivers can lead to connectivity issues. Updating your network driver ensures compatibility and can help in mitigating the error.
Follow the steps below to update your network driver:
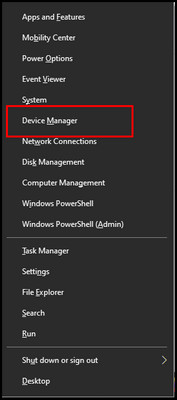
- Press Windows and X keys together and choose Device Manager.
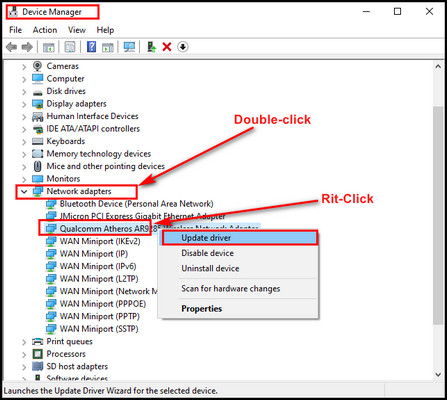
- Locate and double-click on the Network adapters to expand it.
- Right-click on the adapter that you are using and select the Update driver.
- Select Search automatically for drivers from the prompt window.
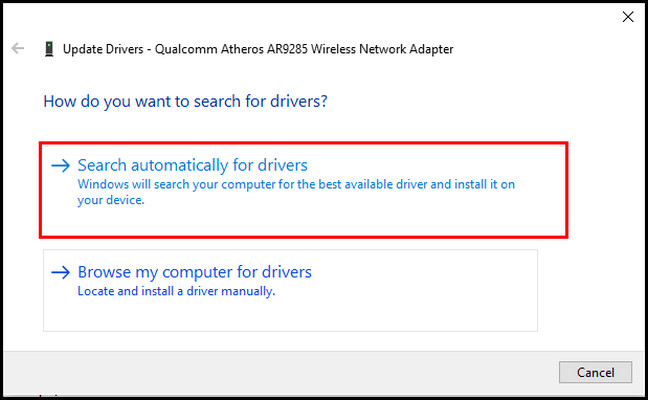
Follow the on-screen instruction afterward and wait for some time to let it update the driver. After the update completes, restart your PC for the update to perform.
2. Use Google DNS Server
Switching to Google’s DNS servers can enhance connection stability and resolve errors by providing a more reliable pathway to the game servers.
Here are the steps to use the Google DNS server:
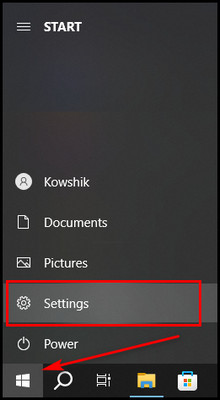
- Press the Win + X keys and choose Settings (gear icon).
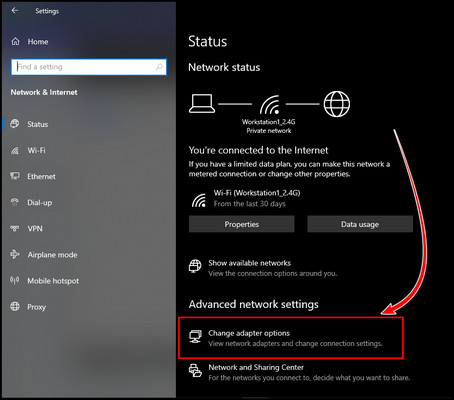
- Select Network & Internet and pick Change adapter options.
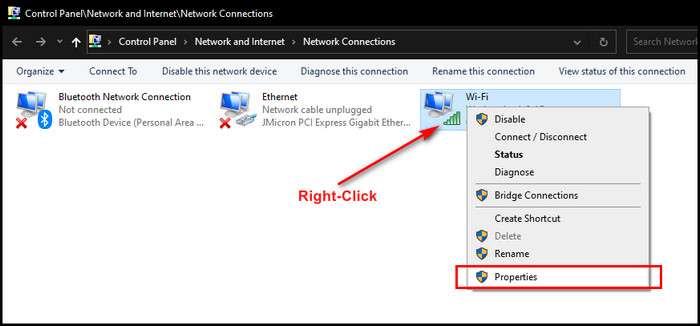
- Right-click on the current network (green signal) and pick Properties.
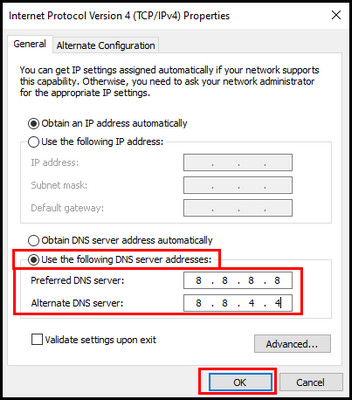
- Click twice on the Internet Protocol Version 4 (TCP/IPv4).
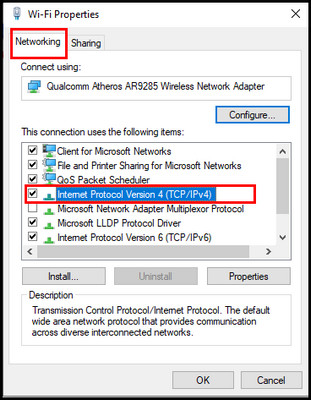
- Put a mark on the Use the following DNS server address and type
- Preferred DNS server: 8.8.8.8
- Alternate DNS server: 8.8.4.4
- Click OK.
After setting up the DNS server now, restart your PC. Google DNS server boosts your connection speed, and as the Hueneme Negev mainly causes the connectivity issue, it’s one of the effective solutions.
3. Disable Teredo
Teredo is a tunneling protocol that might cause conflicts with online gaming. Turning it off through Command Prompt can eliminate the error caused by its interference.
Follow the below steps to disable Teredo with the control panel:
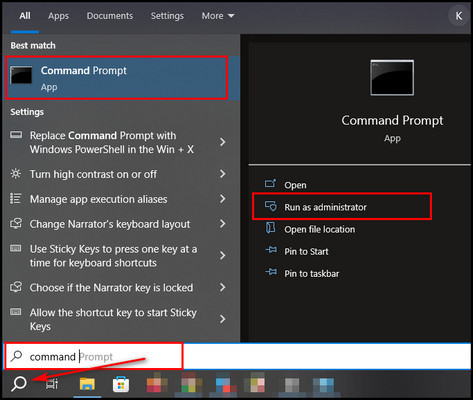
- Click on the Windows Search icon and type command prompt.
- Click on Run as administration to start Command Prompt as administrator mode.
- Put this command – netsh interface teredo set state disabled and press Enter.
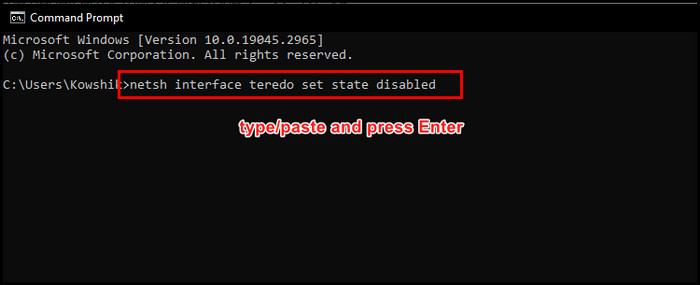
After completing the process, restart your PC for the fix to take effect.
4. Change the Account Address
Switching to a different account address within the game could address account-specific issues causing the error.
Follow the below steps to change your account address in MW2 or Warzone 2:
- Go to the Activision official page.
- Select the LOGIN button from the upper-right corner.
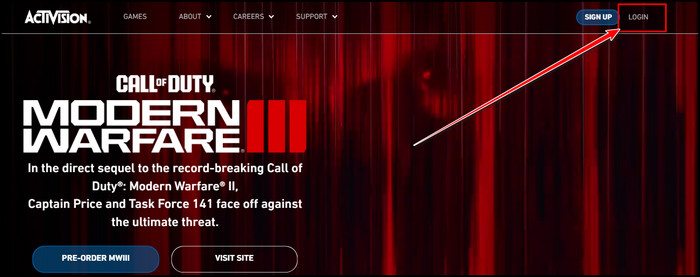
- Put your credentials in and log in to the account.
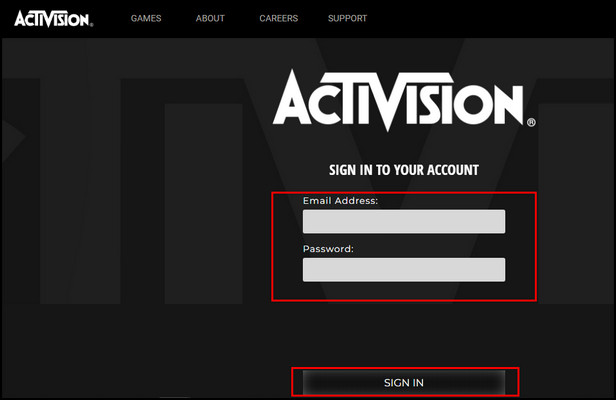
- Click on the PROFILE button and select BASIC INFO.
- Select the EDIT button from the ADDRESS and change your address.
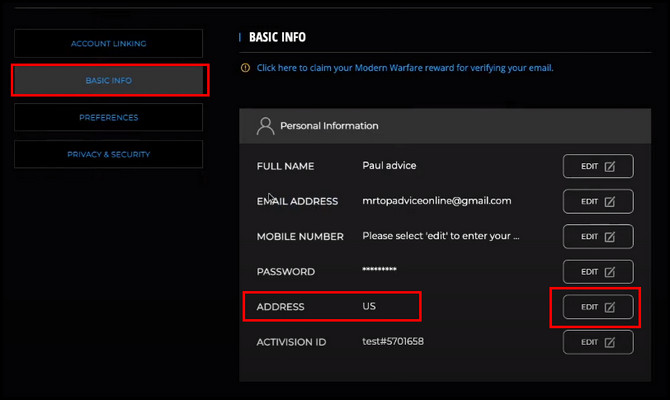
After you change the game now, launch the game to check for the issue.
5. Use a VPN
Employing a Virtual Private Network (VPN) can help you avoid network restrictions or resolve temporary connection problems, offering an alternative way to the game servers.
You can pick any reputed VPN that you like. However, before connecting to VPN, log out from the game launcher. For example, if you are using Steam to play MW2 or Warzone 2, log out from Steam first > connect the VPN > and log in to Steam.
Now initiate MW2 or Warzone 2 and check for the issue. If the problem remains, then you need to verify your game files.
6. Verify Game Files and Update the Game
You must verify the game files if your MW2 or Warzone 2 keeps showing Hueneme Negev error. Also, in case an update is available, you need to update the game too.
Confirm the integrity of your game files via the game platform, such as Steam, to pinpoint and rectify any potential file corruption. This method assures the preservation of the game’s crucial files, resulting in a marked enhancement of shader optimization.
Follow the below steps to verify your MW2 or Warzone 2 game files on Steam:
- Launch Steam and select Library from the top bar.
- Right-click on the Call of Duty: Modern Warfare 2 or Warzone 2 and pick Properties.
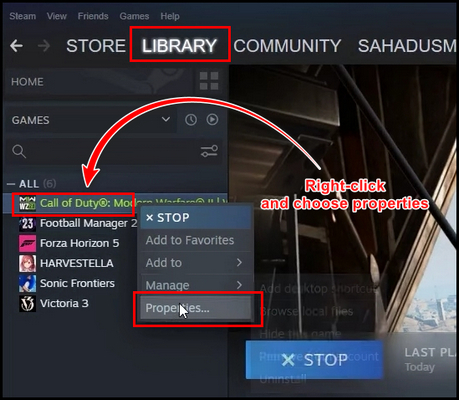
- Choose the LOCAL FILES tab and select VERIFY INTEGRITY OF GAME FILES.
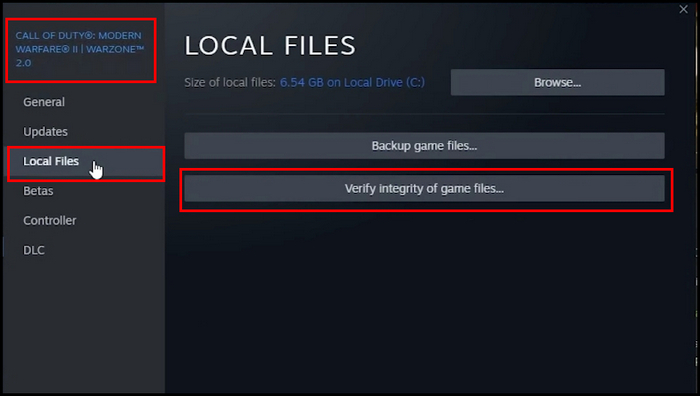
Wait patiently; Steam will take some time to inspect the game files.
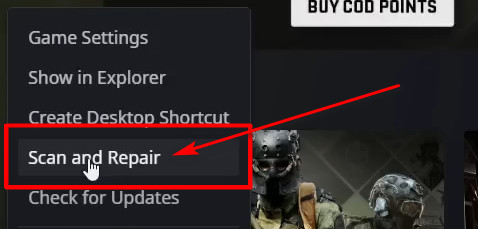
In case you use Battle.net to run MW2 or Warzone 2, then here are the steps to verify your game files:
- Launch Battle.net and navigate to the game Library.
- Find out Call of Duty: Modern Warfare 2 or Warzone 2, select the gear icon, and choose Scan and Repair.
Applying these troubleshooting methods, you’re taking proactive steps towards a smoother MW2 gaming experience.
Experiment with these solutions to identify the one that effectively resolves the Hueneme Negev error and returns to the action-packed world of Modern Warfare 2 or Warzone 2.
How to Fix Hueneme Negev Error in PS5 & Xbox
To fix the Hueneme Negev Error of MW2 or Warzone 2 on PS5 & Xbox, you need to restart your console. To restart, turn off the console, wait for five minutes, and turn it on again. Also, check if your Xbox or PS5 console is getting a proper connection.
Here are the methods to solve the Hueneme Negev error on PS5 & Xbox:
1. Restart Your console
Turn off your console correctly, wait for a couple of minutes, and then turn on the console. Many times a proper restart resolves many buggy situations in the game.
2. Update Your Console
Check for any pending updates on your PS5 or Xbox console. If there is an update available, then give the update. After updating the console, run Modern Warfare 2 or Warzone 2 and check for the issue.
3. Reconnect Network Connection
You can disconnect the Wi-Fi from the console settings and reconnect it to solve the Hueneme Negev error. Follow the below methods to complete the procedure.
- Go to your console’s network settings.
- Remove the current Wi–Fi.
- Restart the console and connect your console to the Wi–Fi again.
Also, you can connect your console with a LAN cable, which ensures a stable connection.
4. Clear Cache
You can clear the cache files of your console to solve the Hueneme Neveg error. To remove the cache file on PS5, follow the below steps.
- Turn off PS5.
- Hold down the power button for 5 to 7 seconds until there is a second beep to initiate Safe Mode.
- Find the Rebuild Database and Clear Cache option.
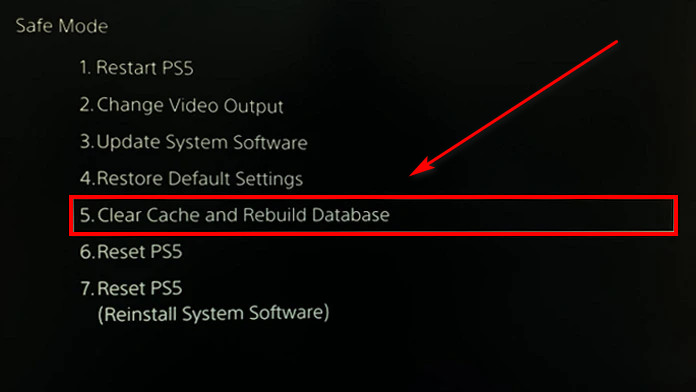
And from there, you can clear the cache file. (you can apply this on your PS4 too)
Apply these methods on your PS4, PS5, or Xbox Series X/S to solve the Hueneme Negev error on MW2 or Warzone 2.
Frequently Asked Questions
What is the error message in Hueneme Negev?
The Hueneme Negev error message is Unable to connect to the host. HUENEME – NEGEV. The error often indicates a connection issue between your system and the MW2 servers and causes lag, disconnections, or game freezes.
Are there any known long-term solutions to prevent the Hueneme Neveg error?
Maintaining updated drivers, ensuring a stable network connection, and staying tuned to server updates can contribute to preventing and minimizing the Hueneme Negev Error over time.
How can you determine if the error is server-related?
To identify server-related issues, check if the error occurs consistently across various online games or applications. If other online activities run smoothly, the problem might be server-related.
Wrap-Ups
The Hueneme Negev Error can be an unpleasant stumbling block in MW2 or Warzone 2. However, empowered with these troubleshooting procedures, you should be able to overcome it.
Addressing the problem is more than gameplay, it’s about unlocking a more seamless and engaging gaming experience. Take advantage of these methods to maximize your MW2 or Warzone 2 experience.
Happy Gaming!