A timeline is like a storyteller showing your information or events step by step. Microsoft Word makes it easy to create timelines, even if you are not a tech wizard.
In today’s article, I will show you how to create a timeline in MS Word using the SmartArt feature and customize it to your liking.
Therefore, without wasting any more words, let’s begin.
What Is a Timeline in Microsoft Word?
A timeline in Microsoft Word visually represents a series of events or steps in chronological order. It can show the order of events in a story, the process steps, or the event dates. Timelines can be simple or complex, depending on the information.
That said, Timelines in Word are created using SmartArt graphics. The SmartArt features provide several pre-designed timeline layouts that you can choose from to build your timeline.
Some standard layouts include primary linear timelines from left to right, circular or spiral timelines, and branching timelines that show parallel events. Now, let’s see how to create a timeline in MS Word.
How to Make a Timeline in Microsoft Word
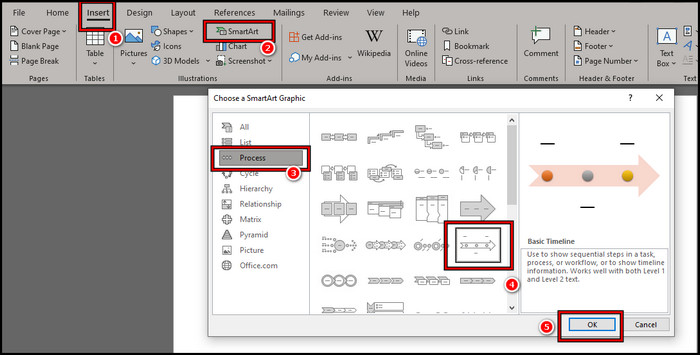
You must utilize the SmartArt tool to create a Timeline in MS Word. Launch MS Word, click on the Insert tab, and choose SmartArt. Now, select Process on the prompt window and pick Basic Timeline. Finally, choose OK; the timeline will be added to the doc.
When you insert a timeline graphic, Word will automatically add text placeholders where you can enter your timeline steps or events.
Here are the steps to add a Timeline in MS Word:
MS Office 2013-Present
- Initiate MS Word.
- Click on the Insert tab and choose SmartArt.
- Select Process and choose Basic Timeline.
- Click on the Text and type or paste your text on the placeholder.
MS Office 2007 and 2010
- Click on Insert for the top bar and choose Illustrations.
- Select Process and pick your Basic Timeline.
- Click on the Text option to put your information.
Office on macOS
- Launch MS Word, select Insert, and click on the SmartArt icon.
- Pick Process from the dropdown options.
- Select your preferred Timeline option and click on it.
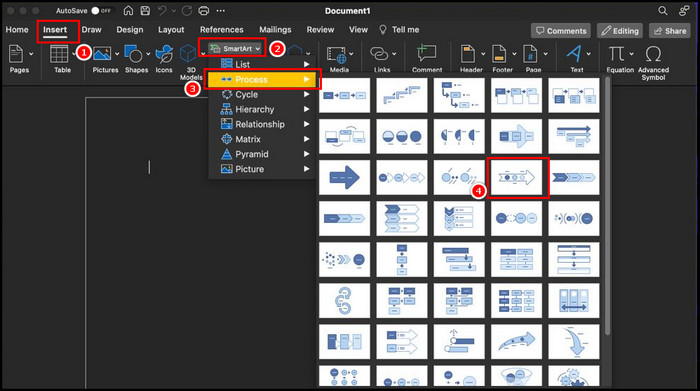
As you see, the options are identical. To add the Timeline, you have to locate the SmartArt option.
After you add Timeline to your MS Word, click on the Text placeholder to put the information of events.
So you added Timeline in Microsoft Word. Let’s now see how you can customize it.
How to Customize Timeline in Microsoft Word
You can use the SmartArt Design option to customize the Timeline in MS Word. You can customize the look by changing the color scheme, font styles, and other formatting options. Images and icons can also be added to create a visually engaging timeline graphic.
Here are the ways to customize Timeline in MS Word:
- Add Additional Placeholder: To put your information and add additional event options, you can use the Text Pane option. Click on the SmartArt Design from the top and select Text Pane from the left. A prompt window will appear with the text boxes.
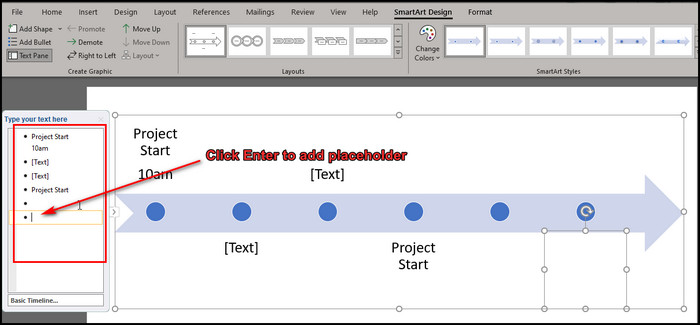 These are the deliverables of your timeline. You can put the information here, and when you press Enter on your keyboard, you will find out that additional event placeholders are added. Add additionals to make the Timeline more appropriate.
 - Change Color and Layout: You can also change the colors and outs of your Timeline. While on the SmartArt Design option, click on the Color option to pick different colors.
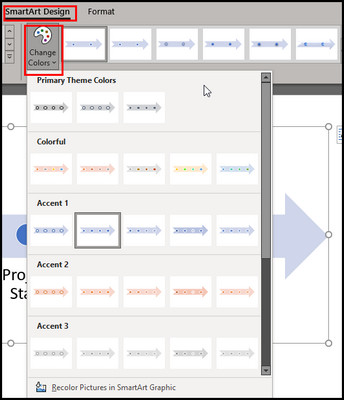 Furthermore, you can use the Layout option to change the type of your Timeline. There are various layouts.
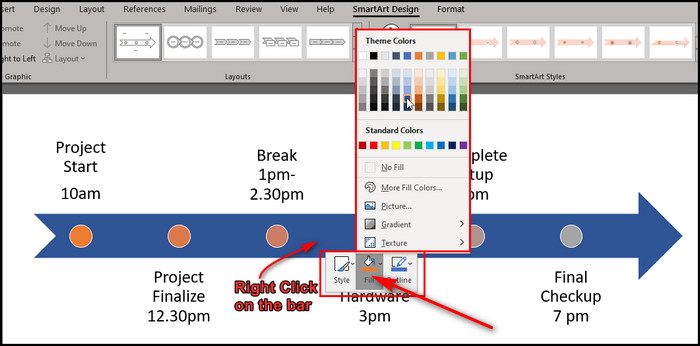
 - Customize Individual Components: You can customize individual elements by right-clicking them. You can change the style and color of the arrow and the circles.
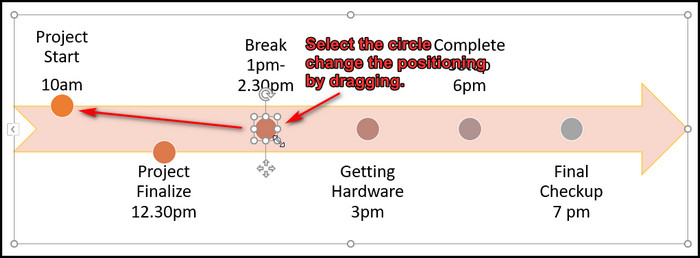
- Drag and Drop the Elements: You can change the position and sizes of the elements by dragging them. Simply click on the Circle and change the size with the border margin. Also, you can drag them to change their position.
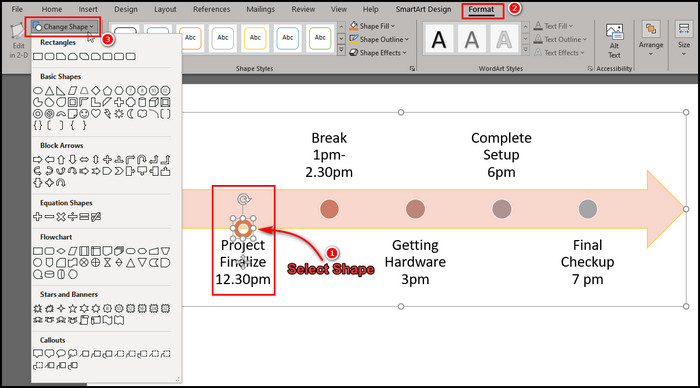
- Change Shape: With the Format option, you can change the circle shape and arrows to make it more interesting. Click on the Circle and choose Format. Now select the Change Shape option. Select your preferred shape and adjust it.
Tailoring your timeline allows you to emphasize key details and transform your graphic into an impactful, informative visual aid for your readers. The customization tools in Word empower you to create timelines that perfectly meet your requirements.
How to Create a Vertical Timeline in Word
To create a vertical timeline in MS Word, you can use the Rotation option or a Timeline with Shapes from the Insert option. For utilizing the rotation option, make a Timeline with SmartArt. Select the Timeline and click Format > Arrange > Rotate > Rotate Left 90.
That will rotate the shape. Now, drag the text field and circles to position them correctly. You can also draw a vertical Timeline from scratch using the Shape tool in MS Word.
Here are the steps to create a vertical Timeline in MS Word using Shapes:
- Click Insert > Shapes and select the rectangle shape. Draw a narrow rectangle on the left side of the page. This will be the timeline bar.
- Adjust the size and position as needed. To move the shape, click it and drag. Click and drag the sizing handles on the sides and corners to resize.
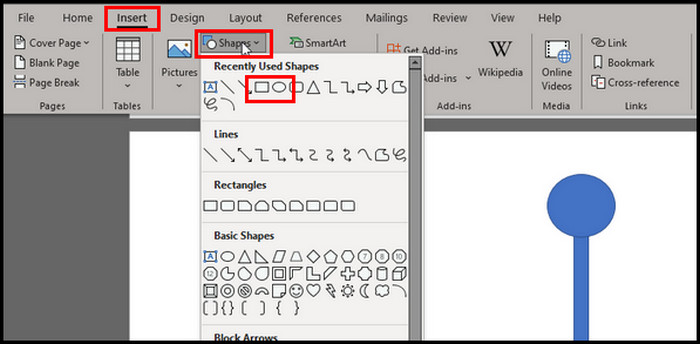
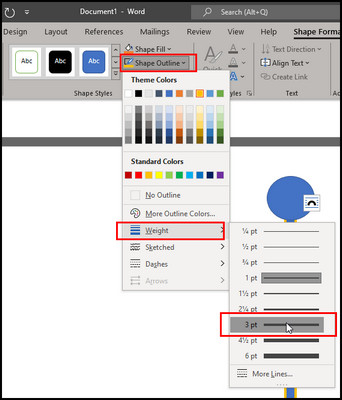
- With the shape selected, go to Shape Format > Shape Outline > Weight and increase the thickness by 3-4 PT. It will help the timeline bar to stand out.
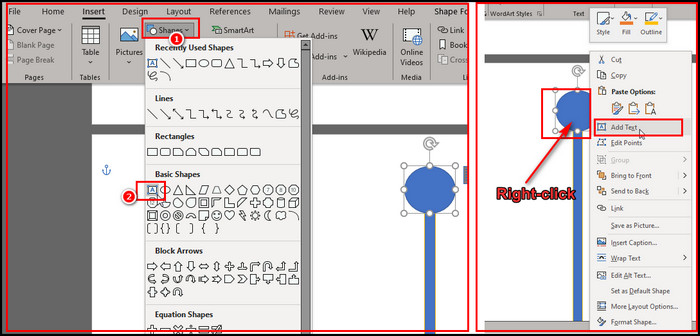
- Click Insert > Shapes again and select a circle. Draw circles along the timeline bar for the timeline events/dates.
- Resize the circles to be small; make sure they slightly overlap the timeline bar.
- You can either put text inside the circle. To do that, select the circle, right-click, and choose Add Text. Otherwise, click on Insert > Shapes and choose Text Box. Draw a text box beside the circle shape and put text in there.
- To add connecting lines between the events and timeline bar, select the Lone shape and draw a line from each circle to the bar.
- Format the line’s color and thickness to distinguish them. Bring the circles forward with the Bring Forward option under Shape Format.
To create a clean vertical timeline in Word using basic shapes, one can customize the visual style, colors, and spacing. However, it is essential to note that there is a learning curve when first using the Shape tool.
After adding a shape, I recommend you play with the tools under the Shape Formate and mostly the arranged categories.
FAQs
How to create a timeline in MS PowerPoint?
To create a PowerPoint timeline, click Insert from the top bar and choose SmartArt. Click on the Process from the Choose a SmartArt Graphic and select Basic Timeline. The timeline bar will be added to your PowerPoint. Now, edit and customize to your preference.
Is there a timeline template in Word?
Yes, Word has built-in timeline templates that you can select to create different timelines quickly. To browse the templates, go to Insert > Templates > Timelines. You can then choose a template that fits your needs and customize it.
What is the best Microsoft program to create a timeline?
PowerPoint is the best Microsoft program for making visual timelines quickly since you can use SmartArt graphics, shapes, and other objects with a blank canvas.
Wrap-Ups
The timeline feature allows you to create chronological charts to present historical events or plan project schedules in an organized way.
I have demonstrated how to easily create a timeline in MS Word and how to customize it to give it a stunning look. This guide assists you in creating and enhancing your Timeline Game.