Remote control desktop programs are great when collaborating with a remote team. Using these applications, you can quickly share control of your device.
Microsoft Teams also has its own embedded remote control feature. This helps to share confidential files without the risk of any data leak.

This article will cover every ins and outs of the remote control feature of Teams.
So, let’s get started!
Teams users can give control of their shared content during a meeting. If you want to share your computer control with any participants, select Give Control from the sharing toolbar. Choose the participant’s name, and Teams will notify the participants about the control update.
Giving control to the participants allows them to take over your computer virtually, and the participants who have access can type, edit, or change your computer’s screen.
Moreover, Teams allows sharing only a portion of your screen or the entire computer screen.
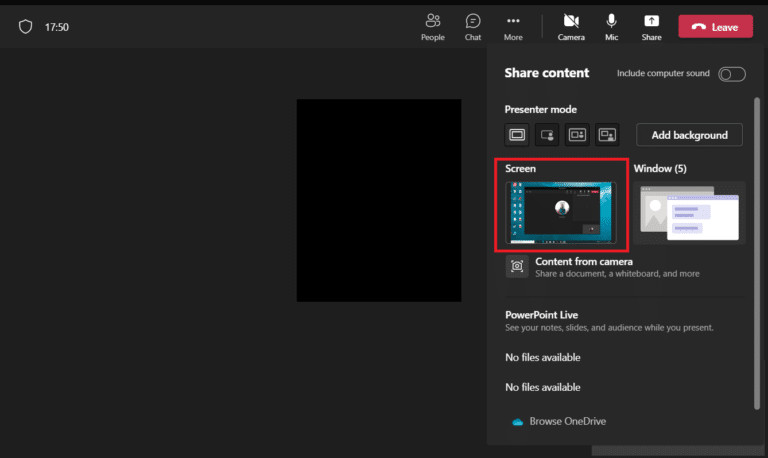
For example, you can share the entire screen access by choosing the Screen option. Contrarily, you can share one or multiple windows by selecting the Window option. Check the subsequent instructions for a step-by-step guide.
Here are the steps to give control of shared content in MS Teams:
- Launch Teams on your computer and join a meeting.
- Start presenting your screen to the participants.
- Locate the Share content button on the top of the page and click on it.
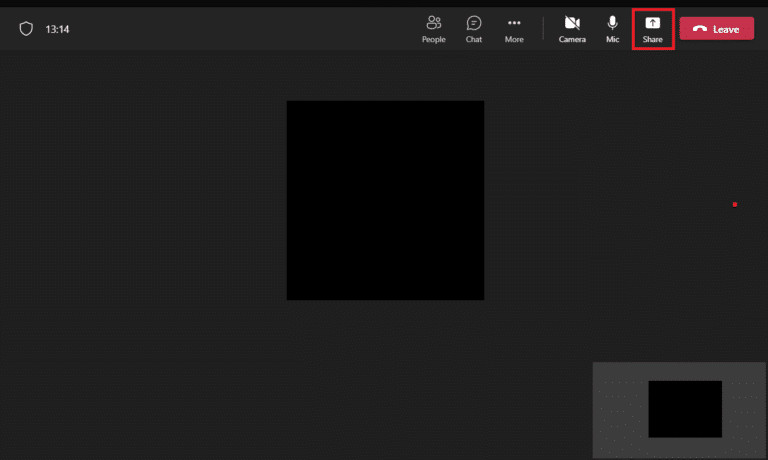
- Select one of the following options according to your need:
- Screen
- Window
- PowerPoint Live
- Click Give control from the top of your meeting screen.
- Select the participant from the dropdown menu to whom you want to give control to.
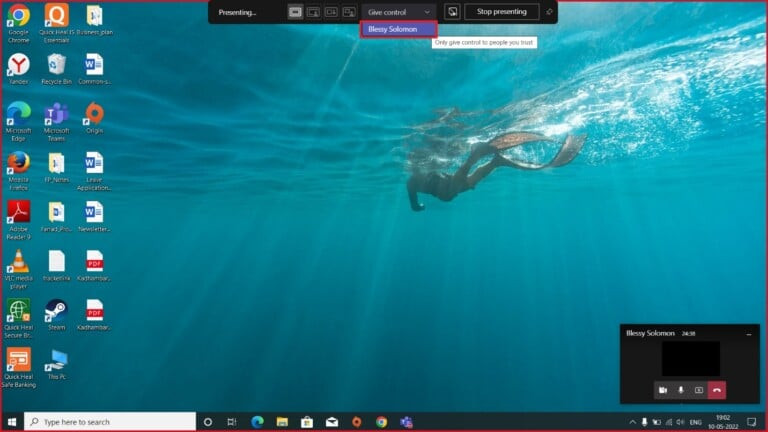
- Click Take back control or Cancel Control to stop sharing the screen control.
You will only be able to give control to someone else when you are presenting in the Teams meeting. Otherwise, you won’t see the option to share the screen control.
When the participant takes control of your screen, you will see the mouse cursor of that participant. At this moment, you can only allow one person to take control of your computer screen during the Teams meeting.
While sharing the control, turn on the Include computer sound option to ensure the participant can hear your computer sound.
If you face issues during the sharing session, simply use the Take back control button to stop the screen sharing instantly.
You may also like to read about Microsoft Teams Breakout Rooms not working.
Select the Request control option to take control of someone’s screen in the Teams meeting. The presenter will get a notification about the access permission and can allow or deny the request. Once the request is accepted, you can type, edit or modify the screen content.
When you are done with modifying the presenter’s computer screen, simply click the Stop control button to revoke the access.
Furthermore, you must have met some basic requirements before using the request control feature in a meeting. For a brief instruction, check out another post on how to request control in Microsoft Teams.
Consider the following instructions to take control of shared content in Microsoft Teams.
Here is the method to take control by requesting the presenter:
- Open Teams and join a meeting.
- Wait for a presenter to share his display.
- Click Request Control to take control of the presenter’s display.
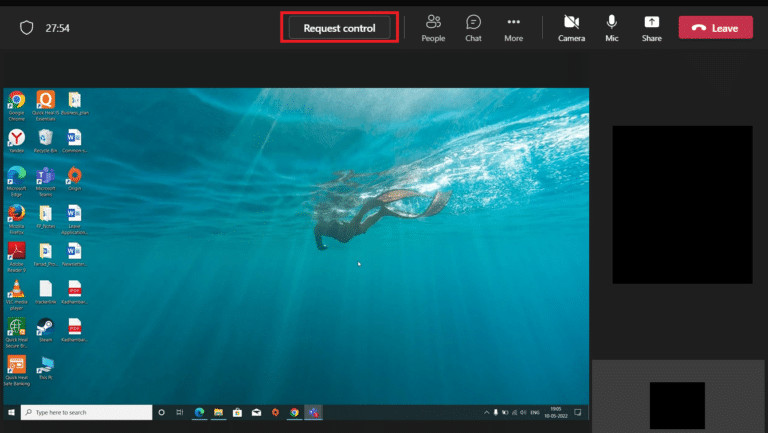
- Select Request to confirm the request.
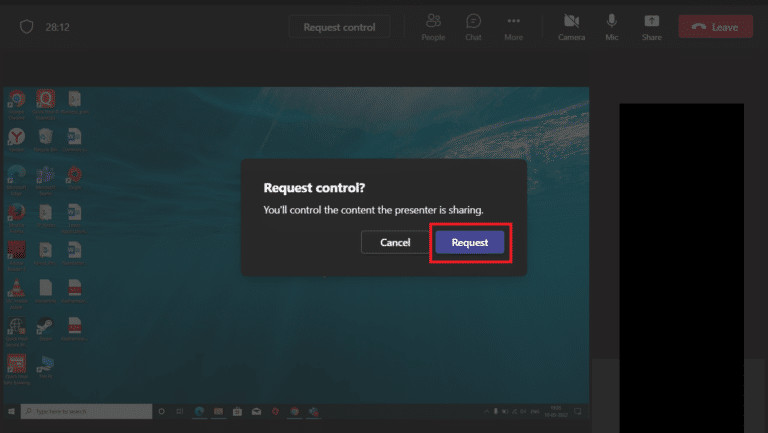
- Wait until the presenter accepts the request.
- Select Stop control to revoke the display sharing.
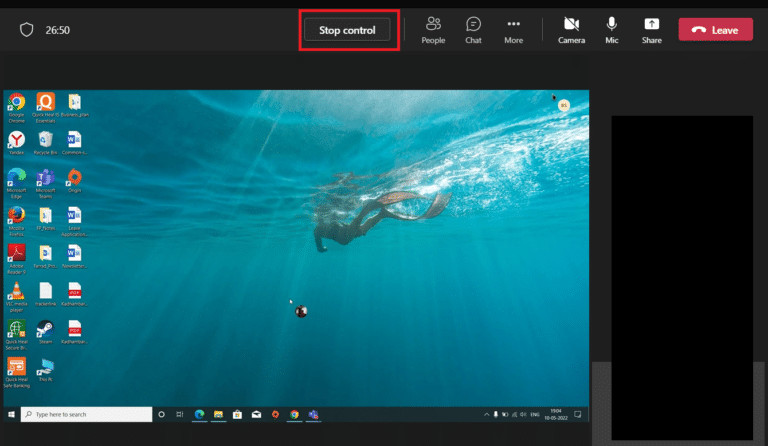
When you take control of the presenter’s screen, all other meeting participants can see your activity on the presenter’s screen.
You can quickly take a screenshot in a Microsoft Teams meeting. However, when you are done modifying the presenter’s screen, click Stop control to cancel the control.
Why Does Microsoft Teams Give Control Not Working?
When the GPU hardware acceleration is disabled, or the device doesn’t have a graphics card (GPU) installed, Microsoft Teams give control feature won’t work. The Give Control drop-down menu will be unavailable if your device doesn’t support the hardware acceleration feature.
During a meeting, if anyone requests control of your device screen, you should be able to give control using the give control drop-down menu.
You will see the request on your Sharing toolbar. However, you won’t get the option to approve or deny the request without a Graphics Processing Unit installed on your computer.
Are you facing a hard time creating meetings in Teams? Then check out another post on the easiest way to create meetings in Microsoft Teams or delete the meeting recording.
So, how to identify if your system supports hardware acceleration?
Open your browser and navigate to chrome://gpu/ or edge://gpu/, depending on your browser. If you see Software only or hardware acceleration unavailable next to any Graphics Feature Status, your system doesn’t support the Give Control feature.
Frequently Asked Questions
Can I give control in Teams to an external user?
Yes, you can. However, you must turn on the request control feature for external users. Go to the Teams Admin Center, and locate the Content Sharing settings. Turn on the Allow an external participant to give or request control option to give control to an external user.
How do I request control in the Teams Admin Center?
The global admin manager can request control in the admin center by navigating to Teams admin center > Meetings > Meeting policies > Content sharing. Then turn on the Allow a participant to give or request control option.
What is Teams remote control?
Microsoft’s Teams remote control feature connects and operates a meeting participant’s computer remotely. You can type, edit, and modify the screen content when the participant allows access.
Final Thoughts
A meeting participant can control the host’s computer if the host shares the control via the Teams Give Control feature.
However, you can only give control if your device supports the hardware acceleration facet. Otherwise, the give control drop-down menu won’t work.
For further queries related to the remote control feature of Microsoft Teams, leave a comment below.