Outlook capped the maximum attachment size limit to 20 MB for each email. If you need to attach multiple files that surpass the limit, Outlook won’t allow you to do it.
In such scenarios, you must reduce these attachments’ sizes to send them through Outlook email. Compressing or zipping the files is the most relevant method of lowering file size.
But how to compress files in Outlook? This article will cover the most straightforward methods of creating and sending zip files using Outlook.
So, let’s begin!
How to Create and Email Zip Files in Outlook
To create zip files in Outlook, go to the folder where the files are stored. Select the files you want to compress, right-click on the selected files, and navigate to Send to > Compressed (zipped) folder. Attach the zip file to your Outlook email and send it to the recipient.
You can also add multiple files from different locations by dragging and dropping the files into the same zip folder. Consider the following discussions to create and send zip files via Outlook email.
Here are the steps to create and send zip files in Outlook:
1. Compress the Files
Let’s begin with compressing the files into Zip format. Open File Explorer by pressing the Windows + E keys. Navigate to the location where you store the files.
Locate and select the files or folders you want to compress. To select multiple files, press and hold the Ctrl button and select the files. Once the files are selected, you will see the files are highlighted.
Now right-click on the selected files, and navigate to Send to > Compressed (zipped) folder. 
2. Rename Zip File
Rename the zip file with a relevant name that perfectly represents the files inside the zip folder. To rename the zip file, right-click on the file and choose Rename from the context menu. 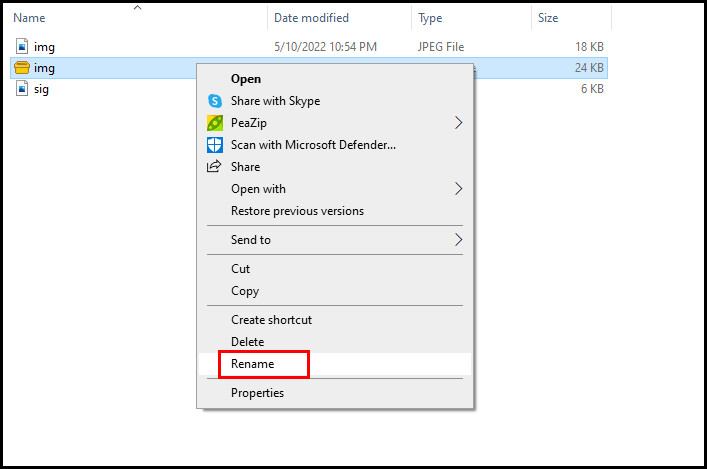
3. Attach and Email the Zip File
Once the zip file is ready, you must attach the file to your Outlook email. To attach the zip file, right-click on it and navigate to Send to > Mail recipient. It will open a new Email window in Outlook. 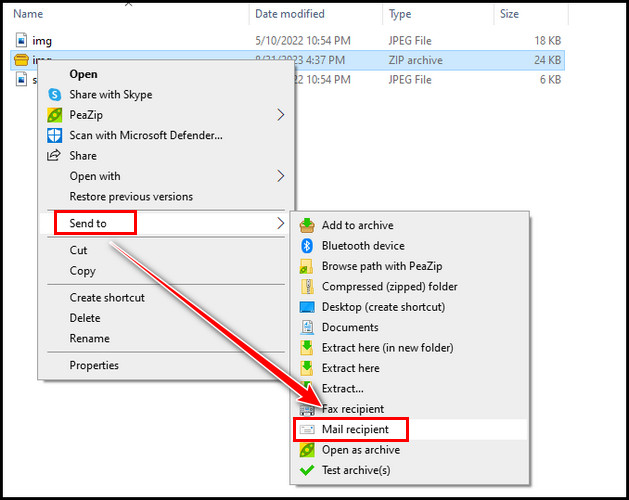
Now, add the recipient’s email, CC, Subject, and send the email with the Zip attachment by clicking the Send button.
What to do if the ZIP file is too large to send over email?
The file size limit for Outlook email is 20 MB. To send files over 20 MB, upload the file to OneDrive, then add the file link to the Outlook email and send it to the recipient.
How to Export Outlook Emails to a Zip File
To create a copy of all your Outlook emails as a zip file, go to File > Open & Export > Import and Export, choose Export to a File & Outlook Data File (.pst). Select a location to store the file, and click Finish to export the emails. Select the file, and choose Compressed (zipped) folder to create a zip file.
Here are the steps to export Outlook emails to a zip file:
- Launch the Outlook desktop application.
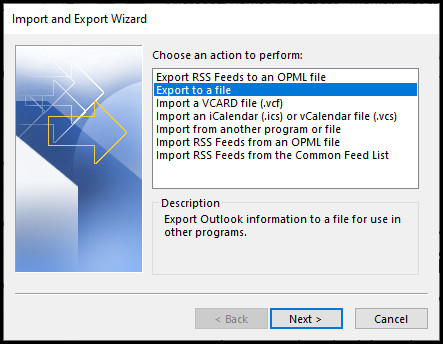
- Navigate to File > Open & Export > Import and Export.
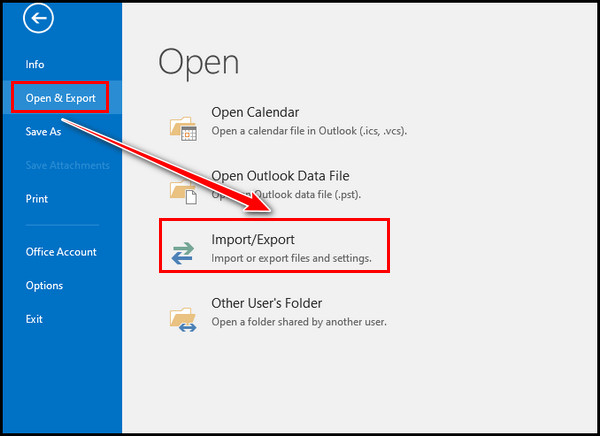
- Select Export to a File and click on Next.
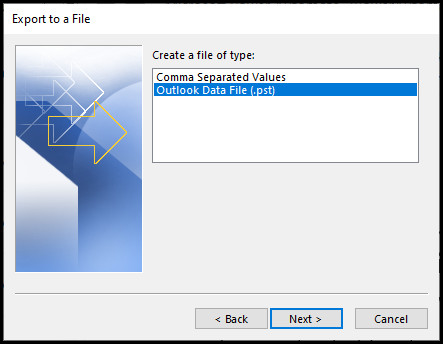
- Choose Outlook Data File (.pst) and select Next.
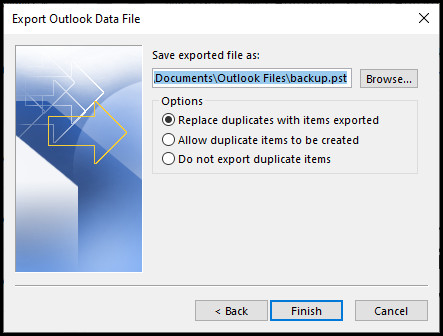
- Select the folders you want to export.

- Browse the location where you want to save the file and click Finish.
- Open File Explorer and go to the location where you saved the file.
- Right-click on the file name, and navigate to Send to > Compressed (zipped) folder.
The above steps will download your Outlook data file in .pst format and then convert the file to a zip file.
Frequently Asked Questions
Can you zip emails in Outlook?
Yes, you can effortlessly zip Outlook emails. First, select the emails, copy them, and paste them into your local drive. Now select the downloaded emails, right-click on them, and navigate to Send to > Compressed (zipped) folder.
How to create a zip file in Outlook 365?
There is no direct way to create a zip file in Outlook 365. Instead, you’ve to zip the files using the default Compressed feature of Windows and then add the zip file to Outlook 365 email.
Why can’t you send a zip file through Outlook?
Outlook’s maximum attachment size limit is 20 MB. If you try to send a file larger than 20 MB, you will get an error saying Attachment size exceeds the allowable limit. In case the problem resembles yours, first, upload the file to OneDrive. Then, add the file link to the Outlook email and send it to the recipient.
How do you send a large zip file in Outlook?
If you need to send a larger zip file using the Microsoft Outlook client, upload it to OneDrive, copy the file link, paste it into the email body, and send the email to the recipient.
Wrap Up
Compressing the files is the most easy and accessible method to reduce the size of large files and attachments. You can efficiently save time by creating and sending zip files in Outlook.
Following the above-mentioned guide, you can easily compress larger files and send them through Outlook with ease.
However, for future assistance, comment below.