Creating & managing a SharePoint calendar allows you to share event information like holidays, party dates, leaves, or other essential details with team members. The calendar will be shared with all members who have access to the site.

But new users can find creating or using calendars in SharePoint challenging.
In this article, I will guide you on how to create a calendar in Sharepoint & how to use it. Let’s dive in.
SharePoint calendars allow site owners to check team member’s schedules for events & organize meetings by synchronizing them. If you are a member, you need to verify you have the access permission level for the SharePoint site so that you can create an event.
Additionally, ensure the SharePoint site is available for other team members. Now, follow as below to create a calendar on your SharePoint site.
Whether it’s a Communication site or Teams site, you can make an event to create a SharePoint calendar. Follow the steps below to create an event calendar in SharePoint.
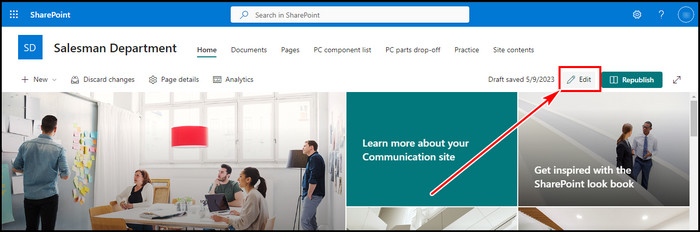
- Go to your SharePoint site.
- Click on 🖍 Edit from the top right side.
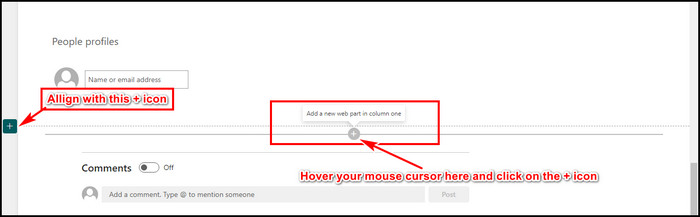
- Scroll to the bottom & hover your mouse in the middle section, aligning with the + icon from the left.
- Click on the + icon in the middle to Add a new web part in column one.
- Type Events in the search box & click on the Events from the search result.

- Click on the Edit icon above the Title.
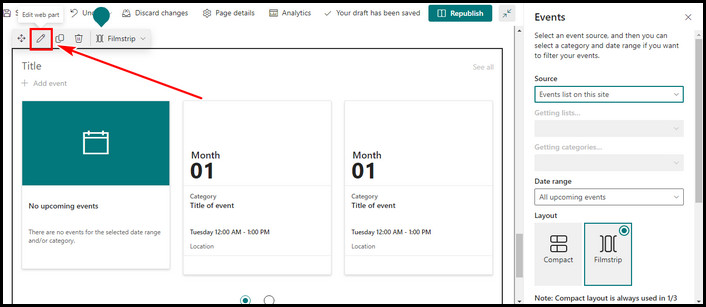
- Input information in the list & close the edit mode by clicking Save as draft from the top left corner.
After this, the event you created will appear on the site page. To view the event information as a calendar, navigate to Site contents, select Events & enjoy the calendar view.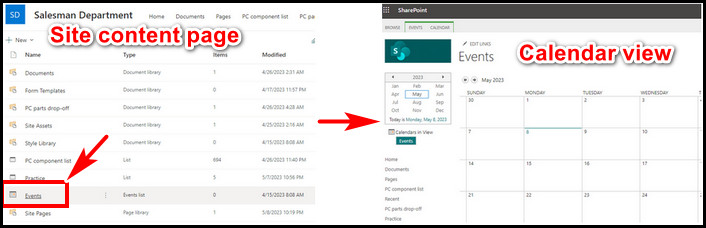
Alternatively, you can also embed calendar to SharePoint Online modern page with embed code instead of events. To embed the calendar to a SharePoint page,
- Navigate to the SharePoint page.
- Select 🖍 Edit from the top right side.
- Click + to add a new web part.
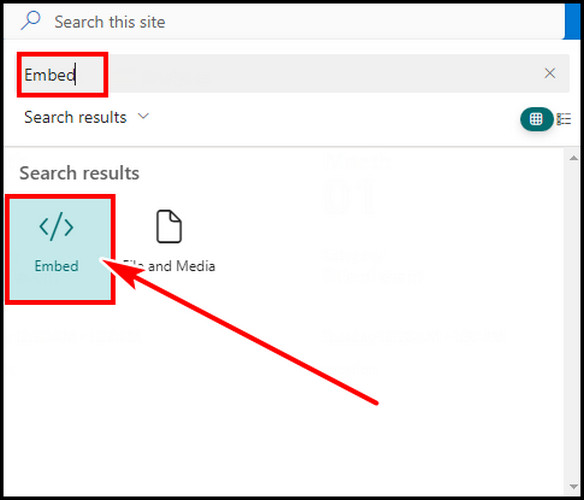
- Search Embed & select the Embed.
- Use the below embed code to add calendar.
Here, *** is your calendar.aspx link. For example, for me, it is, https://mytenant.sharepoint.com/sites/SalesmanDepartment/Lists/Events/calendar.aspx 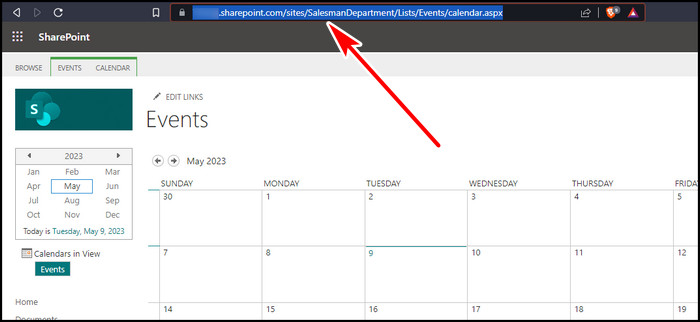 In the embed, isDlg=1 is used to hide the page’s top & left navigation with other elements.
Now, what about a calendar for a classic SharePoint page? Read along to know about it.
If you are using Classic view & want to add calendar app, it’s also possible. You can go to the classic SharePoint view by going into Site content page & click on Return to classic SharePoint at the bottom left side.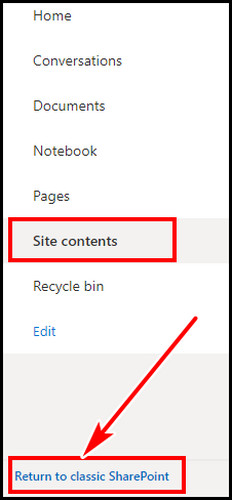
Now, how to add a calendar to SharePoint? Follow as below to add the calendar app in the SharePoint classic experience view.
- Select add an app from the right side.

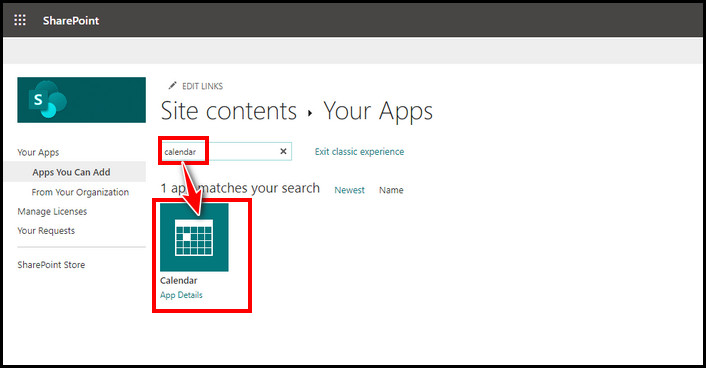
- Search calendar & select the Calendar app from the search result.
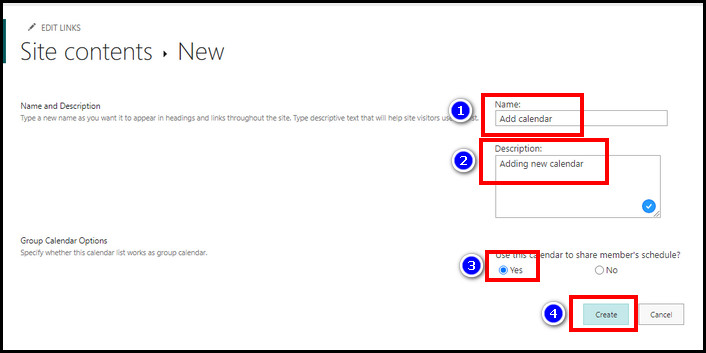
- Give a name to your calendar & hit Advanced Options.
- Add a description & choose Yes to make it a group calendar.
- Hit Create to finish.
- Add members from the site in the Add Person section.
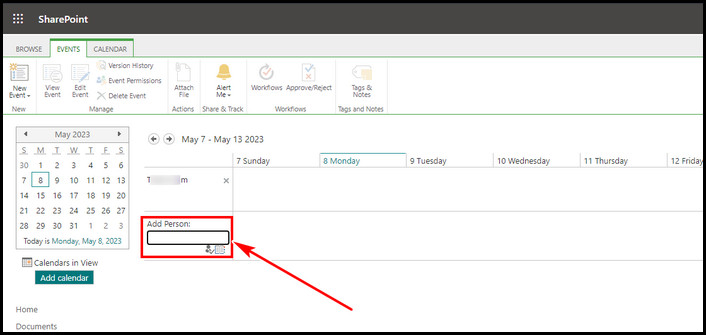
Now, you have added a SharePoint calendar to your site. You can select the Calendar tab from the top ribbon & change view too.
You can view your SharePoint list in the calendar view. Before creating a calendar view, ensure you have two custom date fields, such as start date, end date, expiry date, reminder date, etc., to show a range.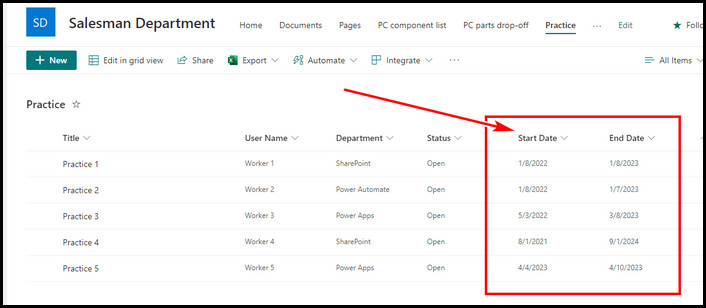
Now to create the calendar view, follow as below,
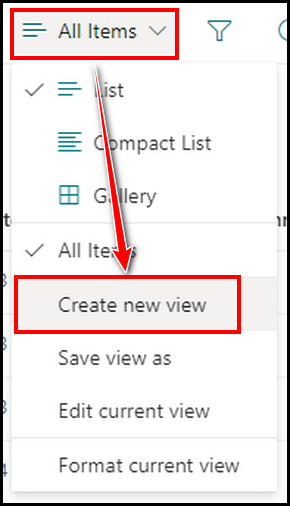
- Click on All items & select Create new view.
- Give a name to the calendar view.
- Select the Calendar option under Show as.
- Pick your start date & end date according to your need to show the range.
- Click on More options & pick the name which will function as the Title of the calendar event.
- Hit Create to finish setting up the calendar view.

This will display your SharePoint list in calendar view.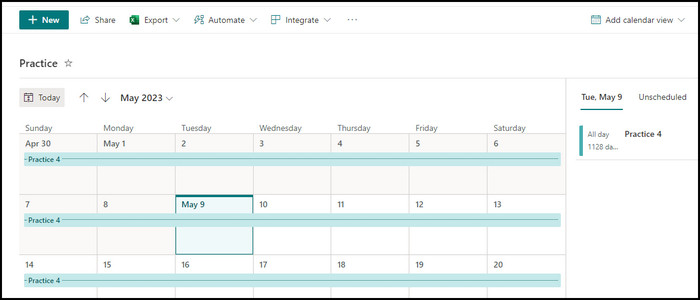 To always view the list with calendar view, select Set current view as default from the list view dropdown.
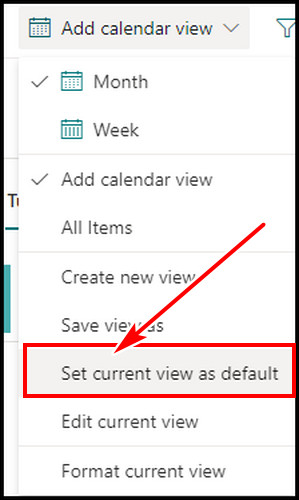
Now you know how to create or add a calendar view in your SharePoint, let’s learn about some usage to accelerate your work.
The SharePoint calendar is a quick comfortable way to visualize daily, weekly, or monthly events. As you already figured out about creating a SharePoint calendar, let’s discuss some cases where you might face difficulties.
1. Add Event to Calendar
After creating a Calendar, you will need to add events later. Follow the procedure below to add an event to the calendar.
- Navigate to your calendar event list.
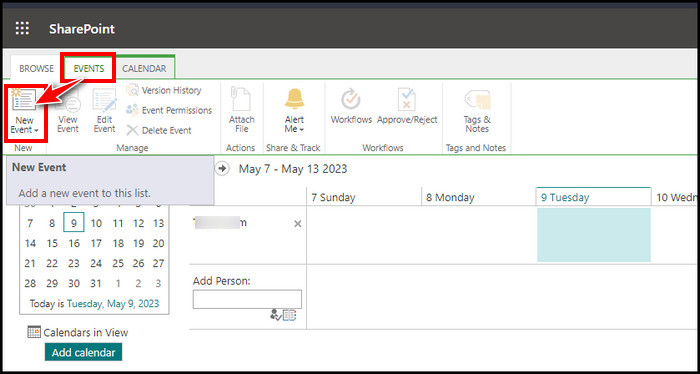
- Select Event tab from the top ribbon & then New Event from the top left side.
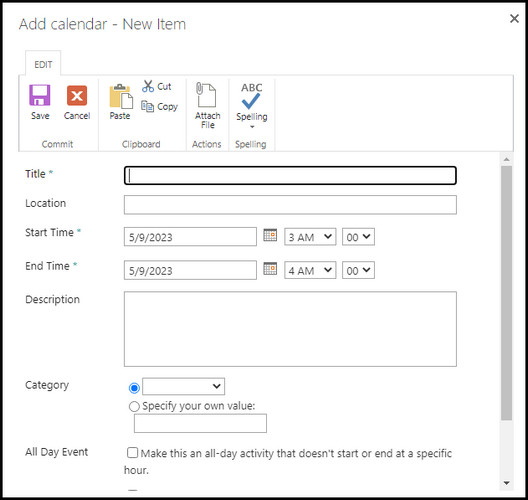
- Enter title, time, description, category, etc. & then Save.
With these easy steps, you can add an event to the calendar in the SharePoint list.
2. Display the Calendar in Quick Launch
When I first created a calendar in SharePoint, it didn’t appear on quick launch. But you can display it on your top ribbon or quick launch menu for fast access. If you want the calendar to appear in quick launch, follow the steps below,
- Go to your SharePoint site & navigate to the Site content page.
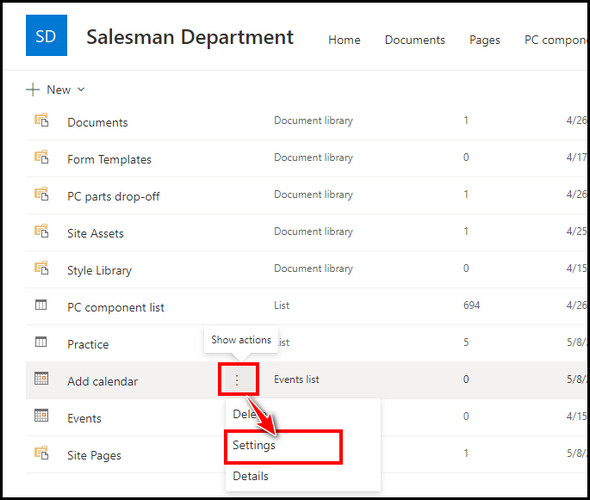
- Find your calendar name & click on the vertical three dots & select Settings.
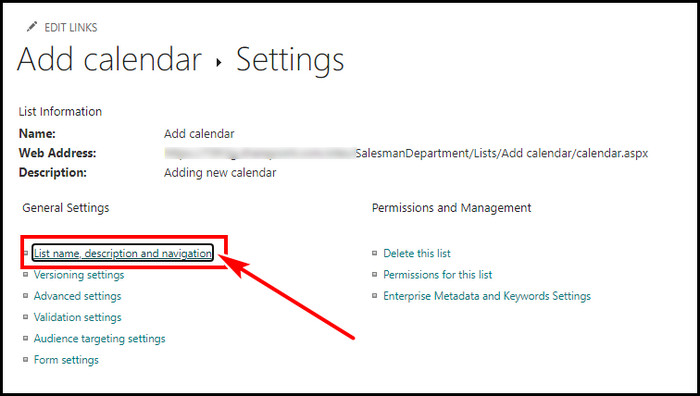
- Click on List name, description, and navigation.
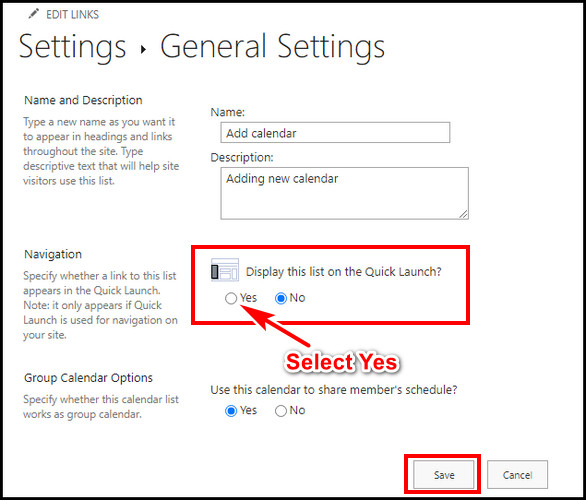
- Select Yes from the Display this list on the Quick Launch? section & hit Save.
After that, you will have the calendar for your quick navigation.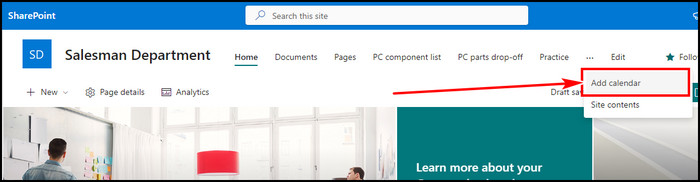
3. Edit Permission
After creating a calendar, you would definitely want to know who will have access to make events. Here are the steps to edit permission for the calendar list.
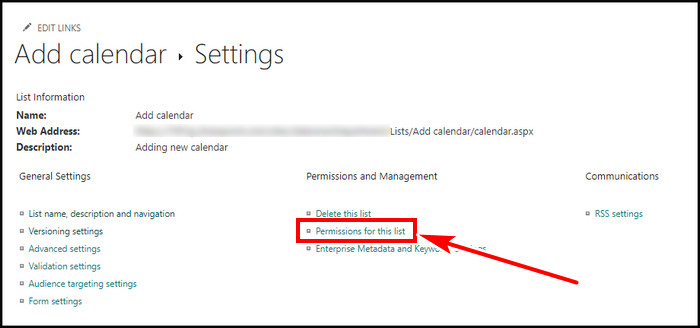
- Navigate to your calendar list & select List Settings.

- Click on Permissions for this list.
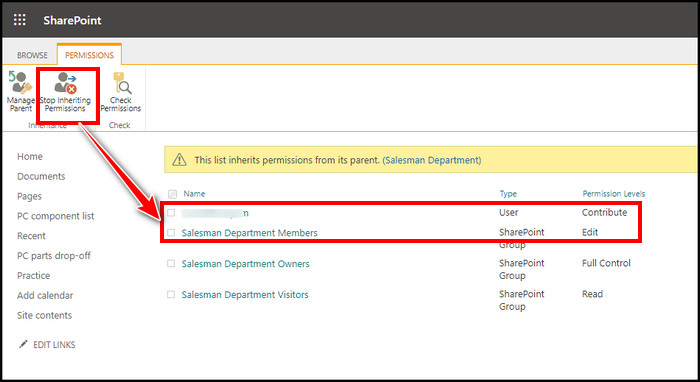
- Select Stop Inheriting Permissions.
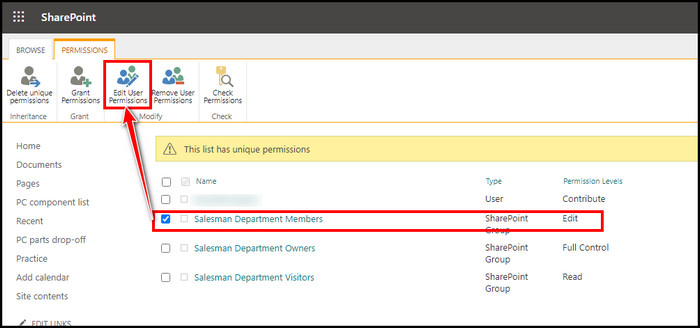
- Check the name you want to edit permission & then Edit User Permissions.
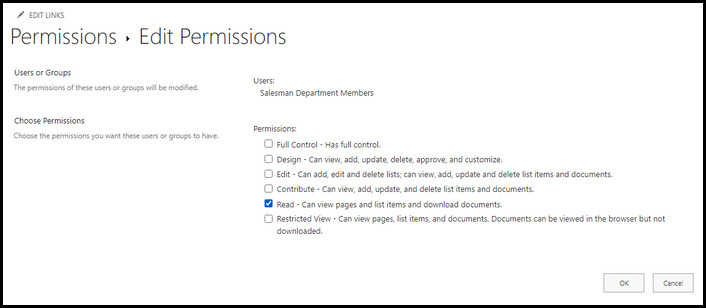
- Pick the permissions you want to give & hit OK.
4. Enable Versioning
You can turn on the version option so that every time you or someone makes a change, it will create a new version. To enable versioning in the SharePoint calendar,
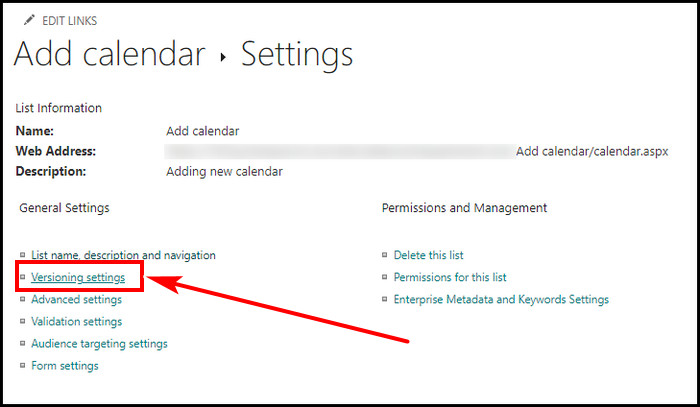
- Go to the calendar list settings.
- Click on Versioning settings.
- Check Yes for Create a version each time you edit an item in this list and click OK.
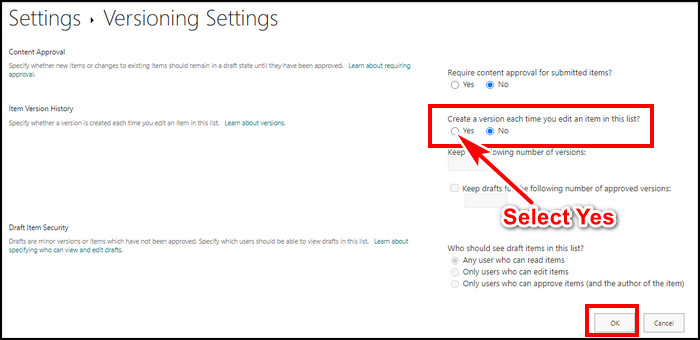
By enabling this, you will have a newer list every time there is a change.
5. Sharing Calendar
You can also share a calendar to Outlook. It is possible to send a link in an Email. To do so,
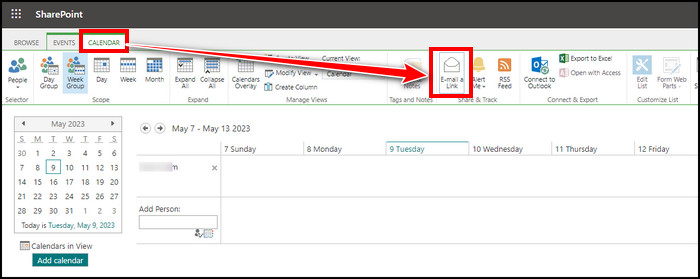
- Go to the Calendar page from the quick launch you just made.
- Select the Calendar tab.
- Click on the E-mail a Link.
This will open a prompt redirecting you to Outlook, which will open a message with a link. You can share the link with others, but remember that the users will not have any special privileges.
If you encounter missing calendar list in SharePoint, don’t worry. Navigate to your SharePoint site & follow the steps to resolve the issue.
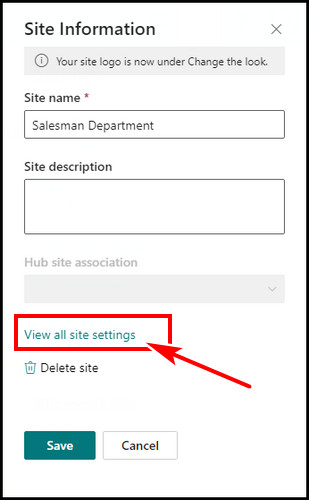
- Click on the gear icon from the top right side & select Site information.
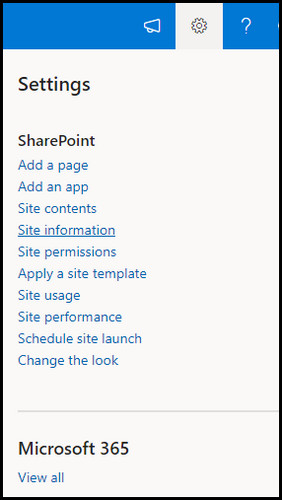
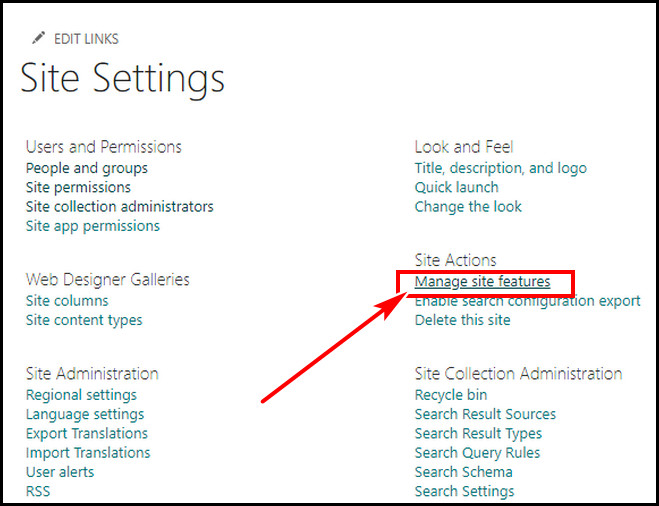
- Select View all site settings.
- Choose Manage site features under Site Actions.
- Scroll down, find Team Collaboration Lists & Activate it.
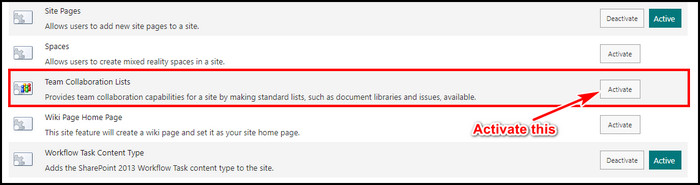
Doing this lets you make a calendar list from Add an App.
Final Thought
Setting up a SharePoint Calendar is not in plain sight & can be hard to set up for new users.
In this article, I described how one can easily set up a SharePoint calendar & how to use the calendar in convenient ways. If you have any further issues, please leave a comment.