Are you tired of doing the same job again and again? Then imagine emails that organize themselves, responses that pen themselves, and replies that write themselves.
It’s possible with the macros in Microsoft Outlook that bring the automation to your fingertips. It does the job without any error, lightens up your daily work, and saves time.
In this article, I’ll provide an in-depth guide to the macros and show how to enable and use them.
So, let’s begin.
What is Macro in Microsoft Outlook?
Macro is a set of instructions, lines of code, or script that can be automated to perform specific tasks within the Microsoft Outlook application. Macros are written in Microsoft Visual Basic for Applications or VBA to execute a single or multiple automated tasks simultaneously.
It is used to perform repetitive tasks and extend the functionalities in Microsoft Outlook. In addition, it saves time and reduces the error in work.
Macros in MS Outlook are widely popular for sending mass mail, formatting emails automatically, managing contacts, creating or deleting emails, and calendar management.
Consider reading the following passages to enable, create, and use macros in MS Outlook.
How to Enable or Disable Macros in Outlook
To enable the macro in Microsoft Outlook, you need to change the Trust Center Settings and select Enable all macros for Outlook or add-ins. If you want to disable or turn off the macro, you must choose the disable all option from the Macro Settings.
Macros are an advanced feature of Microsoft Outlook and are potentially dangerous if not managed properly. You need to manually turn on or change the macro security by following the procedures below.
Here are the steps to enable macro in Microsoft Outlook:
- Launch Microsoft Outlook on Windows.
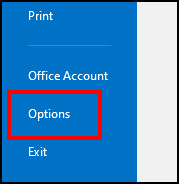
- Press on File and go to Options.
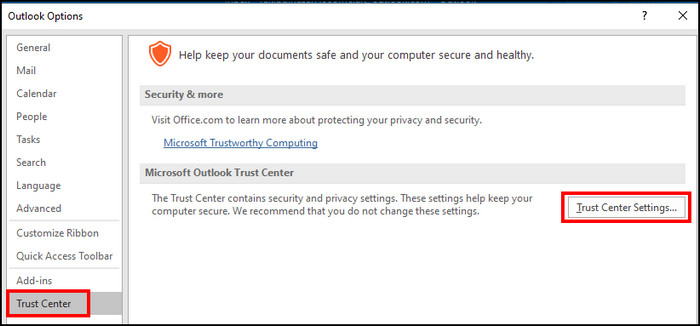
- Navigate to the Trust Center and click on Trust Center Settings.
- Press on Macro Settings and choose the radio button beside Enable all macros.
- Check the box beside Apply macro security settings to installed add-ins.
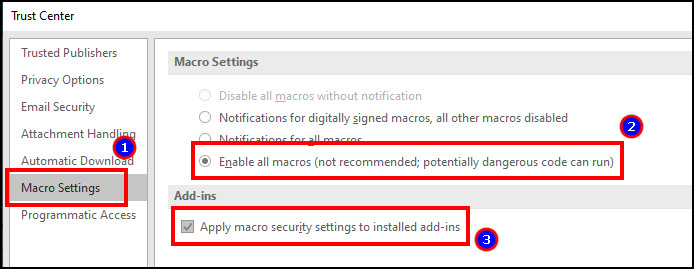
- Press on OK.
To turn off the macro in Outlook, uncheck the Apply macro security settings to installed add-ins option and choose Disable all macros without notification. 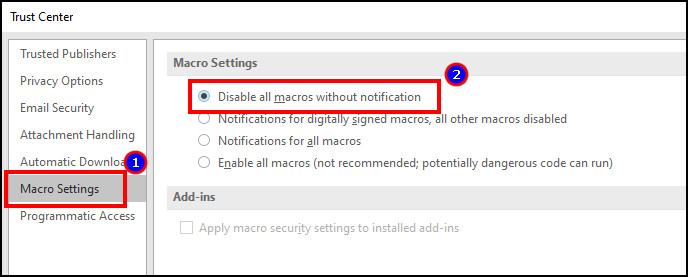
Where is the Macro Button in Outlook?
By default, the macro options are hidden in Microsoft Outlook. They are a part of the Outlook Developer tab, and you need to manually add them to create a button for the macro on the Quick Access Toolbar or QAT.
Read the procedure below to create a button for macro on the Quick Access Toolbar:
- Press on File and go to Options.
- Navigate to Customize Ribbon.
- Choose Main Tabs from the Customize the Ribbon.
- Check the box beside the Developer.
- Press OK.
Now, the Developer tab will be visible on the Quick Access Toolbar, and you will find the Macros button under it. 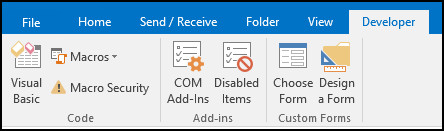
How to Create Macros in MS Outlook
You can create a macro in Microsoft Outlook by pressing the Macro button under the Developer tab and providing a name. But before creating a macro, you must enable the option from Trust Center Settings and add the Developer tab to your Quick Access Toolbar.
Here is the way to create a macro in Microsoft Outlook:
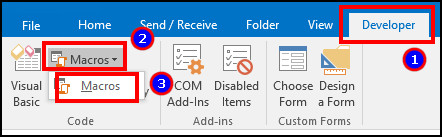
- Navigate to the Developer tab.
- Press on the Macros button under the Code category.
- Click on Macros or Alt + F8.
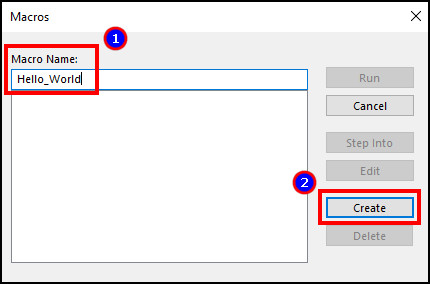
- Type a macro name and press on Create.
It will create a macro and take you to Microsoft Visual Basic for Applications to insert codes and instructions.
How to Use Macros in Microsoft Outlook
To use macros in Microsoft Outlook, you need to create and type the codes or instructions in Visual Basic for Applications (VBA) and execute them. After running the program, it will complete the automated task and provide results based on the commands.
Macro in VBA is a powerful feature of Outlook. You must have knowledge of programming to write or modify the codes.
The macro doesn’t have a recording option. So, you need to rely on the coding to apply commands.
Before jumping into more advanced macros, let’s start with something basic. We’ll print Hello World using the VBA in Outlook and show you the use of macros.
Here are the steps to use and run macros using VBA in Microsoft Outlook:
- Create a new macro named Hello_World.
- Paste the following code.
Sub Hello_World()
    MsgBox ("Hello World")
End Sub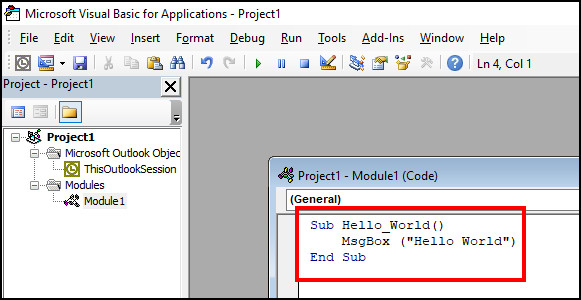
- Click Ctrl + S to save the program.
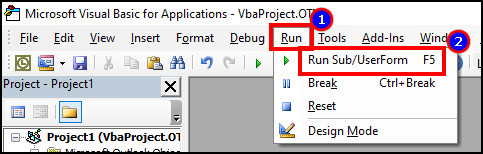
- Press on Run or click F5.
After executing the macro VBA code, Microsoft Outlook will provide an output saying Hello World. 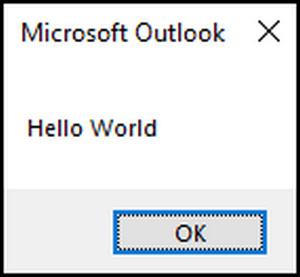
Now, let’s try advanced macro VBA code to do more exciting tasks. The following passage will provide examples of macros in Microsoft Outlook.
Use Macro to Create Outlook Mail Item
Here, we’ll create an Outlook email and automatically set the recipient, subject, and body. Create a macro and paste the following code.
Public Sub CreateAnOutlookMailItem()
Dim MyEmail As MailItem
' Create a new Outlook message item programmatically
Set MyEmail = Application.CreateItem(olMailItem)
'Set your new message to, subject, body text and cc fields.
With MyEmail
.To = "[email protected]"
.Subject = "Your subject"
.Body = "This is the email body."
End With
MyEmail.Display
End Sub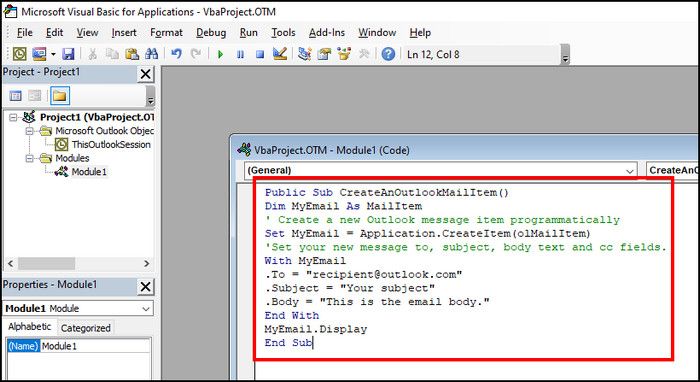
After running the code, it will automatically create a mail item and insert the provided recipient’s email address, subject, and email body. 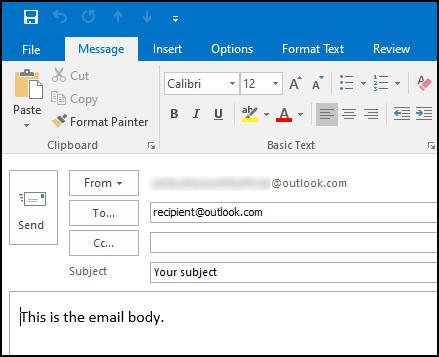
Use Macro to Respond to Emails
The best way to respond to email with a macro is by using an Outlook template. You can use your email template and program the macro to automate the emails. Type the following codes in macro to respond to an email.
Sub SendAReply()

Dim origEmail As MailItem
    Dim replyEmail As MailItem

    Set origEmail = Application.ActiveWindow.Selection.Item(1)
    Set replyEmail = Application.CreateItemFromTemplate("C:\Users\USER\AppData\Roaming\Microsoft\Templates\sendareplytemplate.oft")

    replyEmail.To = origEmail.Sender
    replyEmail.CC = origEmail.CC
    replyEmail.Subject = origEmail.Subject

    replyEmail.HTMLBody = replyEmail.HTMLBody & origEmail.Reply.HTMLBody
    replyEmail.Display

End Sub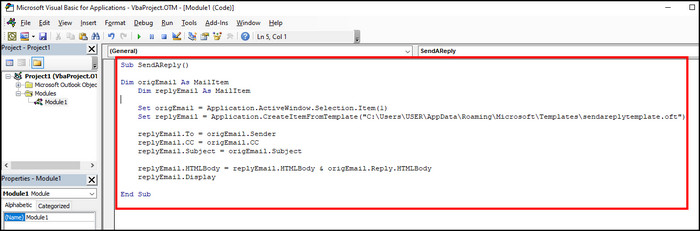
Change the template path with your Outlook email template and save the VBA code. Now, open an email and run the macro code. It will create a new reply with the provided information in the template. 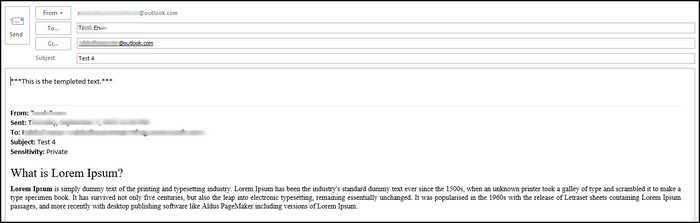
Use Macro to Save Attachments to Folder
If you want to save the attachments of an email to a folder, you can program the macro and download the items with a single click.
Sub SaveAttachmentsToFolder()
    ' Define variables
    Dim objOL As Outlook.Application
    Dim objMsg As Object
    Dim objAttachments As Outlook.Attachments
    Dim objAttachment As Outlook.Attachment
    Dim strFolderPath As String

    ' Specify the folder path where you want to save attachments
    strFolderPath = "C:\Your\Target\Folder\Path\"

    ' Get the current Outlook application
    Set objOL = Outlook.Application


    ' Get the selected email (if an email is selected)
    On Error Resume Next
    Set objMsg = objOL.ActiveExplorer.Selection(1)
    On Error GoTo 0

    ' Check if an email is selected
    If Not objMsg Is Nothing Then
        ' Get the attachments collection of the selected email
        Set objAttachments = objMsg.Attachments

        ' Loop through each attachment
        For Each objAttachment In objAttachments
            ' Save the attachment to the specified folder
            objAttachment.SaveAsFile strFolderPath & objAttachment.FileName
        Next objAttachment

        ' Release the objects
        Set objAttachment = Nothing
        Set objAttachments = Nothing
        Set objMsg = Nothing
        Set objOL = Nothing
    Else
        MsgBox "No email selected.", vbExclamation
    End If
End Sub
Replace C:\Your\Target\Folder\Path\ in the above VBA macro code with your target folder. As you run the code, it will automatically save the items in your folder.
In case you want to run a macro in Outlook automatically, you’ve to sign it by going to Digital Signature from Tools in VBA. 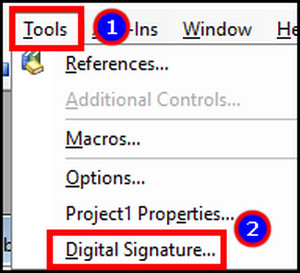
How to Create Shortcut Button for Macros in Outlook
Every time, accessing the Macro option from the Developer tab may seem a bit of an extra job. You can create a shortcut button for your desired macros and add them in the Outlook ribbon.
Pressing the macro button shortcut will run the VBA code and give the expected output. Follow the procedures below to create a shortcut button for macros.
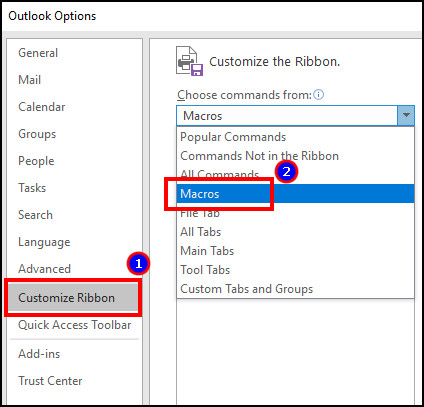
Here are the steps to create a shortcut button for macro in Microsoft Outlook:
- Press on File and go to Options.
- Navigate to Customize Ribbon.
- Choose Macros from the commands.
- Add a New Group.
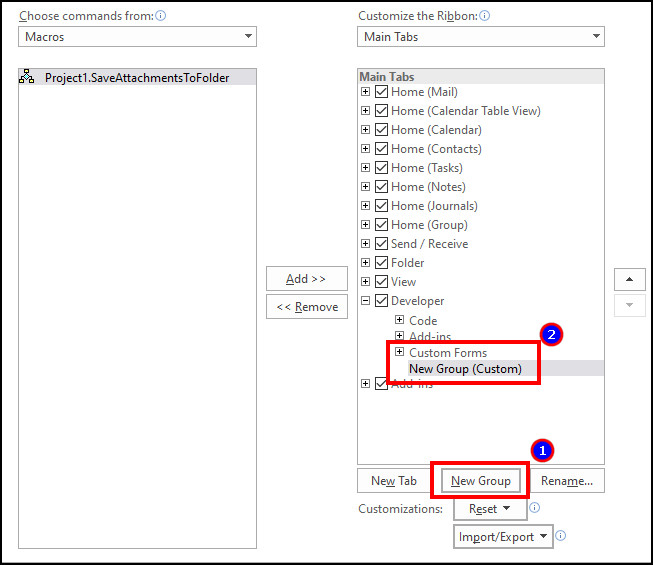
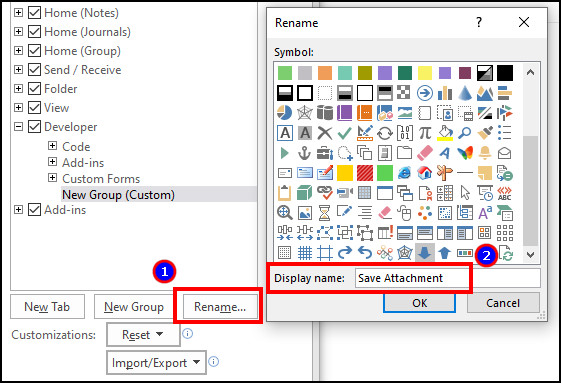
- Rename the group.
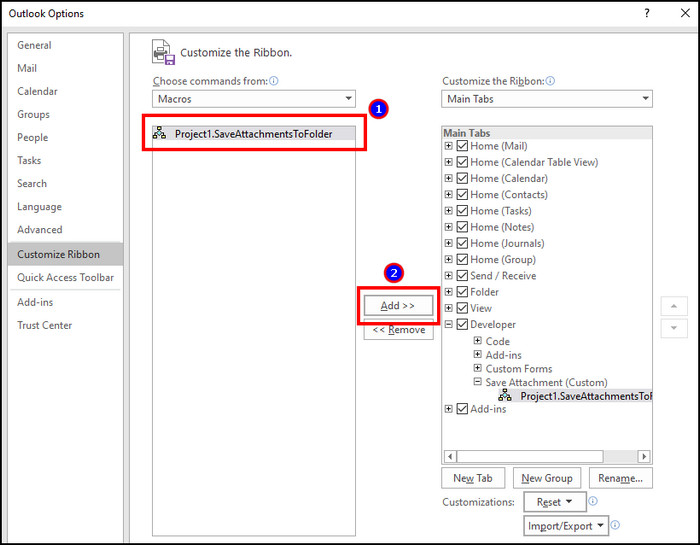
- Select the macro from the commands and click the Add button.
- Change the macro name if you want.
- Press on OK.
Now, go to the tab where you have added the macro shortcut. You will find the shortcut there, and pressing it will execute the program. 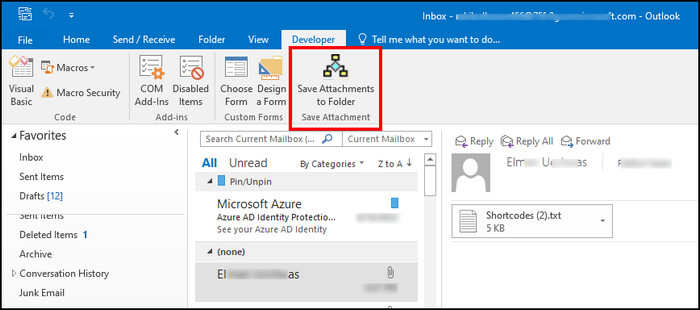
Who Should Use Macros in Microsoft Outlook?
Macros in Microsoft Outlook are used to automate a task. It can perform repetitive tasks with a single click and save lots of your time.
For example, if you want to save an attachment of an email, you need to open the mail, press the option, and then click Save As.
On the other hand, if you use a macro to save the attachments automatically, a single click is enough to store all the attachments of your mail to a specific folder.
It’s very convenient for those who perform the same tasks repeatedly. In the corporate field, the option can be handy when managing your precious time.
Here are some usage of macros in Microsoft Outlook:
- Email Management: When working with many emails, the automated macros can execute all the tasks simultaneously.
- Customer Service: Macros can create emails automatically if you need to fetch data from the customer’s email and include them in a reply, such as email address, name, or other info.
- Email Marketing: People need to work with numerous emails in mail marketing, and macros can quickly create and track the information.
- Customized Workflows: Microsoft Outlook doesn’t have a built-in system to customize the workflows. You can use macros to create a flow for the Outlook client and add-ins.
- Data Management: Macros can be used to extract data, attachments, and store them in a specific folder within Outlook.
- Compliance and Reporting: For organizations with specific compliance requirements, macros can help automate tasks related to email retention, archiving, and reporting.
- Efficiency Seekers: Macros can benefit anyone looking to boost their productivity and reduce repetitive, time-consuming tasks in Outlook.
Macros are extremely helpful, especially for organizations, corporate businesses, and companies using Outlook as their email client. Automation saves a lot of time, money and increases productivity.
However, macros may not be very beneficial if you are a regular user or use Outlook clients where there are no repetitive tasks.
But, you are always welcome to use simple and creative programs in macros to decorate your Outlook and use them occasionally to save a second of your time.
Frequently Asked Questions
Do Macros work on Outlook 365?
No, macros don’t work in Microsoft Outlook 365. The same goes for Outlook on the Web, Outlook on Mac, and Android or iOS. It only supports Outlook on Windows.
Are macros disabled by default in Outlook?
Yes, the macros are disabled by default in Outlook. They are an advanced feature of Microsoft that allows you to customize many settings and options. Without knowing the correct use, it can be harmful. Thus, Microsoft has turned it off by default to maintain the safety measurement.
Do macros work with Outlook add-ins?
Yes, macros do work with Outlook add-ins. You need to enable the macros at first and select Apply macro security settings to installed add-ins to allow their functionality in third-party apps.
Final Thought
Macro is a fantastic feature to bring automation to your daily Outlook uses. It not only does the job without an error but also completes it quickly and decreases the chance of missing important information.
This article has provided a complete guide to macros, from learning about the basics to using them at an advanced level. I hope you’ve found the article helpful in clearing all your questions regarding macro.
Don’t forget to share your thoughts in the comments, and I’ll catch you at the next one.
Cheers!