If you often struggle to gather feedback from your colleagues or clients on important decisions, including voting buttons in Outlook can be the solution you’ve been looking for.

With just a few clicks, you can create a voting system within your email that lets your recipients quickly indicate their availability or preferences.
In this guide, I’ll walk you through the steps to add the voting feature in Outlook and simplify your communication process.
Let’s begin!
How to Add and Use the Voting Button in Outlook
In Outlook, you can add voting buttons when creating a new email or forwarding or replying to a message. To add voting options, click Use Voting Buttons from the Options tab. After sending the voting options, you’ll get a summarized view of what the recipients have voted for.
Follow the instructions below to add and use voting buttons in Outlook:
1. Add Voting Buttons
Before using the voting feature, make sure to log in to your Microsoft Exchange Server account in Outlook. Otherwise, you can’t use the voting feature. After signing in to the Exchange Server, add the voting buttons from the Options tab when composing your message.
Here are the steps to add voting buttons:
- Launch Outlook on your device.
- Select New Email from the top left corner.
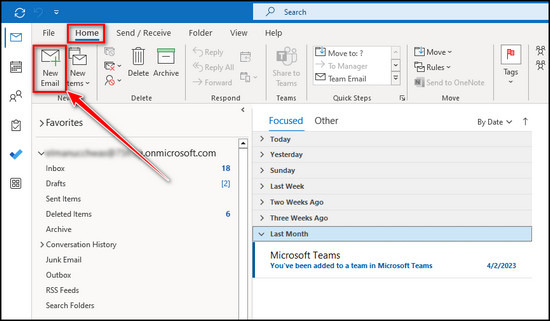
- Go to the Options tab and click Use Voting Buttons.
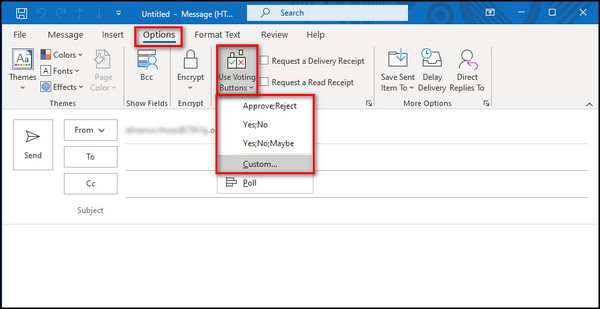
- Choose one of the following voting options:
- Approve;Reject: use this option when you want your colleagues to accept or refuse a proposal.
- Yes;No: this is a good option if you are taking a quick poll.
- Yes;No;Maybe: use this option when you don’t want to restrict the recipients between yes and no. They can provide other responses.
- Custom: this option will allow you to make your own voting options.
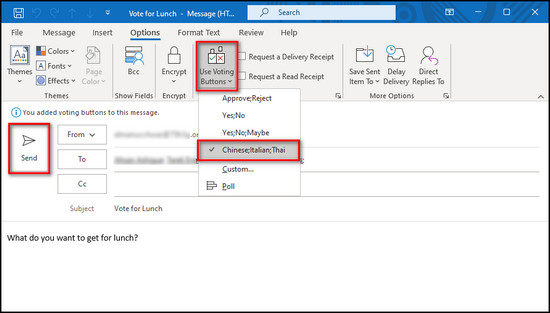
- Select Custom if you don’t want to use the premade voting options.
- Write your voting options in the text field. Put a semicolon (;) between each option, and don’t use any spaces.
![outlook-voting-options]](https://10pcg.com/wp-content/uploads/outlook-voting-options.jpg)
- Click the Close button when you are done.
- Select the recipients, finish composing the message, and click the Send button.
2. Review the Voting Responses
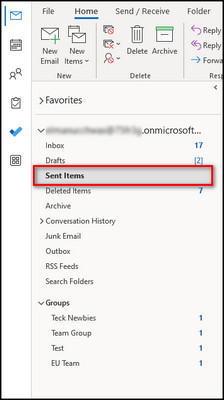
After the recipients cast their votes, you can open the original message from Sent Items and go to Tracking to see who has voted for what.
Below I’ve explained how to review the voting responses:
- Go to the Sent Items folder and double-click on the voting message.
- Proceed to the Message tab.
- Click Show and choose Tracking.
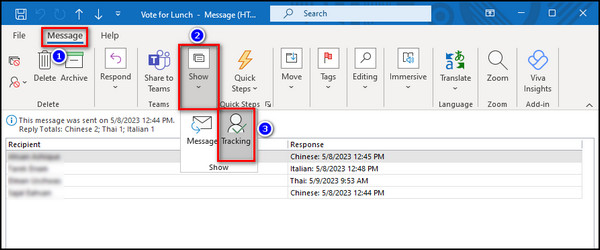
Now you can see which colleague has voted for what item. You can copy the response, paste it into a Word document or Excel spreadsheet and print it.
How to Fix Voting Buttons Not Showing in Outlook
It can be frustrating if you are experiencing the voting buttons not showing in your Outlook emails, especially if you need to gather quick feedback from your colleagues. But using the correct message format and sending it without encryption through an Exchange server will fix the issue.
Below I’ve provided the solutions to resolve voting buttons not showing up in Outlook:
Use RTF Message Format
One potential solution to fix the issue of voting buttons not showing up in Outlook is to use the Rich Text Format (RTF) message format. Because sometimes, when you send emails in Plain Text or HTML format, the voting buttons may not appear.
Here are the steps to use the RTF message format:
- Open Outlook and click the New Email button.
- Proceed to the Format Text tab.
- Click on Rich Text from the Format group.

Once you have changed the message format to RTF, try adding the voting buttons again. They should now appear in your email.
Sign in to Microsoft Exchange Server Account
Make sure you are signed in to the Exchange server. Otherwise, the voting buttons won’t appear.
Here’s how to sign in to a Microsoft Exchange Server account:
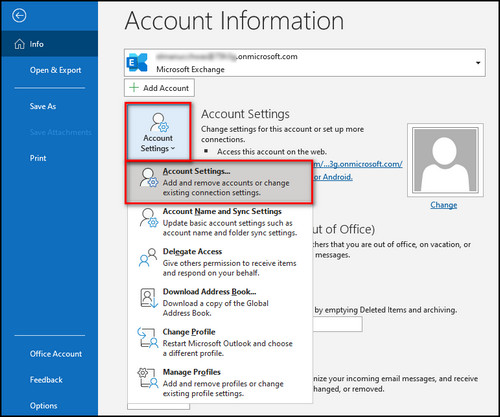
- Open Outlook and go to the File tab.
- Click Account Settings and select Account Settings from the dropdown menu.
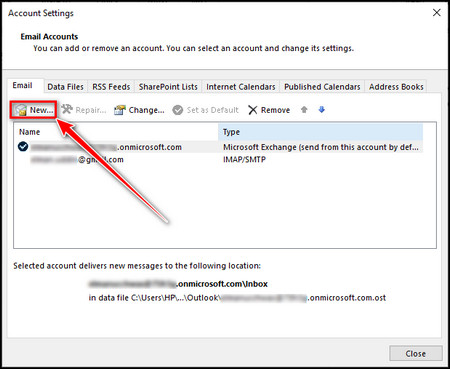
- Move to the Email, and click the New button.
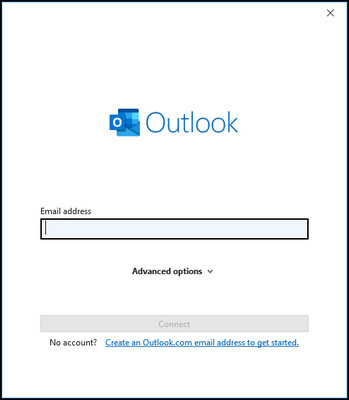
- Provide your Microsoft Exchange email & Password. Once you are logged in, set the account as default.
- Close the Account Settings window.
Use this newly added Exchange Server email to send voting messages within your Microsoft 365 organization.
Don’t Encrypt Messages with Voting Buttons
If you have enabled message encryption in Outlook, it may be why the voting buttons are not showing up. To fix this, disable message encryption.
Follow the steps below to send voting messages without encryption:
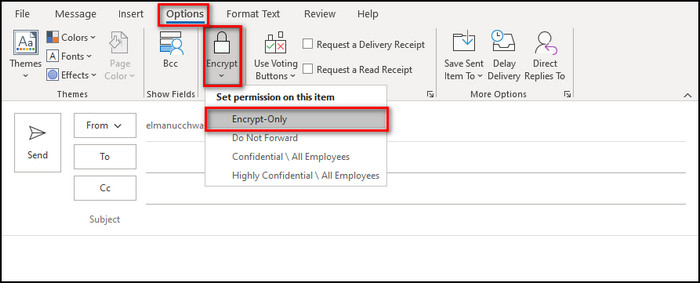
- Open Outlook and click New Email.
- Proceed to the Options tab.
- Click the Encrypt button and uncheck the Encrypt-Only option.
Now try to add the voting buttons again. They should now appear in your email.
Send Voting Emails within Your Organization
The voting feature in Outlook is only available to users within your Office 365 organization. So, if you send an email with voting options, you can only send it to others in the same organization.
Users outside the organization won’t receive it to maintain privacy and security. It ensures that the results of the vote are accurate and reflect the opinions of the intended audience.
How to Create a Poll in Outlook
Besides casting votes, creating a poll in Outlook is another helpful way to gather information and feedback from your colleagues, clients, or friends. You can use it to collect opinions on various topics, schedule meetings, or organize events.
Here’s the process for creating a poll in Outlook:
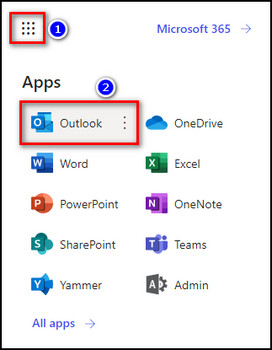
- Open Microsoft 365 and login to your organizational account.
- Click on the App launcher from the upper left and select Outlook.
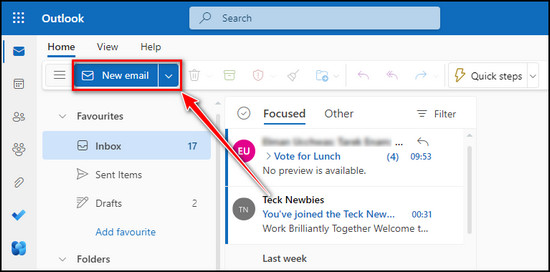
- Compose a New email.
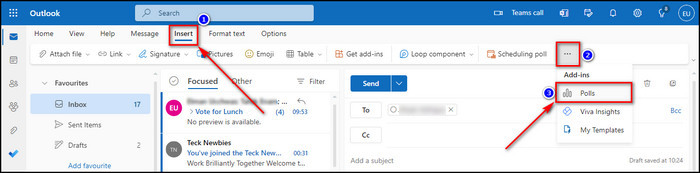
- Go to the Insert tab, click More options (ellipses), and choose Polls.
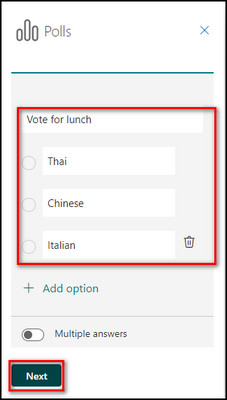
- Type in your question and customize the options. Toggle on Multiple answers if you want your colleagues to choose more than one option. Click Next when you are done.
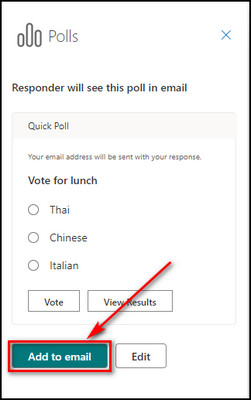
- Select Add to email.
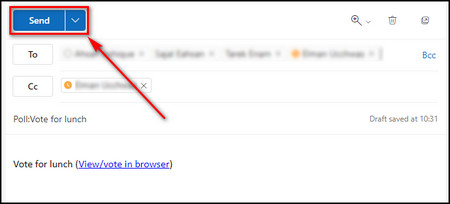
- Finish composing your message, then click the Send button.
Now recipients can select their preferred option in the poll and submit their responses.
Once the poll has closed, you can view the results by opening the original email in your Sent Items folder. Click the Poll button in the ribbon to view the results.
FAQs
How do I vote yes or no in Outlook?
To vote yes or no in Outlook, add the Yes;No voting option to your email. To do that, open Outlook, select New Email, go to the Options tab, and click Use Voting Buttons. Choose Yes;No and click the Close button. Select the recipients, finish composing the message, and click Send.
Why do I not see voting buttons in Outlook?
You do not see the voting buttons in Outlook because you are using Plain Text or HTML message format instead of Rich Text, you are not connected to the Microsoft Exchange Server, or you are using encryption for the voting message.
Do Outlook voting buttons work externally?
No, Outlook voting buttons do not work externally. Outlook’s voting feature is limited to users within your Office 365 organization. Emails with voting options can only be sent to others in the same organization to maintain privacy and security, ensuring accurate results that reflect the intended audience’s opinions.
How many voting options are there in Outlook?
You can add up to 32 voting options in Outlook. It will discard all voting buttons in a message without warning the user if there are more than 32.
Final Thoughts
With just a few simple steps, you can add custom voting options to your emails, allowing recipients to quickly and easily provide feedback.
Whether scheduling meetings, gathering opinions, or making decisions, voting buttons can save time and reduce confusion.
By following the steps in this article, you can easily insert voting buttons in Outlook and start using this convenient feature immediately.
Comment below if you have further questions, and we’ll get back to you.