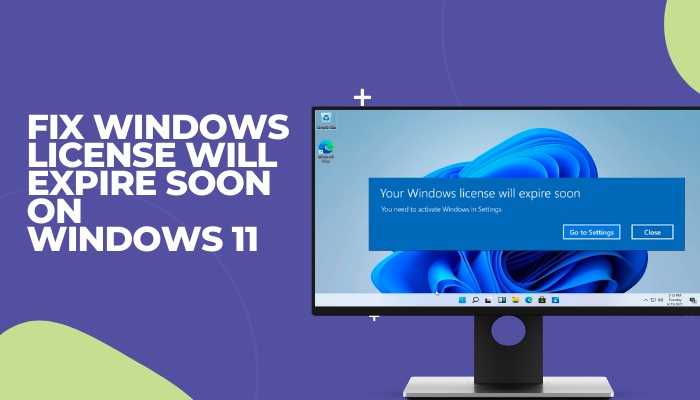
A large number of recent complaints have reported that users are getting constant reminders to renew their Windows license key, saying that it will expire soon.
Don’t worry, you won’t have to spend any money to get a new license to fix this. I found several solutions on the web that helped me get rid of the same issue.
So, grab a cup of coffee and dive into the article to learn more.
Will My Windows 10 License Expire If I Upgrade to Windows 11?
In addition to that, after a recent update, Microsoft has also added support for Windows 7 product keys to Windows 11.
However, you cannot directly upgrade from Windows 7 to Windows 11 with the same product key. If you are on Windows 7, you must first activate it using the Windows 7 product key and then upgrade to Windows 10.
After activating Windows 10 with the same product key, you are free to upgrade to Windows 11 using the same product key.
The Windows 8 and 8.1 product keys will also do the same job. One point to note here is that you cannot activate an edition of Windows 11 if it does not match the original Windows edition.
For instance, if your product key is valid for Windows 7 Home, you cannot use it to activate Windows 11 Pro or Enterprise. You can only activate Windows 10 and Windows 11 Home editions.
Also, read how to update drivers on Windows 11.
How To Fix Windows License Will Expire Soon on Windows 11
One point to consider before attempting the fixes is that you need to avoid using pirated license keys or license keys you did not purchase yourself. The majority of users who reported getting this error were known to be using pirated keys.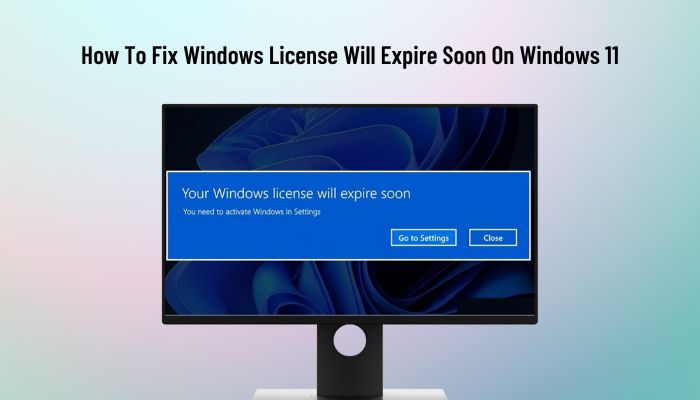
This is not always the case, though, and there are several cases where Windows simply couldn’t detect the license key stored in your system or verify it with Microsoft servers.
As a result, this issue is probably occurring because something is interfering with the license key. The fixes listed below should help you overcome that.
On the other hand, it’s essential to keep in mind that the message could be occurring because your organization didn’t renew the VLK or Volume Key License.
Follow these methods to fix the Windows license will expire soon on Windows 11:
1. Troubleshoot Windows Activation
I’m sure you already know that there are numerous troubleshooters available in Windows. While most of them can seem useless, they are actually pretty good at taking care of minor glitches or bugs.
Instead of finding the source of the problem yourself, why not let Windows do it for you?
Follow these steps to troubleshoot Windows activation:
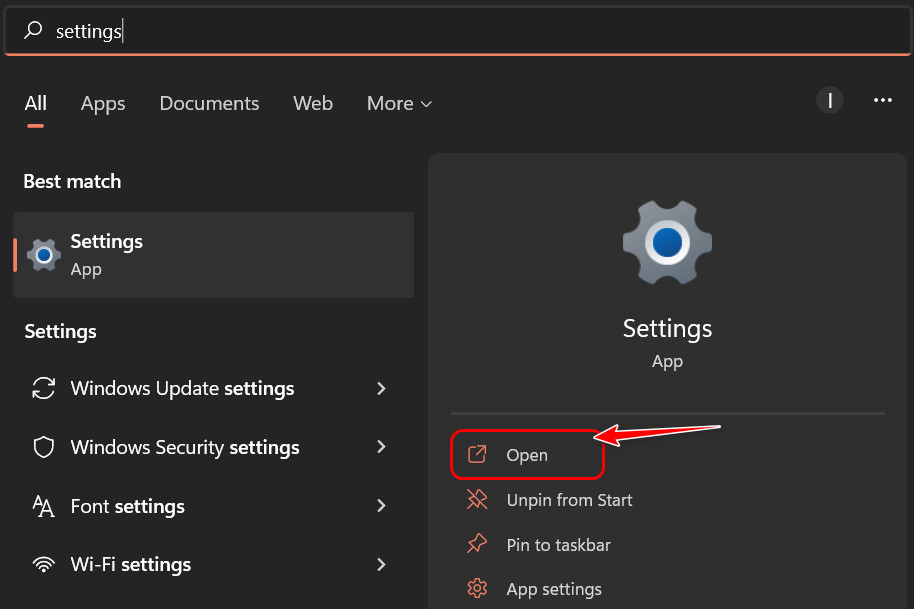
- Go to the Start menu, search for Settings and launch the app.
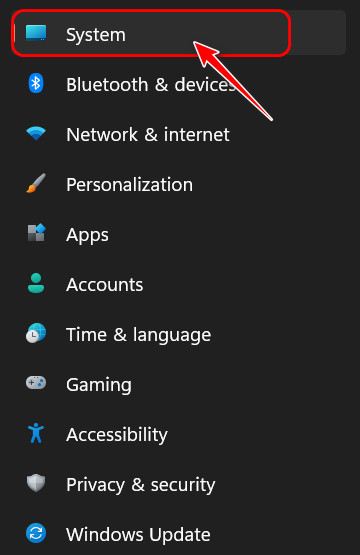
- Switch to the System tab from the left navigation panel.
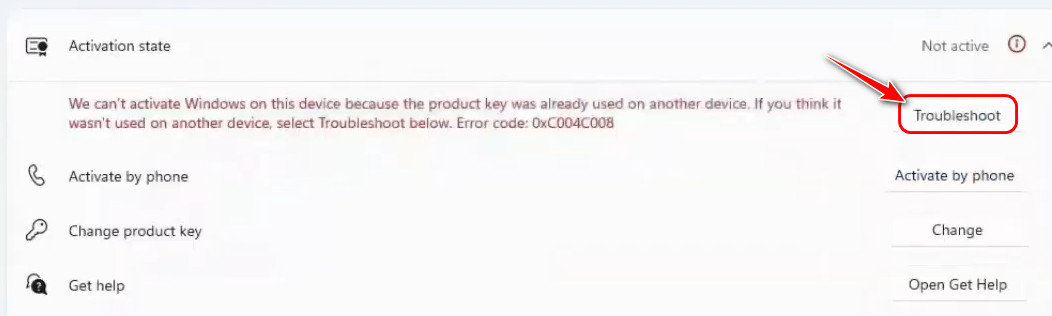
- Scroll to the Activation button on the right side and click on it.
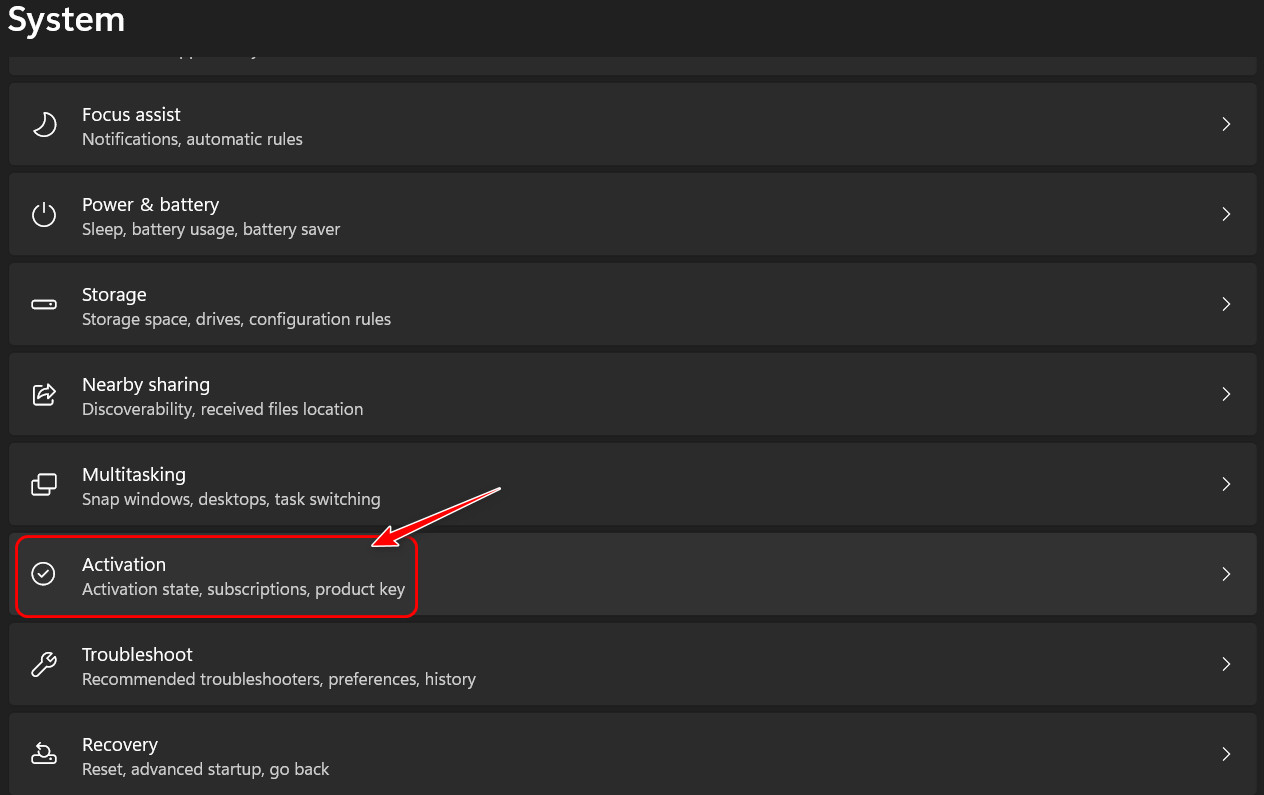
- Look for the Troubleshoot button below the Activation State option and click on it.
- Wait a few minutes for Windows to detect any problems. Once it’s done, reboot your system and see if there are any changes.
Also, check out our separate post on how to fix PC won’t go to sleep in Windows 11.
2. Reset License Key Status
Windows needs to read the license key status in order to understand whether the operating system is activated or not. As a result, resetting the product key status will solve the issue if there is a problem with the status.
Follow these steps to reset license key status:
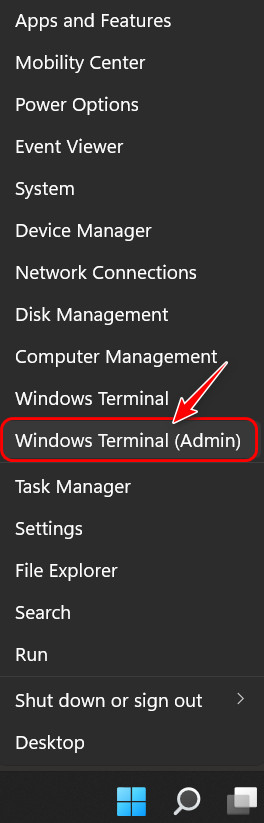
- Right-click on the Start menu icon at the bottom left corner of your taskbar and select ‘Windows Terminal (Admin)’ or ‘Command Prompt (Administrator)’ from the list.
- Click on Yes when the User Control dialog appears.
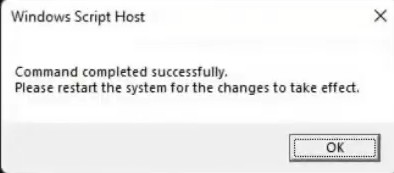
- Type the command ‘slmgr -rearm’ into the Terminal window and press the Enter

- Wait for a Windows Script Host confirmation dialog to appear to confirm that the command was correctly executed.
- Restart your PC and check if the error message appears now.
3. Restart Windows Explorer Service
Windows Explorer is the most used component in Windows, which also makes it a possible cause for any significant issues.
There is no harm in temporarily stopping the Windows Explorer service, so it’s worth a shot.
Follow these steps to restart the Windows Explorer service:
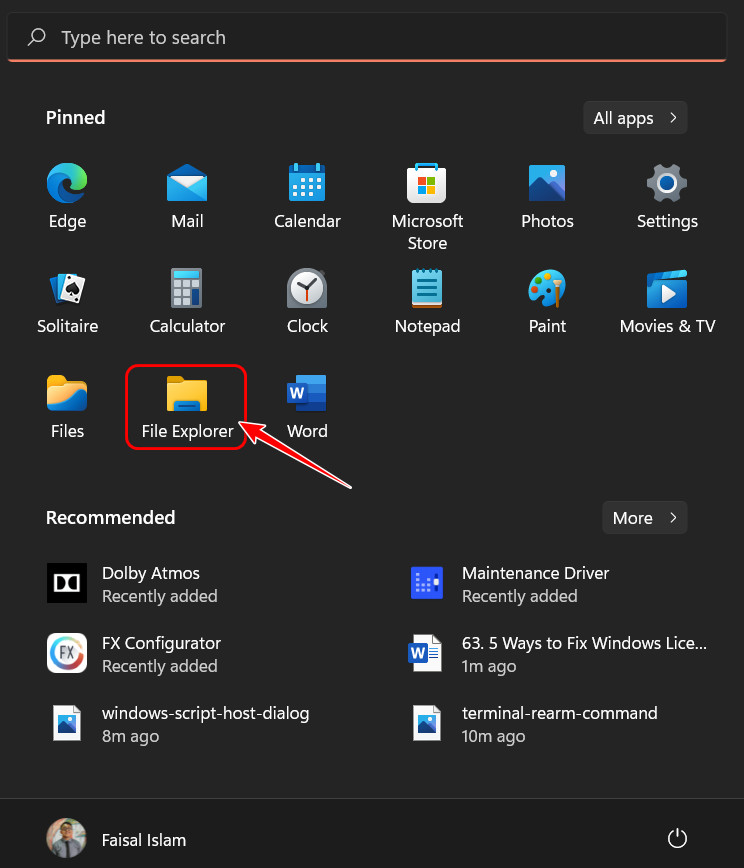
- Press the Windows icon on your keyboard to launch the Start menu and click on File Explorer to launch it.
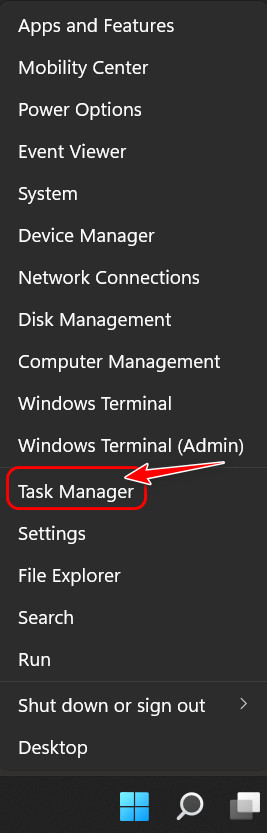
- Press the Windows and X keys at the same time to launch a context menu above the Start
- Select Task Manager from the list of options.
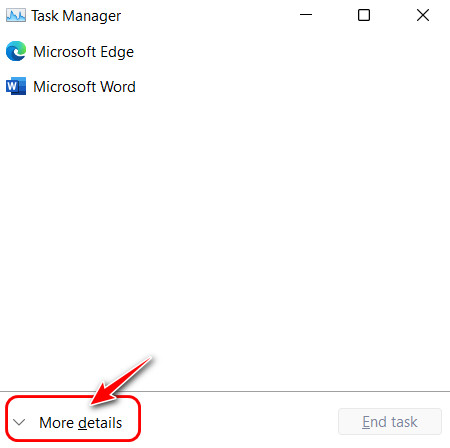
- Look for the More details button at the bottom of the window and click it.
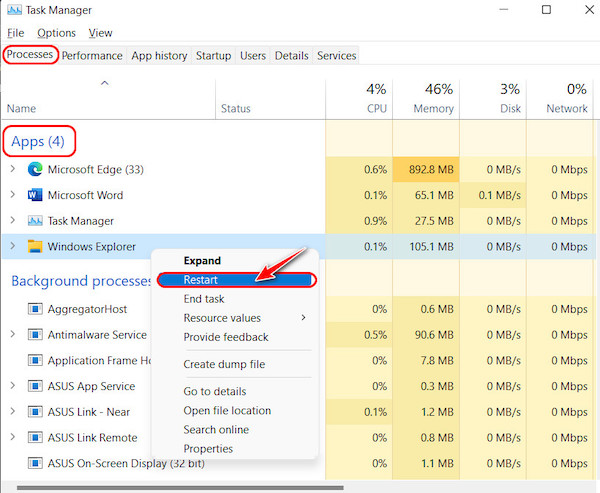
- Switch to the Processes tab from the top and select Windows Explorer in the Apps section. Right-click on it and click on Restart.
- Select End Task for Windows Explorer if that doesn’t solve the issue.
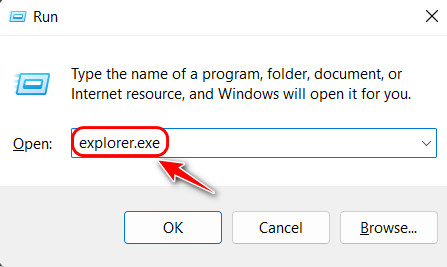
- Press the Windows and R keys at the same time to launch a Run
- Type exe and hit enter.
Follow our guide to fix Windows can’t access network drive on Windows 11.
4. Add Product Key in Settings
Windows typically prompts you to enter the product key only before installing Windows. However, you can actually enter the product key whenever you want by just navigating to the Settings app.
Follow these steps to add the product key in Settings:
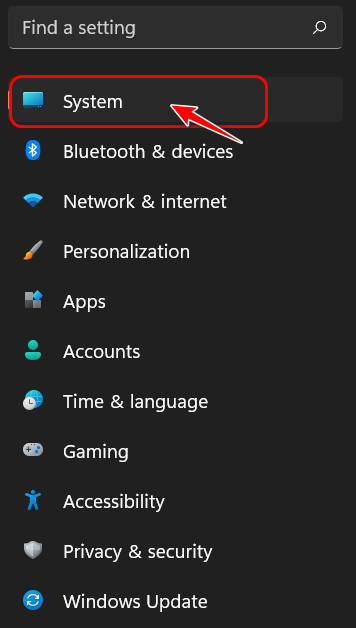
- Press the Windows Key, and I keys simultaneously to launch Settings.
- Click on System on the navigation bar at the left.
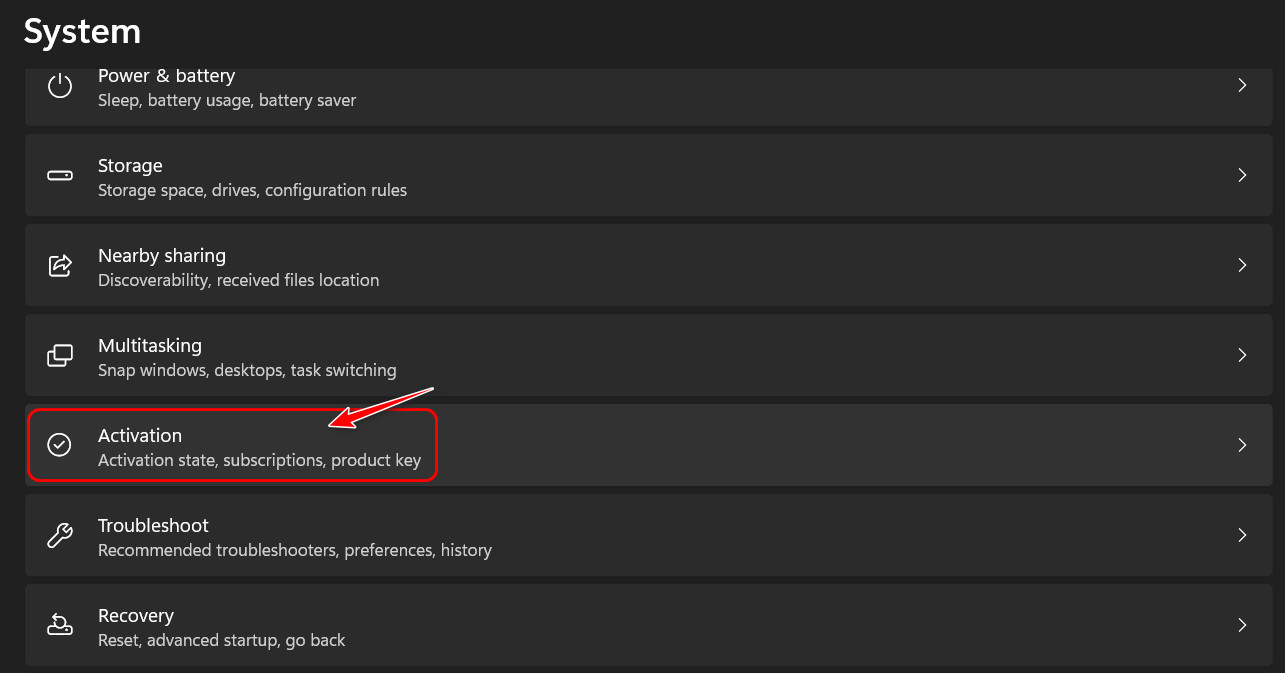
- Scroll and select Activation when you see it.
- Look for the Change button next to the Change product key and click it.
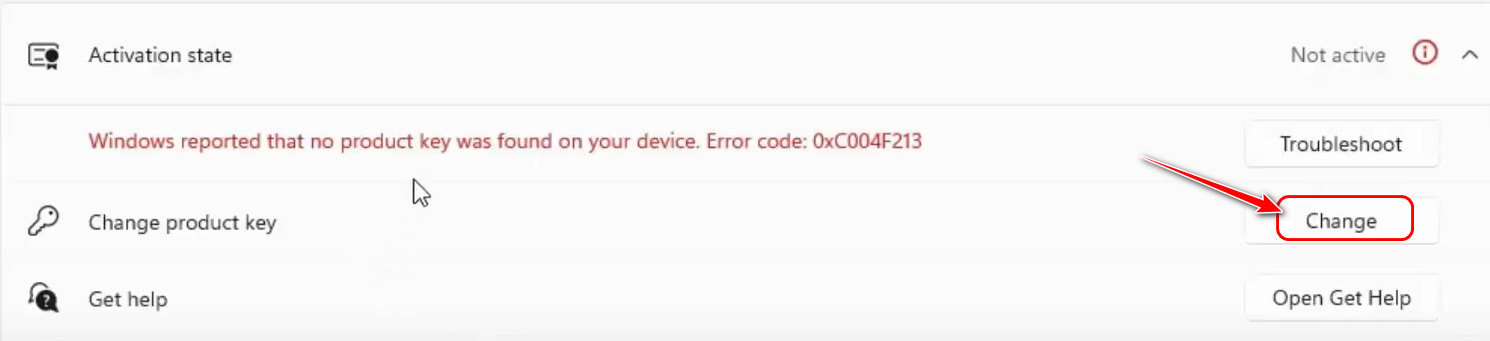
- Type in your Product key in the text box of the window and click on Next. Make sure to type the Product key without the dashes, as those will be inserted automatically.
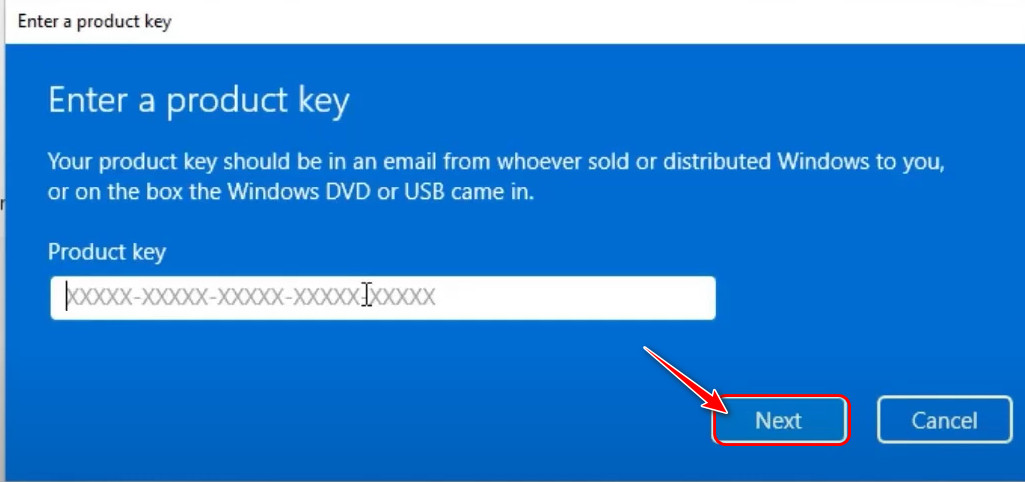
- Reboot your PC after this step and check if the issue persists.
5. Remove Product Key Information from Registry
If you have used Windows for more than two years, you must have come across the term ‘registry’ at one point. This is essentially a database of various kinds of information about your PC and its software.
An important point to keep in mind is that you can end up completely destroying your system by simply modifying a few registry files. As a result, you should always be careful when working with this.
Follow these steps to remove product key information from the Registry:
- Go to Start, type Command Prompt and click on Run as Administrator.

- Select Yes on the User Account Control dialog.
- Type the command ‘slmgr /upk’ and press the Enter
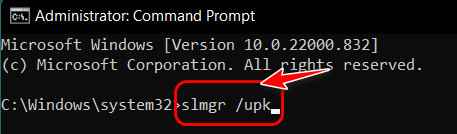
- Wait for the Windows Script Host pop-up to appear to confirm that the command was executed successfully. script-host-pop-up.jpg
- Select OK and type another command, ‘slmgr /cpky’, in the cmd window.
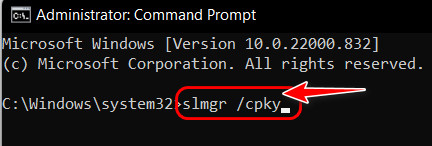
- Wait for another Windows Script Host pop-up to appear.
- Restart your computer and follow the steps in the previous method to add the product key in Settings.
Read more on does Oculus Air link work with Windows 11.
6. Perform a Hard Reset
If you still haven’t been able to solve the problem, there is a good chance that some of the system files of Windows got corrupted. As a result, your only choice is to perform a clean installation of Windows.
Since this is an extreme solution, and you will lose all your personal files, including images, videos, and audio, make sure that the product key you have acquired is genuine and that there’s nothing wrong with it.
I suggest contacting Microsoft support before doing this.
Follow these steps to perform a hard reset:
- Launch the Settings app by pressing Windows and I keys simultaneously.
- Search for ‘Reset’ in the search box at the top left corner and click on the first result.
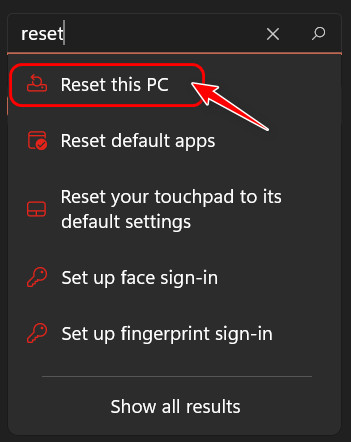
- Select the Reset PC button in the Recovery options section to proceed.
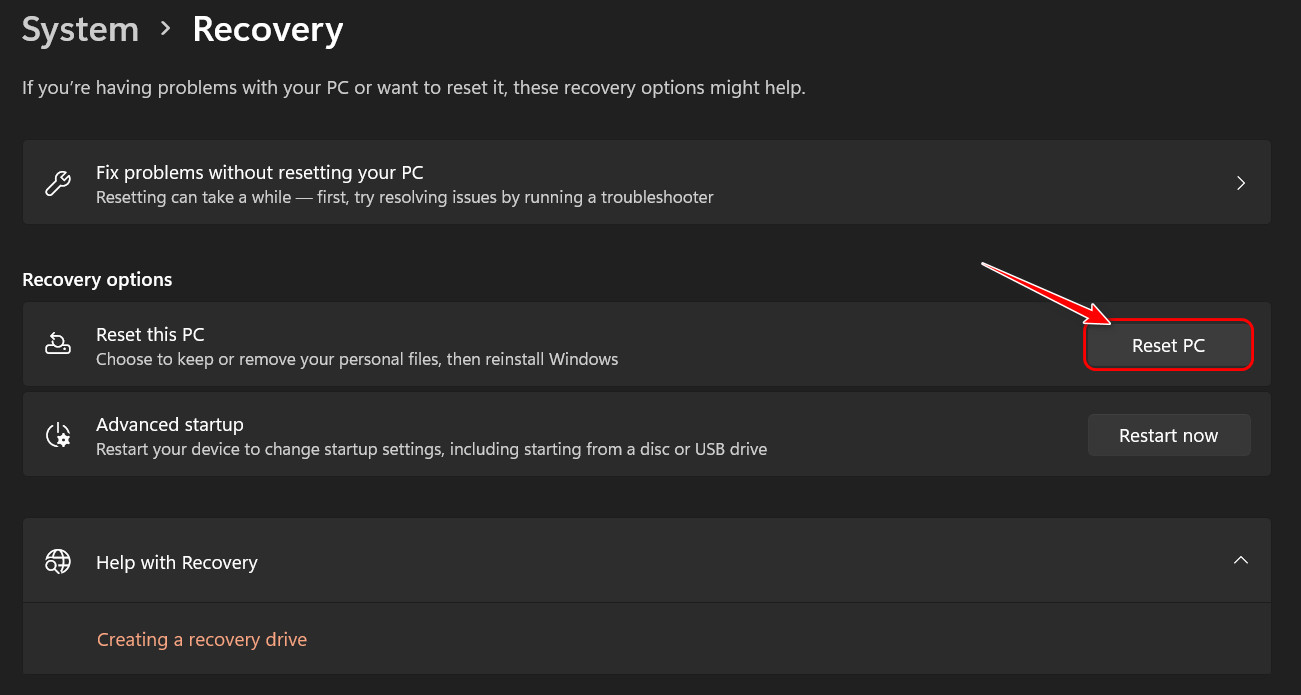
Make sure to back up all necessary files before clicking that button.
But before that, go through our epic guide on adjust page file in Windows 10.
Final Thoughts
It can be quite frustrating to purchase a product key for Windows and still face the same annoying pop-ups as before. After reading the first section, you must understand how the license key is integrated into Windows.
The fixes described in the next section should tell you precisely what you need to do to get back to a clean Windows experience.
Let me know which method worked for you below.