Whether it’s a get-together event, conference, or seminar, Microsoft Word allows users to quickly create and print out multiple name tags or designated address labels for all recipients
The best part is you can avoid the tedious task of manually typing every label by importing data from existing contact lists.
So, without any delay, let’s dive into this article to see how you can easily create different labels in Word.
How to Create Multiple Name Tags or Address Labels in Microsoft Word
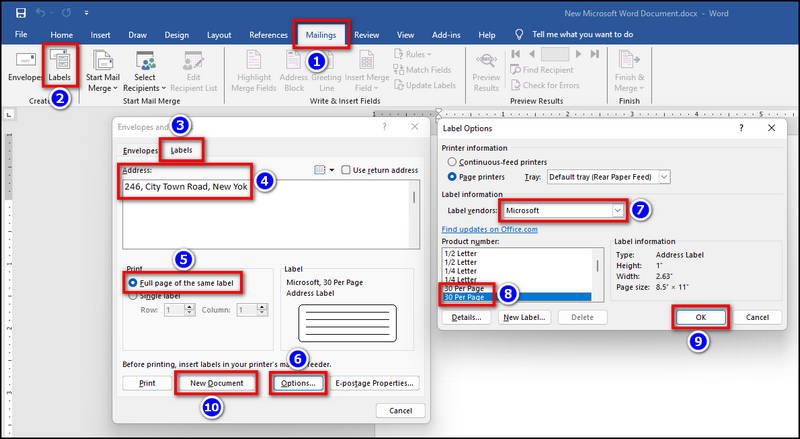
If you want to create and print different labels on one sheet in Word, select the Mailings tab & click on Labels. Now, go to the Labels tab from the pop-up window & click on Options. Set Microsoft as Label vendors & 30 Per Page as Product number. Then, click OK > New Document & input the labels.
In case anything goes wrong during this process, use the Undo feature of Microsoft Word to go back to the previous step.
To be frank, there are two different ways to make name tags with borders or multiple labels in Word that you can print on one sheet. Below, I have discussed both methods in a step-by-step manner.
Here’s how to create and print name tags or address labels in Word:
1. Create Multiple Different Name Tags or Address Labels
- Go to the Mailings tab & select Labels.
- Click on the Labels tab > Options.
- Select Microsoft as the Label vendors and 30 Per Page as the Product number.
- Hit OK.

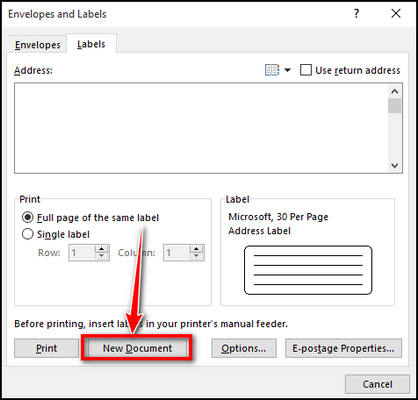
- Select New Document. The labels will appear in a grid layout.
- Type the names or addresses in each label grid.
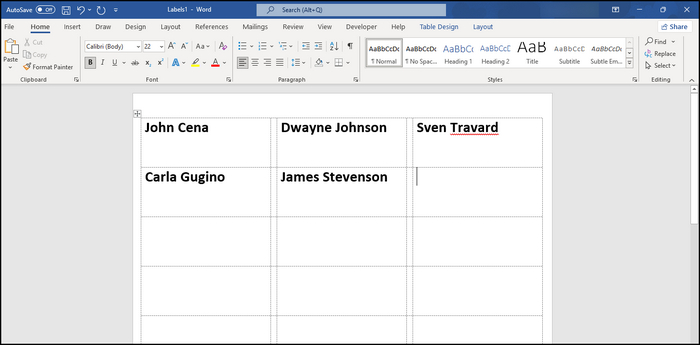
- Change the text format accordingly.
2. Create Multiple Identical Name Tags or Address Labels
- Navigate to the Mailings tab and click on Labels.
- Select the Labels tab > Options.
- Choose Microsoft as the Label vendors and 30 Per Page as the Product number.
- Click on OK.
- Type the names or addresses in the Address box and click on New Document.
That’s it. A new document will appear containing the same name tags or address labels in all the fields. This method can save you a lot of time as you don’t have to copy-paste all the labels manually. 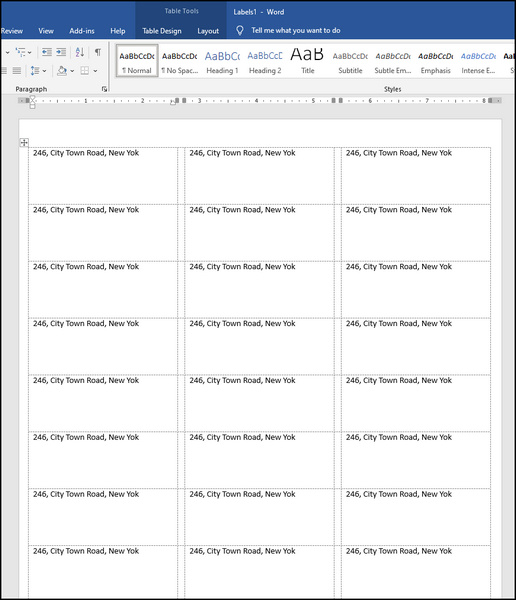
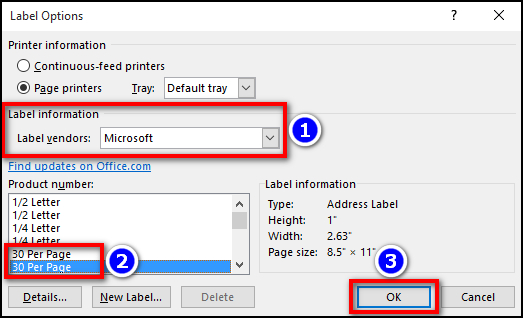
Expert tip: The first 30 Per Page option in the Product number section is for vertical labels, and the second one is for horizontal labels. You can check their height and width from the Label Information section located on their left-hand side.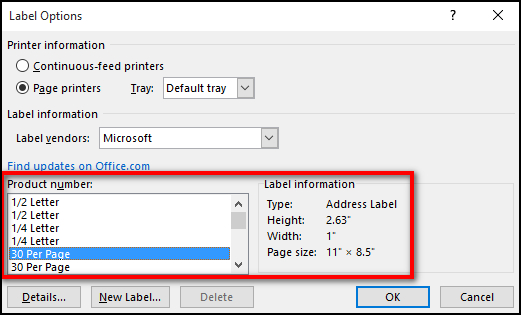
Furthermore, you can use templates to create these labels if you don’t want to go through the trouble of manually creating grids.
Follow these steps to create different labels using Microsoft Word label templates:
- Click on File > More templates.
- Type name badge in the search bar and press Enter.
- Pick any template from the results based on your preferences.
- Insert the name tags manually in their designated fields.
When the labels are ready, click on File > Print and check the document from the right-side preview. If everything looks okay, select the Printer and click on Print. By following these above-listed methods, you can create and print 30 different labels on one sheet in Word. 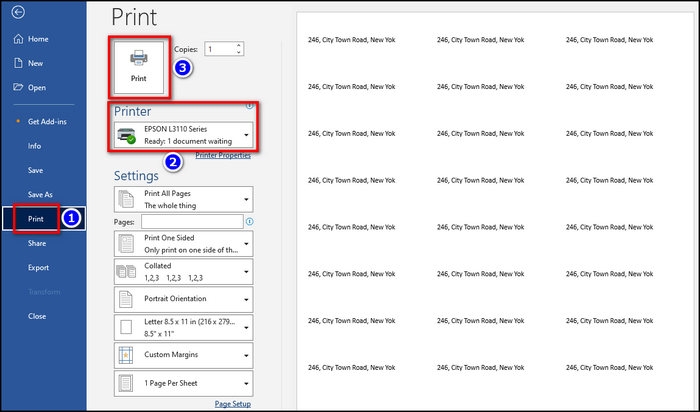
How to Create and Print Labels in Word Using Mail Merge
Alternatively, you can use the Mail Merge feature in Microsoft Word to create and print names, addresses, or any other labels from an existing contact list.
Here’s how to create and print name tags or address labels in Word using mail merge:
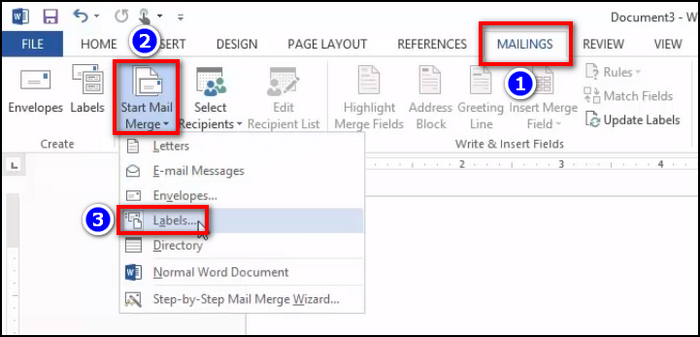
- Select the Mailings tab from the top ribbon.
- Click on Start Mail Merge > Labels.
- Set Microsoft in Label vendors.
- Select the first 30 Per Page for vertical or the second one for horizontal labels.
- Hit OK.
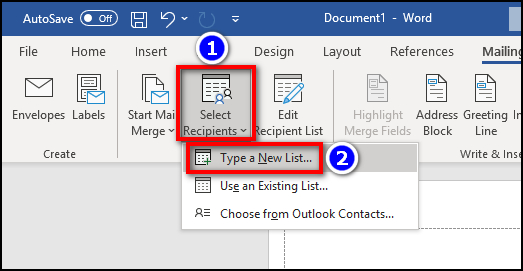
- Click on Select Recipients > Type a New List.
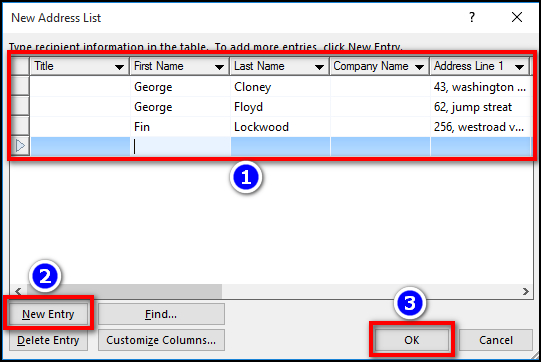
- Type the First Name, Last Name, or Address Line for the labels.
- Click on New Entry to input those values for the next label.
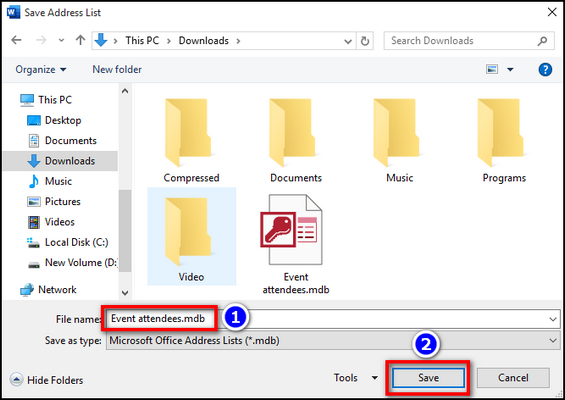
- Select OK and save the list on your computer.
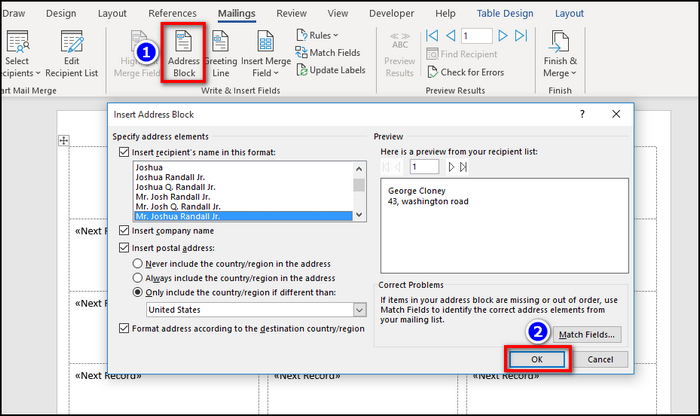
- Click on the Address Block option from the top ribbon and set the name and address layout accordingly.
- Hit OK.
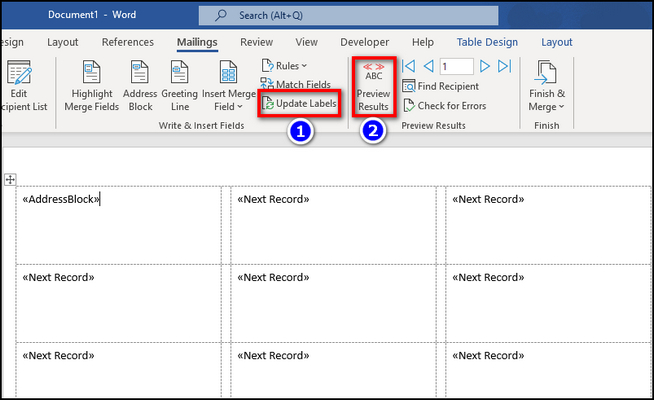
- Click on Update Labels > Preview Results.
Done! Now, your name and address labels are ready to print. You can reuse the saved list to use other labels as well; no need to type them again. 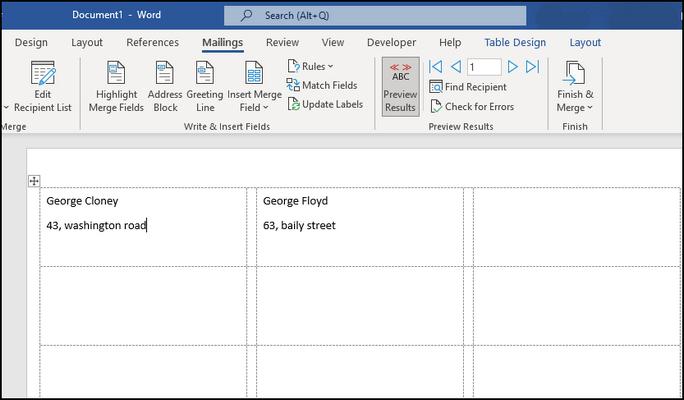
Frequently Asked Questions
What is the use of name tags or address labels in Word?
You can create different address labels or name tags using the Microsoft Word 365 app to print out wearable name tags or specific labels. These labels can also be used to create postcards or letters in a printable format.
How to print multiple labels in Word?
After creating or importing the labels you want to print out, go to File > Print. If everything looks good from the preview, select your Printer from the designated option and click on Print.
Can you create and print different labels in Microsoft Word using mail merge?
Yes. You can directly input recipient names and address labels from an existing/Outlook contact list using the mail merge feature in MS Word. But you will still need to adjust the layouts in an orderly fashion.
Wrapping Up
In the end, using the Mail Merge feature is a much more efficient way to create a bunch of printable labels. Why? Because you can use the same contact list over and over again for the labels instead of typing data in each field manually.
Anyway, I hope this write-up has provided you with the easiest way to create your own printable labels using the Word app.
Have a nice day!