The ASUS ROG Ally is an attractive, lightweight handheld gaming PC with a 120Hz FHD 1080p display. But this becomes uncomfortable when its 40Wh, 4-cell Li-ion battery stops charging when gaming.
Don’t worry. This article will show you the best solutions to resolve the ASUS ROG Ally charging issue.
Let’s dive in.
Why is Battery Not Charging on ASUS ROG Ally?
The reason ROG Ally is not responding to charging can be for a loose AC adapter connection, the adapter or charging cable can be damaged, a software glitch, or a BIOS issue. In addition, if the device is too hot, it can stop charging for protection mode.
When I was playing Forza Horizon 5 on the ROG Ally with 1080p, 120Hz in high settings, it got too hot after a certain time. The battery was around 33% & I plugged in the charger. And to my surprise, the device didn’t recognize the charger and refused to juice the battery.
But, after some moments, I tried again. And this time, Ally started taking charge. So, it was definitely some kind of overheating protection to save the battery for me.
If that’s not the case for you, here are some other reasons that cause not charging ROG Ally:
- The AC adapter connection can be loose.
- Outdated softwares.
- Damaged cables or ports.
- Using Turbo Mode to heat up the device quickly.
- New BIOS.
ROG Ally is powerful enough to handle the most demanding AAA games with its AMD Ryzen Z1 processor. But due to physical faults or software bugs, the ROG Ally power delivery system can be interrupted, which prevents you from playing games for not having enough charges.
How to Fix ASUS ROG Ally Battery Not Charging
To resolve the ROG Ally battery is not charging issue, shut down the device and let it cool down if it’s too hot. In addition, tuning down settings from the command center, enabling battery bypass mode, or reverting to the old BIOS can also mitigate ROG Ally problems for battery charging.
The Ally is a powerful mini-computer, and you can play games anywhere for its portability. But, if the ASUS ROG Ally is not turning on due to the battery being out of juice, it will become useless.
Here are the possible solutions to overcome ROG Ally charging issues:
1. Restart ROG Ally
Just like a PC or laptop, rebooting the ROG Ally also flushes out any temporary files or settings that can conflict with battery charging issues. So we have to force restart the device and verify if it starts to charge.
Follow the below steps to force restart ROG Ally:
- Push the Power button and Volume down button simultaneously and hold it for around 10 seconds.

- Release the buttons after getting a vibration.
After that, the console will restart automatically. Now try to charge the battery. If the failing charging issue persists, follow the next solution.
2. Check Up on Charging Ports and Cable
It’s not a wonder we often overlook the charger cable or power adaptor when a device doesn’t get charged. We assume a defective battery or system malfunction is the primary suspect.
Though the adaptor that comes with the Ally is top-notch, it’s not invulnerable. The ROG Ally charging speed greatly enhances with its 65W charger. But if the cable is roughly used, it can be worn and torn. Also, the pins can be bent, resulting in failure to make proper contact.
All of these can decline to recharge the ROG Ally battery.
As a workaround, inspect the cable and swap it to a new one if possible. Additionally, you can plug the USB-C cable into a laptop and try to recharge the Ally to verify whether the power adapter is the culprit or not. Moreover, you can also change the power socket.
If the results are fruitless, follow the next method to charge the Ally battery.
3. Disable Performance Mode
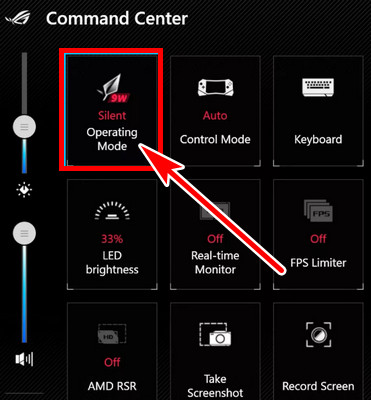
The ASUS ROG Ally has 3 Operating Modes, Silent, Performance, and Turbo mode. While the Silent mode provides only 9W of power, that greatly helps to keep the heat at a reasonable level. On the other hand, Performance and Turbo modes deliver 15W & 25W of power, respectively.
However, if you are using the Turbo mode, it can heat up the device pretty quickly with 1080p high settings. In one way, this drains the battery quickly, and on the other side, this ramps up the battery temperature and triggers not recharging at critical temp while playing games.
You can read the battery level from Windows and Armoury Crate. But when you are in full-screen gaming, you won’t be able to monitor the battery life unless you activate the overlay.
So, how to see the remaining battery on the ROG Ally?
Hit the Command Center button on the left side and select the Real-time Monitor option. During gaming, you can see different metrics like CPU & GPU usage info, temp, battery percentage, etc., in the upper-right side. You can also move the overlay to prevent conflicting with a game’s HUD.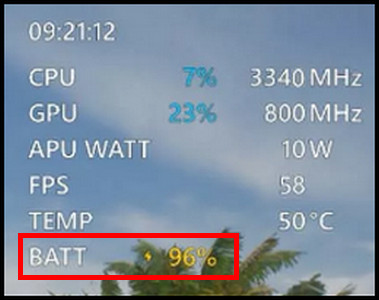
If you disable the Turbo mode, this will reduce the CPU clock speed to a lower value. For my unit, it was floating around 3.2 GHz, and the temp was around 80℃. This effectively helped in my case, and the not charging issue disappeared during gaming.
4. Test With Battery Care Settings
After getting the new ROG Ally, you should always update the Armoury Crate software to the latest version to avoid any bugs or glitches.
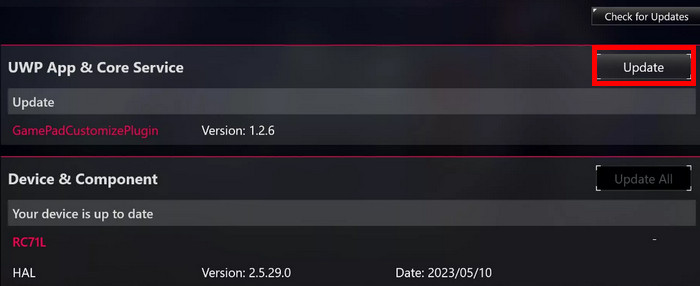
You can update the Armoury Crate by pressing the Command Center button > Content tab > Update Center > Check for Updates. After that, you can update the app and other devices & components. Besides this, you have to use the MyASUS app to update the system.
And in this app, you will find Battery Care Mode, which can conflict with charging issues. One of my friends did a quick test by turning the Battery Care settings on and off. After a while, ROG Ally registered it was plugging in and started recharging. I couldn’t understand how hilarious that incident was. I thought the device needed a defibrillator.
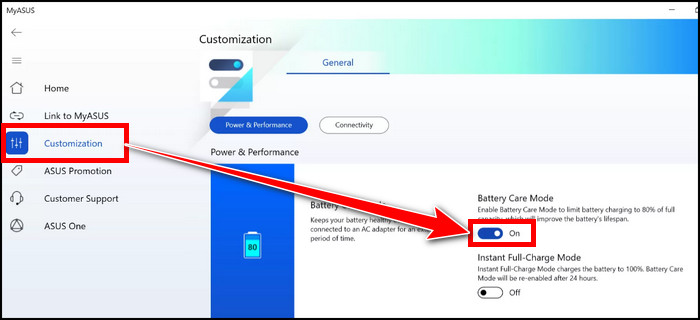
Apart from that pun, to cycle the battery care mode, open the MyASUS app from the Windows search > go to the Customization tab from the left panel > locate the Power & Performance section > toggle on the Battery Care Mode. This will cap the battery charging to 80%. Now again, toggle off the option.
Now wait for some time, and plug in the charger. The not charging issue for ROG Ally should be fixed.
5. Revert BIOS
You should always keep your BIOS up-to-date. And from the MyASUS app, you can easily do that. However, newer things are supposed to fix many old problems and enhance performance or stability, but it’s not always the case.
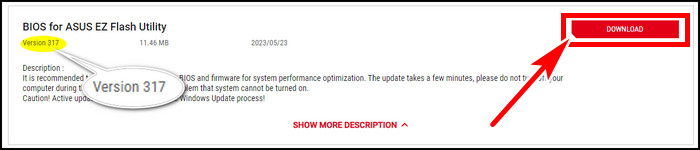
While searching for the battery recharging issue for Ally, I found that many users with BIOS version 319 encountered Ally battery charging issues. Rolling back to BIOS 317 resolved their issue.
Here is the process to roll back to the previous BIOS version on ROG Ally:
- Download and install ASUS WinFlash.

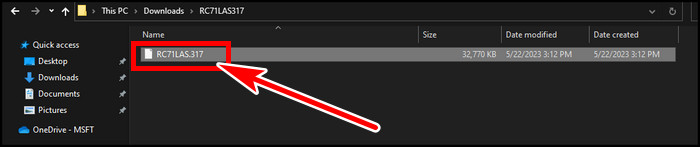
- Download ROG Ally BIOS ver 317 and extract the zip file.
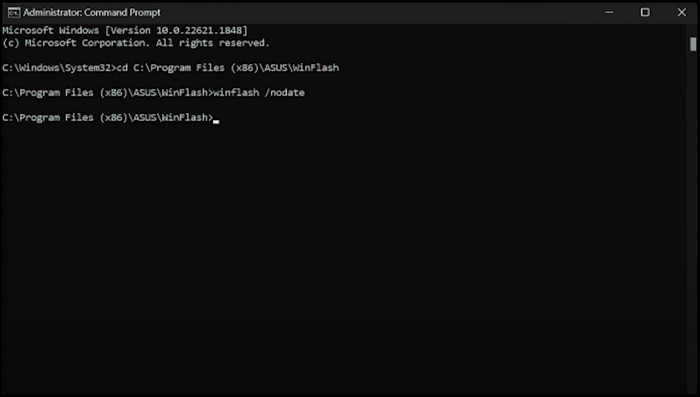
- Search cmd and open command prompt with run as administrator.
- Type cd C:\Program Files (x86)\ASUS\WinFlash and hit enter.
- Type winflash /nodate and hit enter again.
- Open the WinFlash and select Get BIOS from Device.
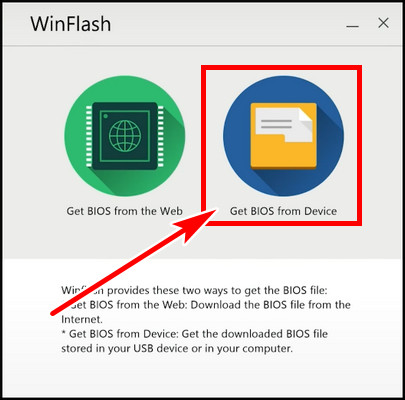
- Select the BIOS 317 you extracted.
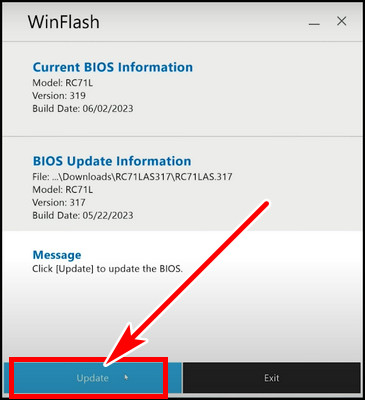
- Click on Update to revert BIOS to 317.
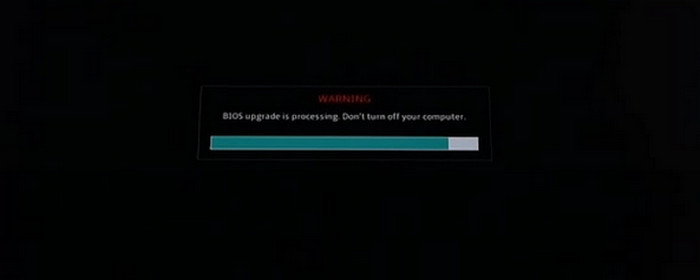
- Wait till the BIOS flashes.
- Open the MyASUS app after booting and turn off Automatic Essential Update.
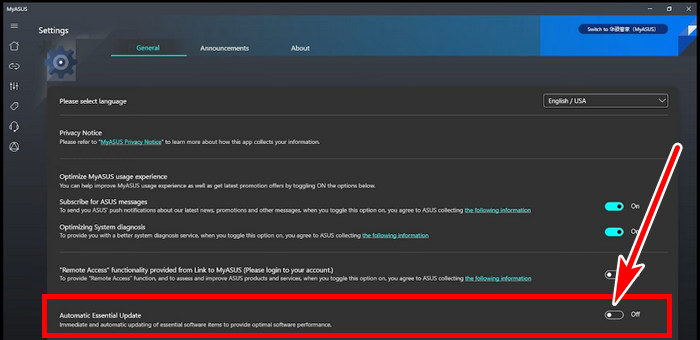
The last part will ensure BIOS 319 won’t be updated automatically and cause issues. The not charging issue will be resolved by now.
Alternatively, there are BIOS 322, and 323 have been released for ROG Ally. You can update to those BIOS versions from MyASUS and verify it resolves your Ally not charging issue.
How to Extend the Battery Life of Your ROG Ally
The ROG Ally is there for you to play the games while you are not idle, moving around. So, preventing draining out the battery quickly should be a target for a longer gaming session on the battery.
The ROG Ally has a larger battery than its rival Steam Deck. It also consumes more power and lasts for around 2-3 hours, depending on the game’s nature, on a single charge at 1080p. However, the battery can back you up to 5 hours for less demanding games with lowered settings.
On the other hand, Steam Deck’s 800p resolution can run 1.5-2 hrs without the next charge. Like Ally, the time can increase with less demanding games, up to 3 hrs.
For having the powerful hardware than the Steam Deck, Ally can drain out the battery quickly, contributing to a shorter battery life.
So does ASUS ROG Ally have a battery problem?
No, but you must take some measurements to ensure the battery doesn’t die on you so soon.
Here are some steps you can take to prolong the ROG Ally battery life:
- Ensure Armoury Crate and other devices & drivers are updated.
- Switch to Silent Mode in Operation mode from the Command Center. Or at least Performance Mode.
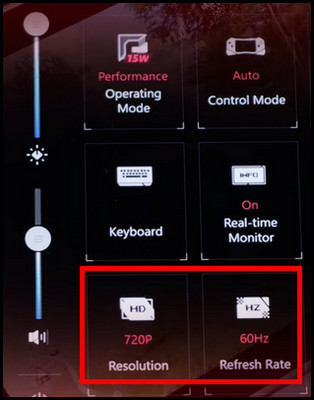
- Lower the Resolution and Refresh rate if you want to stick with Performance Mode.
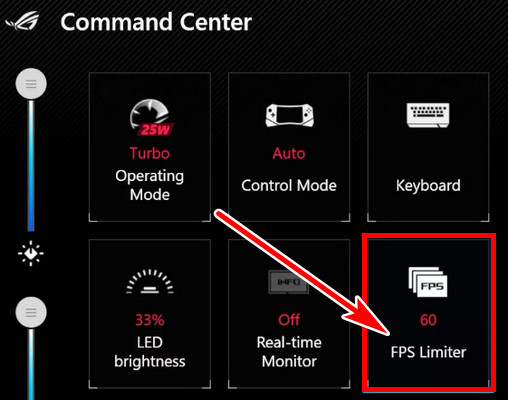
- Cap the Frame rates if you intend to use Turbo Mode.
- Turn on Battery Care Mode to bypass battery mode.
Besides these, you can also reduce screen brightness, optimize power settings when not using the console, or play games via cloud streaming which effectively puts low pressure on the hardware & battery and increases overall battery life.
Can I Disable CPU Boost in ROG Ally?
Yes, you can deactivate the CPU boost, which is enabled by default in ASUS ROG Ally.
CPU boost is turned on on all Windows Power profiles for increasing FPS. But, not all games gain significant performance boosts from the feature. Rather, it heats the CPU unnecessarily & drains out the battery quickly.
The feature can be disabled from Processor Performance Boost Mode, which is hidden in the Power profiles.
To display the option follow as below:
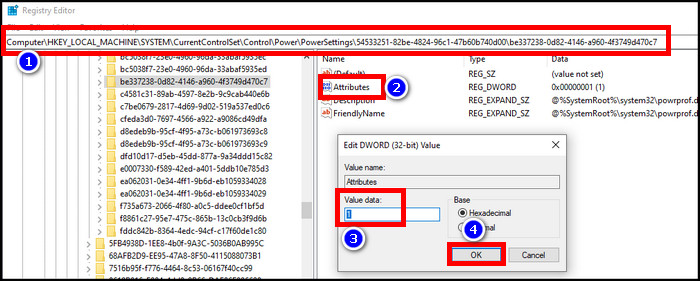
- Search regedit and open it with run as administrator.
- Navigate to Computer\HKEY_LOCAL_MACHINE\SYSTEM\CurrentControlSet\Control\Power\PowerSettings\54533251-82be-4824-96c1-47b60b740d00\be337238-0d82-4146-a960-4f3749d470c7.
- Double-click on Attributes on the right side and change the value to 2.
Now, we have to disable the aggressive boost settings. To do that, search Edit Power Plan and open it > Change advanced power settings > expand Processor power management > Processor performance boost mode > select Disabled from the on battery section.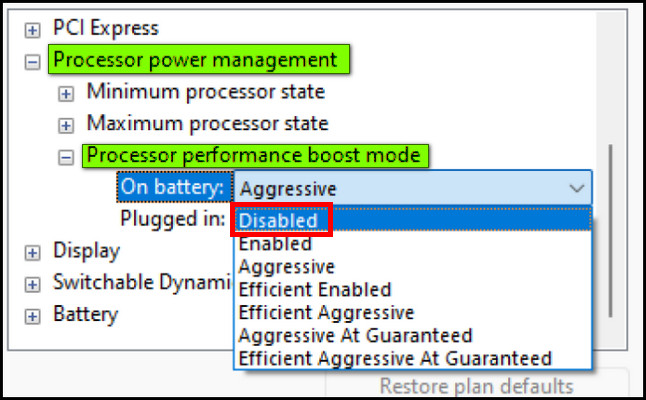
FAQs
How long does the ROG Ally battery last?
ROG Ally can serve you up to 3 hours on a single charge. But the duration can be reduced or increased by tweaking game settings. Screen brightness also affects the battery backup duration.
Can you replace the ROG Ally battery?
Yes, you can. The battery is installed with screws. So you won’t have to worry about glue. This makes the repair and replacement of the battery more convenient. The thumb sticks and motors are also easily repairable for this.
Should I use battery bypass mode in ROG Ally?
You can use Battery Care Mode to lengthen battery life. However, you can disable the feature and bypass battery mode to 100% charge the battery.
Final Thought
It is very frustrating when the battery is low, and you can’t charge it on your ROG Ally. Rebooting the device, verifying the charger cable & ports, or flashing old BIOS can resolve the Ally charging issue.
In this article, I described all the possible fixes and how to extend the battery life of your ROG Ally. For any further queries, please leave a comment.