In today’s world keeping your team up-to-date is crucial for collaboration and informed decision-making.
It’s the key to success, but sometimes you may forget to check the latest news while at work. However, with the RSS feed in SharePoint, you can effortlessly read the latest update from your favorite site and keep yourself updated.
In this article, I’ll describe the RSS feed and show ways to include external news feeds in SharePoint.
So, let’s jump in.
The RSS or Really Simple Syndication feed is a technology that allows you to receive content or updates in a standardized format from another website. It’s a web feed format that you can use in SharePoint to centralize the content from multiple sites in one place.
The RSS feeds are generally in XML format and contain headlines, summaries, and sometimes full articles from a website.
Not every website provides an RSS feed for the user. The website that provides RSS feeds, shows an RSS feed icon or gives a link to their site from where the user can subscribe and read their content.
In SharePoint, you can only add RSS Feed to a modern page. Unfortunately, there is no option to add an RSS feed to SharePoint communication sites.
Consider reading the following passage to embed an RSS feed in a SharePoint modern site.
Users with editing permission can insert an RSS feed from the web part in SharePoint modern team site. You need to copy the RSS feed link from the target website and paste it into the web part, and SharePoint will automatically convert the feed into readable content.
The team site page has an RSS web part and configuring it will bring the content from your desired website. To add RSS feeds from external sites to your SharePoint site, read the following procedures carefully.
Here are the steps to add an RSS feed to the SharePoint team site:
- Go to your SharePoint team site.
- Navigate to the page where you want to add the web part.
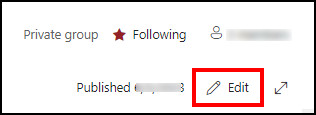
- Press on Edit.
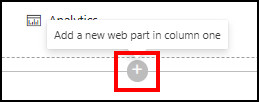
- Click on Add a new web part.
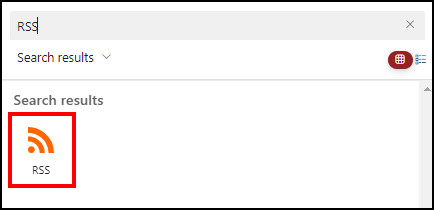
- Search and press on RSS.
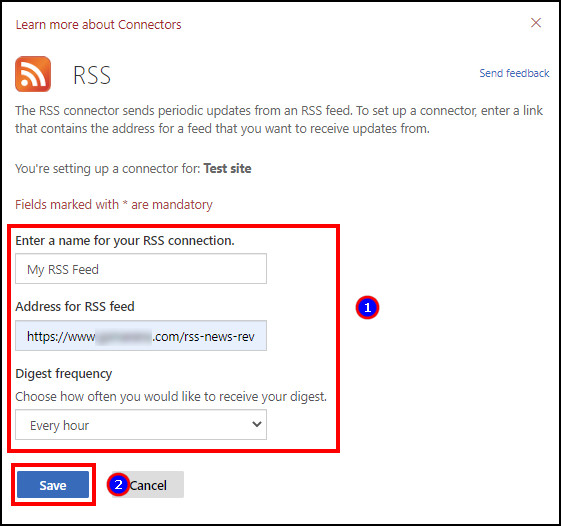
- Provide RSS name, link, and digest frequency.
- Click on Save.
- Press on Republish.
After publishing the RSS feed, it will appear on the SharePoint page and show headlines and content.
Users can create a custom RSS feed reader with Power Automate and include it in the SharePoint site to show the cover image, headline, and content of the target website. The custom RSS feed provides better visuality than the built-in RSS web part in SharePoint.
Also, with Power Automate, you can add the RSS feed in SharePoint communication sites along with team sites.
The RSS feed-creating procedure is more complicated than the typical web part methods. But, the effort is worth every penny as the appearance looks way more modern and nicely customized.
Consider following the procedures below to create and enable the RSS feed in SharePoint with Power Automate and give a good look at the RSS feed.
Read the steps below to create a custom RSS feed with Power Automate in SharePoint:
- Go to the Power Automate website.
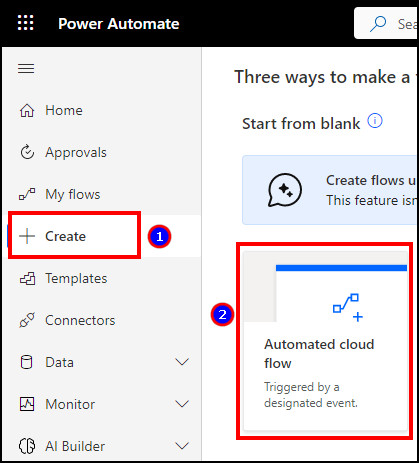
- Click on Create and select Automated cloud flow.
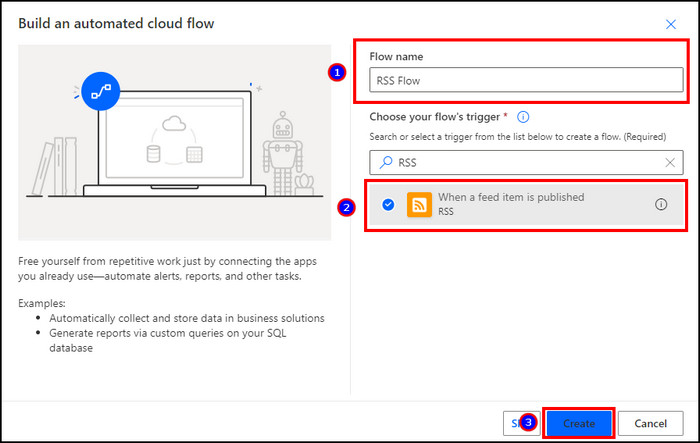
- Type Flow name and select When a feed item is published.
- Press on Create.
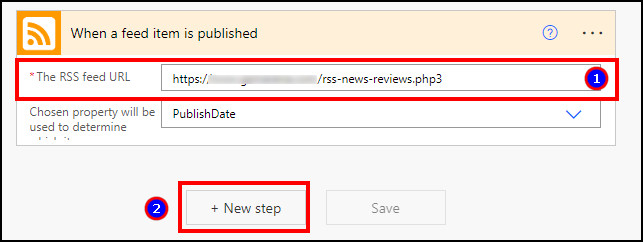
- Paste the feed URL and click on the Next step.
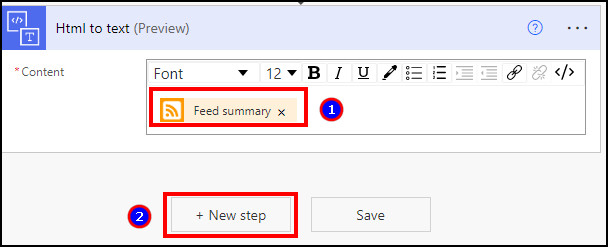
- Create an HTML to text operation.
- Select Feed summary from the dynamic content.
- Press on the Next step.
- Create a Send an HTTP request to SharePoint operation.
- Choose your SharePoint site.
- Select POST from Method.
- Type /_api/sitepages/pages/reposts in the Uri box.
- Copy and paste the following content in the header.
| Enter Key | Enter Value |
|---|---|
| content-type | application/json; odata=verbose; charset=utf-8 |
| accept | application/json |
- Copy and paste the following code in the body.
{"BannerImageUrl":"YourBannerURL","Description":"@{body('Html_to_text')}","IsBannerImageUrlExternal":true,"OriginalSourceUrl":"@{triggerOutputs()?['body/primaryLink']}","ShouldSaveAsDraft":false,"Title":"@{triggerOutputs()?['body/title']}","__metadata":{"type":"SP.Publishing.RepostPage"}}- Click on Save.
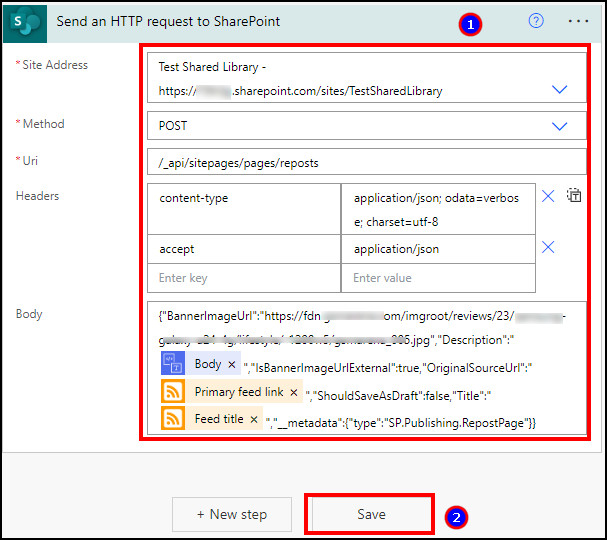
Now, you need to go to your SharePoint page and include a News web part to add SharePoint modern RSS feed.
Here is the way to add the News web part on the SharePoint page:
- Navigate to the SharePoint site you want to edit.
- Click on Edit.

- Press on Add a new web part.

- Search and select the News web part.
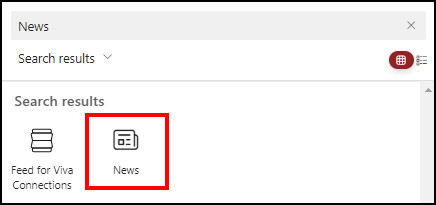
- Click on the Edit web part.

- Choose the radio button beside Select sites and choose your RSS feed site.
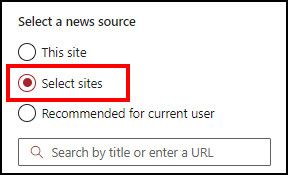
- Press on Republish.
Publishing the News web part will automatically feed the update and contents from your target website and show with the banner image and headings.
Frequently Asked Questions
How do I add an external news feed to SharePoint?
You can add an external news feed to Microsoft SharePoint by adding an RSS web part or using Power Automate.
Can I create an RSS feed on a SharePoint communication site?
No, you can’t create an RSS feed on a SharePoint communication site as there’s no option to add the RSS web part. However, you can use Power Automate to add an RSS feed to the SharePoint communication site.
Who can add an RSS feed in SharePoint?
The site owner, admins, and members with editing permission can include an RSS feed in a SharePoint site.
Final Thought
The RSS feed is a quick way to get the content from the other website and show them on your SharePoint site. You can add news, tech updates, or headlines from other sites and share them with everyone in the organization.
This article has explained the RSS feed and provided two straightforward ways to add a feed to your SharePoint team and communication site.
I hope you’ve found the article helpful and use it to keep your members updated.
Goodbye!



Hello Shubrato,
This was an excellent tutorial and I loved the Power Automate solution. I did have a quick question, I receive an error for the final step with regards to the body section. I believe it has to do with the bannerimageurl portion. What bannerimageurl should we be using? is this from the sharepoint site that it will be posting the news to? thanks once again
Hello Armando,
I’m glad to hear that you found the tutorial helpful! Regarding the error you’re encountering in the Power Automate flow, specifically with the bannerimageurl portion, here are some clarifications:
1. Banner Image URL:
The bannerimageurl refers to the URL of the image that you want to use as the banner for the news post in SharePoint. This image should be accessible via a public URL, as SharePoint will use this URL to display the image.
2. Source of the Image:
The image could be hosted on a SharePoint site, OneDrive, or any other publicly accessible URL. If it’s on SharePoint, you would typically get the URL by uploading the image to a document library and copying the link.
3. How to Get the Image URL:
Upload the banner image to a SharePoint document library.
Right-click on the image file in SharePoint, and select “Copy link” or “Copy shortcut” (exact wording might vary).
Make sure that the link is publicly accessible, and not restricted to specific users.