In SharePoint, understanding storage metrics is the key to optimizing resources and simplifying operations.
Managing storage efficiently is crucial for optimal performance, and SharePoint offers valuable storage metrics statements to help organizations gain insights into their data usage and make informed decisions.
In this article, I’ll provide the necessary steps to unlock storage metrics reports on a SharePoint site to help you check your SharePoint storage consumption and site usage.
Let’s begin!
The whole repository allocated for each company and the number of authorizations owned determines the total storage in SharePoint. It includes additional Office 365 data storage accessories you may have purchased. Microsoft offers 1 TB of storage for each tenant with 10 GB extra per user.
For instance, if there are 100 licensed users in your organization, the full storage of SharePoint Online would be 1 TB + (10 GB x 100) = 2 TB. You can purchase additional repository space when you use the entire storage quota.
The 10 GB storage quota is available for specific licensing plans applied to your organization.
You can get the 10 GB additional space for the following packages:
- SharePoint Plan 1 or 2.
- Office 365 A1, E1, G1.
- Office 365 A3, E3, G3.
- Office 365 A5, E5, G5.
- Microsoft 365 A3, E3 and G3.
- Microsoft 365 A5, E5 and G5.
- Microsoft 365 Business Basic, Standard, and Premium.
The maximum storage capacity allowed for each SharePoint site is 25 TB. It doesn’t mean that the default storage Microsoft provides per site collection is automatically set to 25 TB, but rather you have the option to expand the storage capacity up to that limit.
Therefore, allocate the SharePoint site storage limit according to the specific usage and available storage quota.
Depending on your needs, you can establish an automatic site storage limit or manually configure the setting.
To view storage metrics in SharePoint, access the SharePoint admin center, verify the amount of available storage space, and review the storage metrics. If you have admin privileges, you can view how much storage all the sites are taking up from the SharePoint admin center.
Follow the instructions below to check the storage metrics in SharePoint Online:
Access Storage Metrics at a Site Level
- Go to Microsoft 365 and sign in with your admin credentials.
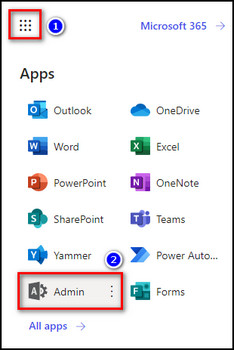
- Click the App launcher from the top left corner and choose Admin.
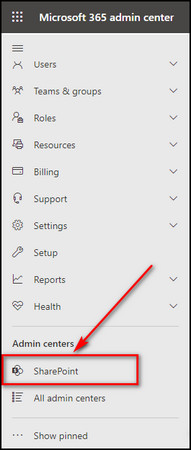
- Select See all from the left menu and choose SharePoint from the Admin centers section.
- Expand Sites from the left bar and choose Active sites.
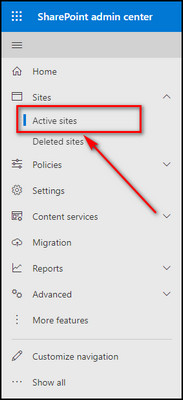
Now you’ll get a list of all the SharePoint sites you and your organization members have created. You’ll see the total storage available for the sites at the top right corner. 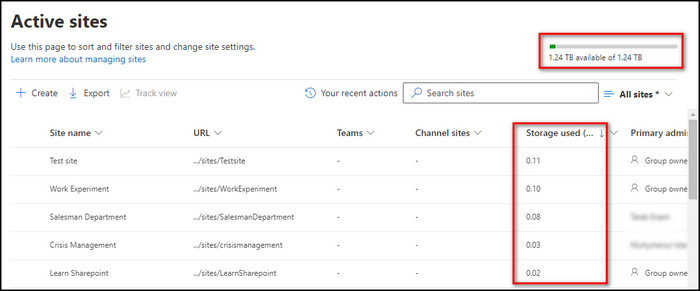
Get Storage Metrics at a Library/Folder/File Level
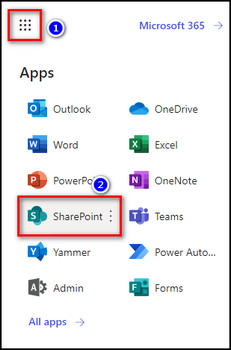
- Click on the App launcher in Microsoft 365 and choose SharePoint.
- Select the SharePoint site whose storage you want to view.
- Click on the Gear icon from the upper right and choose Site information.
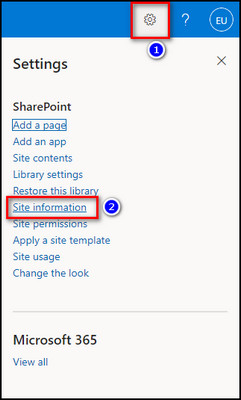
- Select View all site settings.

- Choose Storage Metrics from the Site Collection Administration group.
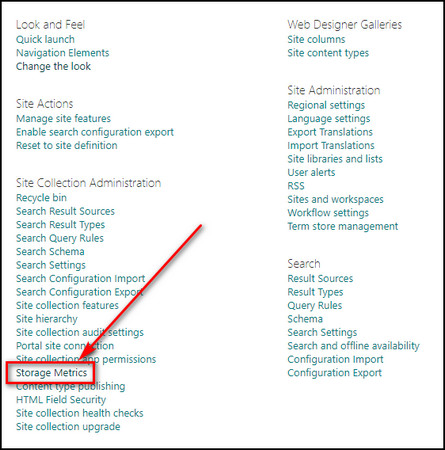
Now you’ll see how much space each folder, file, and subsite are consuming in the SharePoint site. 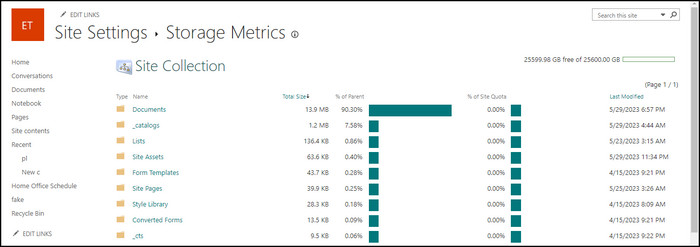
You don’t need to log in to your SharePoint admin center every time you want to open the storage metrics. You can use the admin credentials to sign in to the admin center from PowerShell and run a few command lines to get the complete list of the SharePoint sites with Storage Quota.
Follow the steps below to monitor SharePoint site storage limits using PowerShell:
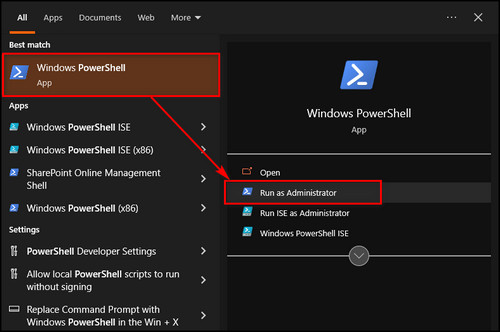
- Run the Windows PowerShell app as an administrator.
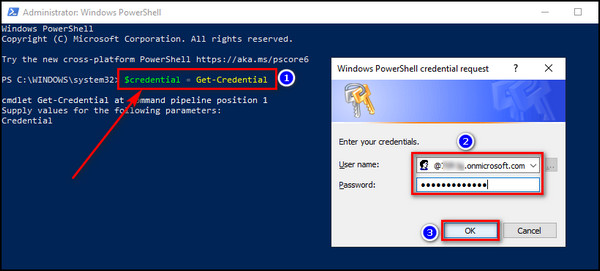
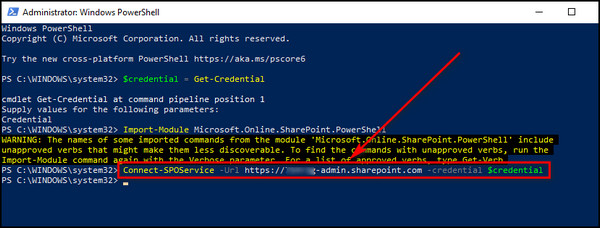
- Execute the command below and sign in to your Microsoft organizational account when the login dialog box appears:
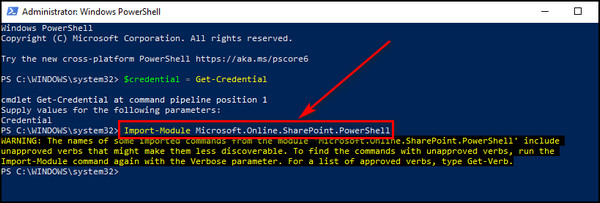
- Run the following script to install the Windows PowerShell module:
- Run the command I’ve provided below to establish a link between the PowerShell module and SharePoint Online:
- Execute the following command, and you’ll get a list of all your SharePoint sites with the Storage Quota of each site:
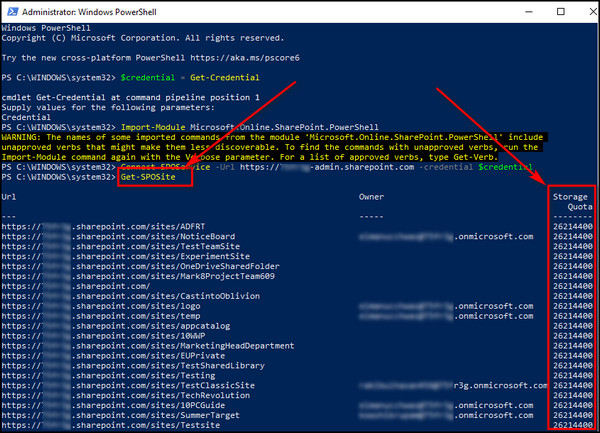
Now that you know how much space each SharePoint site is consuming, go to the following section, where I’ve explained how to limit the storage for a particular site.
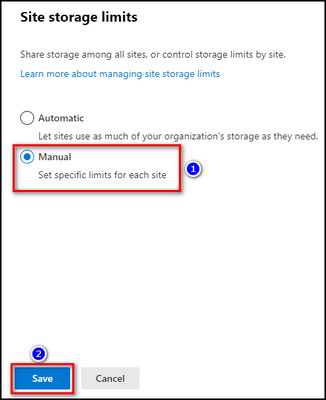
You have 2 options available for configuring site storage in SharePoint. Automatic, where your sites can utilize storage resources without any imposed restrictions, and Manual, where you set storage quotas for each site collection based on the specific requirements and usage of the site.
Below I’ve explained how to use the Manual option to set the site storage limit:
- Open Microsoft 365 admin center and sign in to your admin account.
- Select See all and choose SharePoint from the left menu.
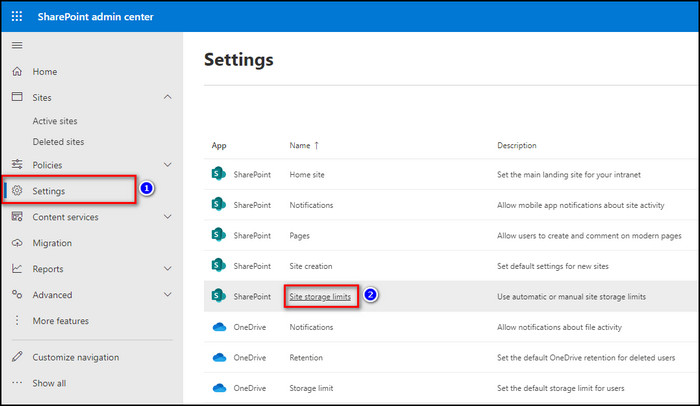
- Move to the Settings tab and click on Site storage limits.
- Choose Manual and click the Save button.
- Expand Sites and proceed to the Active sites tab.
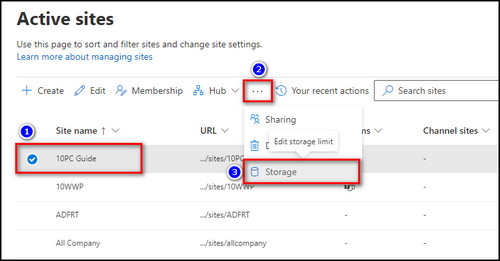
- Select the site for which you want to restrict the storage limit.
- Click on the ellipses (More) from the top bar and choose Storage.
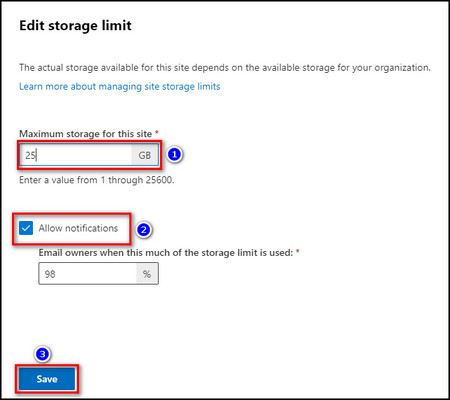
- Enter the storage space you want to assign in the Maximum storage for this site field.
- Check Allow notifications so the site owner gets emails alerting them when the storage almost reaches its limit.
- Click Save to apply the changes.
To export the SharePoint storage quota for all the sites, you must access the SharePoint admin center. Once you have signed in, go to the Active sites page and simply click on Export. You’ll get a CSV file which you can open in Excel to check the storage metrics with other data.
For more details, check out the steps to export SharePoint storage metrics to Excel:
- Open Office 365 and sign in with your admin credentials.
- Select the App launcher from the upper left and choose Admin.
- Select SharePoint from the Admin centers section.
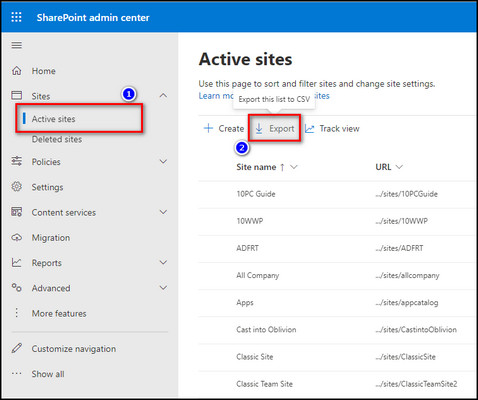
- Go to the Active sites tab under Sites.
- Click the Export button.
After these steps, a CSV (Comma Separated Values) file will be downloaded containing all the details of your SharePoint sites. Open the file in Microsoft Excel, and check the Storage used (%) column. It shows how much storage each site is using.
FAQs
Can you pull reports from SharePoint?
To access the site usage in the SharePoint report, navigate to the Site Usage tab. From there, you can customize the report by selecting the Customize columns feature, allowing you to add or remove columns based on your preferences. Additionally, if you wish to export the report data into an Excel or CSV file, select the Export option.
How do I view managed metadata in SharePoint?
You can manually enter the URL to view the managed metadata. You can also access the managed metadata service through the SharePoint admin center. Expand the Content services section in the admin center, and access the Term store. The Term store is also available within each site collection created within the Microsoft 365 environment.
How do I track file usage in SharePoint?
To verify file usage in SharePoint, you must first log in to the admin center using a global admin account. Then, navigate to the company profile section by going to Admin centers > Settings > Company profile. There you can find the data location option. To view the specific details regarding the data location, click on View details.
Final Thoughts
Obtaining storage metrics statements on SharePoint is essential for organizations seeking to effectively manage their data and optimize storage resources.
By following the steps provided in this article, you can navigate to the Reports section within SharePoint, generate & analyze storage metrics reports, and gain valuable information about storage usage.
Comment below if you have further questions, and we’ll get back to you soon.