Almost 347.3 billion emails are sent and received worldwide daily. The number is crazy, isn’t it?
Nowadays, getting the recipient’s attention with a plain email is impossible. However, Outlook users can use built-in stationery or create one to make boring emails more engaging.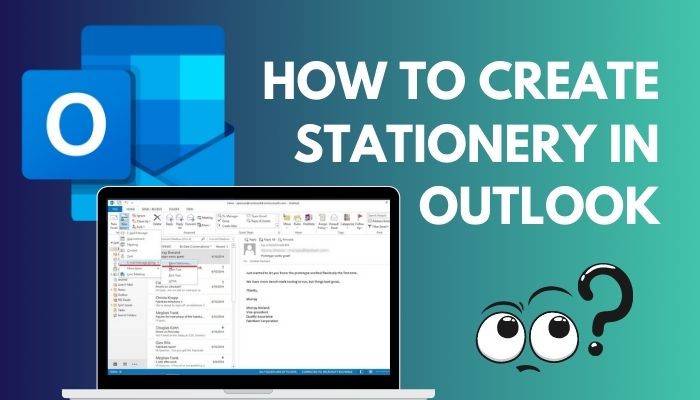
This article will cover all the ins and outs of the stationery feature of Outlook. So, let’s get started!
How to Create a New Stationery in Outlook
In order to create custom stationery in Outlook, open a New Email and customize the message window by setting a background, adding fonts, bullets, and other graphic elements. Then go to File > Save As, save it in this %appdata%\microsoft\stationery location, and click Save.
Though Outlook has some built-in stationery, you should create a custom one to match your requirements better.
You will find some other built-in features in Outlook to customize your emails, such as changing the font size and an image’s alignment for further personalization.
Custom stationery can assist in visualizing your brand style by including a logo, custom color, or any other design assets. Besides, you can also add horizontal lines and images as the message background.
Consider the subsequent method to create custom stationery on Outlook 365, Outlook 2021, 2019, 2016, 2013, and 2010.
Here is the method to create custom stationery in MS Outlook:
- Launch Outlook on your computer.
- Click on New Email to compose an email.
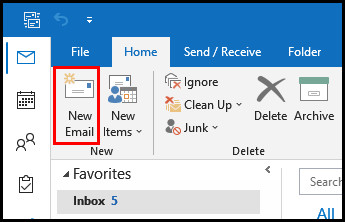
- Customize the New Message window:
- Set a background image as the page background.
- Change the font.
- Add bullets and other design elements.
- Navigate to File > Save As.
- Type %appdata%\microsoft\stationery in the address bar and hit Enter.
- Enter a name for the new stationery, click on the Save as type drop-down list, and choose HTML.
- Click Save to save the changes.
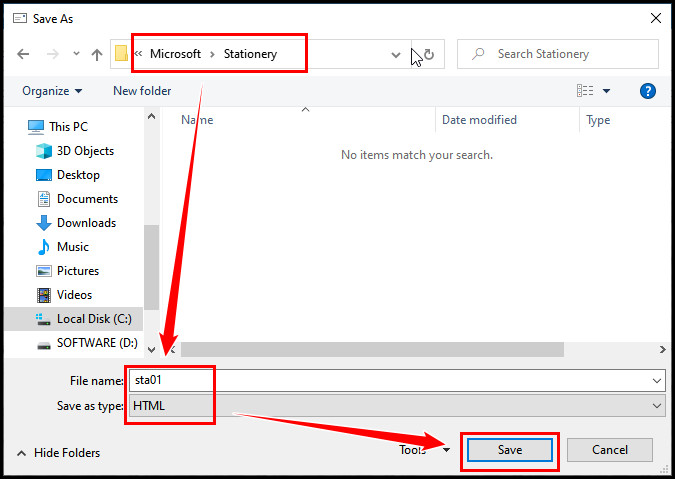
The above steps will successfully create custom stationery that you can use for formatting your email messages.
If the above functions don’t work on your Outlook account, you can remove your primary account from Outlook and connect to another account.
How to Add and Apply Stationery for One Email
You should use the More Stationery function when applying custom stationery for a single email. Open Outlook and navigate to New Items > E-mail Message Using > More Stationery. After that, find and select your custom stationery and click OK to apply your changes.
The Stationery or themes option is only applicable to new emails. You cannot apply the stationery or themes to email replies.
Go through the following instructions to add and apply custom stationery for a single email on Outlook 365, Outlook 2021, 2019, 2016, 2013, and 2010.
Check the following procedure to apply stationery to a single email:
- Open Outlook on your computer.
- Navigate to New Items > E-mail Message Using > More Stationery.
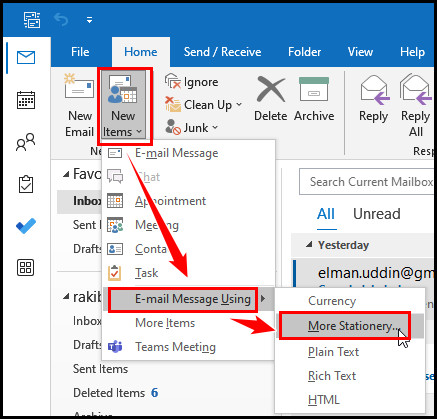
- Locate and select your custom stationery.
- Click OK to apply the custom stationery.
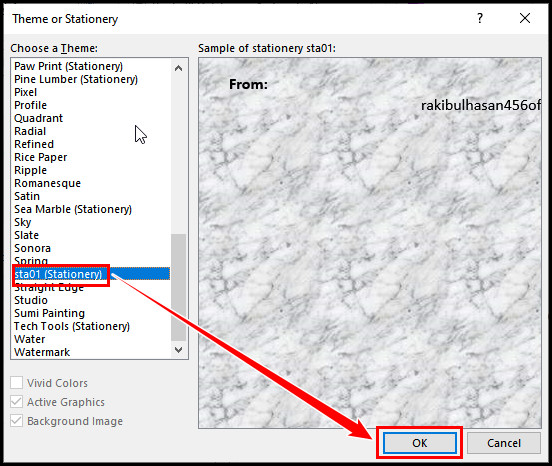
After clicking OK, a new email compose window will open with your custom stationery. Edit the mail depending on your needs and send it.
Outlook 2007 users can find the More Stationery option under the Actions menu inside the New Mail Message Using option.
How to Add and Apply Stationery for All Emails
Ensure the Compose messages in this format option is set to HTML, and then navigate to File > Options > Mail > Stationery and Fonts. Under the Personal Stationery tab, locate and click on Theme. Choose the custom theme or stationery and click OK to save the changes.
You can quickly align your bullet points or change the margins in your Outlook email to customize your stationery or email further.
Consider the following procedure to add and apply the custom or built-in stationery for all Outlook emails on Outlook 365, Outlook 2021, 2019, 2016, 2013, and 2010.
Here’s how to apply custom stationery to all emails in Outlook:
- Launch Outlook on your device.
- Navigate to File > Options.
- Switch to the Mail tab and click on Stationery and Fonts.
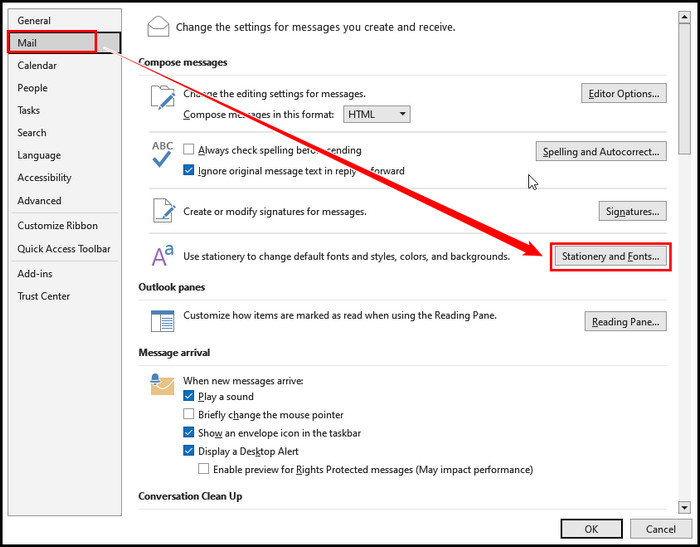
- Click Theme under the Personal Stationery tab.
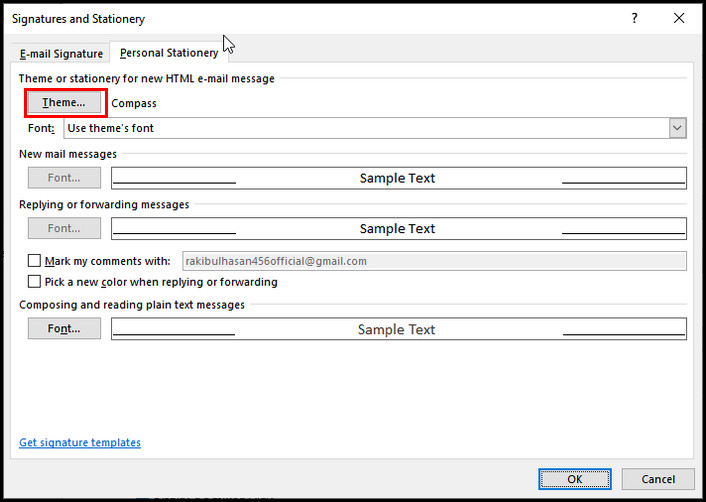
- Select the custom theme or stationery you want to apply for all emails.
- Click OK to save the changes.
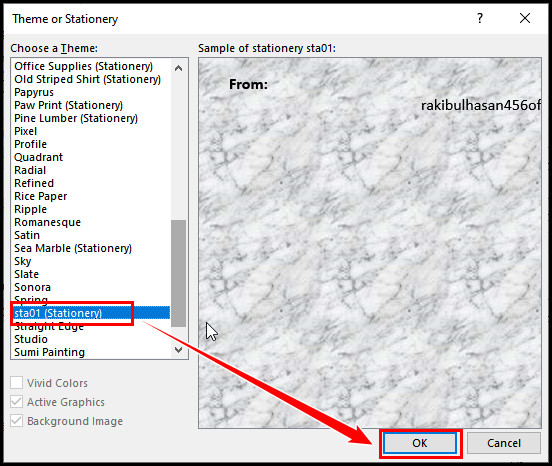
So, how do you change the all message format to HTML in Outlook?
To change your default message format, navigate to File > Options and switch to the Mail tab. Locate the Compose messages menu next to the Compose messages in this message format list, and select HTML from the drop-down menu.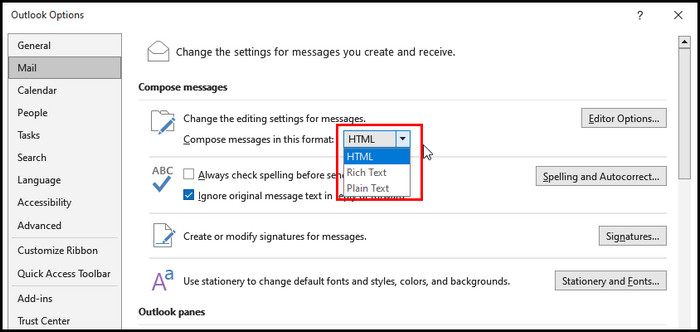
Outlook 2007 users can access the option by navigating to Tools > Options > Mail Format tab. And the rest of the processes are similar to the above steps.
How to Turn Off Outlook Stationery and Themes
If you need to remove the stationery and themes from your Outlook emails, go to Files > Options > Mail > Stationery and Fonts. Locate the Stationery and Fonts tab and click Theme under that tab. From the Choose a Theme menu, select No Theme to turn off stationery.
While working with images in Outlook, you can wrap text around the image to make your email more professional and eye-catching.
Go through the subsequent instructions to turn off the stationery and themes on Outlook 365, Outlook 2021, 2019, 2016, 2013, and 2010.
Consider the following procedure to disable Outlook stationery and themes:
- Launch the Outlook desktop application on your computer.
- Navigate to Files > Options.
- Switch to the Mail tab and select Stationery and Fonts.

- Click Theme under the Personal Stationery tab.

- Select No Theme from the Choose a Theme menu.
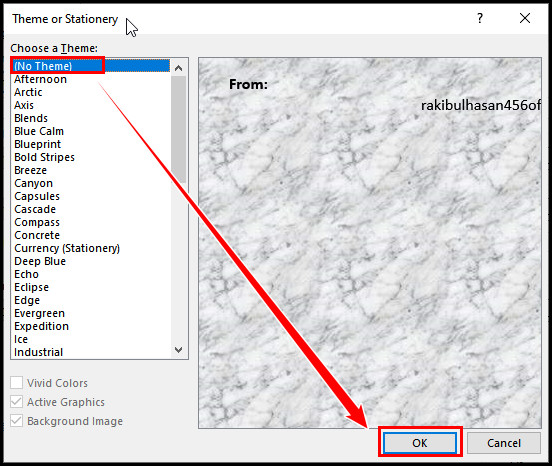
The above steps will remove the stationery and themes from all Outlook emails. Next time, you won’t see any stationery or themes while composing a new email unless you add them again.
Outlook 2007 users can access the Stationery and Fonts option by navigating to Tools > Options and switching to the Mail Format tab.
Frequently Asked Questions
What is a stationery folder in Outlook?
The stationery folder in Outlook is used to store the design elements and color schemes of stationery or themes. Though this is a hidden folder, you can access it using the Run dialog box.
Where is the stationery folder in Outlook?
The Stationery folder is a hidden folder that stores all stationery. To access the folder, open the Run dialog box by pressing the Windows + R keys, type %APPDATA%\Microsoft\Stationery in the text box, and hit Enter.
What is the difference between Outlook stationery and a template?
Outlook stationery can modify the email appearance by adding colorful backgrounds, patterns, and designs. Contrarily, the Outlook template is used to send similar emails. When sending almost identical emails for an event, use an email template.
Final Thoughts
Day by day, it’s getting harder to catch the recipients’ attention with regular email formatting. Here the stationery feature comes as a savior.
Using the stationery feature, users can utilize the built-in presets to ornament their boring email messages. Besides, they can also create custom stationery for any special event.
I hope this article helps you to make your tedious email messages more engaging and meaningful. For further inquiries, leave a comment below.
