The power supply unit of your PC is very often the first thing to fail as it ages. And so, analyzing the voltage output using a multimeter can help you determine a faulty PSU.
But isn’t testing the PSU an expert guy’s move? Yes! But an average PC user can do it too, with the proper guideline and tricks.
Therefore, through this article, I will teach you the experts’ way of testing a PSU with a multimeter.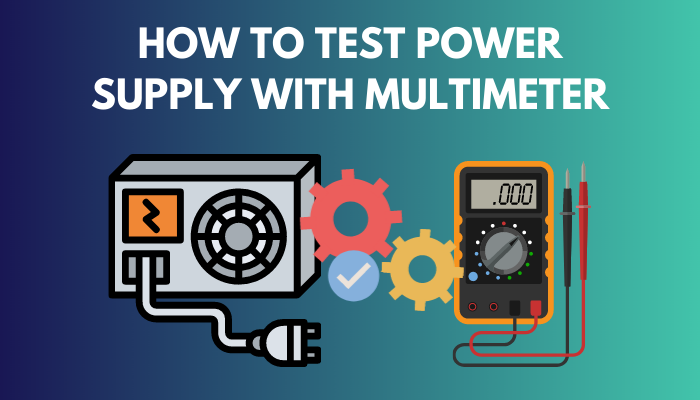
Let’s begin!
You may also like to read about what power supply do I have?
How to Test a Computer Power Supply Using a Multimeter
Examining your computer’s power brick should be the first thing you do if you’re experiencing problems with your system. Thankfully, this process requires only some basic tools like a screwdriver, a stand/ binder clip and a Multimeter/Voltmeter.
To test a PC power supply with a multimeter, power off the PC > detach the power cable > open the side panel of the PC case > remove the PSU > set the multimeter to DC voltage > connect PSU with the multimeter > turn on the PSU > read the value on the meter.
As it involves directly working with electricity and voltage, there are certain risks of electrocution with you are not careful. Hence, as a precaution, always use gloves to touch wires and terminals. Never use your fingers barehanded, and wear an anti-static wrist strap.
Let’s discuss the process more elaborately below. Remember to follow each step one by one, and don’t skip any.
Here are the steps to manually test a PC power supply with a multimeter:
Step 1: Turn off the PC and Ground It Properly
The first and foremost thing would be to turn off your PC properly. Shut down your PC and let it cool down for a minute or two.
Pull off the power cable and other USB peripherals. Most importantly, ground yourself and your machines before you start troubleshooting the PSU.
Related content you should read about what happens if your power supply is too weak?
Step 2: Open the PC case and Remove the PSU
After removing all the wires from the PC case, use a screwdriver to open up the side panel.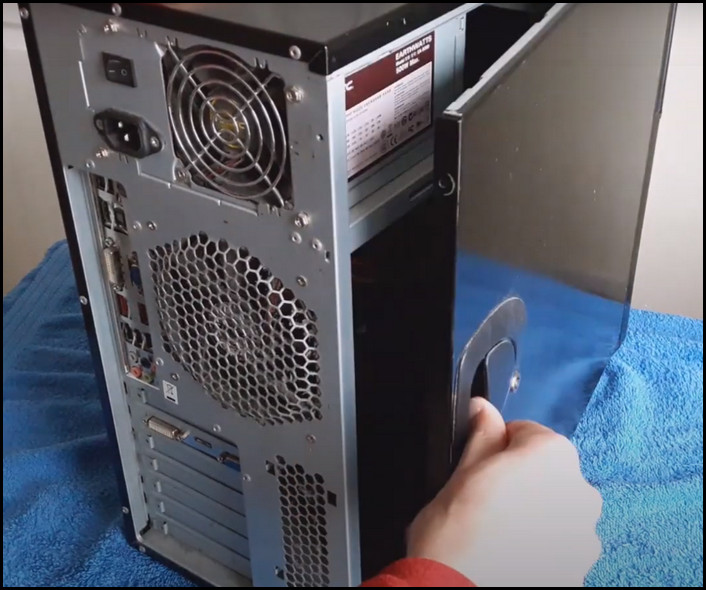
Once that is done, you can locate the power brick inside the case. Unfasten the four nuts holding your PSU and remove it from its position.
Step 3: Detach PSU cables and Group Them Together
Once you take the PSU out of its position, unplug the power connectors from each and every internal device. Usually, the PSU cables go inside the motherboard, HDD and graphics card.
Now, bundle them all together for the ease of examining all the cable pins. As you’re organizing the cables, I recommend rerouting them and pulling them far away from the PC case.
It will reduce the messed up cabled situation.
Related guide on how to fix computer not turning on power supply?
Step 4: Short out pins 15 and 16
The PSU can not be activated once you pull out the power connector from the motherboard. As a trick, you need to use a small wire and short out pins 15 and 16 of the PSU power connector.
In my case, I used a paper clip and bent it into a U shape to connect pins 15 and 16 together.
First, make the paperclip as straight as you can. Then take the paperclip’s other end and stick it inside pin 15 of the 24-pin connector.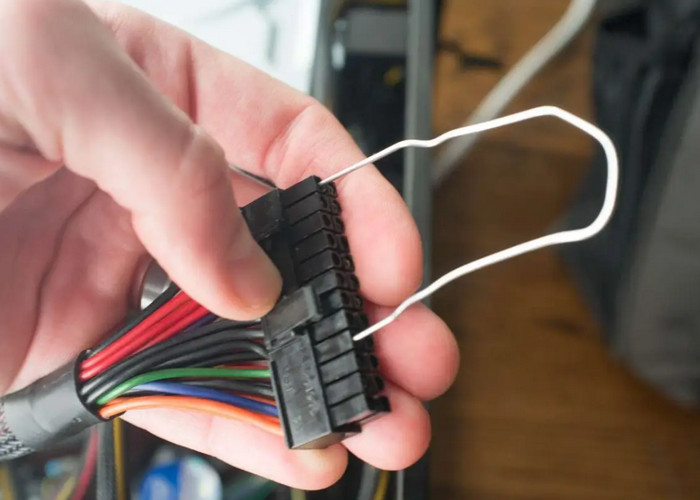
Next, insert the paperclip’s opposite end inside pin 16. After that, proceed to plug the 24-pin connector into your motherboard.
If you can not identify the pins number correctly, look at the picture below to have a better understanding.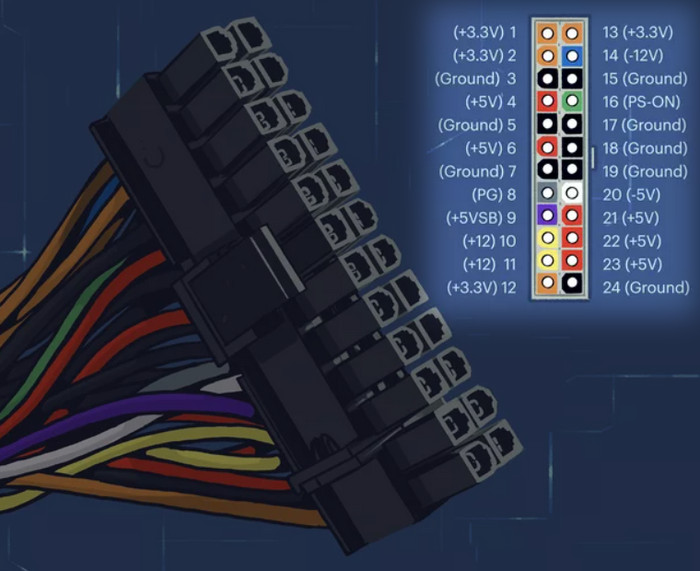
Step 5: Set the PSU Voltage
The PSU voltage must be set to the appropriate level for your country. Europe and other nations generally use 220/230v, while North America and Japan use 110/115v.
So, if you own a switch mode power supply, set it to 110v or 115v, according to your region.
Step 6: Turn on PSU
Once you have verified that the voltage setting is correct, it’s time to gather your tools and supplies. Get a multimeter or just a voltmeter to analyze the power supply. For extra safety, remember to wear safety glasses and gloves.
Now, plug the PSU into a live outlet and toggle the switch on the back of the power supply. If you’ve properly shorted the pins in Step 4 properly and your PSU is not fly dead, it will turn on, and it’s fan will start rotating as well.
Also related to this guide on have to press power button many times to start PC.
Step 7: Set the Multimeter DC voltage mode
If you are using a multimeter as the tester, you must set it up to read DC volts.
Power on your multimeter and shift the dial to the VDC (Volts DC) setting. Usually, it looks like the symbol V with a straight line over a broken line. Set the range to 20 volts.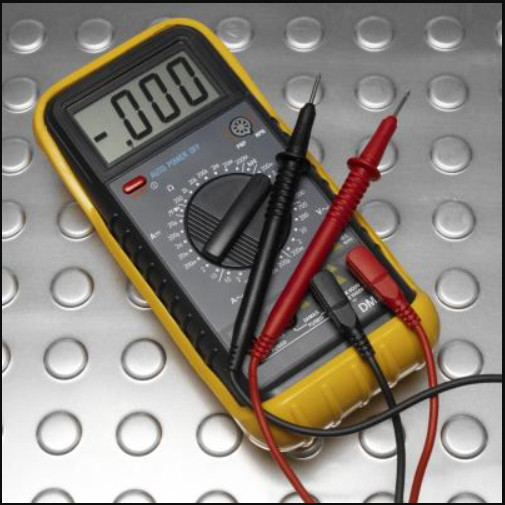
For a normal voltmeter, you don’t have to change any settings.
Step 8: Check the Power Supply Unit Voltage
Now it’s time to check the PSU voltage level on the multimeter. Connect the negative probe (black) on the multimeter to any ground pin, and insert the positive probe (red) to the back of pin 10.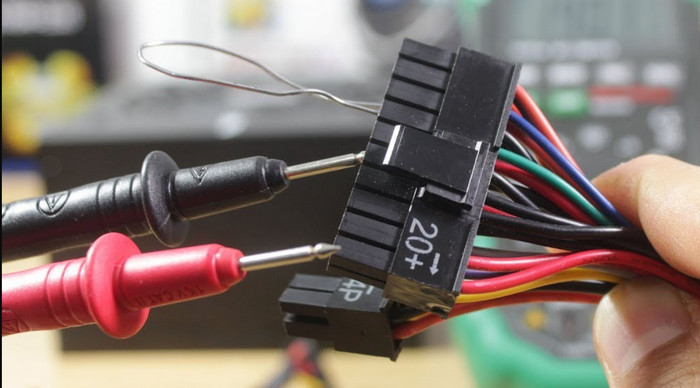
A reading of 11 to 12 volts on the multimeter is expected. If the voltage is too high or too low, it means that the power supply is faulty and needs to be replaced.
Similarly, test pins 12, 8, 9, 19 and 20 for 5 volts. Consider your PSU is damaged when the voltage is not up to the desired 11-12 volts.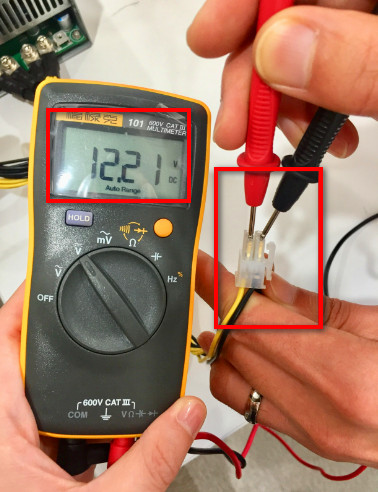
For pins 1, 2 and 11 for 3.3 volts, the voltage result should be around 3.3 volts.
Repeat the same process to check the voltage levels of other power connectors used for HDD or graphics cards.
Read more on is building a PC hard as people say?
Step 9: Reassemble the PC.
Once you are done checking all the pins, turn off the PSU and unplug it from the wall. Remove the paper pin that you used to short pins 15 and 16.
Reconnect all your internal devices to power. Screw the PSU in its position tightly and put back the side panel.
That’s it. You too now know the secrets to test your PC power supply like a professional tech guy.
FAQs
How do I check my power supply voltage?
You can either use a multimeter or a power supply tester to check the PSU voltage. Pull out the power brick off your PC case, connect it with the tester and read the voltage.
What is the normal power supply voltage?
Typically, North America and Japan’s normal power supply voltage is 110/115v, whereas Europe and other countries use 220/230v.
How do I test power supply with software?
You can use a third-party software called SpeedFan as the power supply voltage tester.
Final Words
If you are facing any issues with your desktop power brick instability, it’s always wise to diagnose and run a voltage test. It’s not that much complicated as it seems.
After reading this post, I have no doubts that you can now check the PSU voltage all by yourself using a multimeter.
Have any more questions or feedback for us? Let us know in the comment section below.