SSD, also known as Solid State Drives, is an upgraded technology of HDD. Not only does it increase your PC’s overall speed, but the data you keep is much safer.
 If you are a gamer like myself, you will know that no matter how hard we try, the hard drive fills up sooner or later. Installing current generation games like Assassin’s Creed series or COD eats away your storage like a mouse at the end of the cheese.
Maybe you’ve already faced this issue and already installed a first SSD. However, adding a secondary SSD is a little different.
But don’t worry. Whether to increase your current storage or install a second SSD for fast boot, the guide will help you in every way possible.
How to Install a Second SSD On Windows PC
You can install a second SSD by following 2 steps. First, you need to install the SSD into your Motherboard physically, then you set it up using the Windows Disk Management utility software. But there are some equipments you need to execute all the steps.
In this section, I will give you a step-by-step guide for installing a secondary SSD on your PC. But before that, you should gather some components.
Here are the components you need to install a second SSD on your PC:
- An open drive bay.
- A free SATA port on the motherboard.
- An SSD.
- One screwdriver.
- One SATA cable.
- SATA power connector.
- An adapter (if you want to install the SSD in the 5.25-inch drive.)
After gathering the components now, you can start adding a second SSD to your computer. To install it properly, follow the guide below.
Here are the steps to install an additional SSD on your PC:
- Unplug your PC from power, and open up the case.
- Take off the drive caddy in an open drive bay, and install your new SSD into it.
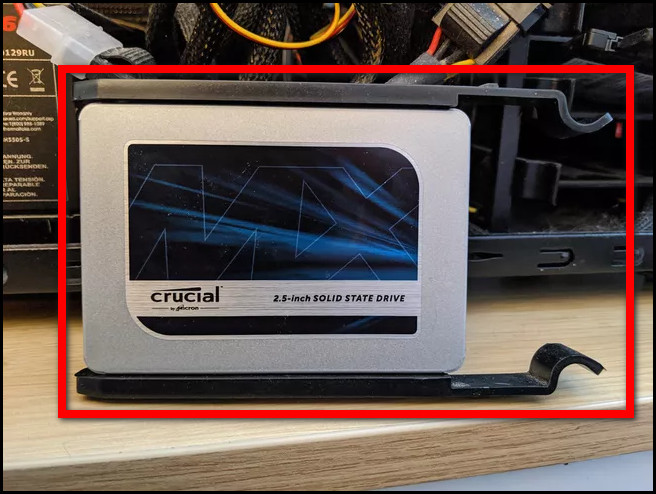
- Install the caddy back into the drive bay.
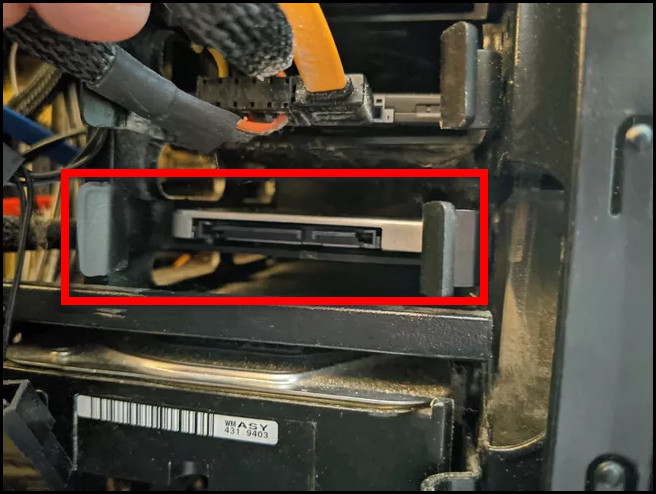
- Find a free SATA data cable port on your motherboard, and plug in a SATA cable.
- Plug the SATA power cable into a free power connector and data connectors into your SSD drive.
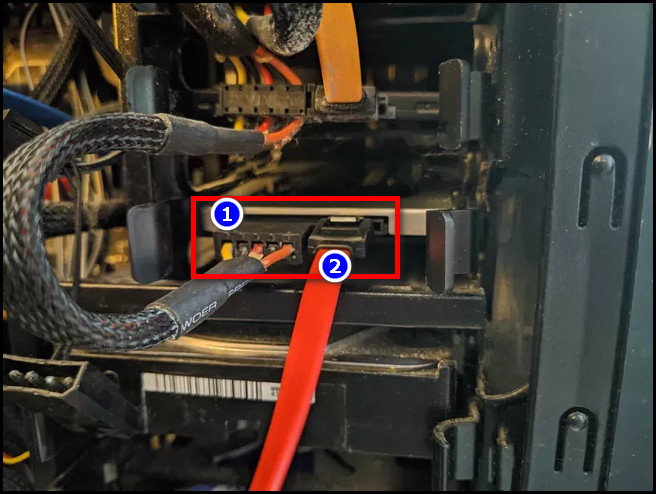
- Turn on your PC.
- Right-click on the start icon and click Disk Management.
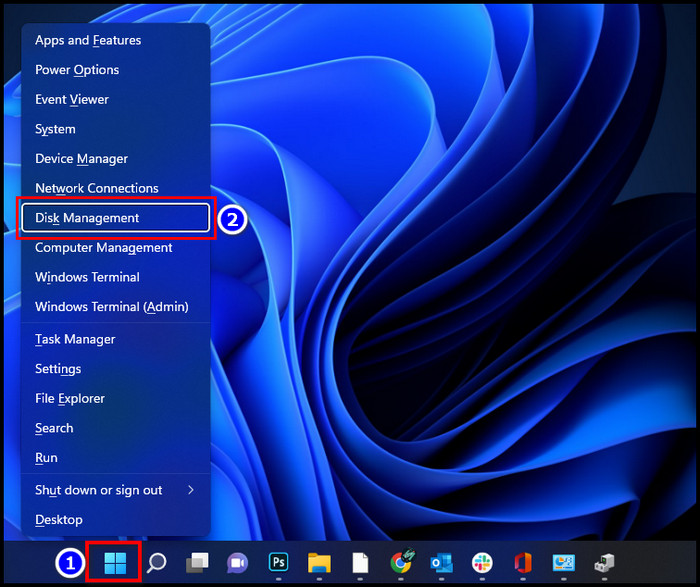
- Select GPT (GUID Partition Table) and click OK.
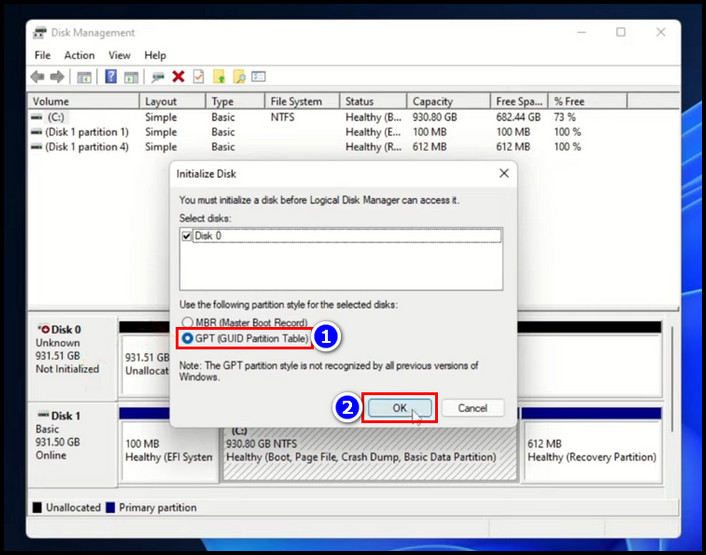
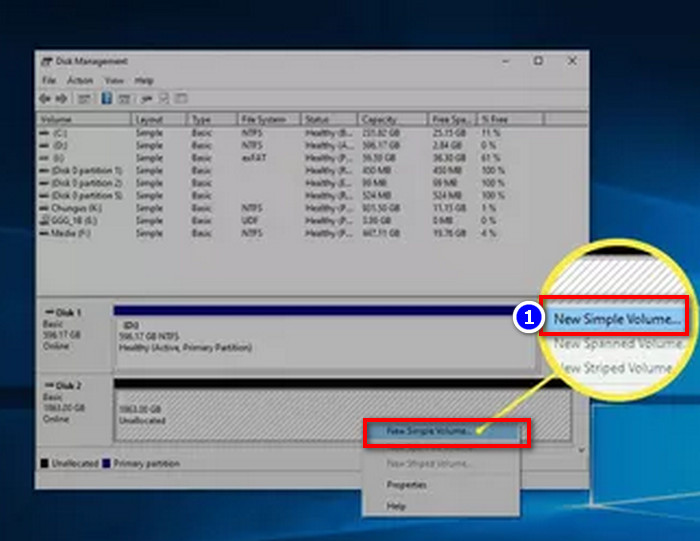
- Find your new SSD in the Disk Management window and Right-click on it. (which is labeled unallocated.)
- Select New Simple Volume and click Next.
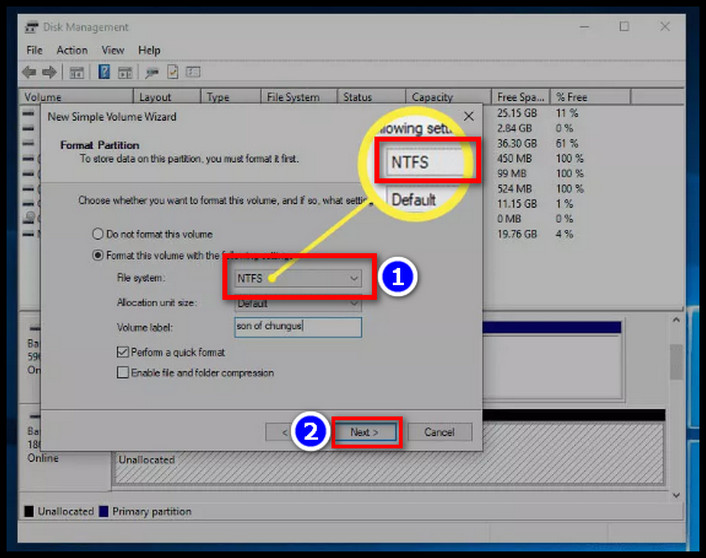
- Make sure to match the two numbers and select Next 2 times.
- Choose the NTFS file system in the Formate volume then select Next.
- Click Finish to confirm.
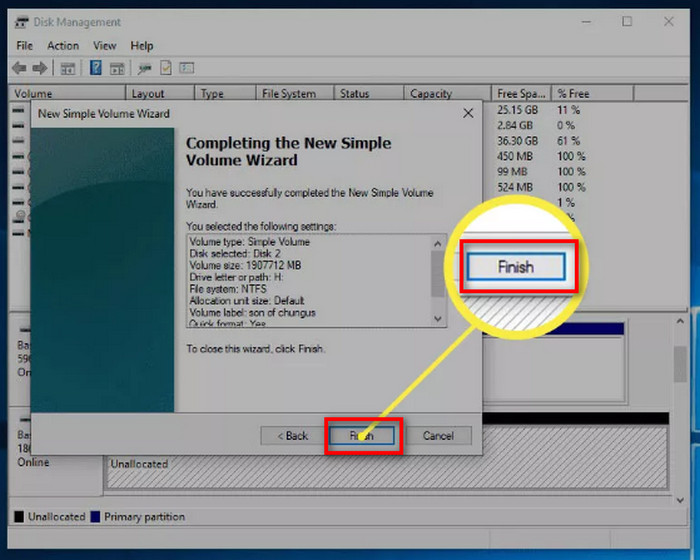
After completing these steps, your second SSD is ready to use. You can now use the SSD as any other storage drive. You can use this guide to install a secondary SSD on Windows 7, Windows 8.1, Windows 10 and Windows 11 PC.
How to Install a Secondary M.2/M2 SSD in Your PC
Installing an M.2 SSD is quite different from installing a regular SSD. The M.2 or M2 SSD doesn’t need the SATA and power cables because It inserts like RAM into your motherboard.
Apart from inserting an M2 SSD into your MOBO, the setup process of the storage is pretty similar to HDD.
In the previous section, I’ve discussed how you can install a usual regular SSD into your computer. Here I will show you how you can install an M2/M.2 type SSD.
Here are the steps to install a secondary M.2/M2 SSD on your PC:
- Unplug your PC from power, and open up the case.
- Find the unused M.2 slot.
- Take off the mounting screw located in the 2 slot.
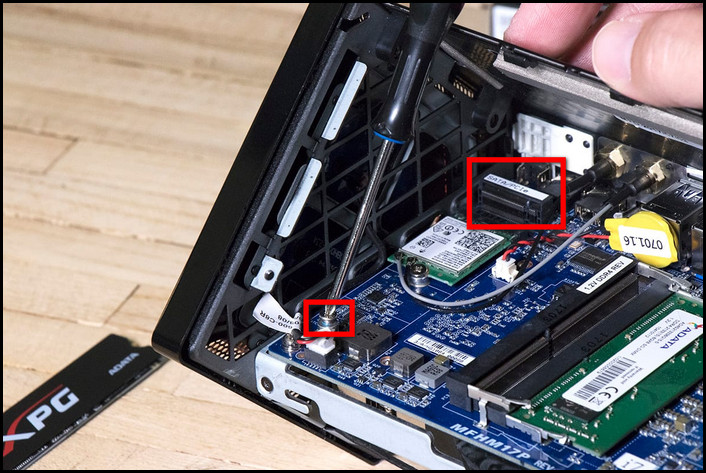
- Insert the2 SSD in the port.
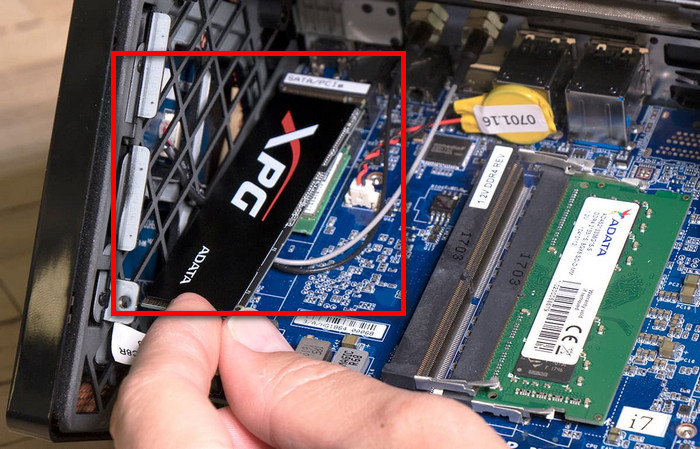
- Plug the mounting screw with the SSD.
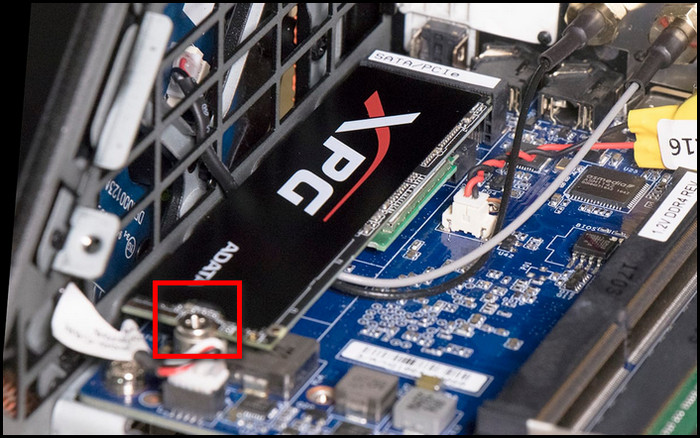
- Close your case and plug in the power cable.
- Turn on your PC.
- Right-click on the start icon and select the Disk Management.

- Choose GPT (GUID Partition Table) and click OK.

- Find your new SSD in the Disk Management window and Right-click on it. (which is labeled unallocated.)
- Select New Simple Volume and click Next.

- Make sure to match the two numbers and select Next 2 times.
- Choose the NTFS file system in the Formate volume then select Next.

- Click Finish to confirm.

After you complete the steps, your SSD is ready to use as a general drive. You should put your games in your SSD if possible. Because the SSD will launch your game faster, and you will get a decent FPS without buffering.
How to Insert a Second SSD into a Laptop
You can install any amount of SSD if your motherboard has the slot. And after that, go to the Disk Management section to configure your SSD on your windows.
Every Laptops motherboard is different from each one, but usually, they have a single M.2 port.
However, some gaming laptops let you insert an additional M.2 SSD. When your SSD has more than one M.2 port, you need to follow the steps below to insert the second SSD.
Here are the steps to insert a Secondary M.2 SSD into your laptop:
- Remove the screw and pull up the laptop’s back cover.
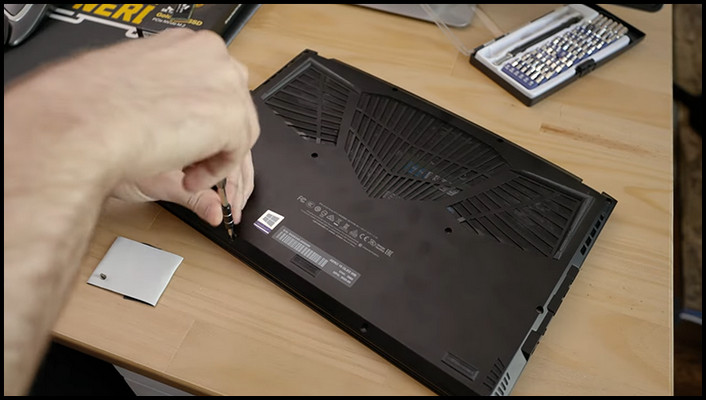
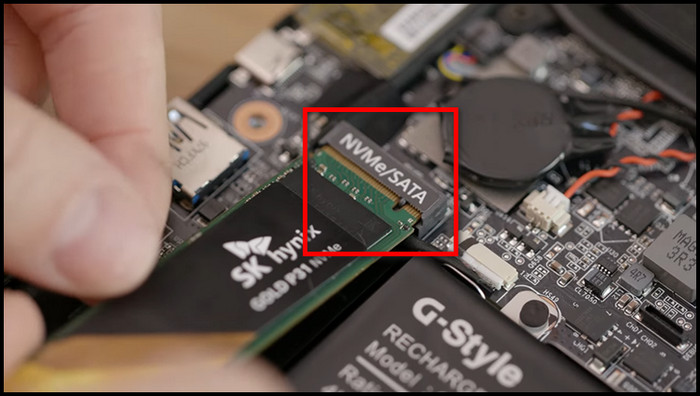
- Find the unused M.2 slot. (Search for NVMe/SATA or similar markings).
- Unscrew the retention screw.
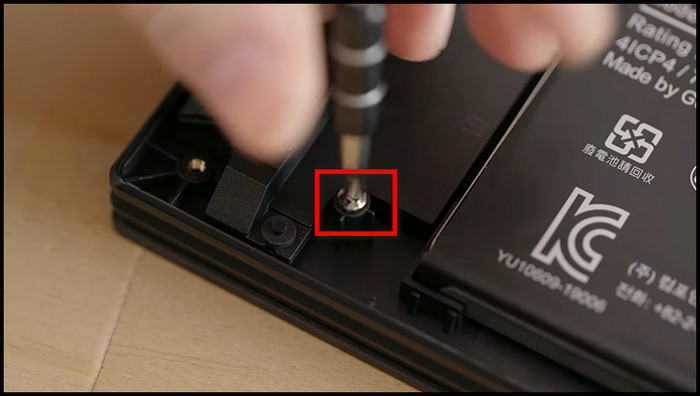
- Insert the2 SSD in the port.
- Plug the mounting screw with the SSD.
- Close your case and plug in the power cable.
- Turn on your PC.
- Right-click on the start icon and select the Disk Management option.

- Choose GPT (GUID Partition Table) and click OK.

- Find your new SSD in the Disk Management window and Right-click on it. (which is labeled unallocated.)
- Select New Simple Volume and click Next.

- Make sure to match the two numbers and select Next 2 times.
- Choose the NTFS file system in the Formate volume then select Next.

- Click Finish to confirm.

And your additional SSD is ready to use. You can also install a regular SSD as a second storage device if your PC has a DVD or CD writer/reader.
Because the DVD drive uses the same SATA port as your HDD/SSD. So you can remove the DVD/CD drive and install an SSD into that portion. In this part, I will give you a step-by-step guide to inserting an SSD by removing the DVD drive.
Here are the steps to insert a Secondary regular SSD into a Laptop by removing the DVD drive:
- Buy a Caddy similar to the size of your optical drive (slim laptops use a5mm DVD drive, and standard laptop uses a 12.7mm version)
- Remove the battery of your laptop and put the device upside down.
- Unscrew the DVD screw and push out the drive using fingernails or a paper-knife.
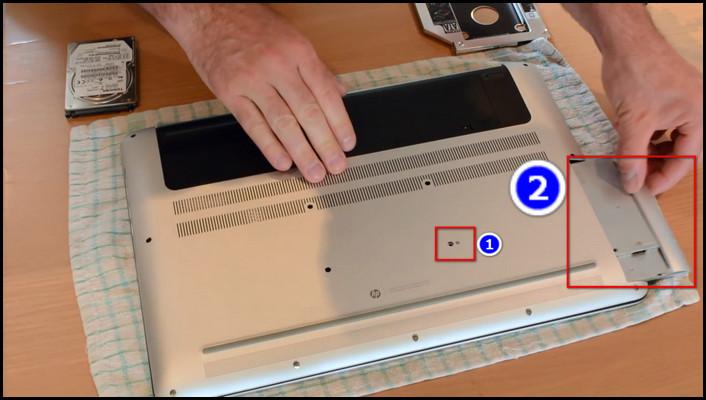
- Carefully remove the Bezel from the optical drive.
- Insert the new SSD into the Caddy, then screw the drive.
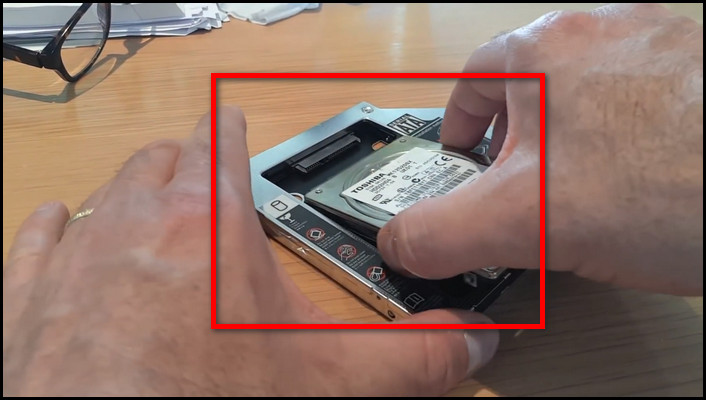
- Attach the Bazzel with the Caddy and insert it into the optical drive compartment.
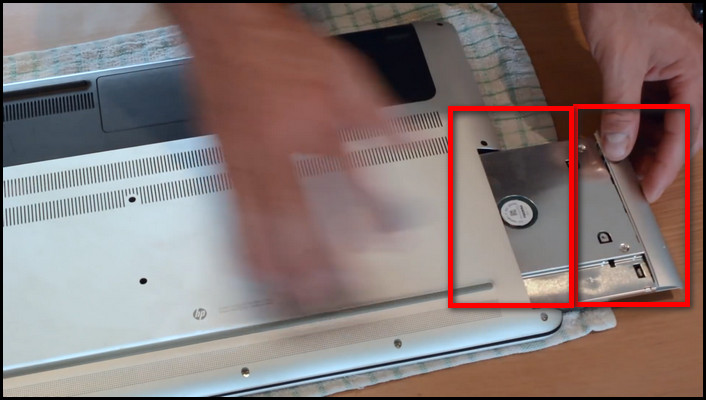
- Connect the screw of the optical drive.
- Turn on your PC.
After completing the steps, you will find the newly added SSD drive in the DVD section. You can now access the device without any issues.
FAQs
Can you install two SSDs?
Yes, you can put as many SSDs as you want on your computer, but you must ensure that your motherboard supports the additional SSD.
Can I install an SSD on my PS5?
Yes. Sony has enabled the SSD configuration on PS5 in the September 2021 update.
Can I install 2 SSD on a laptop?
Yes, you can install 2 SSD on a laptop if your laptop has two M.2 ports or optical drives. Otherwise, it’s impossible.
Conclusion
Long story short, to insert an additional SSD, you need to first plugin the SSD into your CPU and then configure it using the Disk Management option. After that, you will be able to use it as storage. Adding a secondary SSD will improve the software’s productivity and workforce.
After reading this article, I’m sure you now know how you can add a second SSD to your PC. Installing a new secondary SSD is a super easy and cool process, right?
At the end of the discussion, if you face any problems when you execute the steps I described earlier in this article, comment below.