The Table is one of the most used and convenient features of Microsoft Word due to its ability to organize information in a little space. Furthermore, it allows you to reorganize, modify or format them as needed. However, you might not know how to use them effectively.
According to Microsoft, there are various methods to call tables in your doc. Namely, Quick Tables, Custom Tables and Default Tables. Among them, most people have used the default Tables.
Here I will demonstrate different methods to use Table on a Word document and customize them. So, read this article carefully and follow my instructions to successfully add Tables in your Word.
Without further ado, let’s hop right into it.
Follow our guide on how to use thesaurus in MS Word.
How to Insert Tables in Your Microsoft Word
Before inserting Tables in Microsoft Word, make sure you have the latest version of Word installed on your computer. Otherwise, you may miss out on some of the most recent additions and options of the Tables.
Here’s what you have to do to create tables in Word:
1. Use the Default Table Menu
Word has a default Table Menu to use tables according to the number of columns and rows. A user can easily select the rows and column numbers from here to create a table with default properties.
Follow the steps to use the Table Menu:
- Click on the Windows icon and type Word. Select the best match, and this will open Microsoft Word.
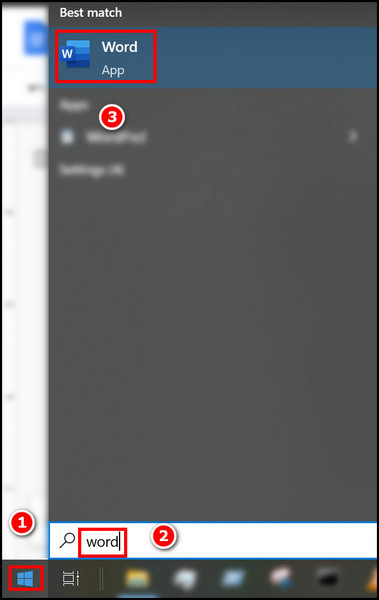
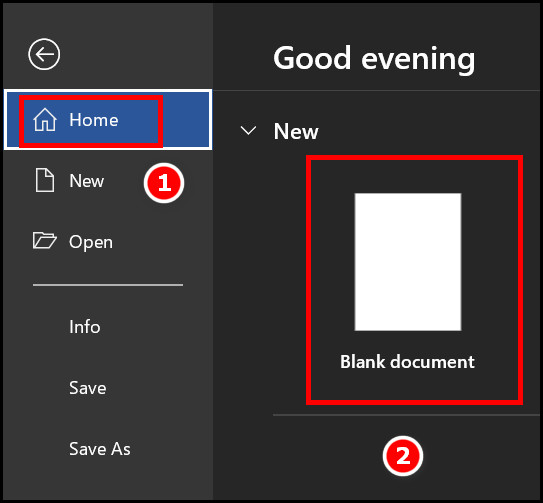
- Make sure that the Home option is selected on the left panel.
- Click on the Blank document on the right panel, and a new document will open. This is where you will add the Table.
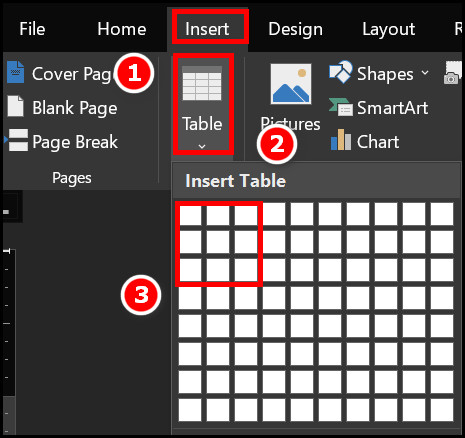
- Look for the Insert option in the Ribbon. You will find Insert right next to the Home option. Click on it.
- Select the Table menu, and then a small window with small boxes will pop up.
- Hover your mouse over the small boxes, and you will be able to create the table with your specified row and column number.
- Click on the selection, and it is done.
Most users use this method to create Tables as it is convenient and easy to determine the number of columns and rows. However, there are other methods to do the same.
Check out the easiest way to fix grant access issue with Microsoft Word on mac.
2. Create a Table from The Table Dialogue Box
There is a Table Dialogue box for advanced users that need more customized tables. Though normal users don’t often use this method, it is convenient to use once you get the hang of it.
Follow the steps to create a table from the table dialogue box:
- Click on the Windows icon and type Word. Select the best match, and this will open Microsoft Word.

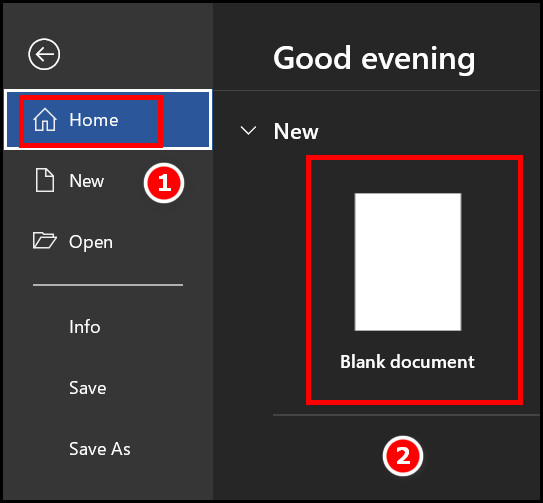
- Select the Home option on the left panel.
- Click on the Blank document on the right panel, and a new document will open. This is where you will add the Table.
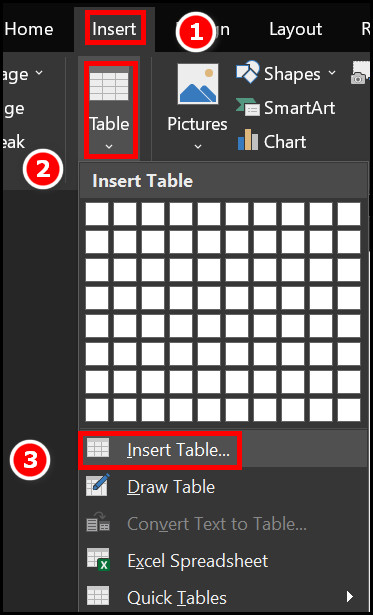
- Look for the Insert option in the Ribbon. You will find Insert right next to the Home option. Click on it.
- Select the Table menu, and a small window will pop up. Choose the Insert Table option from there. Another small window will pop up.
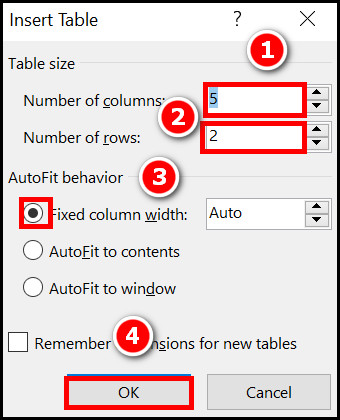
- Select the number of columns and number of rows. Then select the autofit behavior according to your need.
- Click on OK, and you will get the table you need.
If you’re looking for a quicker way, then you might want to try out the next method.
Read more on how to add headers and footers in MS Word.
3. Use The Quick Table
The quick table is the feature where you choose from some premade and preformatted tables. You can use one of those according to your preferences.
Follow the steps to use the Quick Table:
- Open Word, start a blank document and then click on the Insert option on the Ribbon.
- Select the Table Menu, and a window will appear.
- Hover your mouse pointer over the Quick Tables option, and you will see some examples on the right.
- Click on the suitable one, and it will be added to your document.
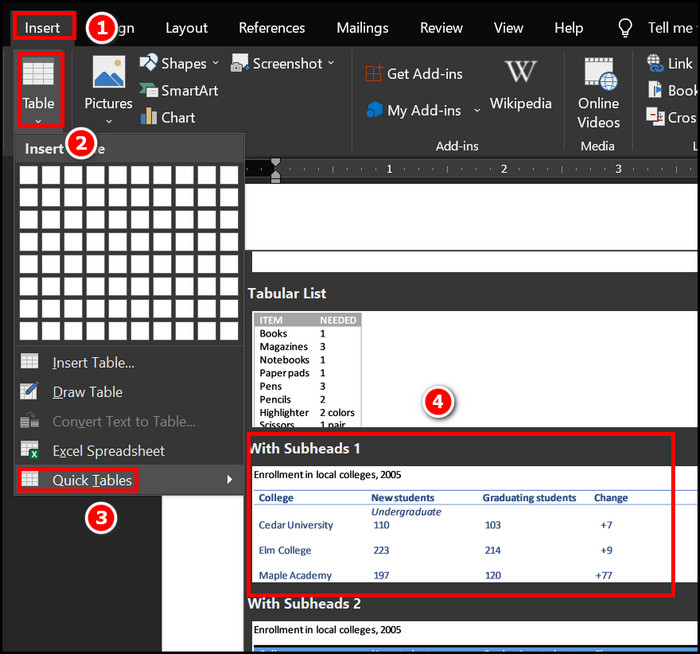
The quick table is popular because some tables are already created for specific purposes. So you can find one for your needs quite easily and efficiently.
Go through our epic guide on how to dictate in Microsoft Word desktop/web.
FAQs
How do I automatically Insert a list of tables in Word?
You can automatically insert a list of tables from the Reference option in Word. Search the Captions group and click on the Insert Table of Figures. Select your preferred options and click OK. This will insert a list of all the Word tables.
How many ways can you Insert a table in Word?
There are 3 ways one can add tables in Word. Those are from the Table Dialogue Box, Table Menu and Quick Table options.
Can you AutoFill the table in Word?
Yes, you can use an autofill table in Word for certain information types. Set two cell values first. Then you will need to set the entire table as a cell block. Now click on Insert > Fill > Table AutoFill. The empty cells in your table, beginning from the third cell based on the first two cells, will be automatically filled with sequence information.
Final Thoughts
Tables are important for organizing, modifying and storing lots of information easily. However, your work will become much easier if you know the different types of Word tables and ways to call upon them.
If you have any problems with the above methods, feel free to contact me. You can use the comment section below for that purpose.