Appearance is an essential part of a PowerPoint presentation slide. The necessity of elegance is also actual for the text box.
The indent option can enhance the aspect of the text, especially for paragraphs and essays. Using the option can give an aesthetic look to your presentation slide.
There are different indent options to adjust the layout of your text box. However, many users are oblivious to such settings and don’t use them in PowerPoint slides.
In this article, I’ll discuss the indent and the ways to create or remove different indent settings in text lines and bullet points in Microsoft Powerpoint.
Without wasting any time, let’s begin.
You may also like to read about Enable Automated Kiosk Presentation on PowerPoint.
What is Indent in Microsoft PowerPoint?
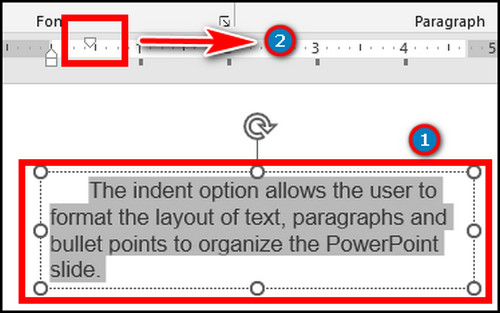
The indent option allows the user to format the layout of text, paragraphs and bullet points to organize the PowerPoint slide. Users can adjust the spacing of the first line of a paragraph to create a hanging indent or indent the whole paragraph.
Indent is useful when writing a paragraph or essay. It gives a blank space before the text and a margin to enhance the visuality. It makes the article easy to read, and most users find it comfortable.
The fastest and most straightforward way to indent is to use the Tab key. But, it can only indent a single or selected line.
There are more advanced methods to precisely adjust the indent settings in Microsoft PowerPoint applications and on the Web.
You will find the process to adjust the indent and create or remove the hanging indent from the passage below.
Related content you should read about how to get PowerPoint Design Ideas & use it?
How to Adjust Indent in Microsoft PowerPoint
By adjusting the First Line Indent marker from the ruler, users can change the indent for the first line of a paragraph. Also, you can use the Increase List Level and Decrease List Level options in the desktop client and web version to adjust the whole paragraph indent.
Consider reading the following procedures to adjust the first line or whole paragraph indent in MS PowerPoint desktop client and web version.
Here are the ways to adjust indent in MS PowerPoint:
1. On Desktop Client
Indent in MS PowerPoint on desktop clients provides options to indent the first line of the whole paragraph of a text box.
Follow the methods below to add a first-line or whole-paragraph indent in Microsoft PowerPoint.
Here are the steps to adjust the first line indent in the MS PowerPoint desktop client:
- Open Microsoft PowerPoint desktop client.
- Go to your PowerPoint slide.
- Select the text you want to change.
- Drag the First Line Indent marker from the ruler to indent the first line.
The First Line Indent option from the ruler is only available for the PowerPoint desktop client.
Read the steps below to adjust the indent in the whole paragraph of a text box in the desktop client.
Here is the process to adjust the indent in the whole paragraph on the PowerPoint desktop client:
- Launch Microsoft PowerPoint desktop client.
- Open the PowerPoint slide.
- Choose the text box.
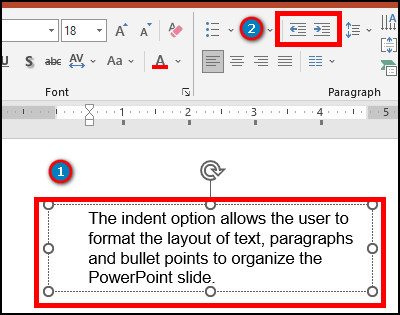
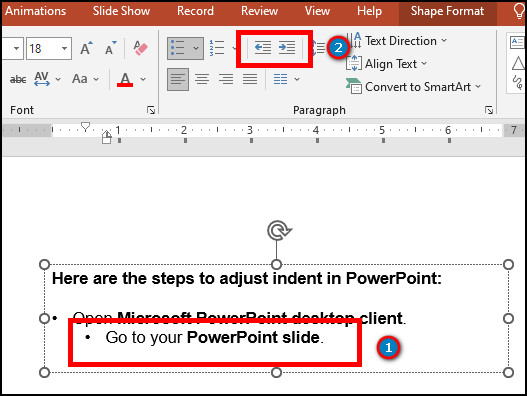
- Navigate to the Home tab from the top ribbon.
- Click on Increase List Level or Decrease List Level from the Paragraph section to indent the whole paragraph.
If you use a web version of PowerPoint, follow the process below to adjust the indent in paragraphs.
Check out the easiest way about Microsoft Teams Channel email not working.
2. On the Web
Unlike the PowerPoint desktop client, the web version doesn’t have a first-line indent option from the ruler. However, you can adjust the indent of the whole paragraph from the web version.
Consider following the instructions below to add a paragraph indent on the PowerPoint web version.
Here are the procedures to adjust whole paragraph indent in MS PowerPoint on the Web:
- Visit Microsoft PowerPoint on the Web using a browser.
- Open your PowerPoint slide.
- Select the text box.
- Navigate to the Home tab.
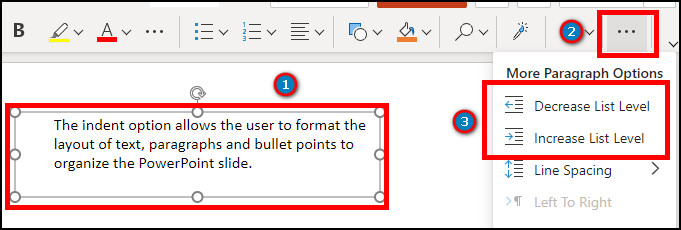
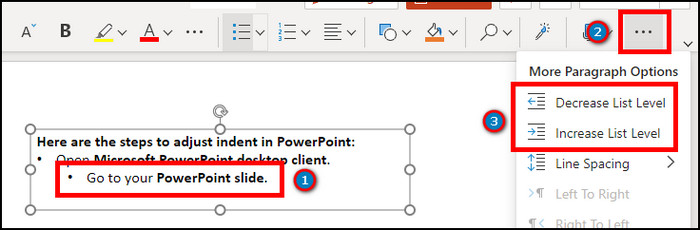
- Press the More Options from the top right ribbon.
- Click on Increase List Level or Decrease List Level to indent the whole paragraph.
Adjusting the indent in bullet points is slightly different than a regular text paragraph. Read the following passage to add an indent in bullet point.
Follow our guide to fix where is the Command Button on a Keyboard?
How to Adjust the Indent in a Bullet Point in MS PowerPoint
Users can indent bullet points or numbered text in PowerPoint using the First line Indent marker and Left indent marker options. Additionally, you can use the Increase or Decrease List Level option to adjust the indent of the selected bullet points text in the desktop client and web version.
Follow the instructions below to learn how to adjust the indent in a bullet point in Microsoft PowerPoint.
Here are the ways to adjust the indent in a bullet point in PowerPoint:
1. On Desktop Client
The first line Indent marker and Left indent marker help to adjust the bullet point and text in a bulleted or numbered text. Also, users can use the Increase or Decrease List Level to indent the bulleted or numbered text.
Let me guide you through the indenting process in bulleted or numbered text in MS PowerPoint desktop client.
Here are the steps to adjust the indent in a bullet point in PowerPoint using a ruler:
- Go to the Microsoft PowerPoint application.
- Open the slide.
- Select the bulleted or numbered text you want to indent.
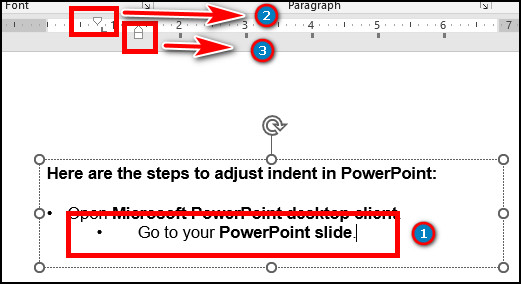
- Drag the First line Indent marker to adjust the bullet point position.
- Drag the Left indent marker to change the text position.
Also, you can change the indent by using the Increase List Level and Decrease List Level options. The instructions below will describe the process of using them.
Here is another procedure to adjust the indent in a bullet point in PowerPoint:
- Select the bulleted or numbered text from the text box.
- Go to the Home tab from the top ribbon.
- Press on Increase List Level or Decrease List Level from the Paragraph section to indent the bulleted or numbered text.
Follow the instructions below to indent bullet points in Microsoft PowerPoint on the Web.
2. On Web Version
PowerPoint web version doesn’t have the First line Indent marker and Left indent marker to change the bulleted or numbered text-indent. But you can use the Increase List Level and Decrease List Level options to indent the bulleted text.
Here is the method to adjust the indent in a bullet point in PowerPoint on the Web:
- Go to Microsoft PowerPoint on the Web.
- Select the bulleted or numbered text after opening the slide.
- Go to the Home tab.
- Click the More Options from the top right ribbon.
- Press on Increase List Level or Decrease List Level to indent the bulleted or numbered text.
If you are looking for the option to create or remove the hanging indent, the following passage will help you.
How to Create or Remove a Hanging Indent in MS PowerPoint
By changing the units in Before text and selecting Hanging from the Paragraph Options, users can create a hanging indent in Microsoft PowerPoint. Also, clearing the Before text units and selecting None will remove the hanging indent from the text box.
If you’re unaware of the hanging indent options, follow the procedures below.
Here are the methods to create or remove a hanging indent in MS PowerPoint:
1. On Desktop Application
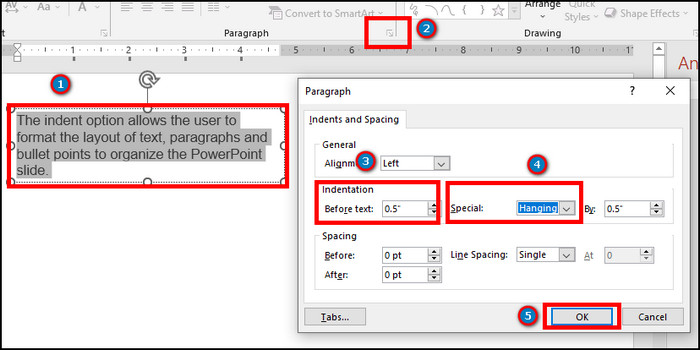
Users can create a hanging indent by increasing the Before text unit and selecting Hanging options from the Paragraph dialog box launcher. Also, clearing the option removes the hanging indent from the text box.
Read the steps below to create or remove the hanging indent from your PowerPoint desktop client.
Here is the procedure to create a hanging indent in the PowerPoint application:
- Open PowerPoint slide.
- Highlight the text.
- Go to the Home tab from the top ribbon.
- Click on the Paragraph dialog box launcher.
- Increase the unit in the Before text under the Indentation.
- Choose Hanging from the Special to create a hanging indent.
- Press OK.
To remove the hanging indent, follow the steps below.
Here is the process to remove hanging indent in MS PowerPoint desktop client:
- Select the text.
- Navigate to the Home tab from the top ribbon.
- Press the Paragraph dialog box launcher.
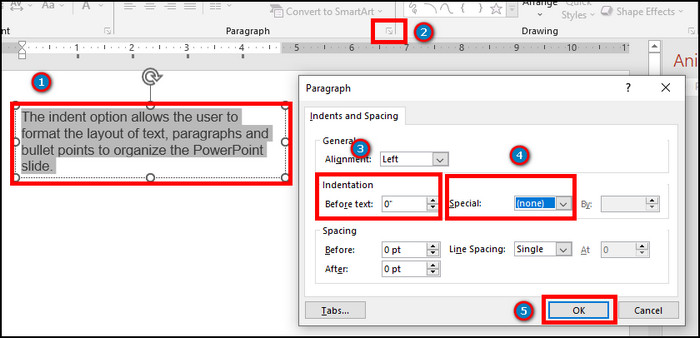
- Clear the unit in the Before text under the Indentation.
- Choose None from the Special to remove a hanging indent.
- Click on OK.
2. On Web Version
Users can change the Before text units and Special options from Paragraph Options to create or remove a hanging indent in MS PowerPoint.
Follow the instructions below to add or delete the hanging indent from the PowerPoint on the web.
Here are the steps to create a hanging indent in the PowerPoint web version:
- Visit Microsoft PowerPoint on the Web.
- Launch the PowerPoint slide.
- Highlight the text box.
- Click on the Home tab from the top ribbon.
- Press on More Options.
- Click on the Paragraph Options.
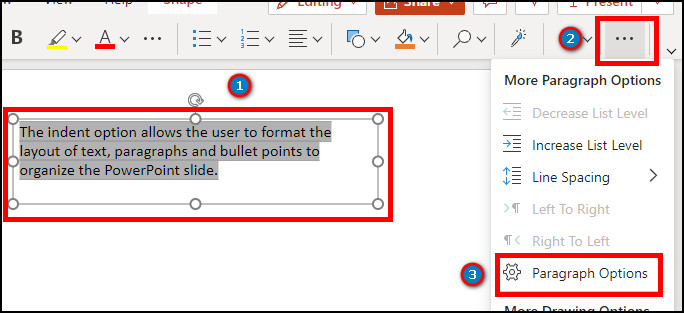
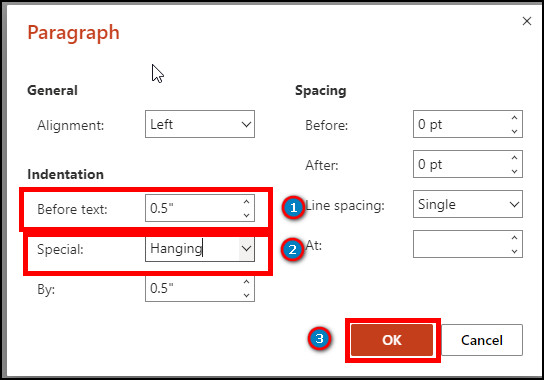
- Increase the unit in Before text under Indentation.
- Select Hanging from the Special to create a hanging indent.
- Press OK.
Read the following instructions to remove the hanging indent from the PowerPoint web version.
Here is the process to remove hanging indent in MS PowerPoint on the web:
- Highlight the text lines.
- Go to the Home tab from the top ribbon.
- Click on More Options.
- Navigate to the Paragraph Options.
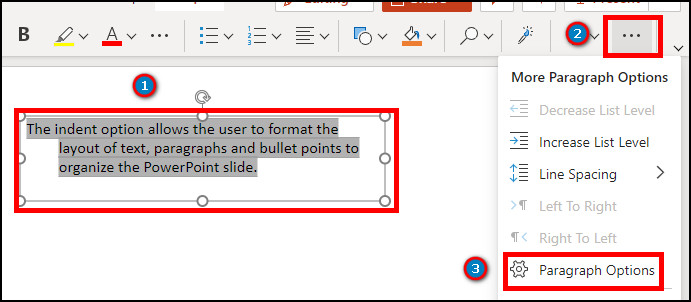
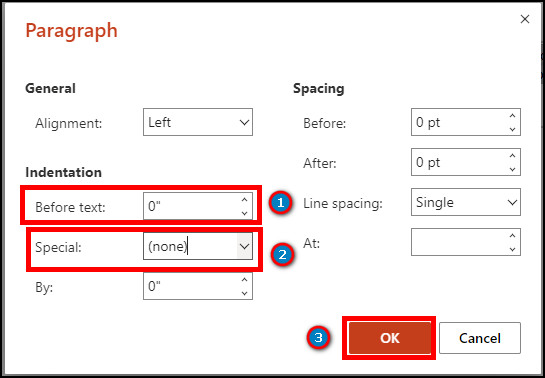
- Clear the unit in the Before text under Indentation.
- Select None from the Special to remove the hanging indent.
- Click on OK.
How to Fix Hanging Indent Not Working in PowerPoint
Users can fix the hanging indent in MS PowerPoint by creating a new PowerPoint slide. Additionally, you can effortlessly delete the problematic hanging indent and create a new text box by using the Slide Master View from Microsoft PowerPoint.
If you have an issue with the hanging indent, consider reading the following steps carefully to resolve the problem.
Here are the methods to fix hanging indent not working in PowerPoint:
1. Create New PowerPoint Slide
Sometimes, your PowerPoint slide gets corrupted, hindering you from adjusting the hanging indent settings. Opening a new PowerPoint slide can solve the hanging indent issue.
Read the following methods for creating a new PowerPoint slide and pasting the previous items.
Here are the procedures to create a new PowerPoint slide and paste the text box:
- Open PowerPoint.
- Go to File and create a Blank Presentation.
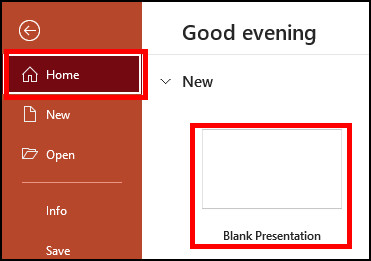
- Paste the text box from the previous slide.
- Edit the indent options.
If the option isn’t fixing your problem, follow the instructions below.
2. Use Slide Master View
Slide Master View allows the user to delete or add items to the PowerPoint slide quickly. Use the option to delete and add a new text box from the layout.
The following instructions have described the ways to use the Slide Master View and the process of creating a new text box.
Also, check out our separate post on fix Auto Archive not working in Outlook.
Here are the steps to open Slide Master View and create a new text box:
- Go to your PowerPoint slide.
- Press on View from the top ribbon.
- Click on Slide Master from the Master Views section.
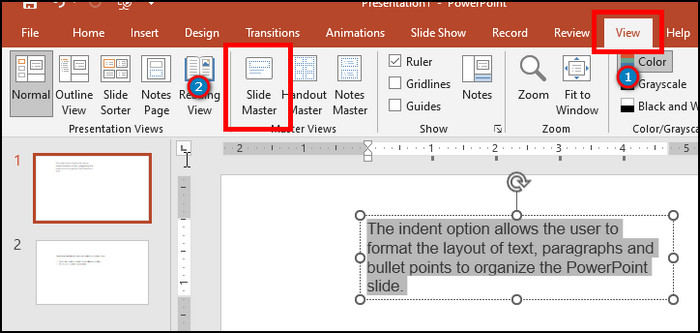
- Delete the problematic text box.
- Navigate to the Insert tab.
- Press on the Text Box option to create a new text box.

- Edit the text box to adjust the indent.
Frequently Asked Questions
How to adjust the indent in Microsoft PowerPoint?
To adjust the indent in MS PowerPoint, go to the slide > select text box > Home > Increase List Level or Decrease List Level.
How do you indent a bulleted list in PowerPoint?
To indent a bulleted list in MS PowerPoint, Select the text > Click on Paragraph dialog box launcher > Increase units in Before text > Choose Hanging > OK.
Which shortcut key would you press to indent the selected line?
You can use the Tab key as a shortcut on your keyboard to indent the selected line in Microsoft PowerPoint.
Conclusions
Doesn’t it look dull and odd seeing a paragraph without an indent? Using the indent option is very effortless and doesn’t take much time.
No doubt adding an indent improves the charms of your PowerPoint slide. You can adjust or remove them to meet your expectations at any time.
This article has explained the easiest ways to add and remove the indent in Microsoft PowerPoint slides, and I believe you’ve already started using it.
Don’t forget to comment, and I’ll catch you at the next one.