Do you receive emails that have nothing to do with you? Maybe you are in the sales team but constantly get meeting details from the HR team.
Luckily, Outlook has an Ignore Conversation feature that will get rid of these emails from inboxes without you needing to do anything. And I will also show you a different way to achieve the same thing.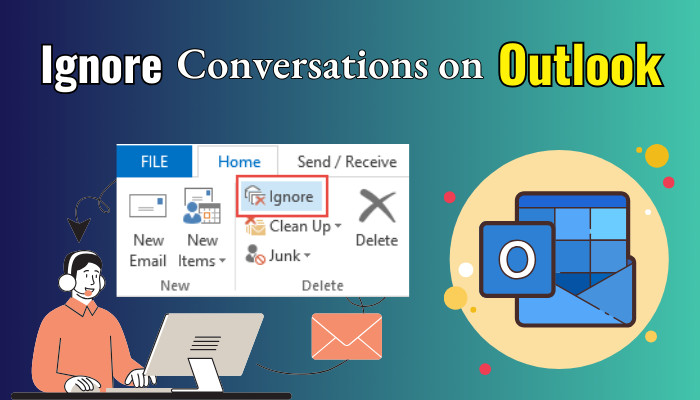
So, let’s jump right into the article and see how it is done.
What is Outlook’s Ignore Conversation Feature?
Outlook’s Ignore Conversation moves all the selected emails to your Deleted folder. It does not stop there; any future email coming from the same address will go into the Deleted folder.
Now, you can say that deleting the emails does the same thing, right?
Actually, it is a bit different. Once you delete an email, it goes into the Deleted folder. But when an email from the same domain arrives later on, you have to do the same thing with it again. Ignore not only deletes the selected email, but any future mail will also be automatically removed.
How to Ignore All Email Messages in a Conversation on Outlook?
To ignore conversation on Outlook, first click to select the email. Next, click on the Ignore button present under the Home tab on the ribbon menu. Another way to do this is by creating a rule and sending the emails from a certain address to the Deleted folder.
The first method is obviously my preferred choice. So, let’s see how we can do that.
Here are the methods to ignore a conversation on Outlook:
1. Use the Ignore Conversation Button
If you select an individual mail and press the Ignore button, only the email from that address will not arrive in your inbox. Selecting a conversation thread will move the entire conversation to the deleted folder. So, both options are present for you.
Here is how you can ignore conversations on Outlook:
- Open the Outlook app. For the web version, go to outlook.office.com and log in with your credentials.
- Click on the email you do not want to receive.
- Press the Ignore button in the ribbon menu. On newer Outlooks, you need to click the arrow next to the Delete icon to reveal this.
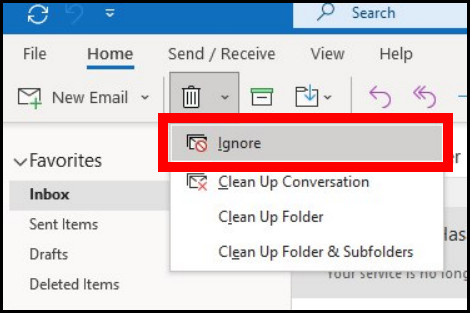
- Select Ignore Conversation from the confirmation dialog box.

Now click on the Deleted Items folder. You will see the deleted email here.
2. Create a New Rule
We can achieve the same results by creating a custom rule. That will redirect the email from a set domain to land in the deleted folder. It takes a few more steps than before, but this is also another way of doing it.
These steps will create a new rule on Outlook that sends emails to the Deleted folder:
- Open Outlook.
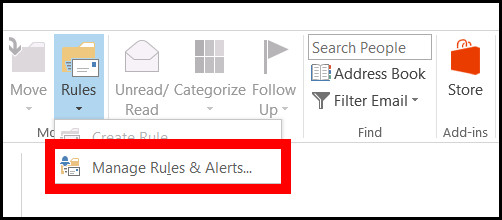
- Click on Manage Rules and Alerts under Rules.
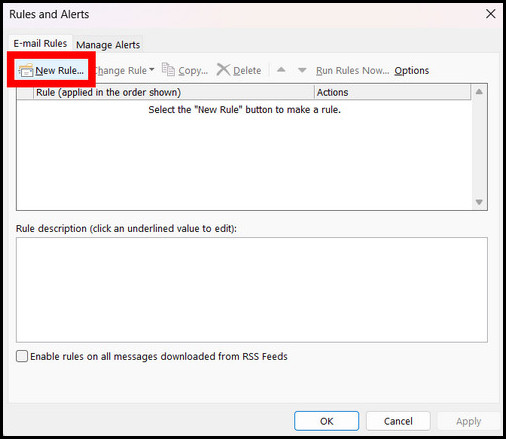
- Press the New Rule button.
- Select Move messages from someone to a folder.
- Click on People or Public Group from Step 2.
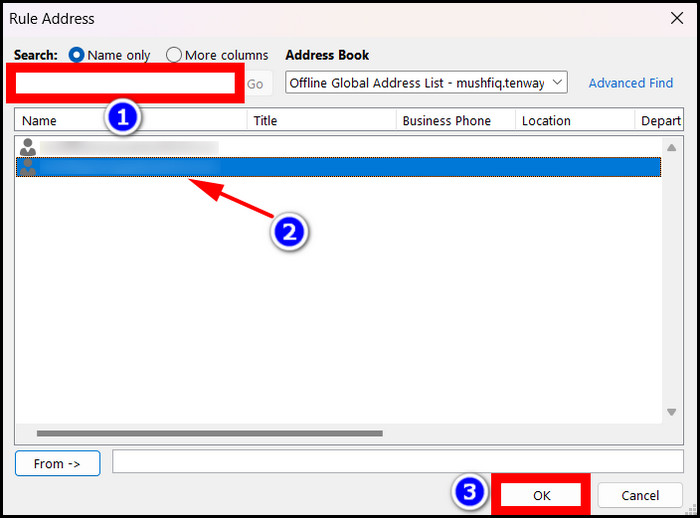
- Type the sender’s email address in the search bar and press Go. Click on the email address that appears in the results and press OK.

- Click on Specified folder from Step 2.
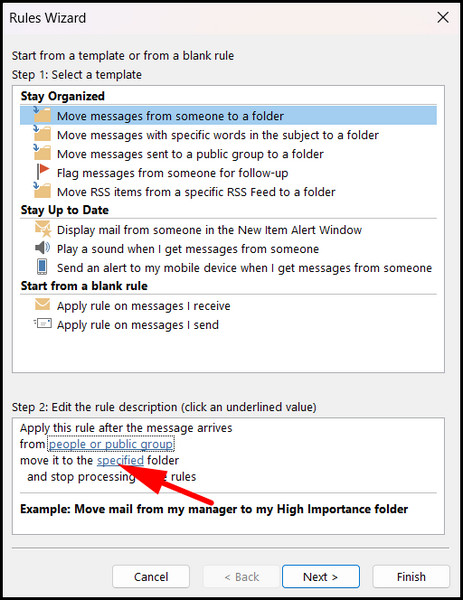
- Select the Deleted Items folder and click OK.
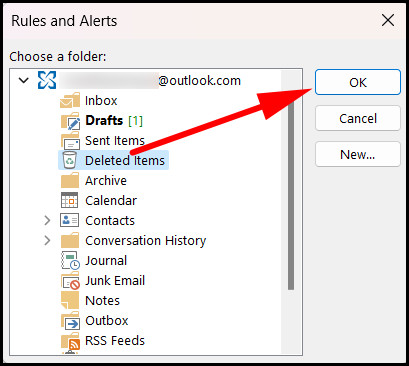
- Once you see the mail address and the destination folder appear on the wizard window, click on Next.
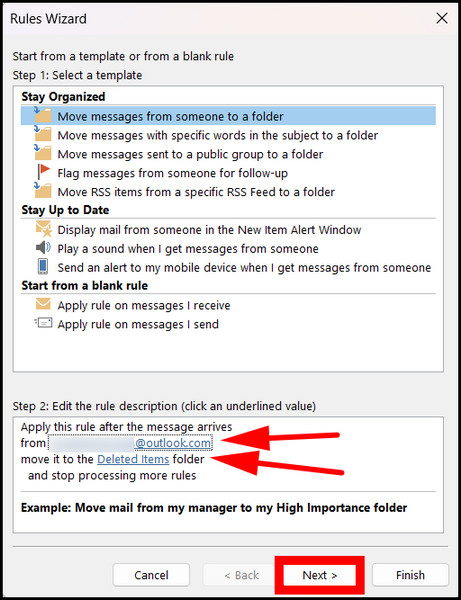
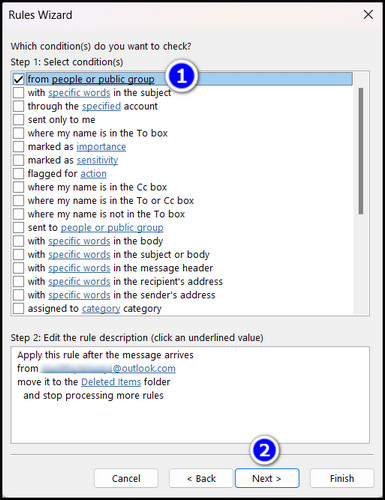
- Mark the checkbox near from people and public group, and click Next.
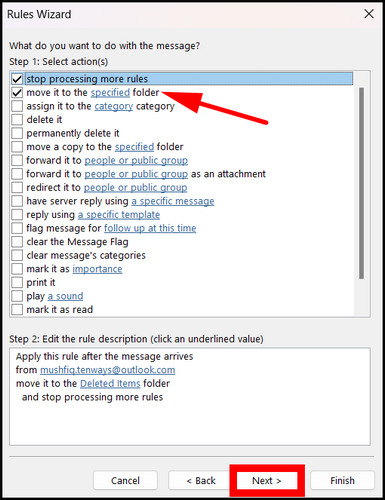
- Mark the checkbox near move it to the specified folder, and click Next.
- Give the rule a name, and make sure to Turn on the rule.
- Click the Finish button.
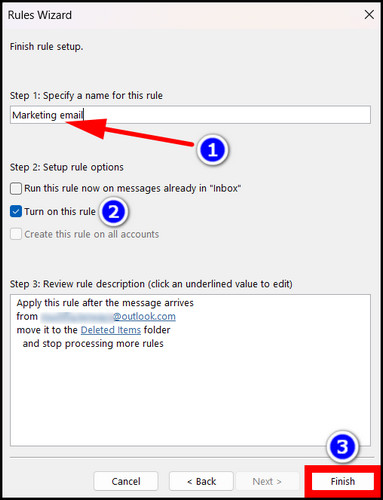
You have successfully set a new rule on Outlook. Now, whenever a new email arrives from a certain address, it will automatically go to the deleted folder.
How to Ignore Conversations on Outlook Mobile?
The Outlook mobile app for Android and iOS also allows you to ignore conversations. This feature was rolled out for the mobile devices more recently in 2020. The desktop app had the same option much earlier.
Ignore works in the same way on the mobile app. You can retrieve the email back from the deleted folder if you want.
Here are the steps to ignore conversations on the Outlook Mobile app:
- Open Outlook.
- Long press to select an email.
- Tap the more options icon and select Ignore Conversation.
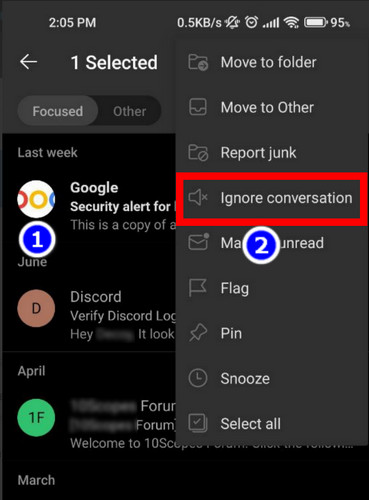
- Acknowledge when the app asks you to confirm this action.
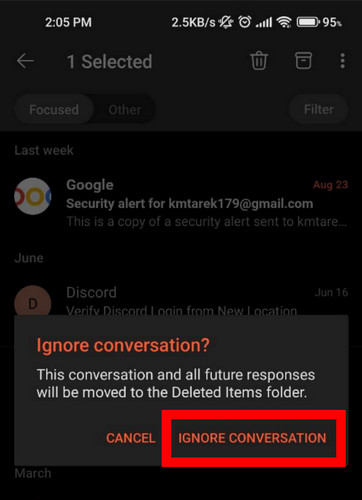
You will no longer see the same email in your inbox. It is sent to the Deleted folder. However, as long it remains there, you can bring it back to the inbox.
How to Stop Ignoring Conversations on Outlook?
The conversations that you have ignored end up in the Deleted folder. That means you can select and bring them back to your inbox.
But remember this: you can only bring emails that are present in the Deleted folder. Outlook deletes emails from the Deleted folder after 14 days. So, keep that in mind because if this time has elapsed, there will be no way of getting your hands on that mail.
Ignore Outlook Conversation on the Desktop (2019/2016/2013/365)
- Open Outlook.
- Click on Deleted Items.
- Select the email you want to bring back to the inbox. For conversations, selecting only one email will do the same thing. You don’t need to select every mail on the conversation thread.
- Click the Ignore Conversation icon.
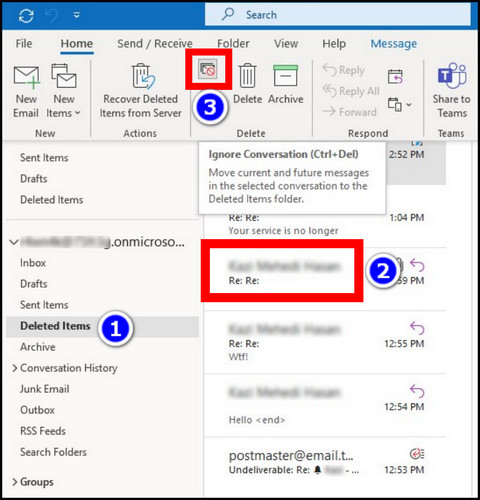
- Select Stop Ignoring Conversation.

Ignore Outlook Conversation on Mobile
- Open the Outlook app.
- Swipe from the left and tap on Deleted.
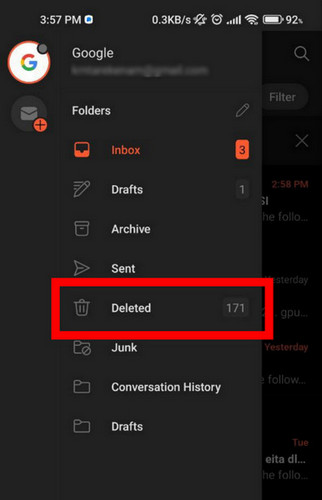
- Select the email by long-pressing it.
- Tap on Restore Conversation.
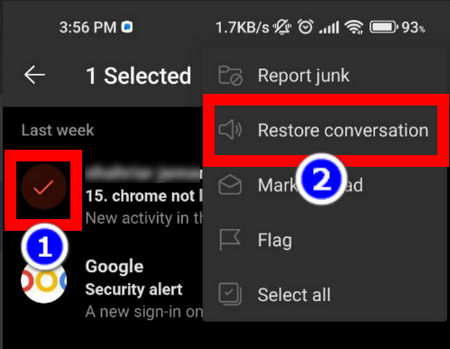
Now go back to your Inbox. You should see all the emails you removed earlier.
Frequently Asked Questions
What is the difference between Delete and Ignore on Outlook?
Deleting an email on Outlook removes it from the inbox into the Deleted folder. If you ignore an email, this will send the email to the Deleted folder. It also makes sure incoming emails from the same domain are deleted when they arrive in your inbox.
How to find ignored emails in Outlook?
The ignored emails can be found in the Deleted Items folder in Outlook. These remain for 14 days. If you try to access it after this period, it is permanently deleted.
Conclusion
Ignoring conversations is a great way to de-clutter your inbox. Emails you do not need will no longer appear, and you can work without any distractions.
It is a two-way action, meaning you can easily reverse it. Just click a button, and the emails you send are instantly back in the inbox.
I hope you find this feature very helpful in your daily workflow. With that said, it is time to say goodbye.