Punctuation enhances our writing with silent intonation. However, incorrect formatting of the punctuation can alter the actual meaning and lead to suffering.
Thankfully, while writing on Google Docs, you don’t need to worry about punctuation formatting, as you can select all the periods and replace them with the correct format and size.
In this article, I will demonstrate all the ins and outs of highlighting and formatting the periods in proper ways.
So, let’s begin!
How to Highlight All Periods in Google Docs
To select all periods in your document, launch the default Find and Replace by pressing the Ctrl + H buttons and type a period in the Find text box. It will instantly highlight all the periods in your document, and here, you can also replace the highlighted periods with any text or words.
Furthermore, you should also try the Advanced Find and Replace add-on for highlighting all the periods in Google Docs. For brief instructions, consider the following methods.
Here are the methods to select all periods in Google Docs:
Use the Default Find and Replace
The most effortless way of selecting all periods is to use the default Find and Replace option. For step-by-step instructions, consider the following process.
- Open your browser and go to Google Docs.
- Press the Ctrl + H keys to open the Find and Replace dialog box.
- Type a full stop or dot (.) in the Find search box to highlight the periods.
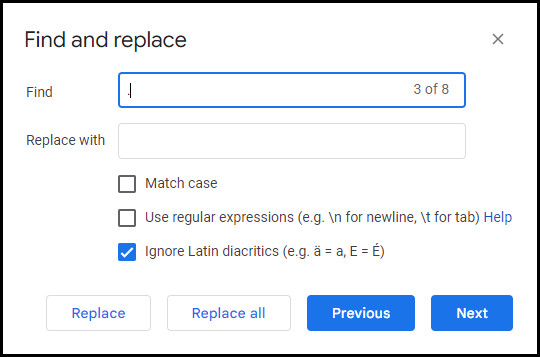
You will see the periods are highlighted in green as all the periods are selected in Google Docs. Now, you can replace all the selected periods with any other character or word. Moreover, you can edit the highlighted periods manually by changing one period at a time.
However, this takes time and patience. But you’ve successfully selected all the periods, which was the primary goal.
Use the Advanced Find and Replace Add-on
For additional features, you must use an add-on called Advanced Find and Replace. This advanced feature also assists in making massive changes while replacing any words. Consider the following instructions to install and use the Advanced Find and Replace add-on.
- Click on Extensions from the main menu.
- Select Add-ons and then click on Get add-ons.
- Type Advanced Find and Replace in the Search App box and hit Enter.
- Click on the Advanced Find and Replace add-on.
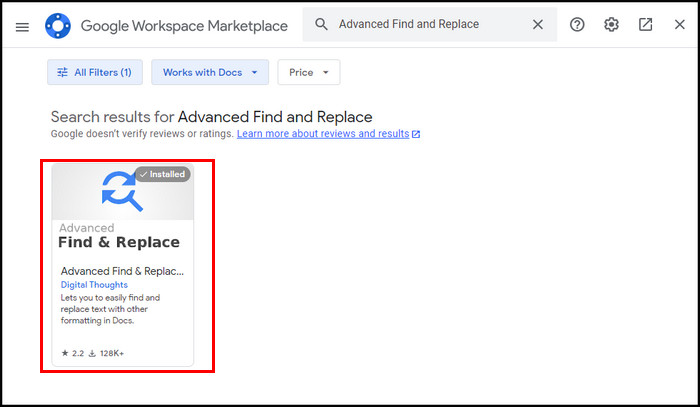
- Click on Install and then select Continue.
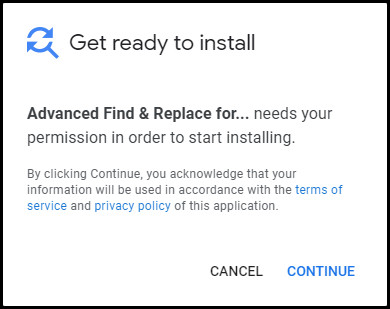
- Choose a Google account to continue the installation from the popup window.
- Allow Advanced Find and Replace to access your Google account.
- Click Done when the installation completes.

- Close the installation window.
- Navigate to Extensions > Advanced Find and Replace for Docs > Find and Replace.
- Type period (.) in the Find text box.
- Scroll down and click on Find All to highlight all the periods in your doc.
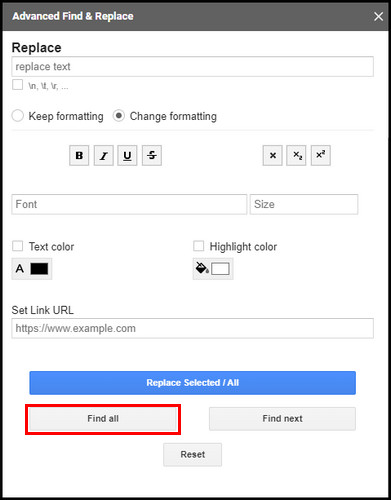
Voila! You’ve successfully selected all the periods in your Google Docs. Here, you can replace the selected periods with a new font, tweak the font size, change text color, and add highlight color to further customize your selected periods.
Using the double underline in Google Docs, you can make your document stand out in a more professional manner.
How to Change Period Size in Google Docs
To adjust the size of your all selected periods in Google documents, you can use the keyboard shortcuts. For instance, press the “Ctrl + Shift + .” buttons to increase the period’s size or press “Ctrl + Shift + ,” to decrease the size of your highlighted Google Docs periods.
In addition, you can also use the default Font size option of docs to manually alter the period size. For huge customization, you should go for the Advanced Find and Replace add-on.
Here are the methods to increase or decrease period size in Google Docs:
Change the Period Size Manually
The most used approach to adjust period size is to use manual adjustments. Go through the following steps to change the size of the periods in Google Docs.
- Open your Google document.
- Highlight the period you want to resize.
- Locate the Font size option in the top formatting bar.
- Click on “+’ to increase the period size, or click on ‘-” to decrease the selected period size.
Remember, the above step is suitable for adjusting one period at a time. However, you can adjust multiple periods simultaneously by performing the following methods.
Use Keyboard Shortcut to Adjust Period Size
Keyboard shortcuts can drastically improve work efficiency. Thankfully, you can also use the keyboard shortcuts to modify the period size.
To increase the selected period size in your document, press “Ctrl + Shift + .”. Alternatively, press the “Ctrl + Shift + ,” keys to decrease the period size.
If you need to adjust multiple periods at once, select all the periods that you want to adjust, then use the shortcut keys.
Use Advanced Find & Replace Add-on
If you haven’t still installed the Advanced Find and Replace add-on, install it before performing the following instructions.
Here’s how to use the Advanced Find and Replace add-on to adjust period size:
- Open the document that contains your content.
- Navigate to Extensions > Advanced Find and Replace for Docs > Find and Replace.
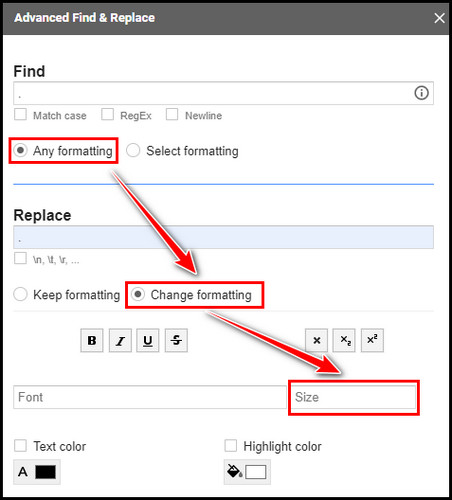
- Type period (.) in the Find input bar.
- Select Any formatting if not selected by default.
- Type period (.) again, but this time in the Replace segment.
- Select Change formatting under the Replace section.
- Click on the font size placeholder and adjust the size of the period.
 Click on the Replace Selected / All button.
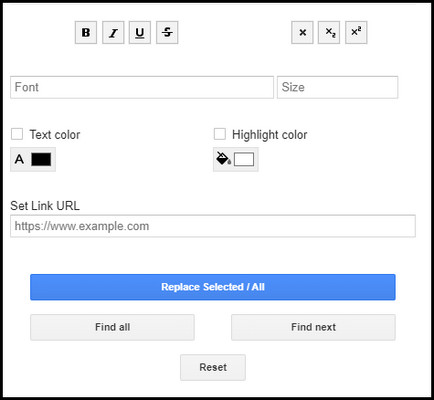
It will instantly apply the new changes to the selected periods and alter the highlighted doc periods based on your preferences.
Why Selecting All Periods in Google Docs is Necessary?
There are several scenarios when you should highlight all your docs periods. Primarily, different sizes of the period may confuse others if you’re working with a team on the same doc file or sharing the document with co-workers.
You must ensure the periods are all in the same font and same size with correct formatting to make the document look more professional and organized.
Talking about correct formatting, you can also perfect your text by curved text in Google Docs.
By selecting all the periods, you can check if any of them are in the wrong format and quickly format them correctly to assure a polished and professional document.
Changing the formal manually can take hours to make it perfect. However, you can use the default Find and Replace feature to easily detect the misconfigured periods and correct them accordingly.
Frequently Asked Questions
How to select all periods and make them bigger?
To select all the periods, install the Advanced Find and Replace add-on. Launch the add-on, type period (.) in the search box, and adjust the period size using the Font size placeholder. Once done, click Replace Selected / All to apply changes.
How to change the font of all periods in Google Docs?
To change the font of your selected periods, open the Advanced Find and Replace add-on, type period (.) in the text box, select the font you want from the Font placeholder, and click Replace Selected / All.
What does the Ctrl period do in Google Docs?
Usually, when you press the Ctrl + period (.), Docs applies a superscript for the selected text. However, if you press the Ctrl + Shift + period (.), it makes the selected text bigger.
Final Thought
Highlighting the periods on Google Docs is straightforward, and formatting them is also much easier once you know the trick and have the proper tools.
Though the default Find and Replace tool is enough for selecting the periods, you must need an advanced tool like Advanced Find and Replace to adjust the size, font, or color of selected periods.
I hope this guide answers all your queries related to the selecting periods in Google Docs. Need further suggestions? Just leave a comment below.