Agree or not, The Power Supply Unit(PSU) is one of the PC’s most vital and unnoticed parts. Some even say in a comedic sense that the PSU doesn’t get any respect.
When the PSU doesn’t get proper attention & cleaning, you may face various malfunctions from your PC. However, It is not that complicated to clean the interior parts of a PSU. I will explain here how effortlessly you can do that.
So, without any delay, let’s begin.

Check our epic post on how to maintain computer Power Supply.
How to Clean Internal Parts of a PSU
Before you make an attempt to clean the PSU, you should take some safety measures. One, use a mask and a pair of gloves while cleaning. Or the dust or debris will stick on your hands, especially your nails, and you may accidentally swallow those dust.
Two, don’t use a vacuum cleaner to clean the PSU and the computer. Because it creates static electricity, which can harm your PC.
You must gather up some tools before you start cleaning: A screwdriver, a Datavac blower duster/a compressed can, a small head brush, microfiber clothes and some cotton swabs.
Here are the steps to clean the internal parts of a PSU:
Step 1: Remove All Cables
First, turn off the PC and remove all the cable connections from your PC case. Give it a rest for two to three minutes. This will allow the PC to cool down & dissolve the remaining power.
You may also like to read on what power supply do I have?
Step 2: Dismantle the CPU & PSU
Open up the PC’s side panel. If it is closed with a screw, open it with the help of a screwdriver. Locate your power supply unit. Generally, it is located in the top or bottom corner of the PC and screwed into the PC case wall.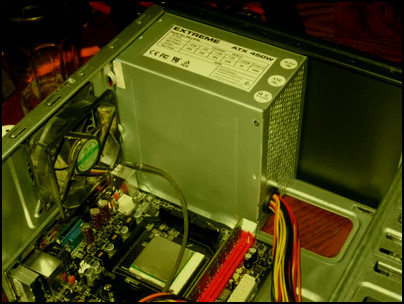
Unplug all the cables that are connected to it. Now remove all nuts from the back of the PC that is connected to your PSU. Take out the PSU from the inside of the case.
Again, use the screwdriver to open up the PSU frame. I know it is unexciting to remove all of those screws. There is nothing much you can do. It is built in that way. Just carefully pull out the frame.
There are two types of ports on the power supply. One is the intake port, the fan, and the other is the exhaust port, called the mesh grill.
Related content you should read on what happens if your power supply is too weak?
Step 3: Clean the Dust
Now it’s time to clean all the dust from the inside. Use a compressed can to remove the dust.
Don’t use any kind of air compressor as it can leave some residual water inside. Whenever you turn on the PSU, it will create a spark and damage your power supply unit.
With the small head brush and the compressed can, carefully remove the dust from the fan, the mesh grill and the PSU power circuit board. Most of the dust will fly away when you blow air.
Wait a while for the dust to settle before starting to blast air once more. Continue this process until all the dust is gone.
With the microfiber clothes, clean the dust from the corner area and the PSU frame. Alternatively, you can use a cotton swab with a mix of isopropyl alcohol to do the cleaning.
Related guide on how to fix computer not turning on power supply?
Step 4: Reattach All the Parts And the Cable Connections
When all the cleaning is done, reassemble the PSU. Now, reattach the PSU inside the case and put back all the connections as they were before.
Close the PC case and insert the cable connections. Turn on the PC.
Pat yourself on the back if the PC and the PCU run without any complications.
Also related to this guide have to press power button many times to start PC.
FAQs
Does PSU need to be cleaned?
Yes, PSU needs to be cleaned. The PSU has a fan attached to the system, which inhales and exhales air. So, dust can be stored inside the PSU and may cause malfunctions in the CPU. It is better to clean the PSU once or twice a year.
How do you clean a power supply without compressed air?
To clean a power supply unit without compressed air, you can use your old unused toothbrush, microfiber clothes or a small head brush.
Can dust ruin a power supply?
Yes, dust undoubtedly can ruin a power supply. When dust or other dangerous particles are stuck inside the unit and in the air intake grill, it blocks the air. As a result, the PSU gets overheated and messes up all the parts from the inside.
Conclusion
Dust continuously keeps growing up on a regular basis. If you don’t remove those from time to time, they can cause serious issues on your computer.
Additionally, don’t forget to take necessary caution. Don’t rush while you are cleaning. Take as much time as you need.
Leave your questions in the comment section if you have any.
Peace Out!