Sometimes the operating system may not be compatible with booting in the UEFI system. In that case, you need to enable CSM (Compatibility Support Module) to install the operating system.
But do you know how to enable CSM from BIOS settings?
Well, I have analyzed some top-branded motherboards and enabled CSM from there. I will discuss those methods.
So, let’s begin.
You may also like to read about how to fix CPU fan not detected in BIOS?
How to Activate CSM in BIOS
To enable CSM, first, you need to go to the BIOS menu. For different motherboards, the boot menu key is different. For ASUS, Gigabyte, ASRock, and MSI motherboards, the boot menu key is F2, F12, F2 and Delete key.
Note: If your motherboard is not one of them, you can try the following path. You will likely find CSM in your particular BIOS.
Related content you should read about AIO pump not showing in BIOS.
Here are the steps to enable CSM in BIOS:
For Gigabyte
- Turn on your PC and press the F12 key to enter the boot menu.
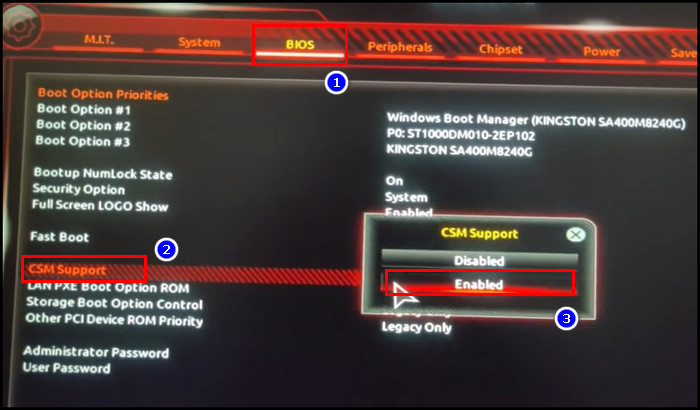
- Go to the BIOS tab.
- Double-click the CSM Support and set the option to Enabled.
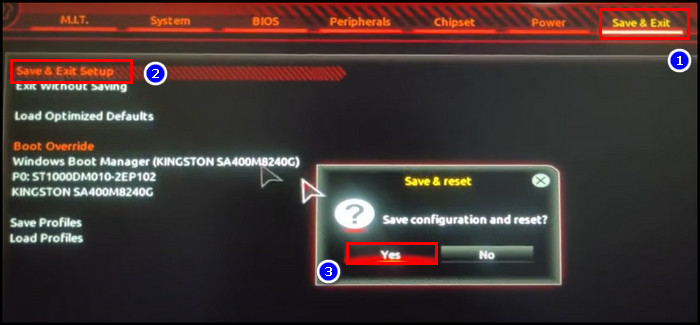
- Move to the Save & Exit tab and click on the Save & Exit Setup option.
- Select Yes to confirm the change. The PC will now take a restart.
Related guide on why your BIOS settings won’t save?
For ASUS
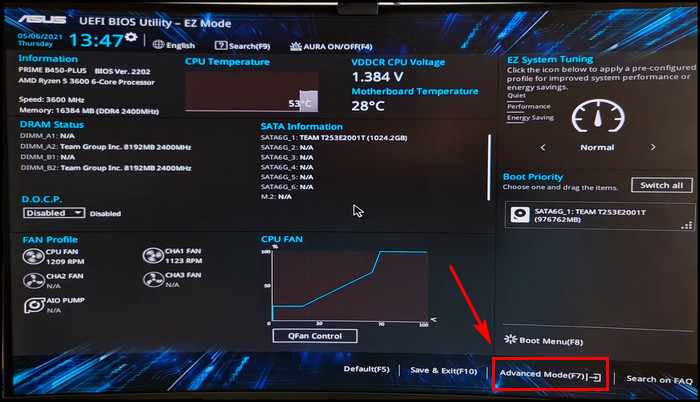
- Turn on the computer and press the F2 key to enter the BIOS settings.
- Click on the Advanced Mode(F7) option.
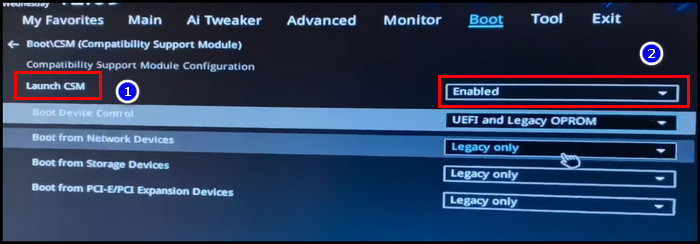
- Go to the Boot tab.
- Click on the CSM (Compatibility Support Module) option.

- Click on the Launch CSM option and select Enabled.
- Go to the Exit tab, select Save changes & Reset and click Ok.

Also related to this guide on how to run check disk from BIOS?
For ASRock
- Turn on or restart the PC and press the F2 button to enter BIOS.
- Go to the Boot tab.
- Locate CSM (Compatibility Support Module) and click on it.
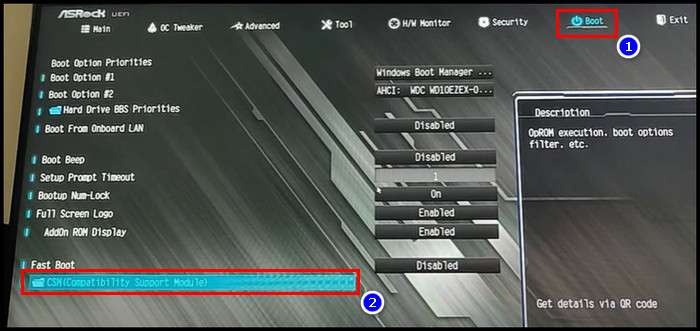
- Click on CSM and select Enabled.
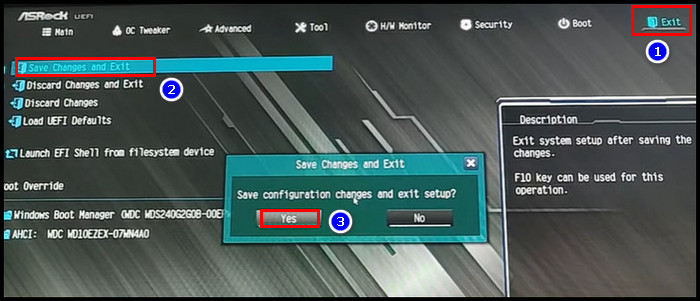
- Go to the Exit tab, select Save Changes & Exit and click Yes.
For MSI
- Turn on or restart your computer, and to enter the BIOS menu, promptly press the Delete key.
- Look at the top of the screen. If the tab is on EZ Mode, you can enable CSM by pressing the toggle icon from the bottom.
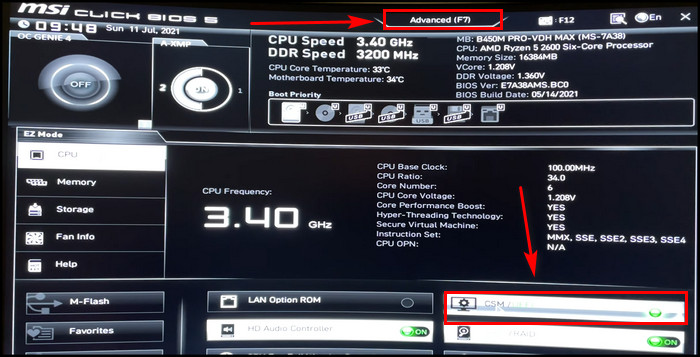
- Go to the Advanced tab.
- Click on the Motherboard settings.
- Select Advanced.
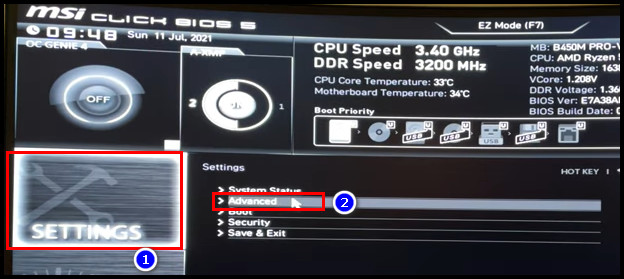
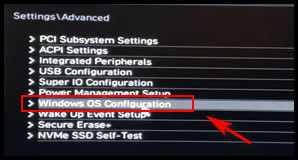
- Click on Windows OS Configuration.
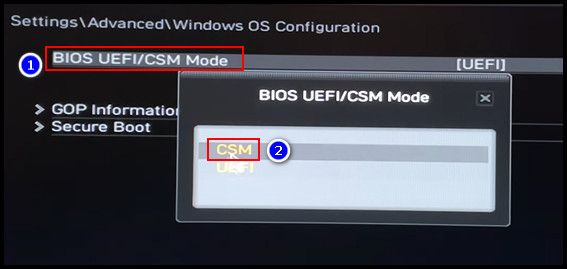
- Select the BIOS UEFI/CSM Mode option and click CSM.
- Press F10 and click Yes to save the changes.
Now the CSM is enabled, the PC will run on legacy mode.
FAQs
Should I enable CSM in BIOS?
It is not mandatory to enable CSM on your computer’s BIOS system. But, if your PC has an MBR device and doesn’t support UEFI, you should enable the CSM.
What does enabling CSM do?
When you enable CSM, the PC can boot in legacy BIOS features. It uses MBR instead of GPT to run the operating system.
Should I use UEFI or CSM?
Usage between UEFI and CSM depends on the drive size. You should use UEFI if your computer has a large drive (more than 2 TB). But if you have a small drive (less than 2 TB) on your PC, it’s better to use CSM.
Final Thought
Depending on the situation, you should decide whether your device requires CSM boot in Windows or not. Because it would cause the system to run more slowly.
When you switch off CSM, your motherboard’s UEFI support will be activated. You will need a suitable OS and BIOS version to control the system.
If you have performed the following steps, you should not encounter any problems with enabling CSM.
For any further queries, comment below.