Microsoft surely tries to delight users with convenient features like Quick Access to get rapid entry to the most recent and used apps. But are you one of those users who sometimes find this feature annoying?
Do you think getting rid of the quick-access menu makes the file explorer much cleaner?
Well, from this article, you’ll learn how to remove it permanently.
Let’s have a look.
Check out our separate post on how to disable quick access in Windows 11.
Disable Quick Access in Windows 10/11
Registry editor is the only effective way you can remove the quick access when you open File Explorer. This fix works for the most recent modern iterations, e.g., Windows 11 and 10.
Here’s how you can deactivate Quick Access via the windows registry editor:
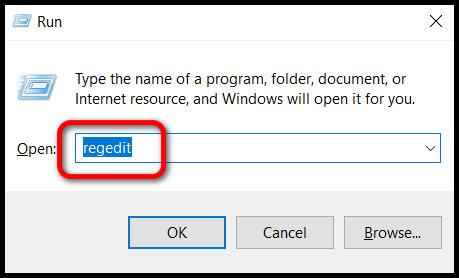
- Launch Run by pressing Windows + R keys together.
- Type regedit and hit Enter.
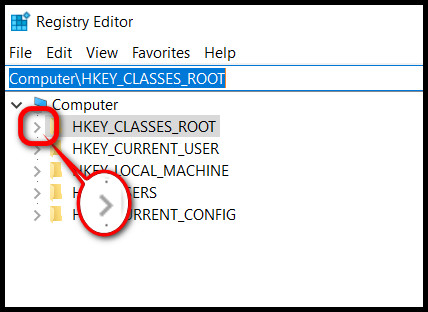
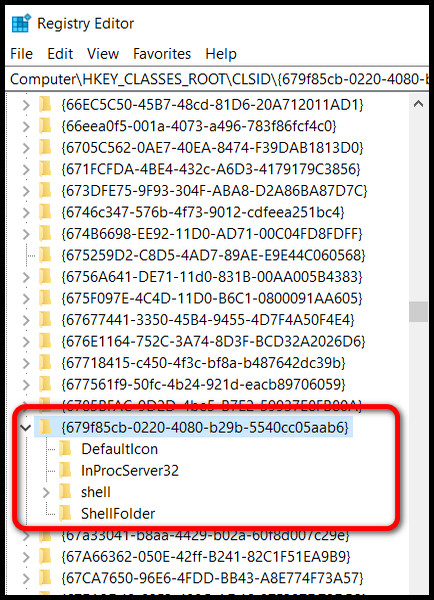
- Click on the arrow (>) on the left of HKEY_CLASSES_ROOT.
- Scroll down and find CLSID folder.
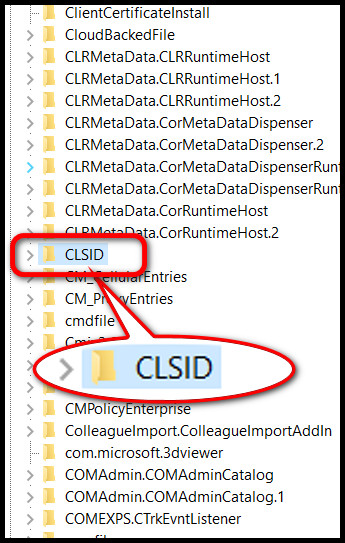
- Double-click on it to expand.
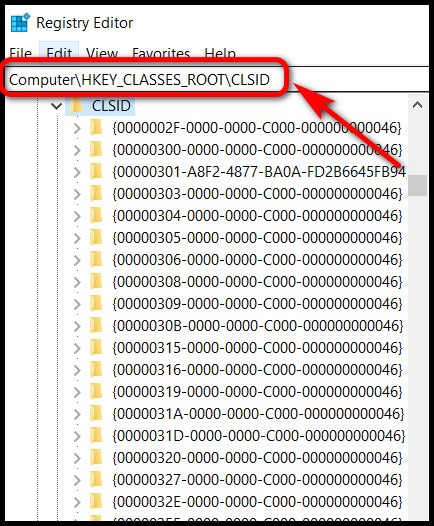
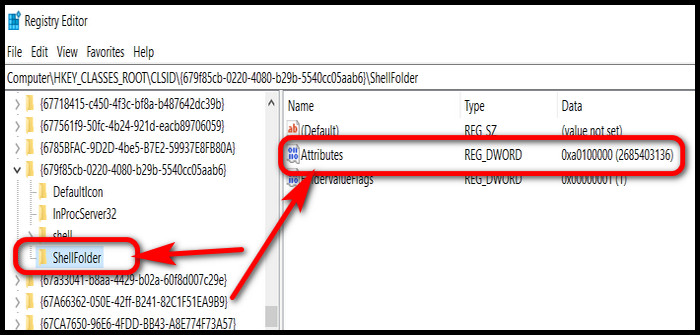
- Find {679f85cb-0220-4080-b29b-5540cc05aab6} folder and expand it.
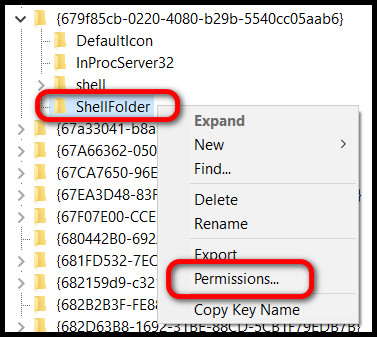
- Make a right-click on the Shellfolder.
- Select Permissions.
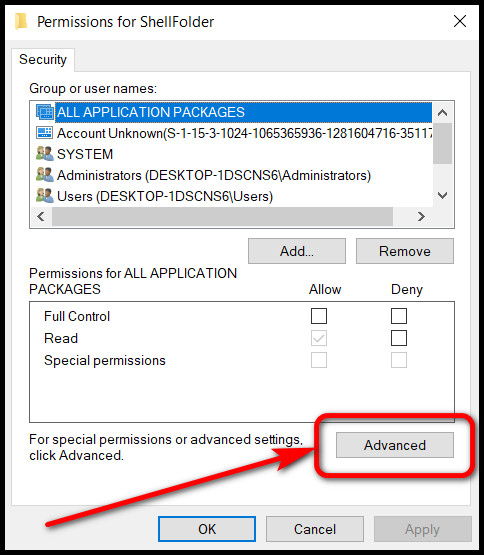
- Choose Advanced from the bottom right of the appeared window.
- Click on Change text, written in blue at the top.

- Choose Advanced at the bottom left corner of the new window.
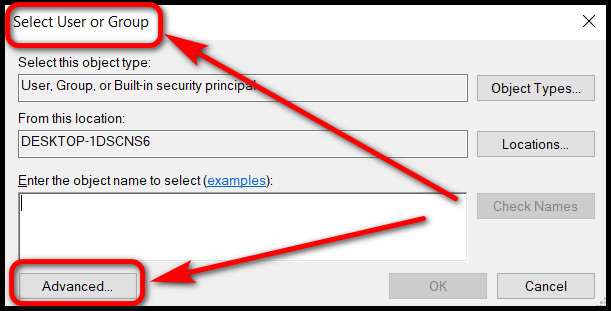
- Press the Find Now button on the right pane of the Select User or Group window.

- Select Administrator from the bottom box labeled as Search results.
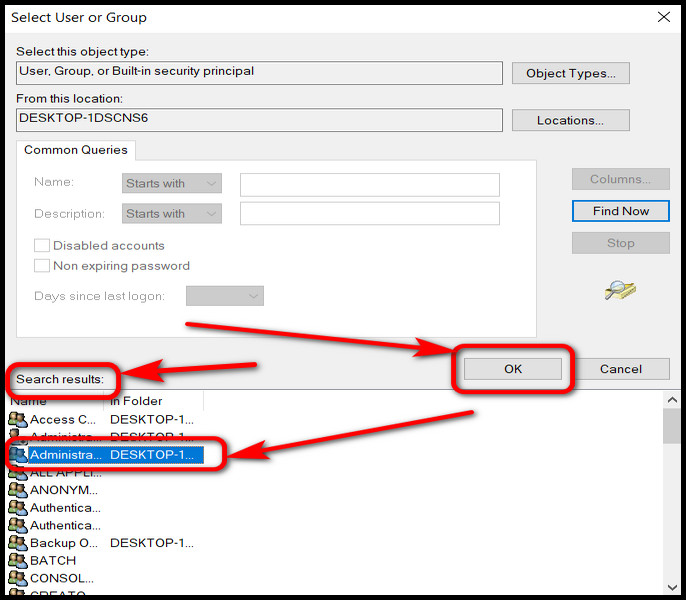
- Click the OK button just above the search results.
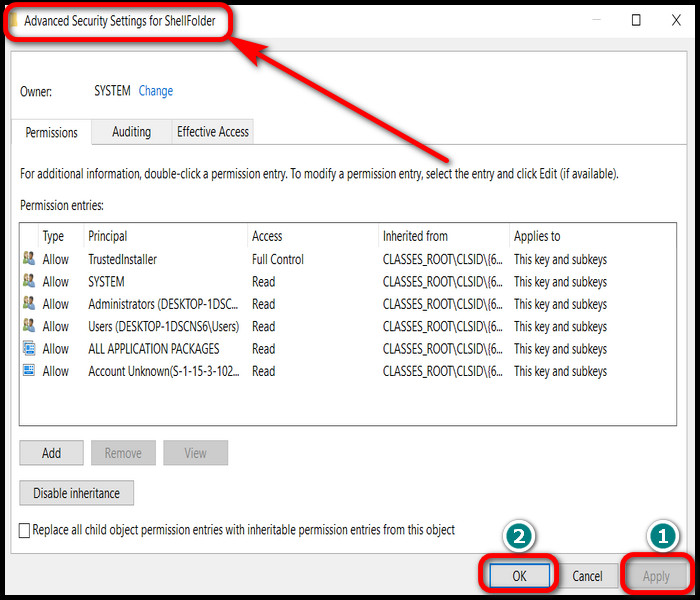
- Hit Apply and then OK from the Advanced Security Settings for ShellFolder window.
- Choose Administrator from the Permission for ShellFolder window inside Group or user names box.
- Choose to Allow for the Full Control option by checking the box.
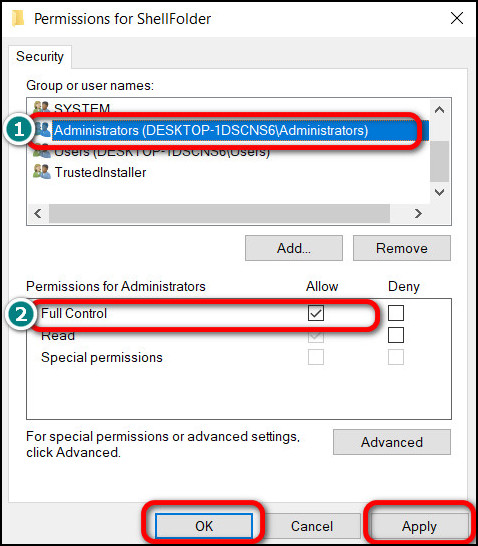
- Press the Apply button and then OK.
- Double-click on the Attributes file and set the value to a0600000 from the main registry window. Ensure the ShellFolder is selected.

Now, restart your computer and open File Explorer and voila! There’s no quick access to bother you anymore.
However, if you don’t want to tinker with the registry file, you can hide the Quick Access files and directly go to the partition drives and access them directly. Read the later section to try it with easy steps.
Read more on windows 10 education vs pro.
Hide Quick Access Files
Hiding the recent files and folders will help you achieve a cleaner experience. It will directly go to This PC without any distraction in the middle.
Here are the steps to hide Quick Access via file explorer:
- Press Windows + E or File icon on the taskbar. It will open File Explorer.
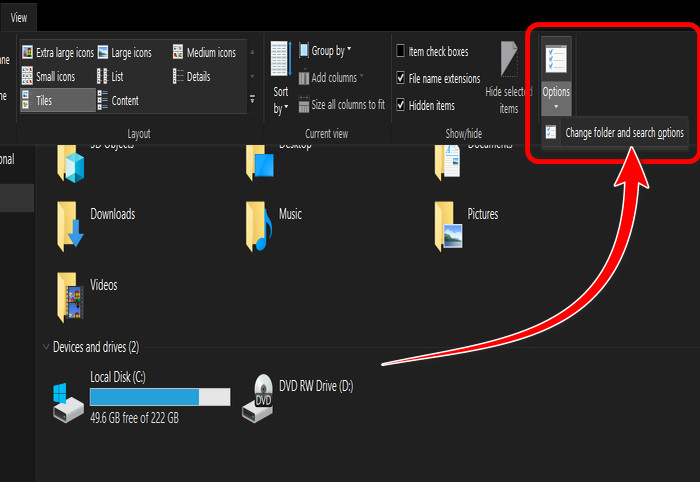
- Navigate to the View tab at the top and click on it.

- Choose Options from the far right of the ribbon.
- Click on the Change folder and search options.
- Set Open File Explorer to option value as This PC.
- Uncheck both the box in the Privacy options under the General tab.
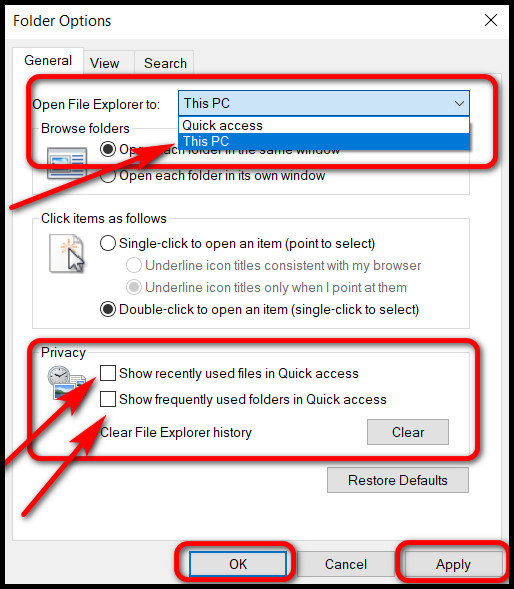
- Click Apply and hit OK.
You’ll notice there are no recent files and folders in the Quick Access option. This takes effect immediately once you press the Apply button.
Related contents you should read how to use password instead of a pin to log into windows 10, hdr washed out windows 10, how to get windows 10 for free as a student.
Ending Remarks
Opening recent files and folders may not be your cup of tea for everyday use. Turning it off permanently is a one-time hassle that will pay you off in future endeavors.
I like to keep it disabled and access my local disk drives instantly.
Hope this article helped you figure out the best and easy way to get rid of quick access.
That’s all for today. Take care.