Revolution comes out of unique ideas from different people. Like most other businesses, I also prefer to hear from my subordinates. But setting appointments or meetings needs particular preparation.
So giving a brief hint of a situation is compelling. For instance, I take opinions about upcoming meetings with specific queries to clarify things. MS Forms can help at this point. Adding a form in a business Sharepoint site makes this more accessible & robust.
So I’m about to share how I add a Form to a Sharepoint Site through this article.
Microsoft SharePoint is already taking place among business organizations because of its advanced features, integration, and control functionalities. On top of that, Microsoft Forms is an excellent tool for collecting leads and bulk responses.
Therefore, posting a Form on the SharePoint site creates significant opportunities. There are a lot of use cases for that.
For example, if you want to collect opinions, complaints, problematic issues, or any updates from the people of a specific group/site, you can use Forms here. It’s so easy and accessible that you can create a form on a mobile device.
Furthermore, imagine you want a data entry form of daily sales information from your marketers and manually put those data into an Excel or CVS file to analyze your business. But you don’t want to give the whole sheet access to them; MS Forms is the optimal solution because you can easily sync Microsoft Forms to Excel instead of manual input.
Since you learned how impactful a form can be in Sharepoint, you should know how to add a Form to your SharePoint.
Here are the simple steps to add or post a Form in a SharePoint Group/Site:
- Open SharePoint in a browser.
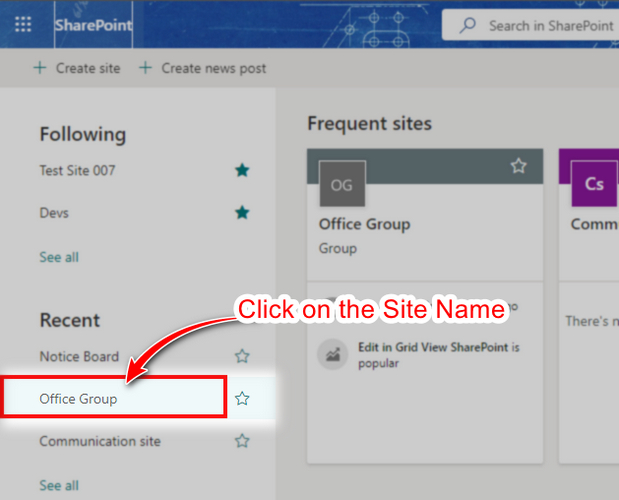
- Click on the Site/Group you want to add a Form.
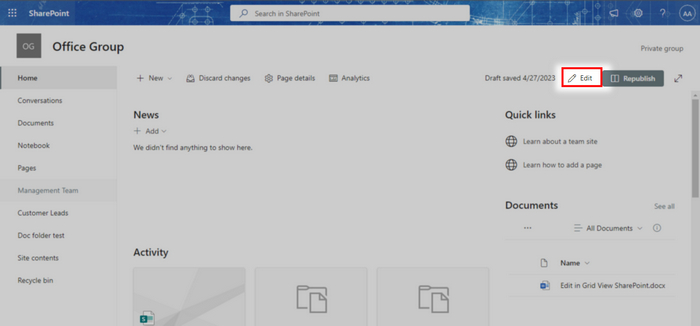
- Click the 🖉 Edit button in the up-right position.
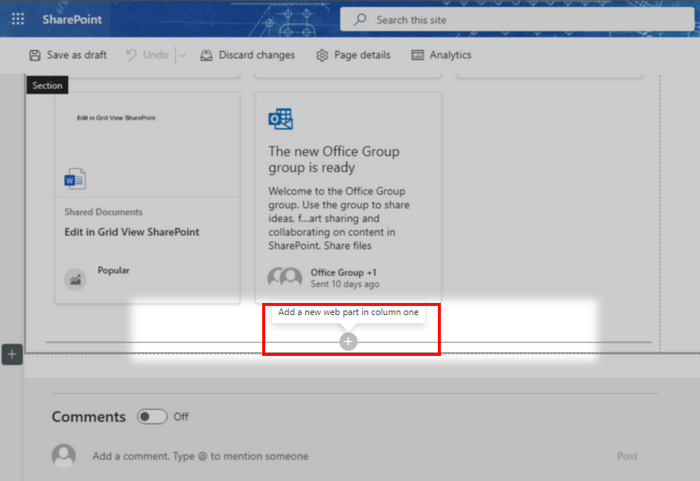
- Scroll down to the bottom.
- Hover over the bottom edge of the last post tile.
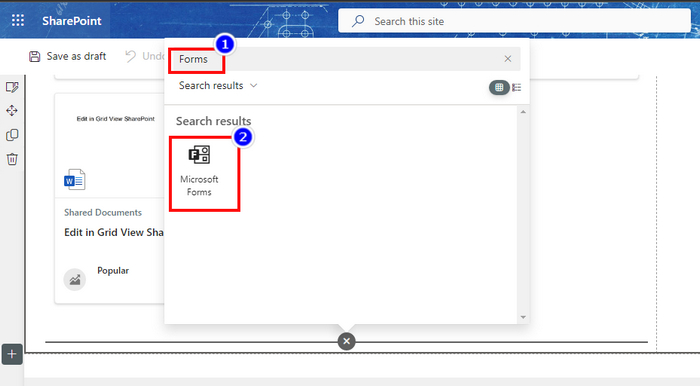
- Click on the ➕ Plus icon.
- Search for Forms and click on MS Forms icon when it appears.
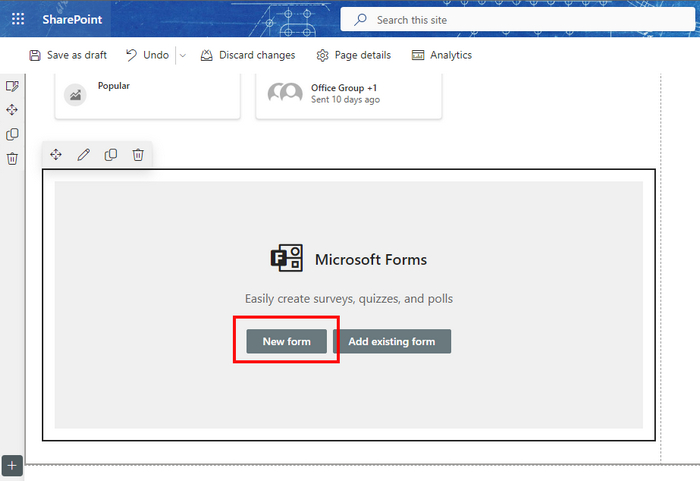
- Click on the New form button.
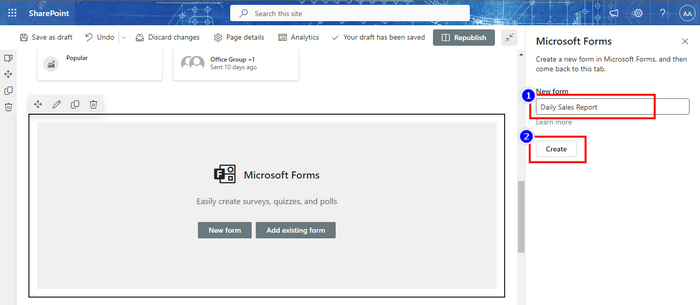
- Input the Name of the new form & click on the Create button.
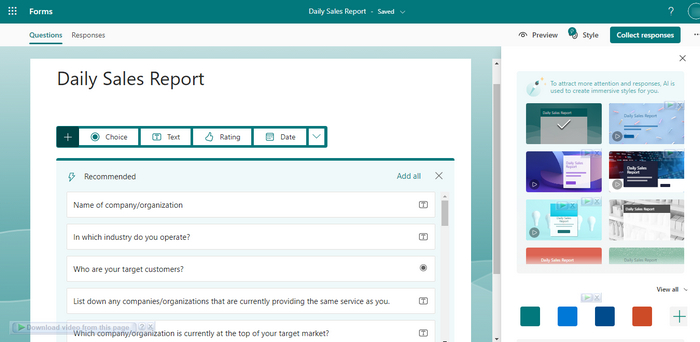
- Customize your Form in a new window.
- Switch back to the previous SharePoint tab.
- Choose to Collect responses & hit OK.
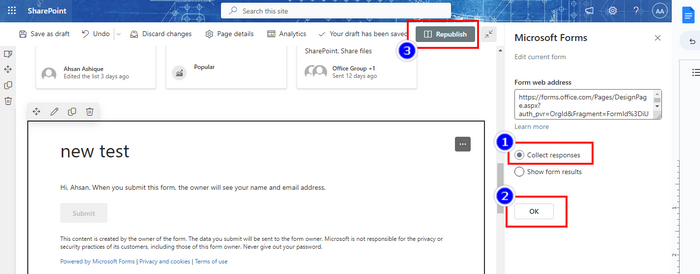
- Click on Republish button to finish the setup.
That’s it; you can now create a fillable form on a SharePoint Site of Office 365. The members of that site/group can fill out the forms, and the responses will be gathered on the Microsoft Forms site. In fact, wherever you add or create a form, you can access them all on the MS Forms site.
In addition, you can automate your form response using Power Automate and make things work for themselves.
FYI there are some limitations while you create a form on MS SharePoint. The attractive design & color or changed fonts won’t be visible in SharePoint. You and the members will only see the added questions and input options in a simple view.
Pro tips: You can add an existing form in SharePoint instead of choosing the New Form button. You need to click on the Add existing form button and paste the form link there.
FAQs
Can I post MS Forms Link in SharePoint?
Yes, you can post an MS form link directly on SharePoint. But it may not be as accessible as an added form, which is fillable on the SharePoint timeline.
Should I share an MS form link to be posted to SharePoint?
Members can’t share the form link easily if you create a form in SharePoint. But if you post a form link directly, it’s easy to share the link.
Can I choose which member in a group can access the Form on SharePoint?
Yes, you can customize the access of a form and restrict the accessibility of your form from the Form settings.
Conclusion
Software integration gives a featureful opportunity to the users. Like Microsoft Forms, connection with SharePoint is a blessing for business owners. But very few users know about these additional functionalities so far.
Hope this article helped you learn how to create MS Forms in SharePoint. Leave a comment below if you have any queries.