In Microsoft Word, users can write text, adjust pictures, and create tables to visualize important data. But directly sharing the table with others can cause several issues.
In such scenarios, turning the table into a picture can keep every little detail and preserve the actual cell size. Fortunately, Word has several ways to convert tables to pictures.
Keep reading this article till the end, as I will share five different methods, so you can choose the most suitable one for converting your Word tables to images.
Let’s begin!
How to Convert a Table to an Image in Microsoft Word
There are multiple methods to convert a Word table to an image. The most straightforward method is to convert using the paste special feature and save it as a Picture. Besides, you can effortlessly convert using the Snipping tool, Paint tool, taking a screenshot, or inserting the table as an object.
But why should you convert a table to an image?
Converting a table to a picture comes in handy when you need to preserve the cell size of the table. It allows you to share the table as an image without sending an entire document. Moreover, it also prevents unauthorized changes from the audience to your Word document.
If you have multiple tables in your document, you can merge the tables in Word before converting to an image.
Here are the methods to convert a Word table to an image:
1. Convert Using the Paste Special
Microsoft Word allows copy-paste a table as an image using the Paste Special feature. After converting it as an image, users can further save it and share it with others. To learn how to do it, consider the following steps for Windows and Mac Word apps.
Here’s how to convert a table using the paste special option:
- Open the document that contains the table.
- Click on the four-sided arrow on top of the table to select it.

- Press Ctrl + C to copy the table.
- Move down and place your cursor on a blank space.
- Expand Paste Options by clicking the Paste dropdown button.
- Select Paste Special from the popup menu.
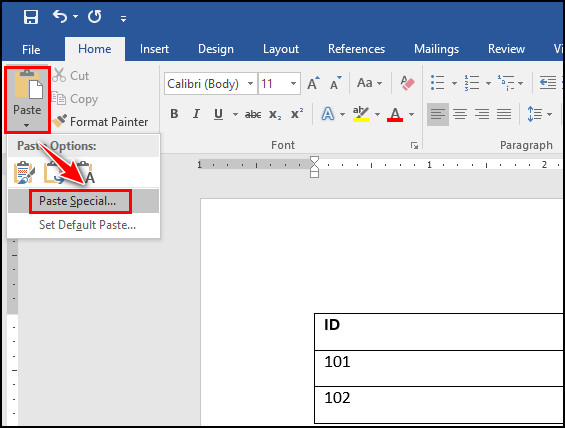
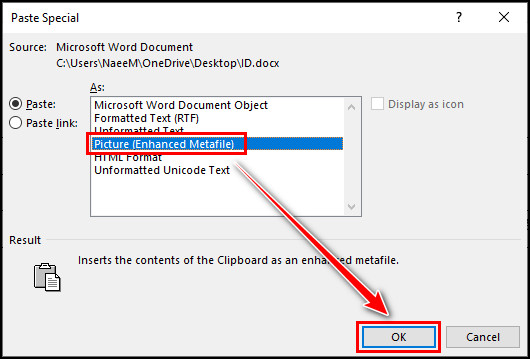
- Choose Picture (Enhanced Metafile) and click OK.
- Right-click on the picture and select Save as Picture.
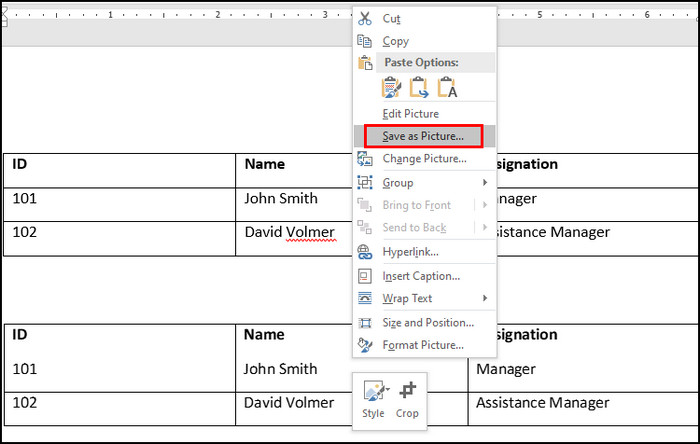
- Choose the destination and type a name for the picture.
- Click Save to save the picture on your local drive.
Voila! You’ve successfully saved your Word table as an image. You can choose between five different image formats while saving the picture. Once the picture is saved, you can share the table picture with anyone.
Furthermore, you can copy and paste your Word table into Google Docs and convert your Google Docs table to text.
2. Convert Using the Snipping Tool
Alternatively, you can use the default Snipping tool to save your Word table as a picture. Using the Snipping tool, you can transform anything into a picture.
Perform the following steps to save a table as an image using the Snipping tool:
- Open your document and keep the table on the screen.
- Press the Windows key and search for the Snipping tool.
- Click the Snipping tool from the search result.
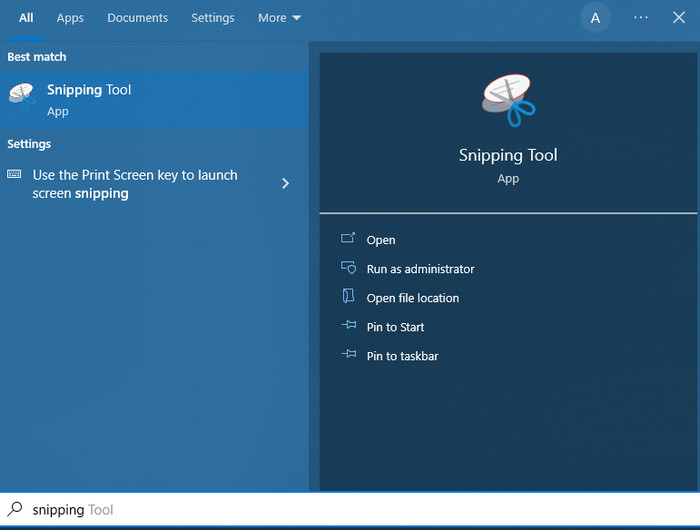
- Select New or press Ctrl + Shift + S and draw a snip over the entire table.

- Click Save Snip to save the table as a picture.
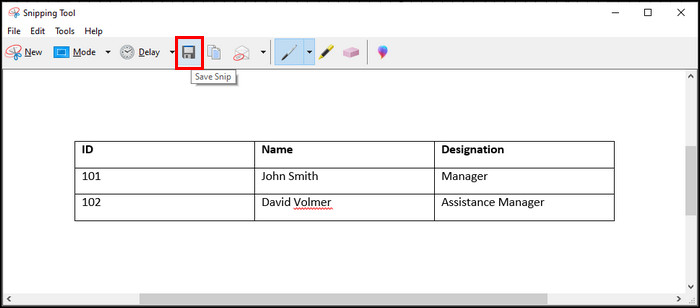
- Browse a location, type a name, choose an image format, and click Save to complete the process.
After saving the table as a picture, you can quickly rotate the table in Microsoft Word.
3. Convert Using Paint
Another relatively simple and more straightforward method of converting tables to images is to use the default Paint tool of Windows. For step-by-step instructions, consider the following process.
Execute the following steps to convert tables to pictures using Paint:
- Select the table by clicking the four-sided arrow.
- Press Ctrl + C to copy the table.
- Search for Paint and open it.
- Press Ctrl + V to paste the table.
- Click the Save icon.
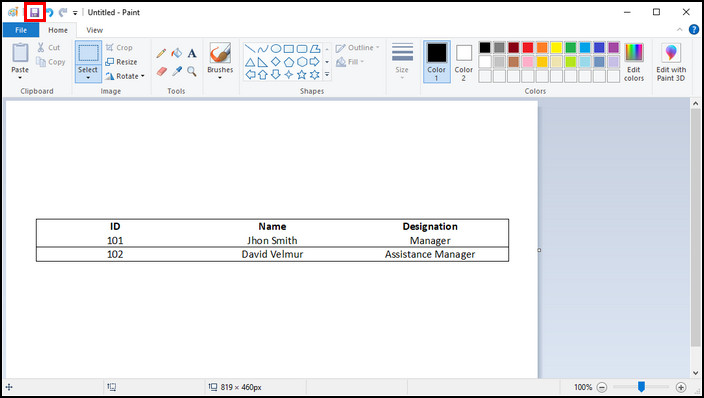
- Browse the destination, type a name, and choose the image format.
- Click Save to save the table as a picture.
The Paint tool allows you to reposition the table according to your needs. Moreover, you can utilize the Resize tool to alter the size in pixels instead of percentages while maintaining the aspect ratio.
4. Convert by Taking a Screenshot in Word
As an alternative, you can also take a quick screenshot using the Screenshot feature in Microsoft Word.
Here’s how to convert your tables to images by taking a screenshot:
- Open the document that includes the table.
- Navigate to File > New > Blank document.
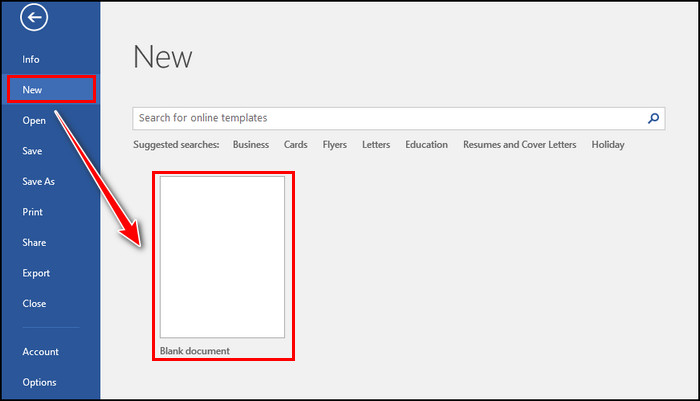
- Switch to the Insert tab on the new blank document.
- Click Screenshot and choose Screen Clipping.
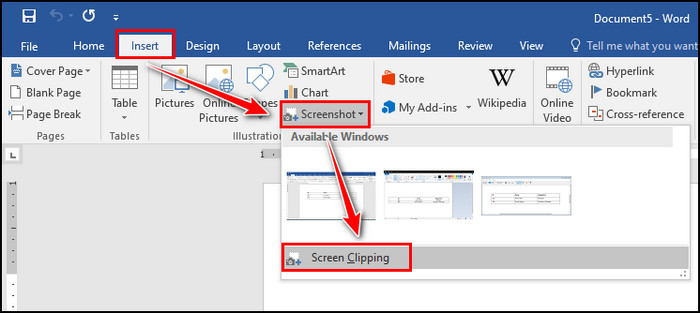
- Select the entire table by dragging the four-pointer arrow.
- Release the left mouse button to take the screenshot.
It will instantly add your table to the new document as an image. Now, you can save the image by right-clicking it and selecting Save as Picture from the context menu.
5. Convert by Inserting as an Object
This is the most unusual and rarely used method for making an image from a table. However, in some cases, this method can be advantageous.
Following are the steps to convert tables to images by inserting the table as an object:
- Save your table in a new document.
- Navigate to File > New > Blank document.

- Switch to the Insert tab and click Object.
- Navigate to the Create from file tab and select Browse.
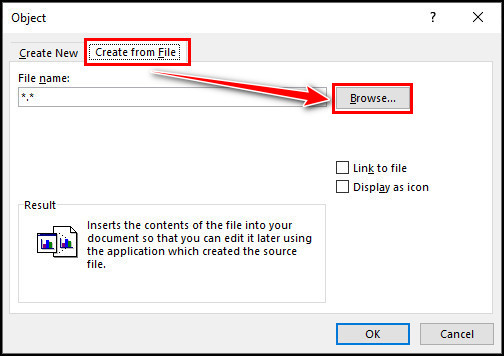
- Select the saved file and click Open.
- Click OK to insert the table as an object.
- Right-click the object and select Copy.
- Return to the previous document.
- Navigate to Paste > Paste Special.
- Select Picture (Enhanced Metafile) and click OK.

- Right-click on the image and choose Save as Picture.

Now, you have an image of the Word table that you can effortlessly store and share without worrying about losing the main document.
Frequently Asked Questions
Can tables be pasted as pictures?
Yes, Microsoft Word tables can be pasted as pictures using the Paste Special Option. To do so, paste the table as Picture, right-click, and select Save as Picture from the context menu.
What are the benefits of saving a table as an image?
When you save a table as an image, it will preserve the cell size along with other information and keep the table safe from unauthorized changes. Moreover, you can quickly attach the table image to any presentation file without adding the entire document.
Why is some part of the table missing while converting to a picture?
When the table takes more than one page or some part of the table goes to the other page, you will find some parts missing after converting the table to a picture. To resolve the issue, select the entire table before converting it.
Concluding Words
To preserve the table contents and cell size, converting it to an image is the ultimate solution. Because when you save a table as a picture, nobody can change the value, or the table won’t be adjusted when moved to other applications.
You can effortlessly convert your Word tables to images by following the above-mentioned methods. For further queries, leave a comment below.