Using Microsoft Word, you can add borders to a page in a document.
A tasteful page border can make a certain page or the whole document stand out.
But using the wrong page border can reduce the readability or appeal of the document.
This post will guide you through the process of adding page borders using Microsoft Word.
You can set page borders easily using Microsoft Word on a desktop. The mobile apps do not have the page border option, but you can set the margins.
Keep reading the post till the end to learn more.
Check out the easiest way on how to use thesaurus in MS Word.
How To Insert Borders In Microsoft Word On Mobile
Word mobile app does not have the page border option. Instead, the page margin option is present, which lets you set up the whitespaces around the page.
The right page margin will play an important role in the readability of the document. You can set a narrow margin to squeeze more text per line, but it reduces the readability.
If your document has a complex layout, adding the right page margin is crucial. So using the page margin option, you can change how the contents inside the page will look like.
When you create a new document using Word mobile app, it has the default page margins applied.
All the Word apps across the mobile (Android, iOS, iPadOS) platform have the option to switch to other preset page margin values. You can also set a custom page margin.
Follow the methods below to change the page margins in Word mobile app:
1. Set Page Margins In Word Android App
The layout of the Word app is different on the Android phone and tablet app due to screen sizes. Nevertheless, both contain the option to change the page margins.
Here are the steps to set the page margin in Word Android app:
- Open the document in MS Word Android app.
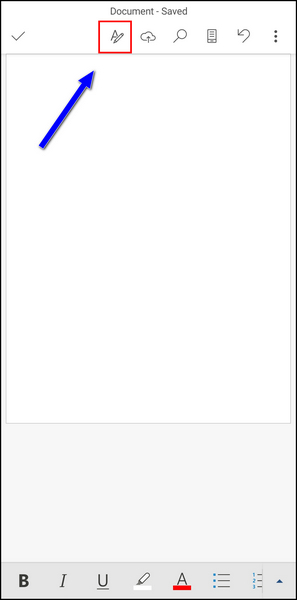
- If you are using an Android tab, tap on the Layout tab from the top. If you are using an Android phone, tap on the Edit icon (the icon with the pencil symbol) from the top, then go to Home > Layout.
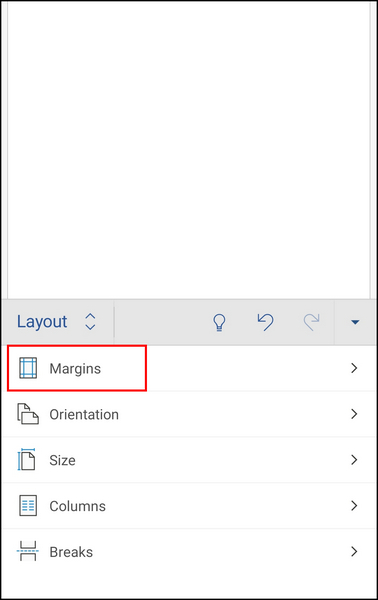
- Select Margins from the list. It will reveal the different options for page borders or margins. The measurements for top, bottom, left, and right will be written. The thumbnail will give an idea about the looks of the page.
- Select the Mirrored option from the list if your document has facing pages.
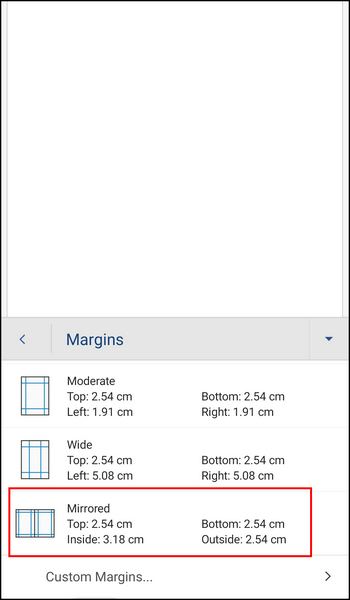
- Select Custom Margins to set your own top, bottom, left, right page border Measurements. The Word app accepts measurements in centimeters.
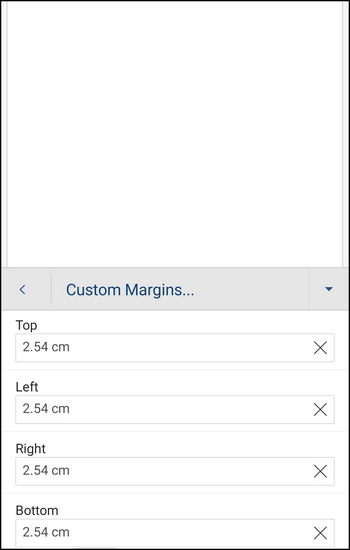
In the Microsoft Word app, the default margin options have the following values:
| Margin Option | Description | Top | Bottom | Left | Right |
|---|---|---|---|---|---|
| normal | suitable for most documents | 2.54 cm | 2.54 cm | 2.54 cm | 2.54 cm |
| narrow | suitable for multicolumn documents | 1.27 cm | 1.27 cm | 1.27 cm | 1.27 cm |
| moderate | let you add some more words per line | 2.54 cm | 2.54 cm | 1.91 cm | 1.91 cm |
| wide | suitable for having extra space on the margins for notes | 2.54 cm | 2.54 cm | 5.08 cm | 5.08 cm |
Follow our guide on how to dictate in Microsoft Word Desktop/Web?
2. Set Page Margins In Word iOS And iPadOS App
You can set the page border from both the iPhones and the iPads.
Here are the steps to change the page margin using iPhone or iPad:
- Open the document in the Word app.
- Tap on the Layout option from the top on an iPad. If you are using an iPhone, tap on the Edit icon (the icon with the pencil symbol), then go to Home > Layout.

- Tap on Margins. You will see a list with different options for page borders or margins (Moderate, Wide, Mirrored, etc.). Top, bottom, left, and right measurements will be written.
If your document has facing pages, choose the Mirrored option.
To set your own top, bottom, left, and right page margin measurements, select Custom Margins.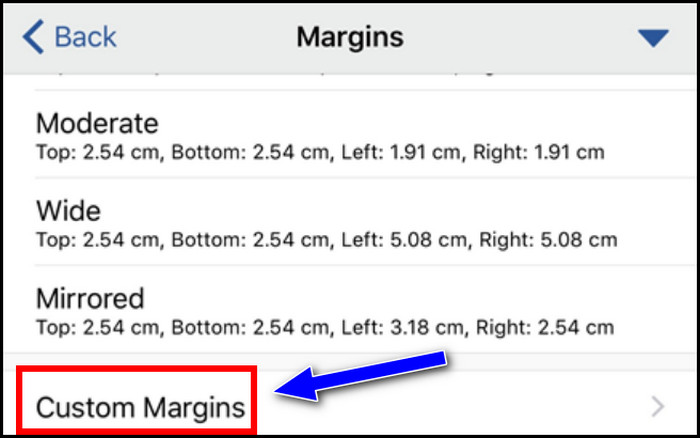
You may also like to read on how to fix Microsoft Word won’t open.
How To Add Page Border In Word Desktop
The Word desktop app has an extensive option to configure the page borders.
So if you have access to the Word desktop app (Windows or macOS), then it is better to insert page borders using them.
Follow the methods below to add borders to a page in Word:
1. Add Page Border In Word Windows App:
Using the Word app in Windows, you can add line or art borders to the pages.
Here is the procedure to add borders to a page in Windows:
- Open the document in Word.
- Go to the Design tab from the top.
- Click on Page Borders from the top ribbon (inside the Page Background group). The Borders and Shading dialogue box will appear. You will be in the Page Border tab.

- Choose an option from the left (under Setting) to define the border. You can choose between the 5 options: None, Box, Shadow, 3D, Custom. The small thumbnail will give you an idea about each of them.
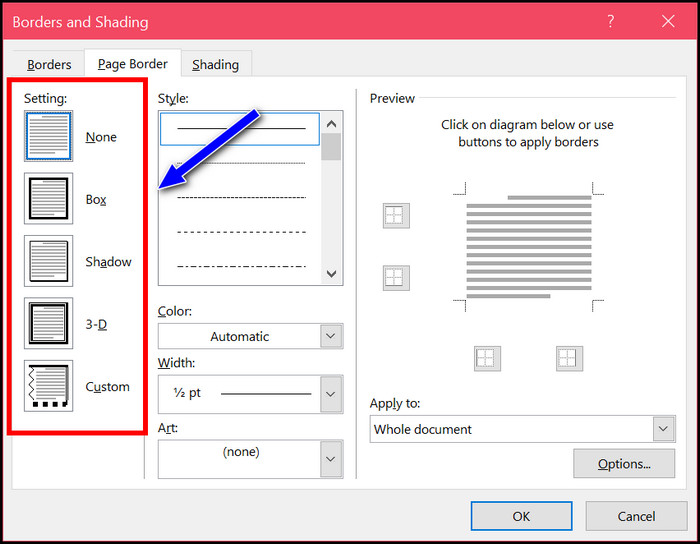
- If you want to add a line border, choose the line style from the center column. There are many line style options available (solid, dotted, wavy, etc.).
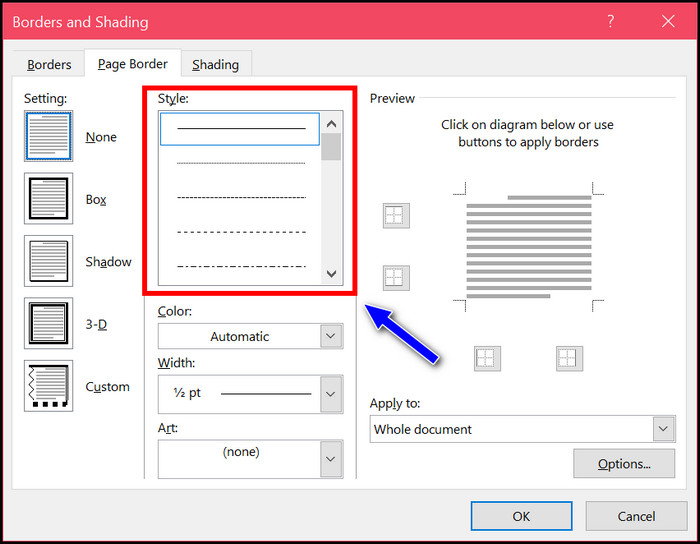
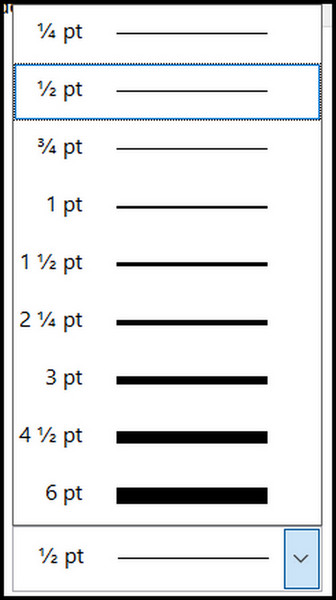
- For the line border, you can also set the color and width of the line. The full color palette is present to let you select the line color. You can choose up to a thick 6pt line width.
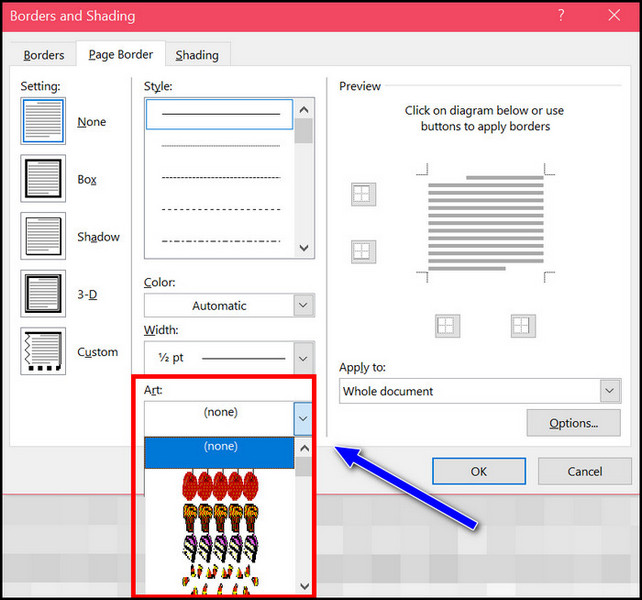
- If you want to insert clip art or other design, select it from the Art menu below the Width option.
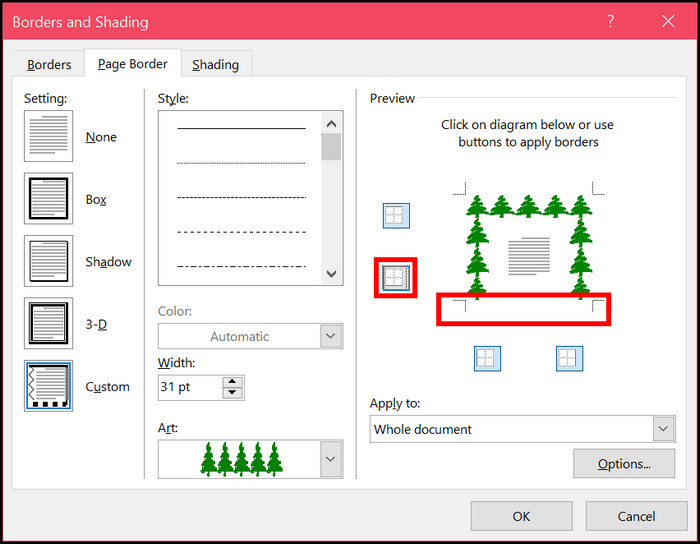
- See the Preview on the right column to check how the page will look like. Click on the borders to toggle them on/off. Using this method, you can set page borders to appear on any combination of sides.
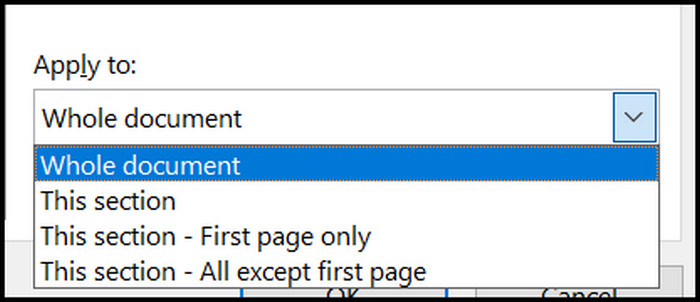
- Click on the “Apply to” dropdown to choose where to apply the page border settings. You can choose to insert the page border on the first page, all pages except the first page, the current section, and the whole document. You can apply different page margins to different document sections using section breaks.
- Select Options to open the Border and Shading Options. Here you can change the distance between the margin and the edge of the page for the four sides: Top, Bottom, Left, and Right.
- Click on OK to apply the changes.
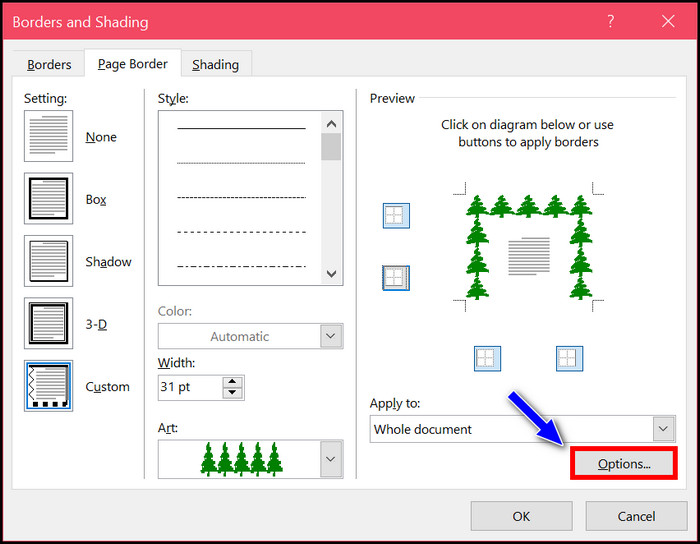
As you can see, the desktop Word app gives you a complete set of options to set the page borders in a document.
Related content you should read on how to print in Microsoft Word?
2. Add Page Border In Word MacOS App:
The Word app for macOS has similar options available to add borders to a page like the Word Windows app.
Here are the steps to add page borders in the Word macOS app:
- Open the document in Word.
- Click on the Design option from the top.
- Select Page Borders from the top. The Borders and Shading box will appear.

- Select the page border style under the Setting option on the left.
- Select the line style under the Style option.
- Select the line color from the dropdown below the Color option.
- Select the line width from the dropdown below the Width option.
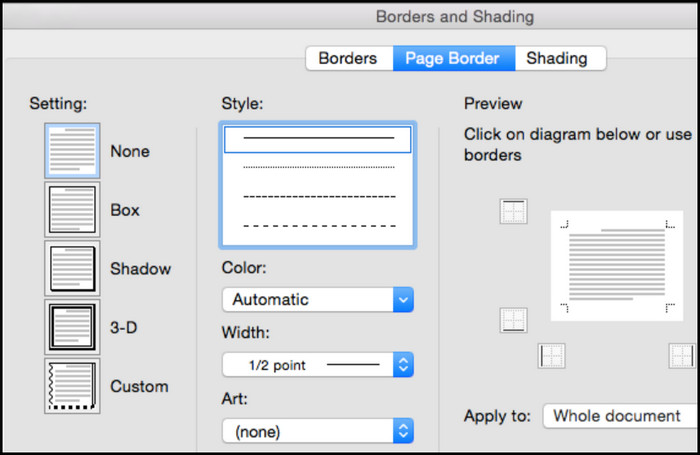
- Click on the “Apply to” dropdown to select where you want to apply the page margin changes. If you have added section breaks in the document, then you will see the different sections listed here.
- Click on Options to adjust the margin measurements for the top, bottom, left and right sides.
- Click on OK to apply the changes.
The preview option on the right will reflect the changes you have made.
Some more guide on how to use Microsoft Word read aloud.
Final Thoughts
Word mobile app gives you the option to customize the page margins. Setting up the correct page margin is important for the readability and appeal of the document.
To add design or clip art to the page borders, you need to use the Page Borders option in the Word Windows or macOS app. Here you can add line borders as well as clip art.