As a Twitch streamer, you’d find the need to delete a past stream every once in a while. Or you might want to delete the highlight or clip with some editing errors.
Whatever the reason, you can quickly delete VODs, highlights, clips, or any videos from your channel. In this post, I’ll guide you through the process of deleting Twitch videos on your desktop and phone.

So keep reading the post till the end to learn more.
What Are The Reasons To Delete Twitch Videos?
You might want to delete Twitch videos to save your channel from copyright strike or delete unwanted moments from the channel. If the video in question has some editing errors or the quality is not up to the mark, you’d want to delete the video.
As the most comprehensive online streaming platform, streaming on Twitch can be pretty challenging. To keep your channel on the right track, you always need to pump out content with the best quality possible. A single mistake can take a heavy toll on your channel in many ways.
Hence it’s always a necessity to keep your channel content up to the mark. Copyright strikes have the most devastating effect on a channel. Getting three copyright strikes can enroll your Twitch channel for removal.
It’s possible to play a piece of copyright music or other copyright material without you noticing it. It could be a video accidentally played or a portion of music playing in the background that you’re not aware of.
You’re likely to get a copyright strike in either case, and it puts your channel in great danger. You’d want to delete the stream or video as soon as you realize the situation to escape from it.
Deleting a Twitch video also becomes urgent if you’ve made a mistake on-stream. Perhaps you have leaked some personal data on the live broadcast by mistake. It’d be a severe pain if you keep the video up on the channel.
Or maybe you’ve said something unpleasant in the heat of the moment that you never meant to say. Sometimes the chat can get toxic, or perhaps you’ve had a wrong time in the game.
Now you want the content removed from your channel.
Did you make some editing errors while making a clip or highlight from a past broadcast? You can delete the video and make another highlight removing the mistakes.
There could be other reasons too to delete videos from your Twitch channel. The good thing is that deleting Twitch videos is relatively easy.
Let’s discuss the process in detail in the next section.
Follow our easy step-by-step guide to add commands on Twitch.
How To Delete Videos From Twitch
The process of deleting a Twitch video is relatively straightforward. Twitch has the Video Producer menu, which lists all the videos on your channel.
Along with other functionality, it has the delete option too. Twitch allows you to delete from your channel too.
So let’s discuss all the processes in detail for both desktop and phone.
But before that, remember you cannot undo a delete. There is no recycle bin option from where you can restore a video after deleting it. Once you’ve deleted a video, it’s gone for good.
Here are the methods to delete Twitch videos:
Delete videos from the desktop app or browser
Deleting Twitch videos is the easiest if you’re doing it from the Twitch desktop app or any desktop browser.
Follow the steps below:
- Open the Twitch desktop app or go to the Twitch website from a desktop browser.
- Log in to your Twitch account.
- Click on your profile picture from the top-right corner. It’ll open the menu.
- Click on Video Producer. You’ll see a list of all your published and unpublished videos.
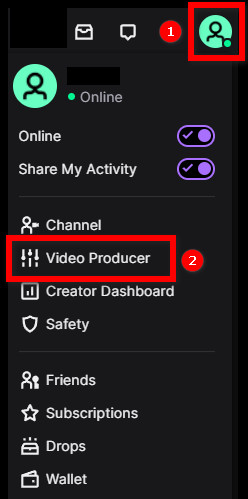
- Filter out the video you want to delete. You can filter by All Videos, Upload, Past Broadcast, Highlights, Expiring, and Channel Trailer.
- Click on the three dots next to the video. A menu will appear with the options to edit, download, share or delete the video.
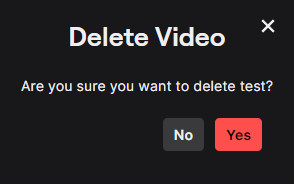
- Click on Delete. It will ask for confirmation.
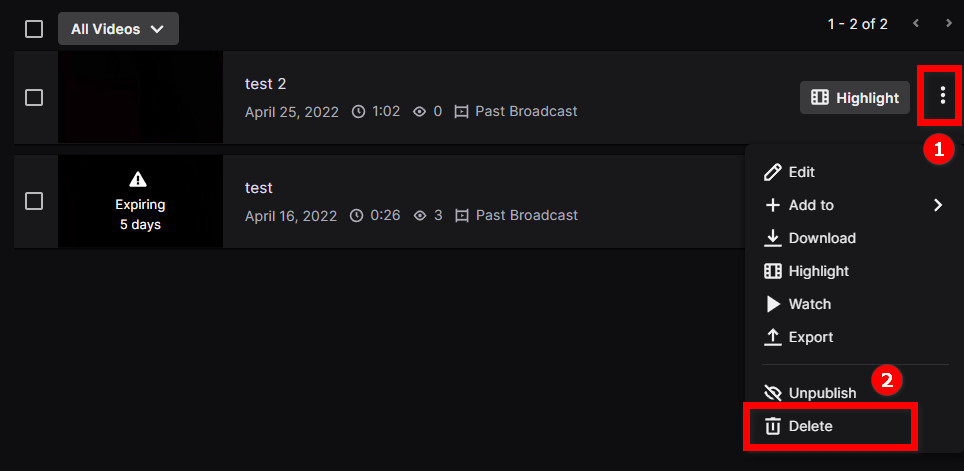
- Select Yes to delete the video from Twitch.
If you want to delete multiple videos from Twitch at once, use the checkboxes at the left of each video to mark them. Once you’ve marked all the videos you want to delete, click on the delete button at the top, then select Yes to confirm.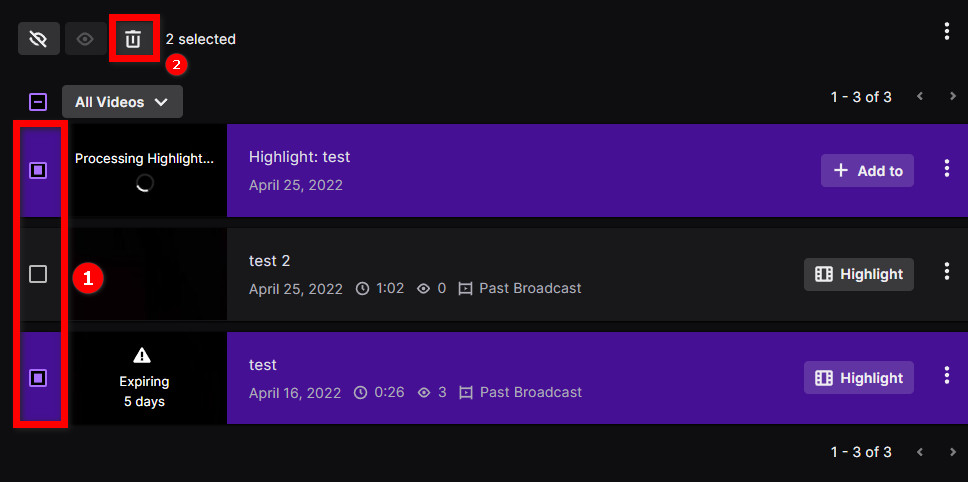
If you want to download all videos from Twitch at once, filter out your videos by All Videos, then select the checkbox at the very top (beside the All Videos filter option). It’ll select all the videos. Finally, click on the Delete button at the top and select Yes on the confirmation popup to remove all videos from Twitch.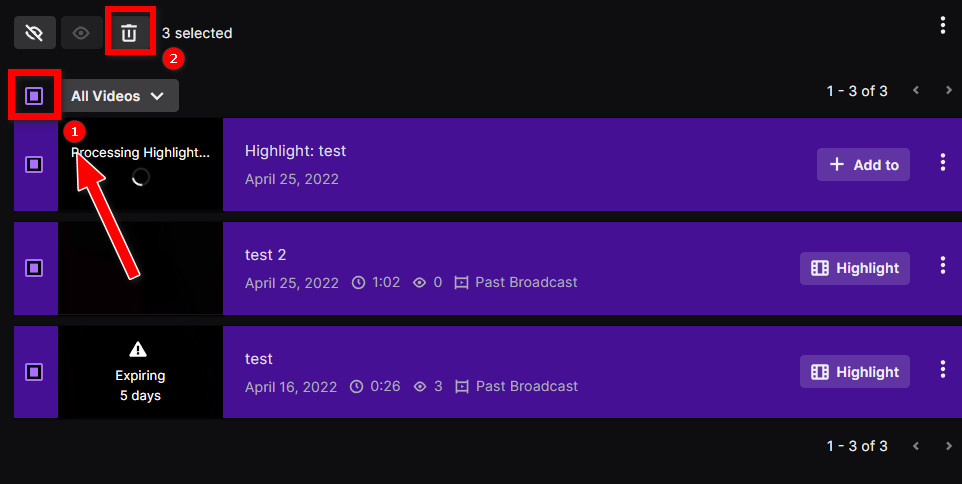
You can use the same method to delete all videos of a single type (Upload, Past Broadcast, Highlight, Expiring, and Channel Trailer). Filter out by the type, then select the checkbox beside the filter option to mark all videos of the type. Finally, hit the Delete button at the top and confirm.
Check out some of the best ways to get Twitch Affiliate status.
Delete videos from the channel page
Instead of going into the Video Producer, you can go to your channel and delete the video from there.
This method and the previous one will have the same results, and it’s just a matter of preference which one you’d like to follow.
Here are the steps:
- Open Twitch in a desktop browser or the desktop app.
- Log in to your Twitch account.
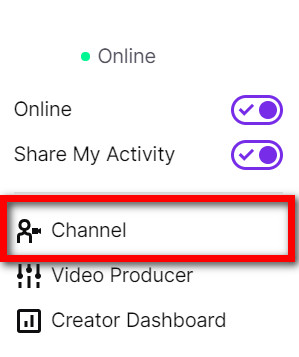
- Click on your avatar from the top-right to bring up the menu.
- Click on Channel.
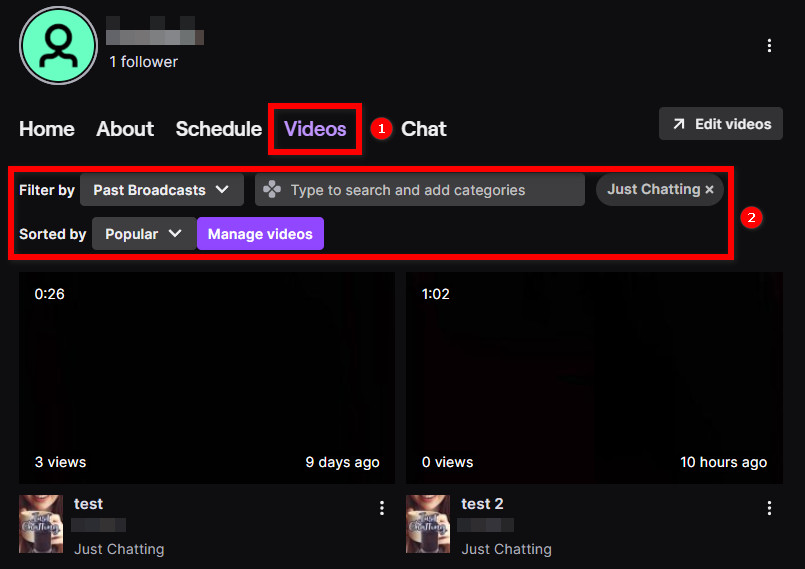
- Go to the Videos tab.
- Find the video you’ll delete. You can filter the videos here by Featured, Past Broadcasts, Highlights, Clips, Moments, Uploads, Collections, and All Videos. It also lets you search by category and sort by Date and Popular.
- Play the video.
- Click on the three vertical dots next to the video title and right to the Share button. It’ll have options to edit or delete the video.
- Click on Delete. Twitch will ask for your confirmation.
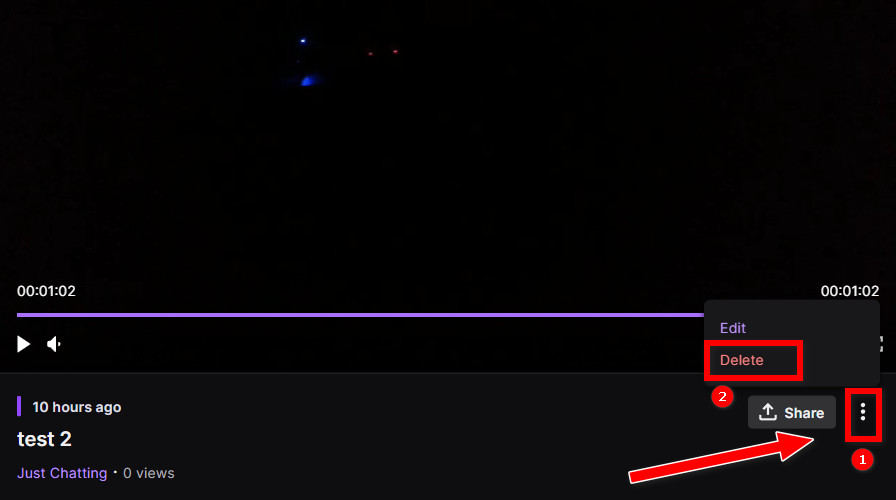
- Click on Delete again to confirm the deletion.
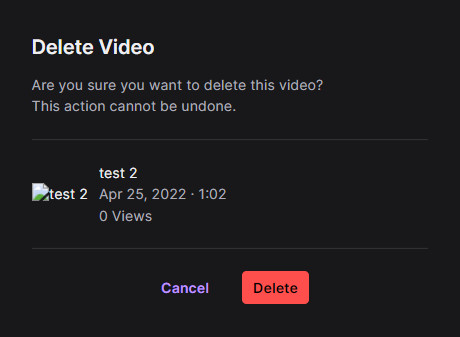
If you have one or two videos to delete, you can use this method. Otherwise, the previous process is better for batch deleting videos.
Delete videos from the mobile app
This method lets you delete videos using your smartphone and can be pretty handy if you don’t have access to your computer at the moment.
Follow the steps below:
- Open the Twitch mobile app.
- Log in to your Twitch account.
- Tap on your avatar from the top-left corner. It’ll reveal the menu.
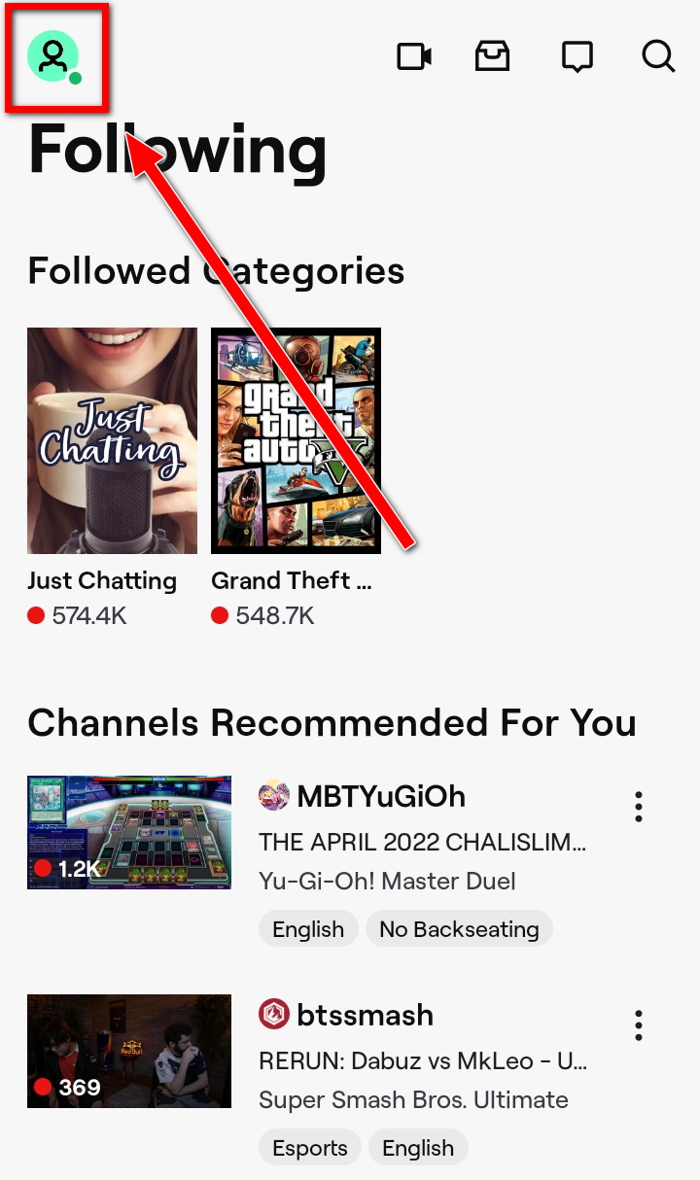
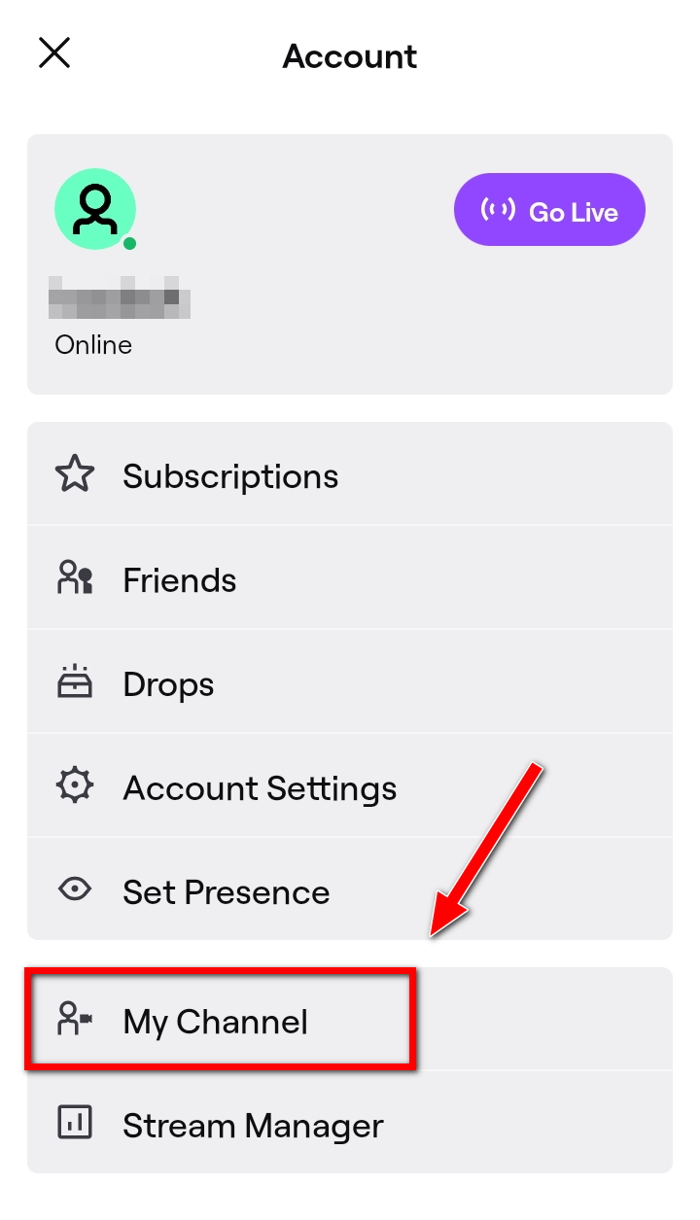
- Go to My Channel. It’ll take you to your channel.
- Go to the Videos tab from the top.
- Scroll and find the video you want to delete.
- Tap on the three vertical dots next to the video title.
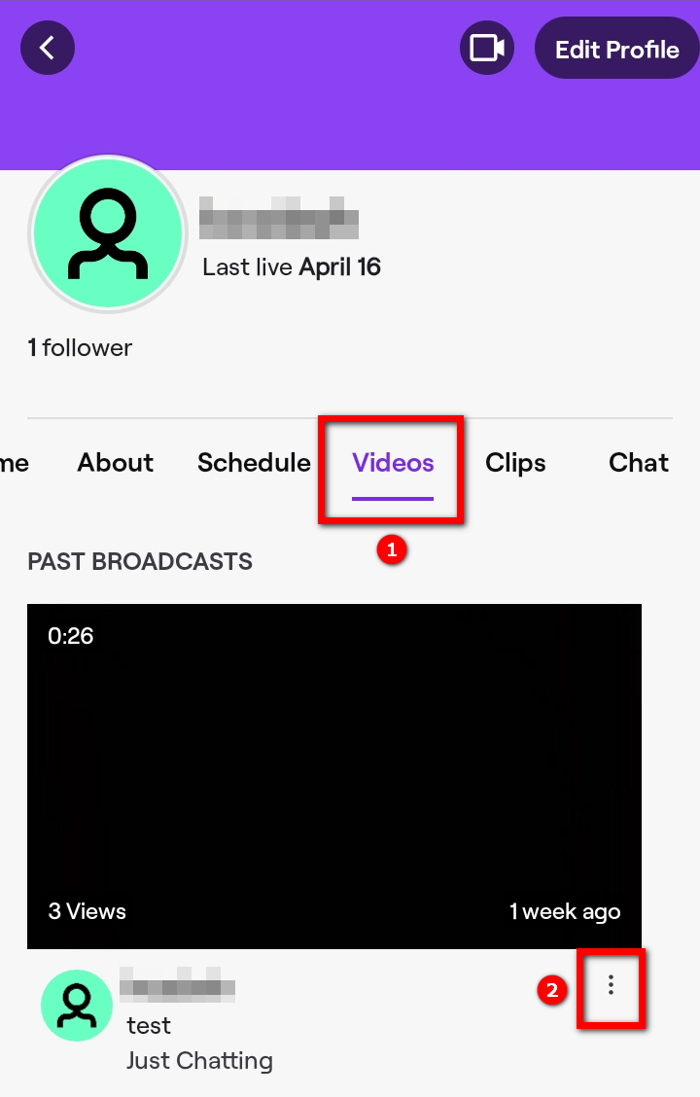
- Select Delete Video from the bottom.
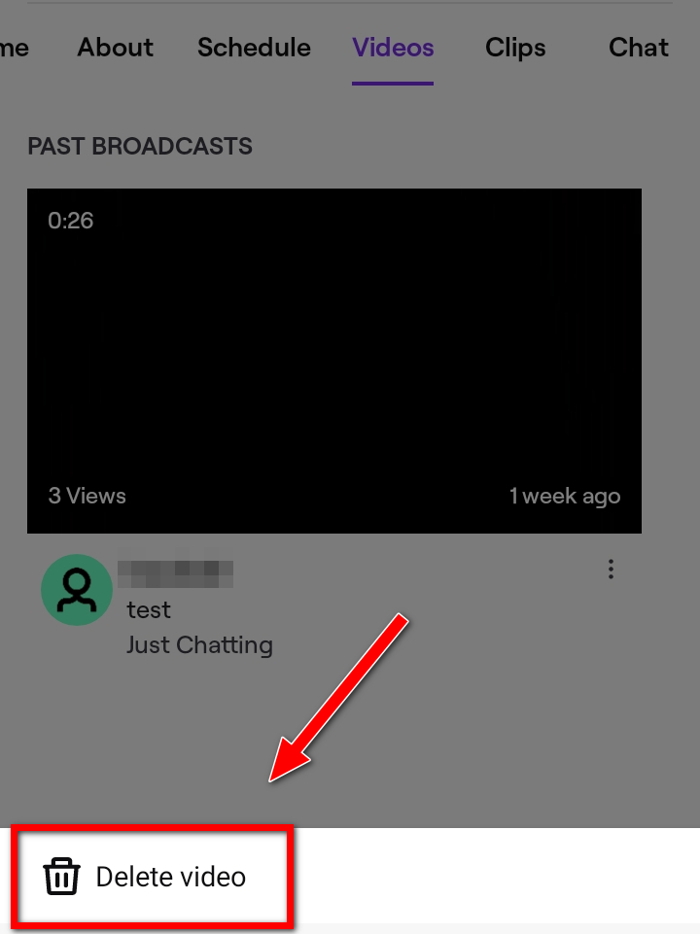
The process is intuitive if you want to download one or two videos. But it quickly becomes tedious if you want to delete multiple videos.
In such cases, you should load the desktop Twitch site from the mobile browser and delete videos as you’d on the desktop.
Refer to the following method.
Check out some of the best ways to get Twitch Affiliate status.
Delete videos from a mobile browser
This method is for you if you want to batch delete videos.
The Twitch mobile app cannot delete multiple videos at once. Hence it’ll be time-consuming to delete videos one by one.
But you can load the desktop Twitch website on most mobile browsers and then delete videos using the Video Producer.
Here are the steps:
- Open a mobile browser that supports loading desktop sites. Some choices are Google Chrome, Microsoft Edge, Brave Browser, Firefox Mobile, etc.
- Go to the menu of the browser.
- Turn on desktop mode. Different browsers label it differently, like ‘Request a desktop site’ or ‘desktop site’.
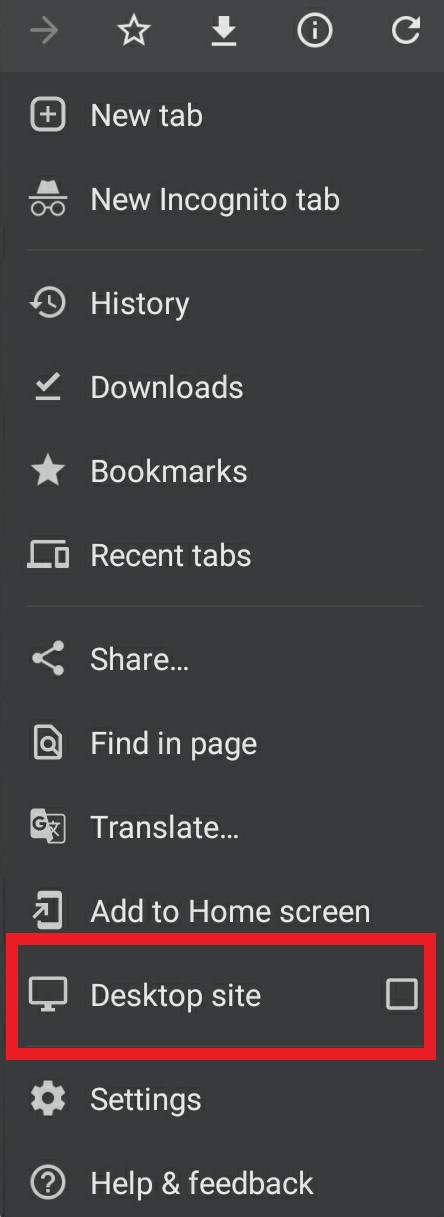
- Go to the Twitch website.
- Login to your account.
- Tap on the avatar from the top-right corner.
- Tap on Video Producer.
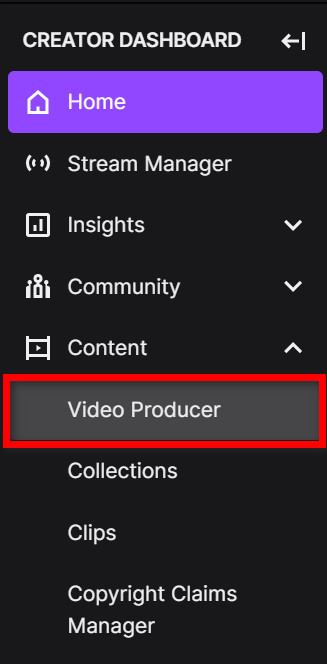
- Select the videos you want to delete using the checkboxes next to them.
- Tap on the Delete icon at the top.

- Confirm deletion.
That’s it. As you can see, the process is precisely the same as the desktop. The only difference is switching on the desktop site at the beginning.
How Does Twitch Save Videos
Twitch videos are not saved automatically at the beginning, and you need to enable the option to save past broadcasts.
Only then will Twitch save the old streams on your channel. The old streams are known as VOD (Video On Demand).
In addition to saving past streams, you can save highlights, trailers, and clips. You can make highlights or a trailer out of a VOD or a past broadcast.
You can use the clip button during a live stream or past stream to make a clip.
All these different types of videos are saved under your channel and have different expiration periods.
Past streams or VODs are stored for 14 days for regular users and 60 days if you have a Twitch Turbo or Prime subscription. Twitch highlights or clips are saved indefinitely.
Hence, even if you don’t delete a video, the past streams or VODs will get removed once they’ve reached the expiration date.
If you cannot find any videos, check if you’re saving the broadcasts on your channel. Do as follows:
- Open Twitch in the desktop app or browser.
- Click on the avatar from the top-right corner.
- Click on Creator Dashboard.
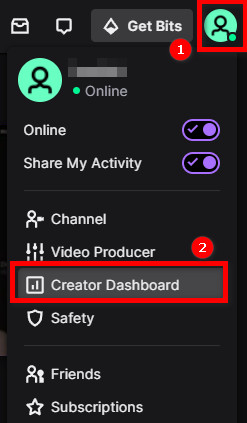
- Go to Settings > Stream.
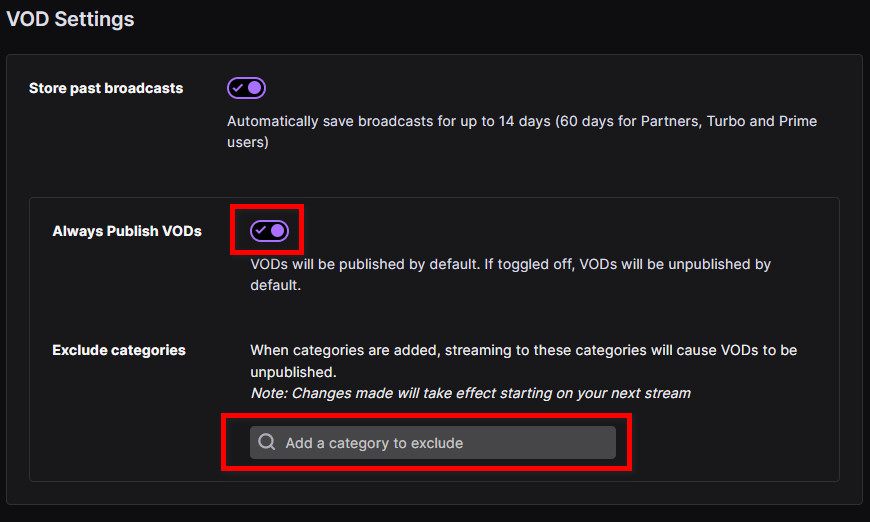
- Ensure Store Past Broadcasts is enabled under the VOD Settings section.

- Set up the Always Publish VODs and Exclude Categories as needed. For example, if you don’t want to save videos of a specific category, you can add the category to Exclude Category. It’ll protect you from manually deleting the video every time.
Quickly check our epic post on Twitch alerts.
Final Thoughts
Twitch has the option to store past broadcasts as VODs (Video On Demand). Once the VODs are stored, you can make highlights or other videos out of them.
But if there’s something unexpected in the video, or you don’t want to keep a video on your channel for a possible copyright strike, you can delete it.
Deleting videos on Twitch is relatively easy and doable from both desktop and mobile devices. You can delete a single video at a time or delete multiple videos together.