Want to unlock your Windows 11 without typing the Password or PIN?
You can use biometric ways to unlock your laptop effortlessly with just your fingertips. Utilizing biometric sensors on your computer is the most convenient option. It removes the process of entering a long, complicated Password and PIN each time to sign in to your PC.
As easy as it is, Windows Hello fingerprint authentication gives you that option for saving time. If you seek a guide to Enable Windows Hello Fingerprint Recognition, you have come to the right place.
So, let’s get right to it and figure out how to turn on Windows 11 Hello Fingerprint!
Also read how to update drivers on Windows 11.
How to Enable Windows Hello Fingerprint Recognition
Before starting, one thing you need to know is that these methods of biometrics recognition only work in laptops or computers with built-in or external biometrics sensors, such as a webcam for face unlock and fingerprint sensors.
Desktop PC users won’t be able to use this function unless they have a USB Fingerprint Reader or devices.
If everything is set, then stick to the instructions mentioned below.
Follow The Steps To Setup Windows Hello Fingerprint in Windows 11:
- Open Settings from the taskbar.
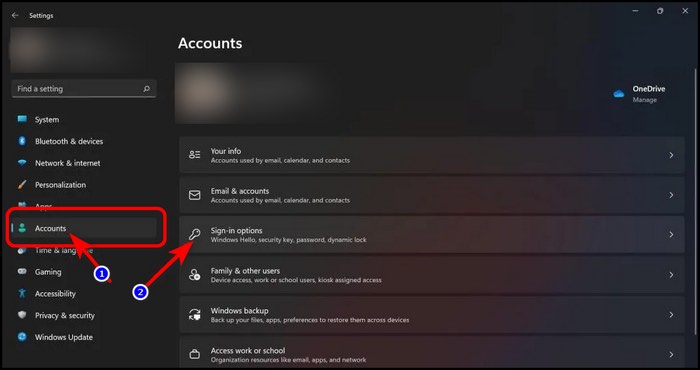
- Click on Accounts.
- Select the Sign-in option.
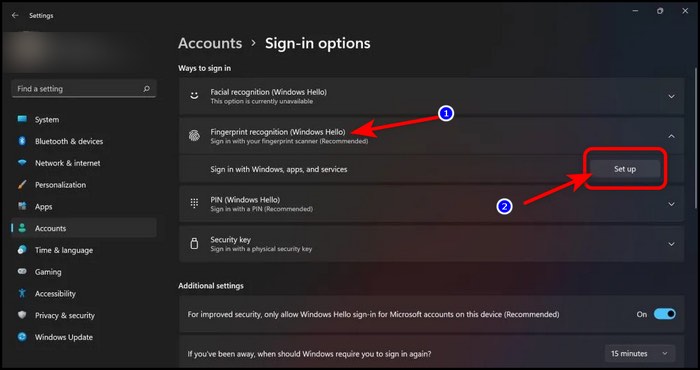
- Select the Fingerprint recognition (Windows Hello) setting under the Ways to sign in section.
- Click the Setup button to turn on the Windows Hello fingerprint option.
- Click the Get started button from the Windows Hello setup window.

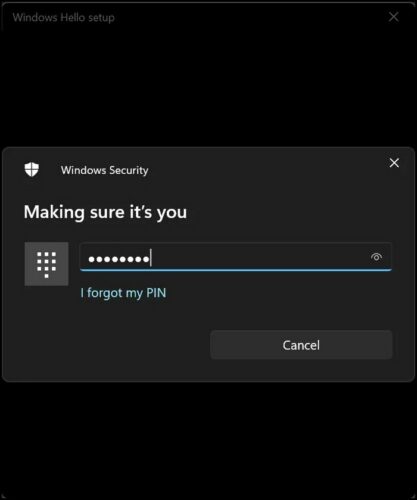
- Type in your Windows account Password or PIN to confirm it’s you.
- Touch the fingerprint sensor with your finger and make sure that your finger is not wet.
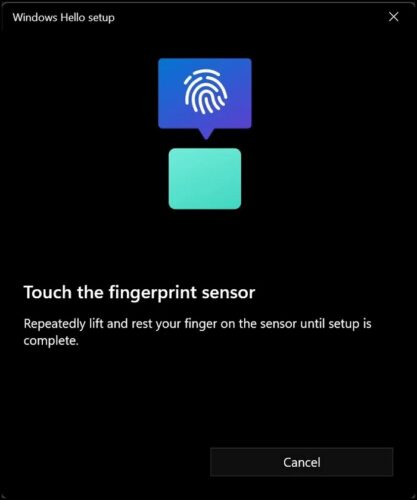
- Select Next and play around with various angles to capture every part of your fingertip.
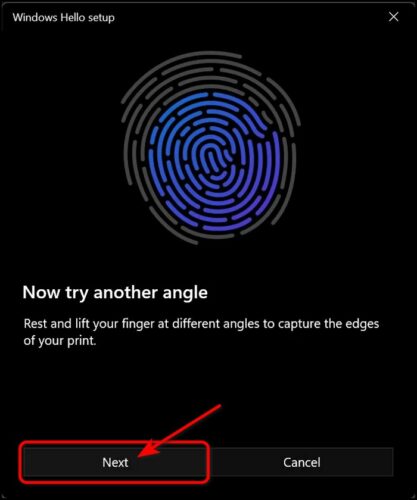
- Repeat the touching process until the on-screen prompt becomes full.
- Click on Close when you see the All set!
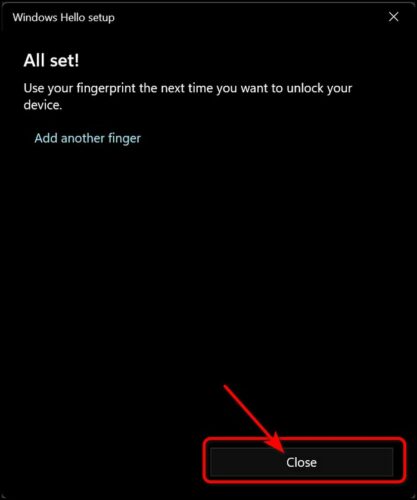
You also add another fingerprint in Windows 11, allowing you to add multiple biometric fingerprints for your partner or family members. For that, the process is the same, Go back to the Sign-in options window and click on Add a finger button.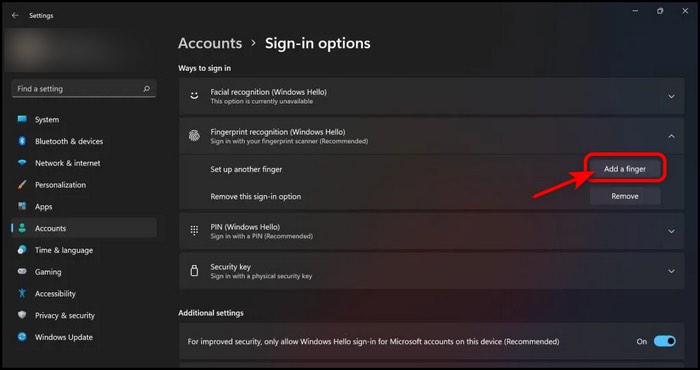
Follow our guide to fix blue screen on Windows 11.
How to Remove Fingerprint Scanner in Windows 11
Here’s a quick guide for removing your saved fingerprint from Windows 11. This will come in handy if you need to delete your finger data.
Follow The Steps To Remove Windows Hello Fingerprint in Windows 11:
- Open Settings from the taskbar.
- Click on Accounts.
- Select the Sign-in option.

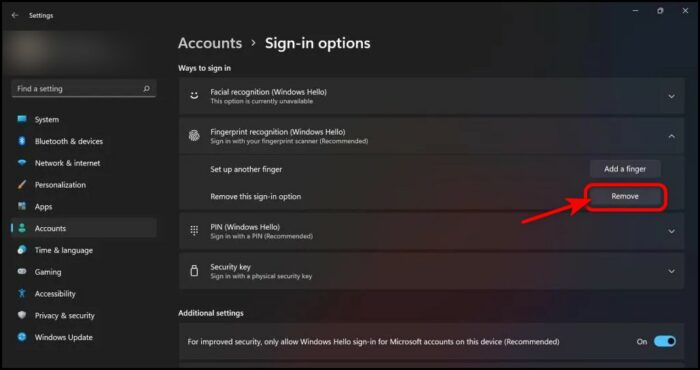
- Select the Fingerprint recognition (Windows Hello) setting under the Ways to sign in section.

- Click on the Remove button as in the image below.
- Confirm your account Password or PIN.
- Click the OK button to remove your saved fingerprint.
Important: You can add multiple fingers in Windows 11, so I recommend you add your thumb and index finger of both hands because if you only add one finger, you will regret it in some situations.
Here is the easiest guide to fix drag and drop not working on Windows 11.
Frequently Asked Question
Why Can’t I Set Up Fingerprints On Windows 11?
Ensure you have a working fingerprint sensor or scanner in your system if you can’t set up a fingerprint on Windows 11.
Why Is My Windows Hello Fingerprint Not Working?
Remove the stored fingerprint data from your system and re-add your biometric data again if your Windows Hello fingerprint stops working.
How Many Fingerprints Can Windows 11 Have?
Windows 11 can hold up to 10 fingerprints and faces per user.
Final Words
Adding a fingerprint to your Windows 11 can be helpful and lets you save time when entering a long password. Windows Hello Fingerprint is a must-use feature if you have a Laptop or Computer that comes with a fingerprint sensor for adding an extra layer of security.
I’ve provided direct methods and steps to enable the Windows Hello Fingerprint option in this article, and I believe you have successfully executed the method.
Don’t forget to share your thoughts, and let me know if you have any more questions regarding Windows 11.