If you’re looking to stream from Discord or record calls and voice chats, you should try OBS. Softwares like Camtasia, Bandicam, etc., have similar features, but I guarantee none will offer you greater satisfaction than OBS.
OBS stands for Open Broadcaster Software, which is free and open-sourced and is designed for live streaming and recording.
One of the most popular communities, Discord, is supported by this software. Many streamers and content creators use OBS to record Discord audio and video.
If you’re trying to record Discord using OBS for the first time, you might get puzzled as the interface looks complex. Therefore, I will explain every step to make things easier for you.
So, keep reading till the end.
What is OBS?
OBS Studio is open-source software available for Windows, macOS 10.13+, and even Linux. It is software that supports real-time video/audio capturing and mixing, intuitive audio mixtures, noise gate, noise suppression, noise gain, etc.
Discord users may or may not know that there’s an in-built feature for streaming, but there is no recording option in Discord. So the users obviously need third-party software for this purpose. OBS happens to be free and easier to operate among the available recording software.
To use OBS, you have to download and install OBS studio first. Then you can enjoy the video audio capturing even in Discord.
Quickly check our epic post on best Discord server name ideas.
How to download and install OBS
To download OBS, head over to the official website of OBS. It is recommended that you do not download from any suspicious site as it might cause malware issues.
After you visit the official website, you can find separate installation files for Windows, MAC, and Linux. Choose one based on your operating system. 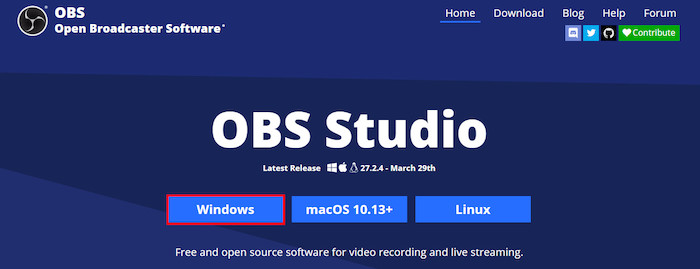
Make sure your internet connection stays stable the whole time. Otherwise, your file might get corrupted.
After the file is downloaded completely, open the file location, double click on the execution file, and keep selecting Next until the installation is complete. Select Finish when the installation bar is all green.
How to use OBS to record Audio
When you open OBS for the first time, you have to specify the mode you want to use OBS for. Select Optimize for recording if you will use it for recording only. Follow the on-screen instructions for your preferred settings.
Once you finish selecting the initial settings, you can directly use OBS in your Discord.
Follow the steps below to use OBS to record Audio in Discord:
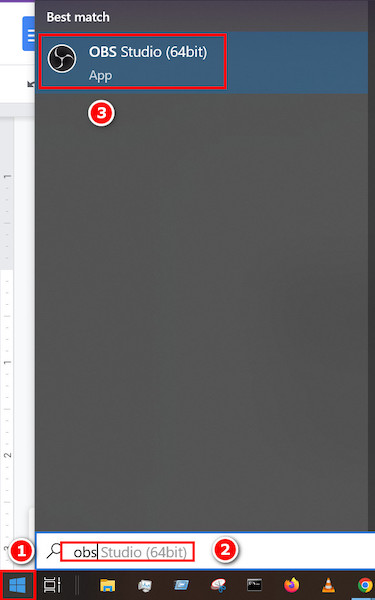
- Click on the Windows icon and type Select the best match.
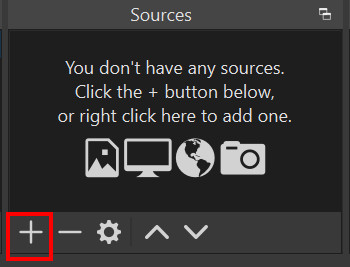
- Locate the + icon at the bottom of the screen and click on it.
- Select the Audio output capture from the list, and a new window will appear.
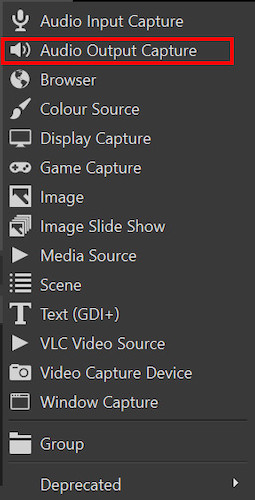
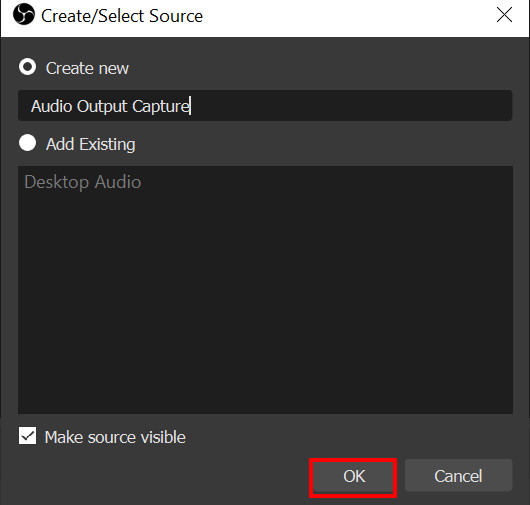
- Once you select OK in the create/select source window, you will be prompted to a new screen.
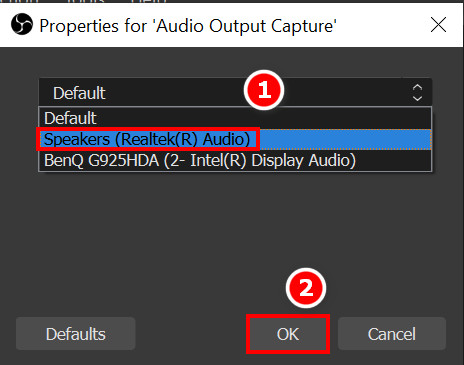
- Select your preferred device and press OK.
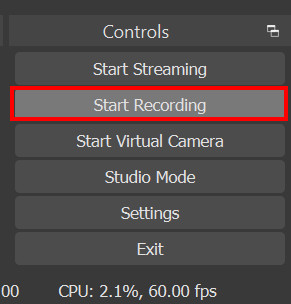
- Click on the Start Recording button on the lower right corner of your obs home screen, and the recording will start.
- Click on Stop Recording when you are finished. (stop-recording)
NOTE: By default, the recorded files will be saved in MKV format with a blank screen and only Audio. Remember that you have to connect to Discord calls before you start recording.
Also, check out our separate post on see Discord servers someone is in.
How to record Display using OBS
Recording Display, i.e., screen capture, is easy in OBS if you have it installed already. You only need to select the source as a Display, and you are done.
Follow the steps below to record Display using OBS in Discord:
- Open OBS and click on the + icon on the Sources portion at the bottom.
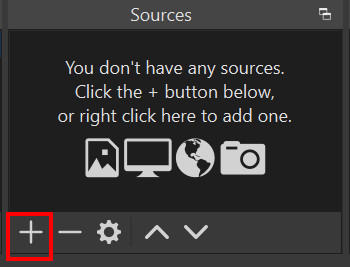
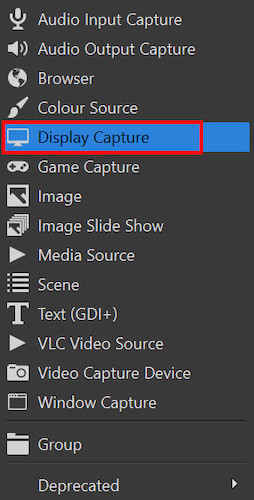
- Select the Display capture option.
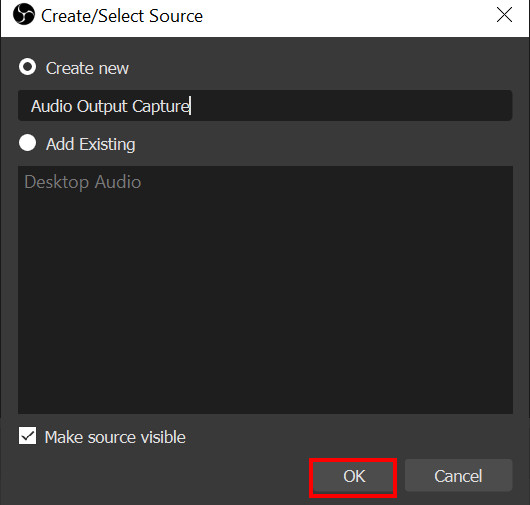
- Click on OK after you select the name of the source.
- You will see your screen on the blank screen of OBS, and you can select the capture method as you wish.
- Click on Start recording, and your display will be recorded.
NOTE: If you have both the audio output source and display source added, you will be able to record them both.
Also read how to clear Discord chat.
How to capture Video using OBS
Video can be recorded from the camera connected to your computer using OBS. To capture your Stream along with yourself in the front camera, you can use OBS easily.
Follow the instructions below to capture video using OBS:
- Open OBS and click on the + icon at the source tab located at the bottom.

- Select the Video capture Device.
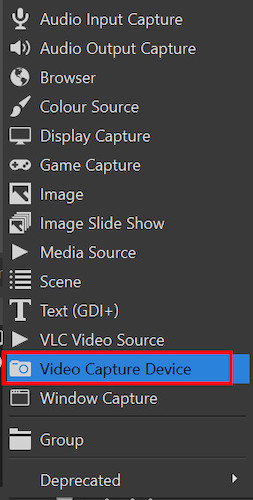
- Click on OK, and a new source will be created for Video capture.
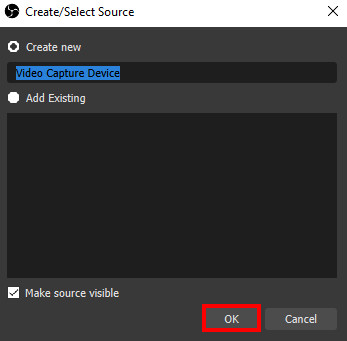
- Select preferred settings in the next property window, and you will see yourself in the corner of the window.
- To capture video, audio, and display all at the same time, add all the sources and press start recording at the bottom right corner.
NOTE: If, for some reason, you can’t find the + icon, then right-click>add while keeping your mouse in the source tab.
Multiple Screen records in OBS
You will be glad to know that by using OBS, one can record multiple screens simultaneously. The process itself is not that hard or different from the previous processes.
You have to add another source to the home screen of OBS. Even if you already have a DIsplay source added, add another display source and set a name for it there. Press on OK, and you will see another screen pop up on the OBS screen.
Drag the new screen within the blank area of OBS, and now you can start the record. Both screens will be recorded simultaneously. It is useful, especially for dual monitor users.
Go and check our other article on how to react on Discord.
Discord and OBS
OBS is a pretty handy tool for recording not only the game screen but also the gamer along with the audio. So it gives a decent professional feeling which some of us long for.
Though Discord lets us stream video or voice calls, the absence of a recording option is a pain. This is where OBS comes in handy. Just connect to your Discord voice or video calls and start the OBS recording. Your calls will be recorded smoothly.
There are many different types of recording software on the internet. Most of them require a license or a subscription. On the other hand, OBS is free and open-source. It means anyone can use the codes and develop the software.
FAQs
1. How to make OBS not record Discord?
You just need to make sure your Start Record option is not ON, and it will not be recorded. But if you want to record other things but not Discord, then change the Discord Audio and Video Device into something other than those selected in OBS.
2. How to record Discord calls using OBS?
Connect to a Discord call. Then all you have to do is click on the Start Record button on the OBS home screen. If your audio output device is selected correctly, your call will be recorded without any issues.
3. How to record Video using OBS?
The process is more or less the same. First, add a Video device in the source tab. Then start the video call. Click on Start Record, and your video will start to be recorded. You can later play that video from the default Video folder of your Computer.
Final Thoughts
Users have been showing their dissatisfaction with the no record options of Discord for a long time. Discord still has not integrated such features. They may or may not integrate it, but OBS does that part beautifully.
OBS studio captures the gaming experience of a user and lets him share that experience with other fellow gamers. This open-source software is a blessing not only to the Discord community but also to other platforms supported by OBS.
Hopefully, this guide helped you to know more about OBS and its functions. Now you guys will be able to record your gaming experience and videos like a professional gamer and share them with other fellow gamers.